
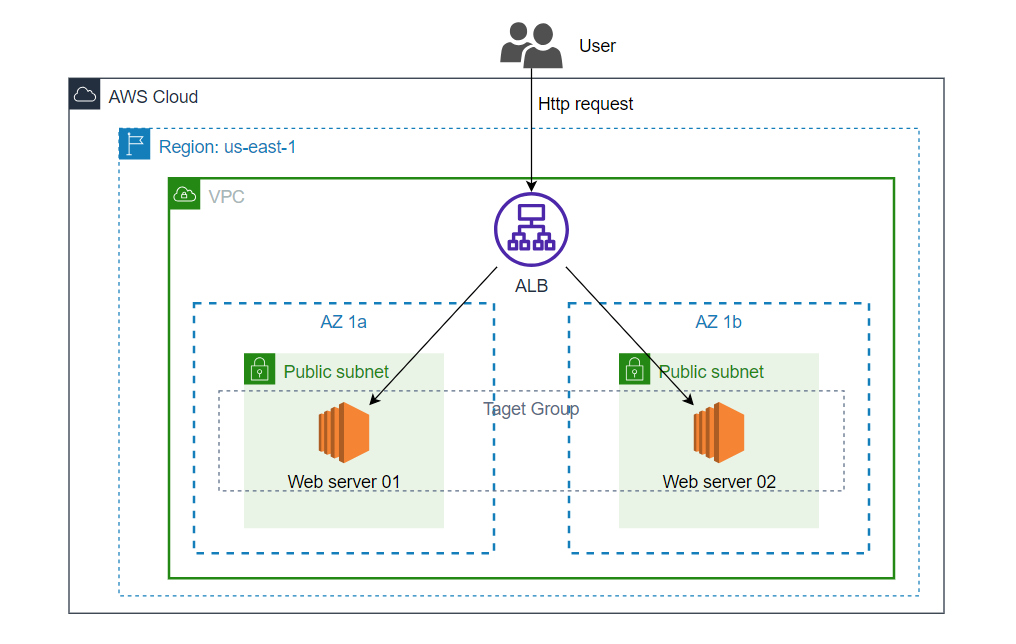
Application Load Balancer
I. Create Security Group
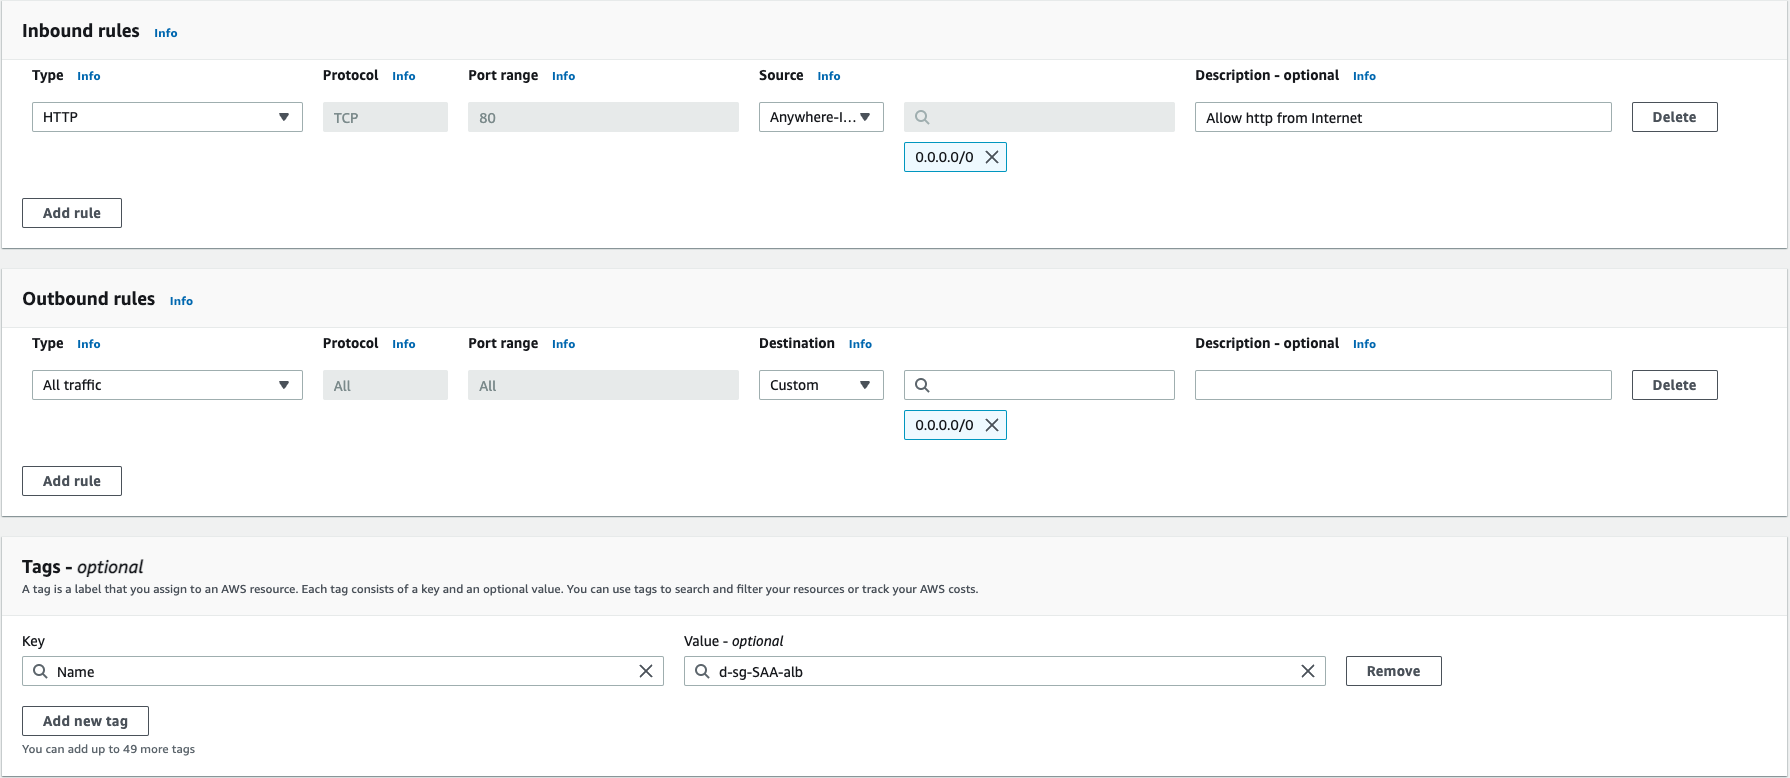
1. Create ALB Security Group
- Name:
d-sg-SAA-alb - Description:
Allow http from internet - VPC:
default VPC - Inboud rule and Outbound rule như hình
- Tag (Key:
Name, Value:d-sg-SAA-alb)
2. Create Web server Security Group
- Name:
d-sg-SAA-web-server - Description:
Allow http from ALB - VPC:
default VPC - Inboud rule and Outbound rule như hình
- Tag (Key:
Name, Value:d-sg-SAA-web-server)

II. Create EC2
Để test Load balancing chúng ta sẽ tạo 2 EC2 ở 2 AZ khác nhau như bên dưới:
d-ec2-SAA-web-server-01
- Name:
d-ec2-SAA-web-server-01 - OS: Default (Amazon Linux 2023)
- Instance type: Default (t3.micro)
- Key pair: Create new keypair with name: d-key-SAA-common
- Network Setting:
- VPC: Default
- Subnet:
us-east-1a - Auto-assign public IP:
Enable - Select existing security group:
d-sg-SAA-web-server
- Advanced details (User data)
#!/bin/bash
yum update -y
yum install -y httpd.x86_64
systemctl start httpd.service
systemctl enable httpd.service
echo “Hello World from $(hostname -f)” > /var/www/html/index.html
d-ec2-SAA-web-server-02
- Name:
d-ec2-SAA-web-server-02 - OS: Default (Amazon Linux 2023)
- Instance type: Default (t3.micro)
- Key pair: Create new keypair with name: d-key-SAA-common
- Network Setting:
- VPC: Default
- Subnet:
us-east-1b - Auto-assign public IP:
Enable - Select existing security group:
d-sg-SAA-web-server
- Advanced details (User data)
#!/bin/bash
yum update -y
yum install -y httpd.x86_64
systemctl start httpd.service
systemctl enable httpd.service
echo “Hello World from $(hostname -f)” > /var/www/html/index.html
Lưu ý ở đây chúng ta không thể connect đến EC2, cũng không thể access http đến địa chỉ public của EC2 được. Vì chúng ra sẽ dùng ALB để access đến EC2, nhưng nếu các bạn muốn connect đến EC2 hoặc access http://{Public-IP} thì các bạn thêm Inboud Rule cho Security group là được
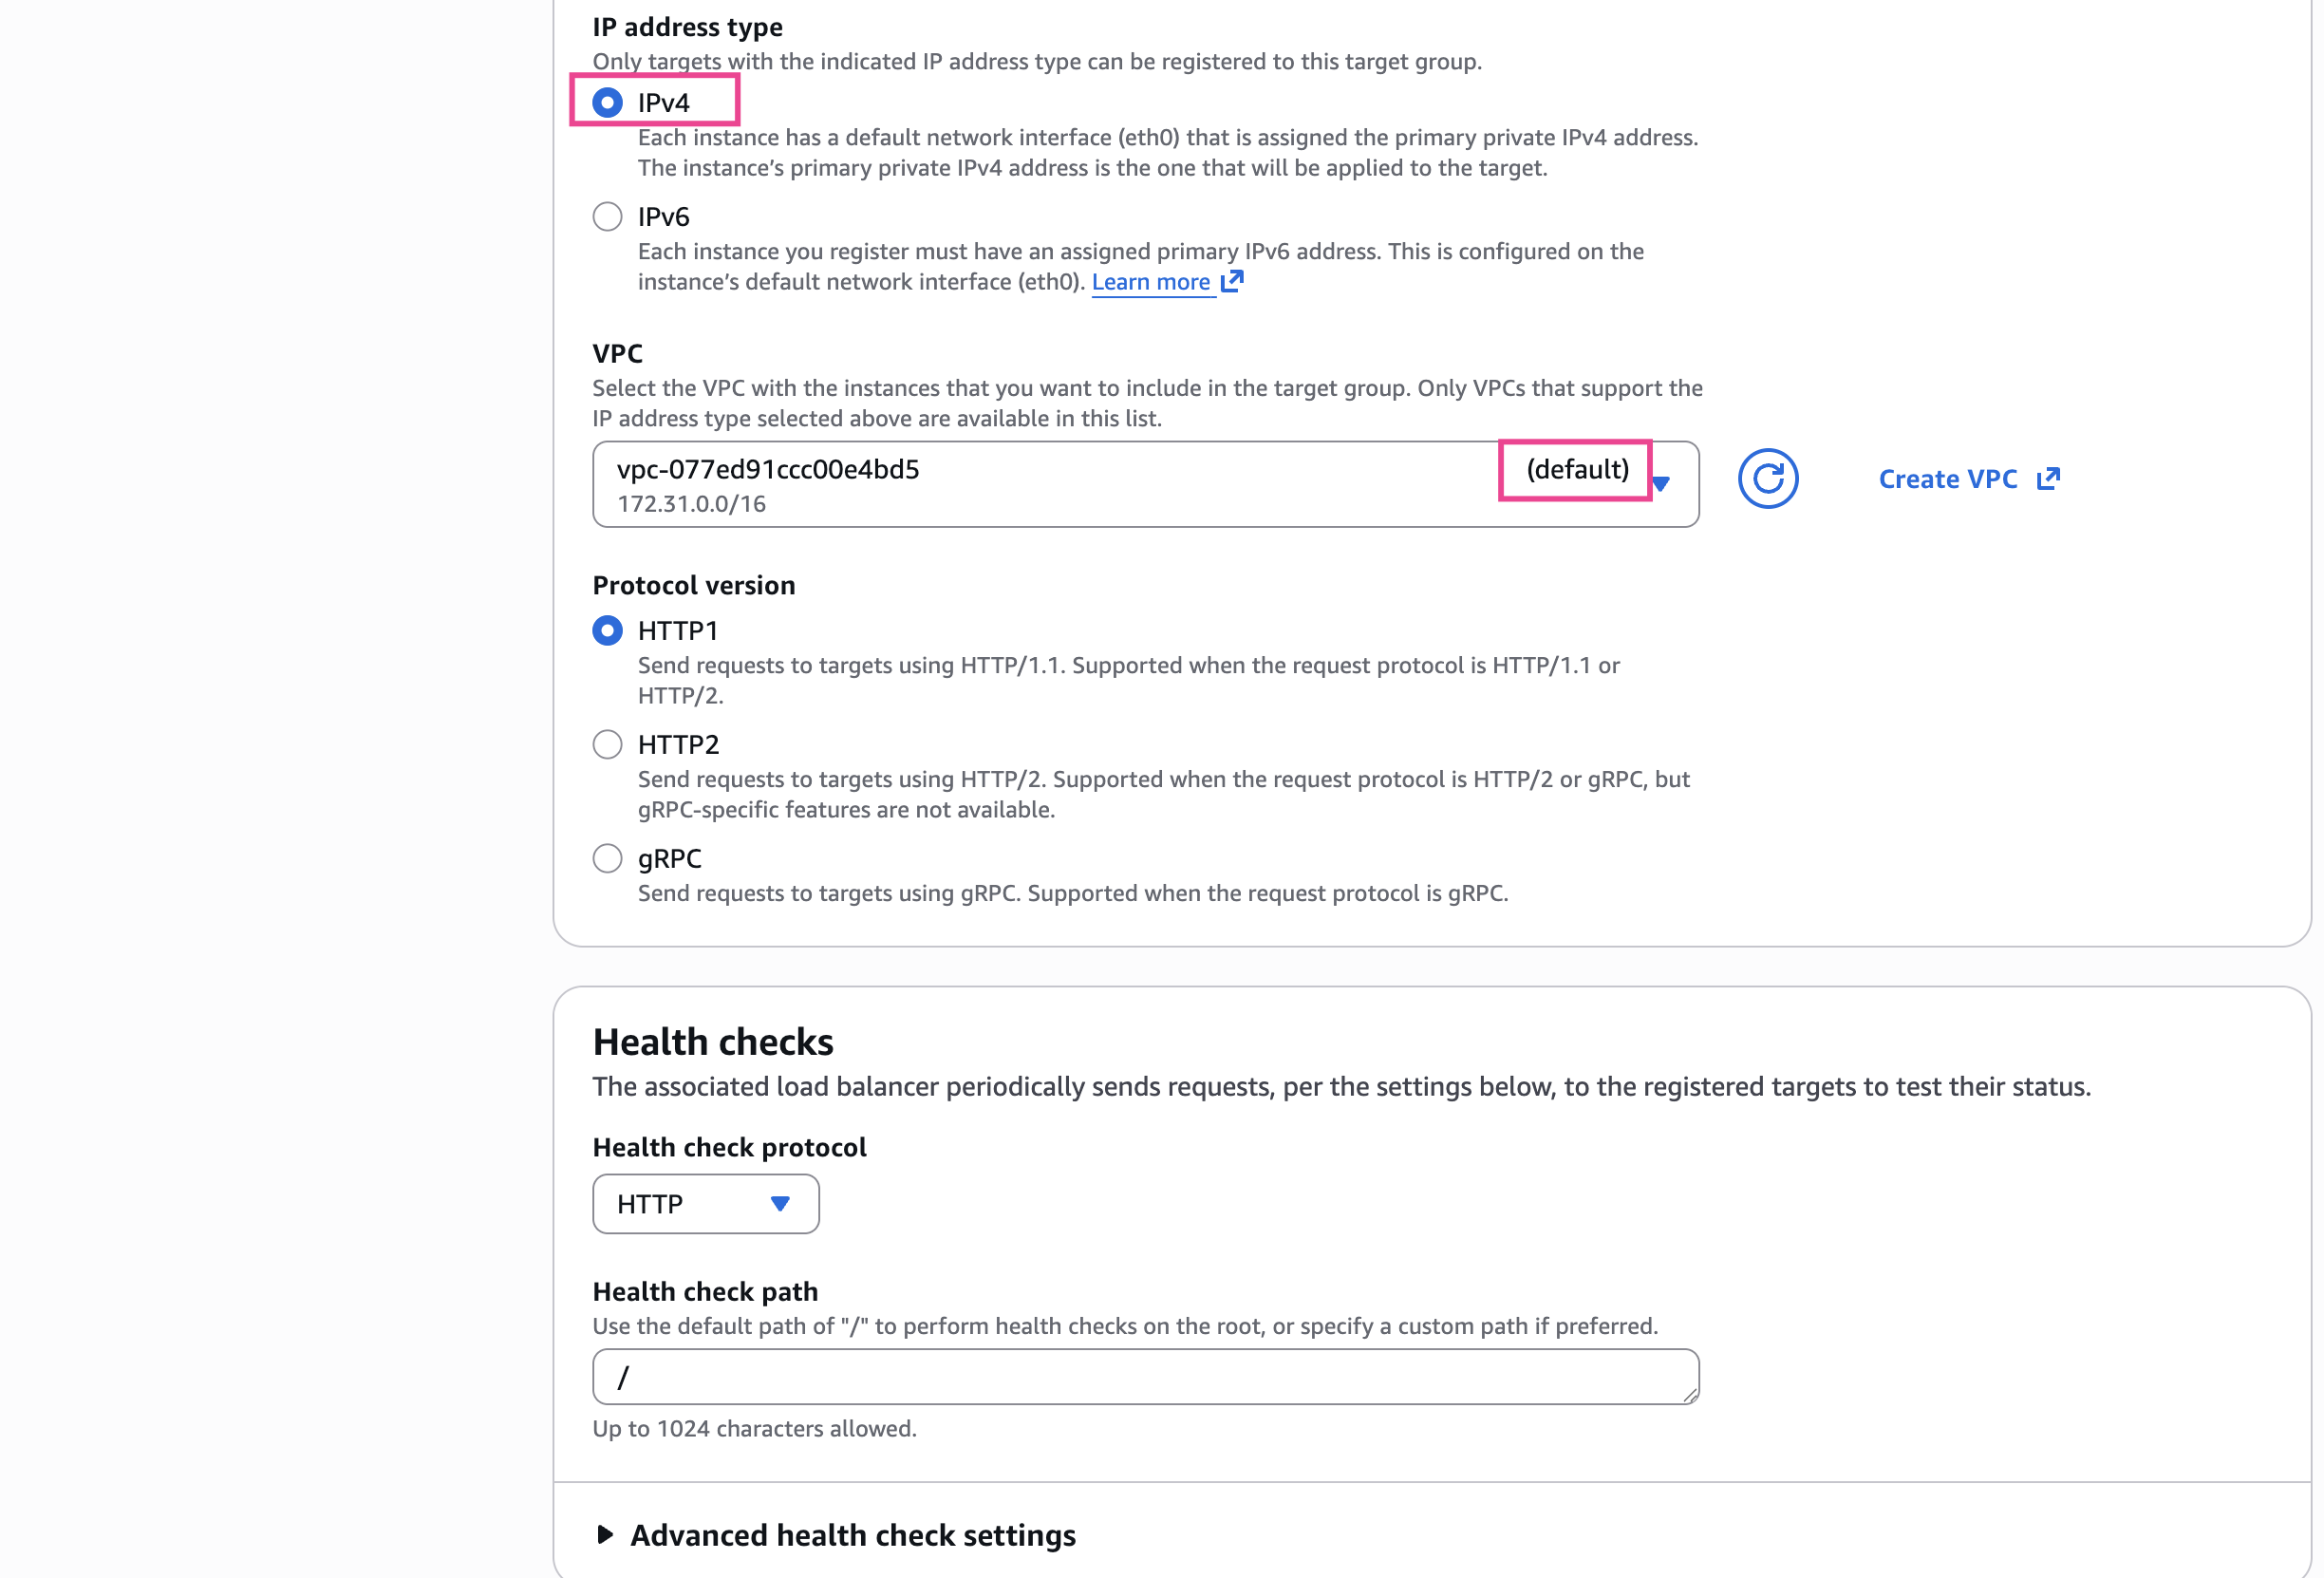
III. Create Taget Group
Vào EC2 Console -> Taget Group -> Nhấn Create taget group
- Choose a target type:
Instances - Target group name:
d-tg-SAA-web-server - Protocol:
HTTP - Port:
80 - VPC: Chọn default VPC
- Tag: Key:
NameValue:d-tg-SAA-web-server - Các setting khác để như default
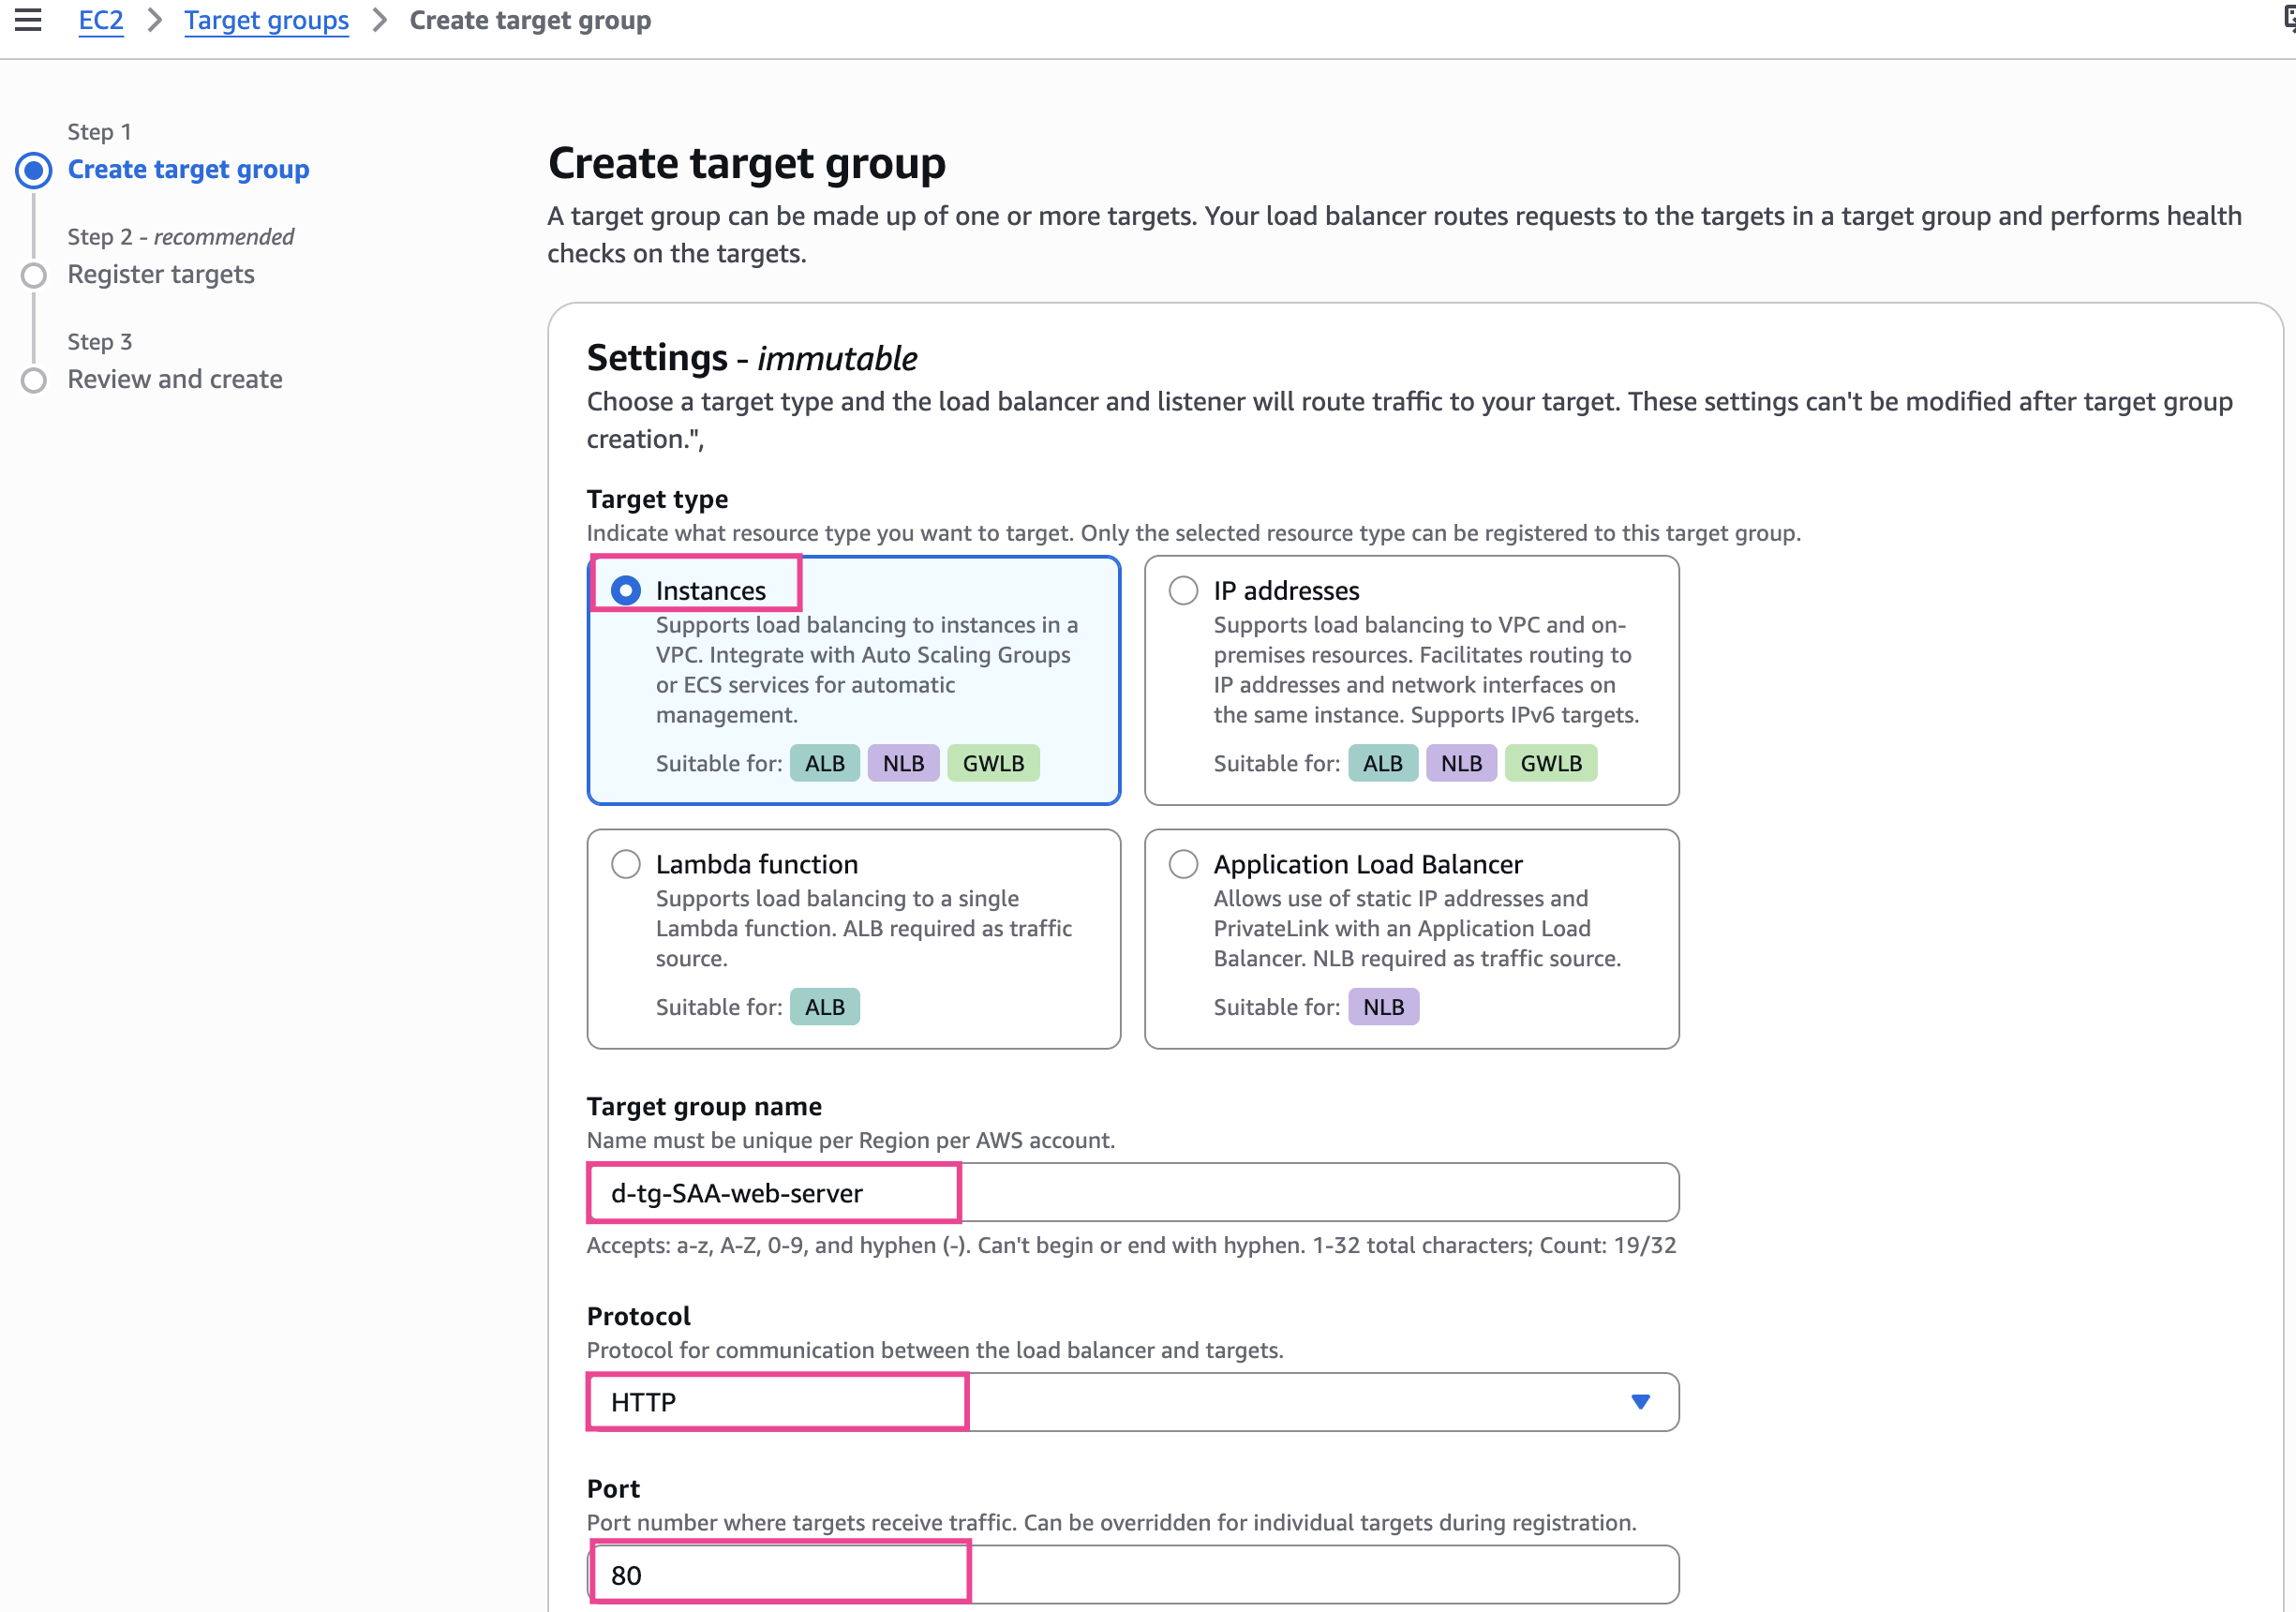
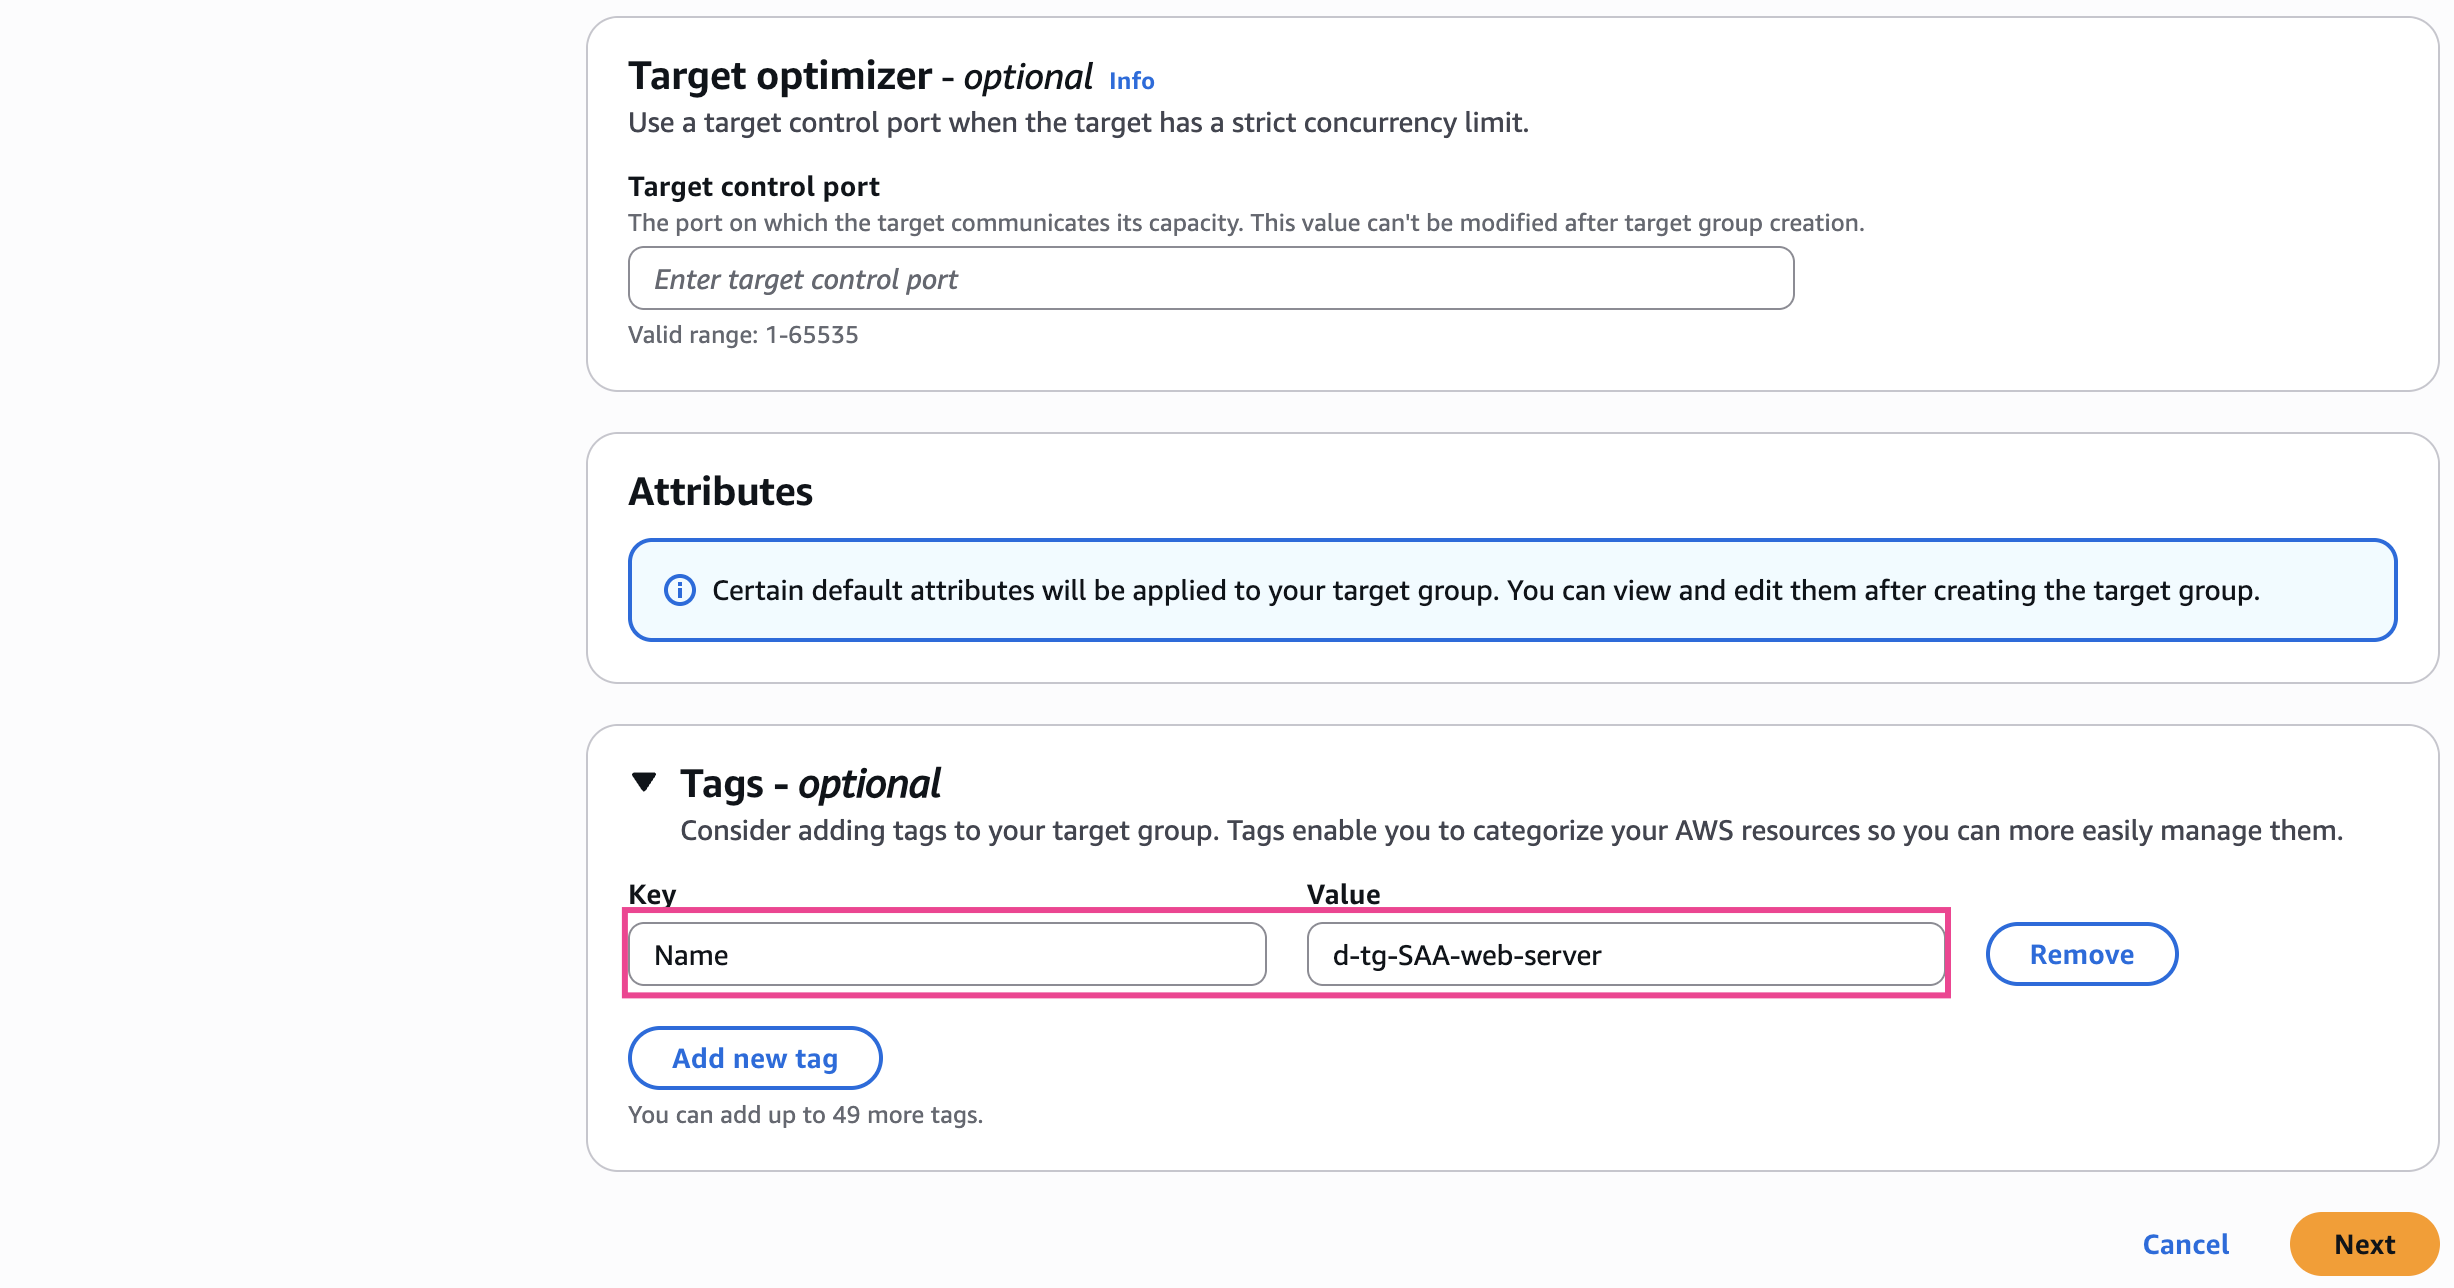
- Nhấn Next
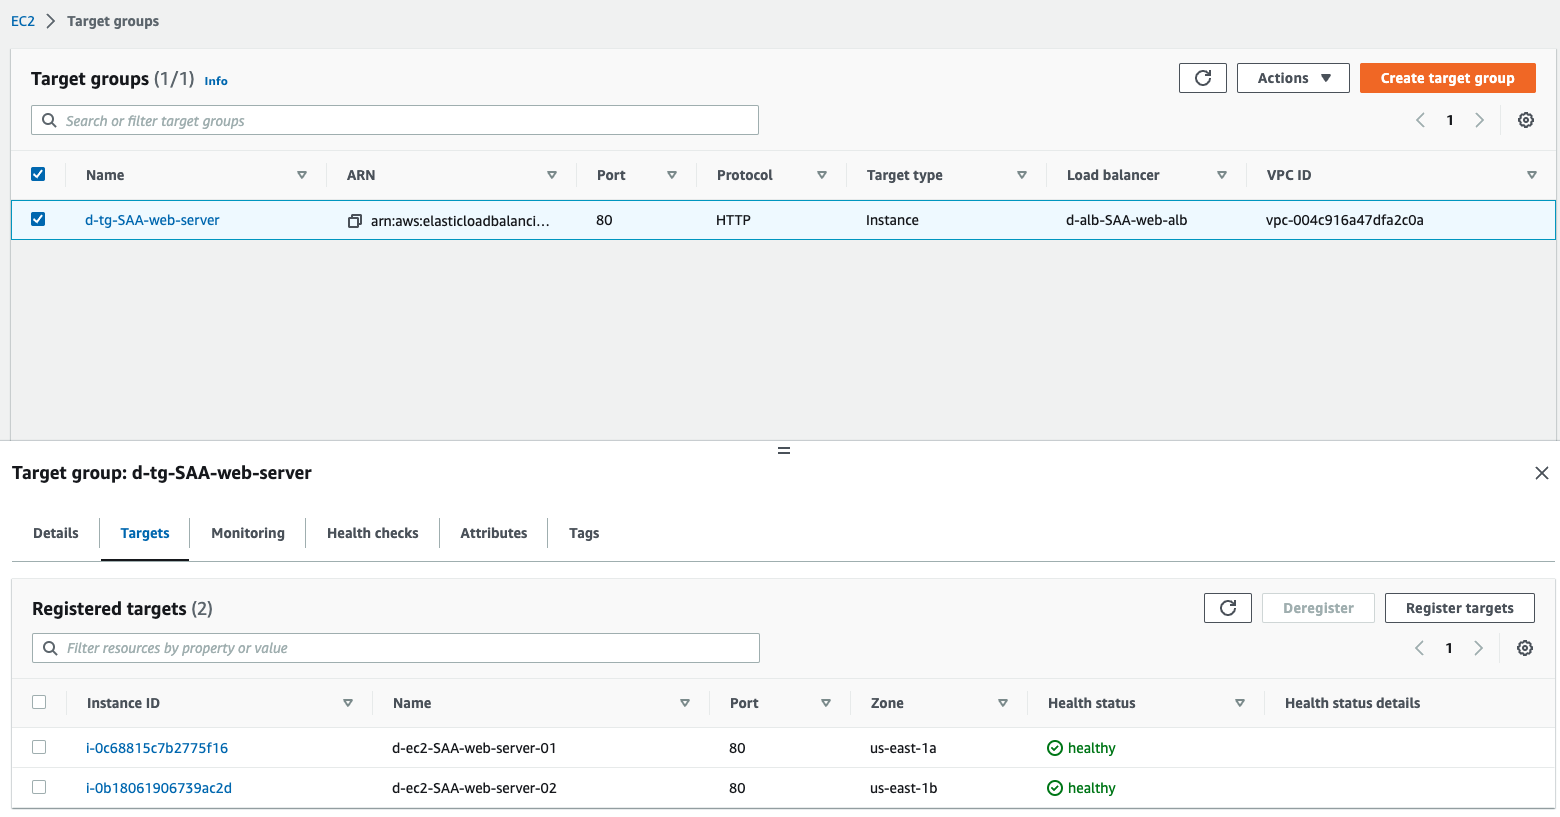
- Đăng ký EC2 vào Taget group:
- Tại đây chúng ta sẽ add 2 Instance đã tạo lúc nãy vào Tagets, Check chọn 2 Instance và Nhấn nút Include as pending below
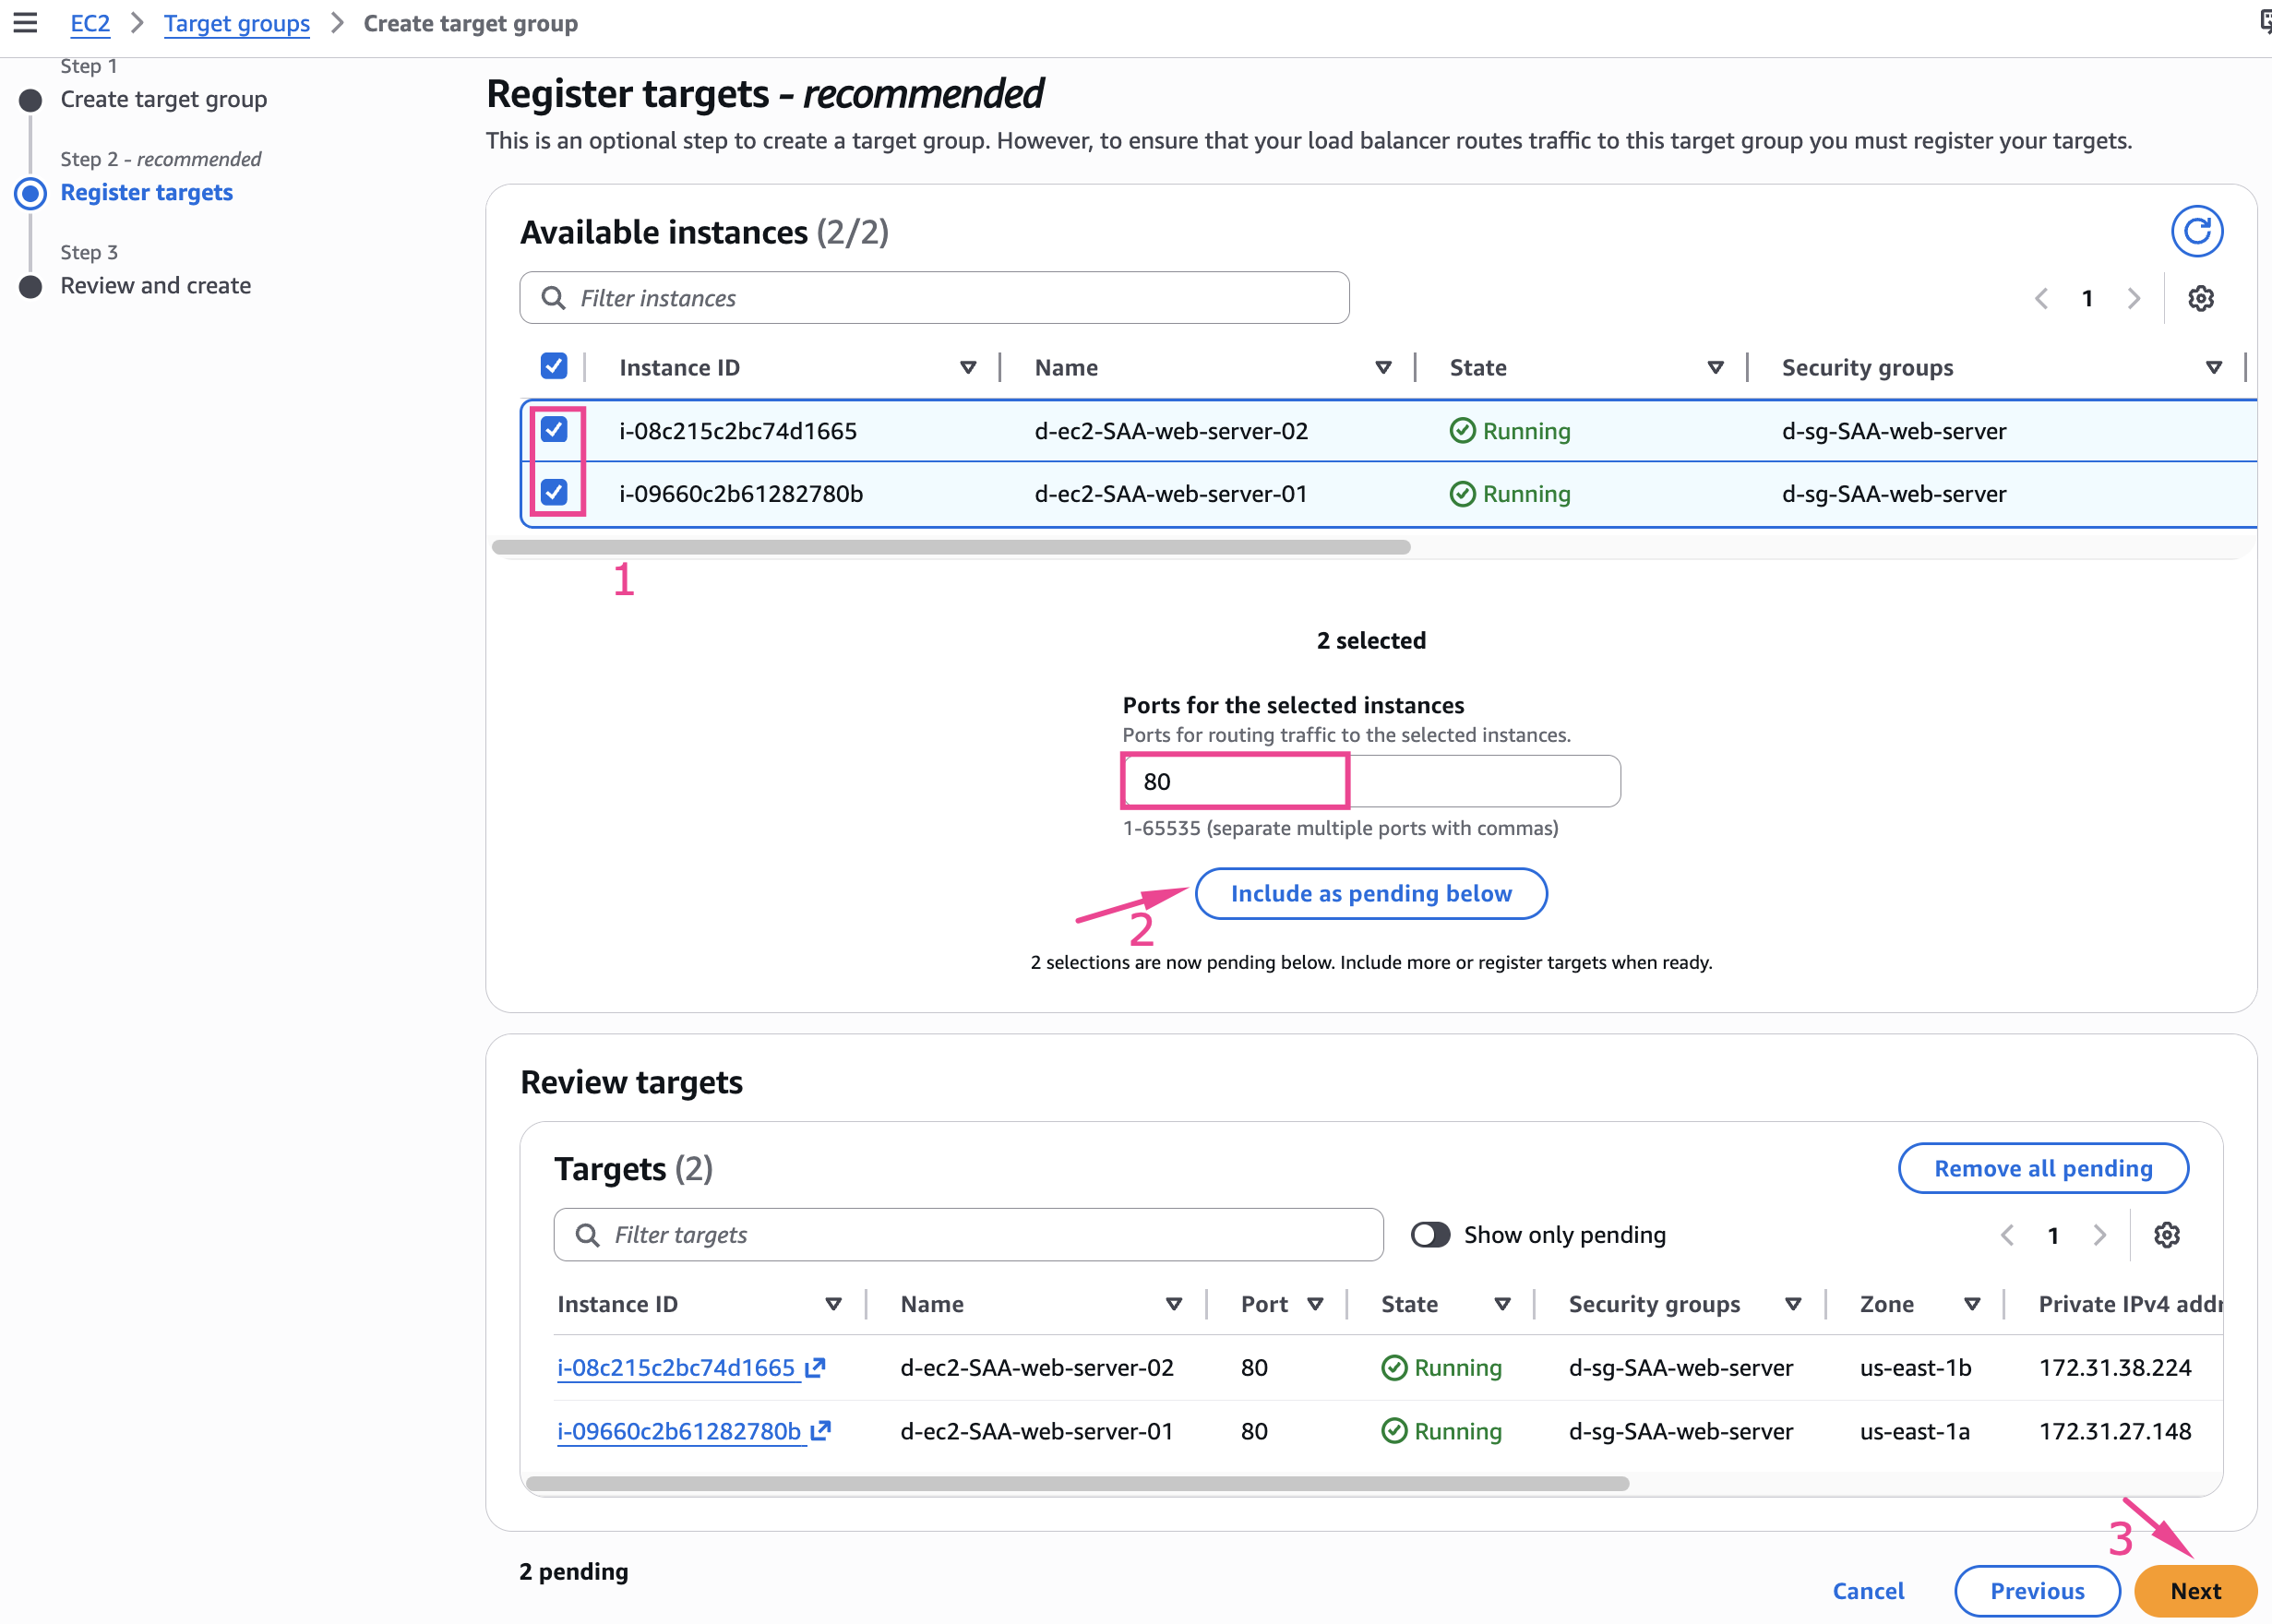
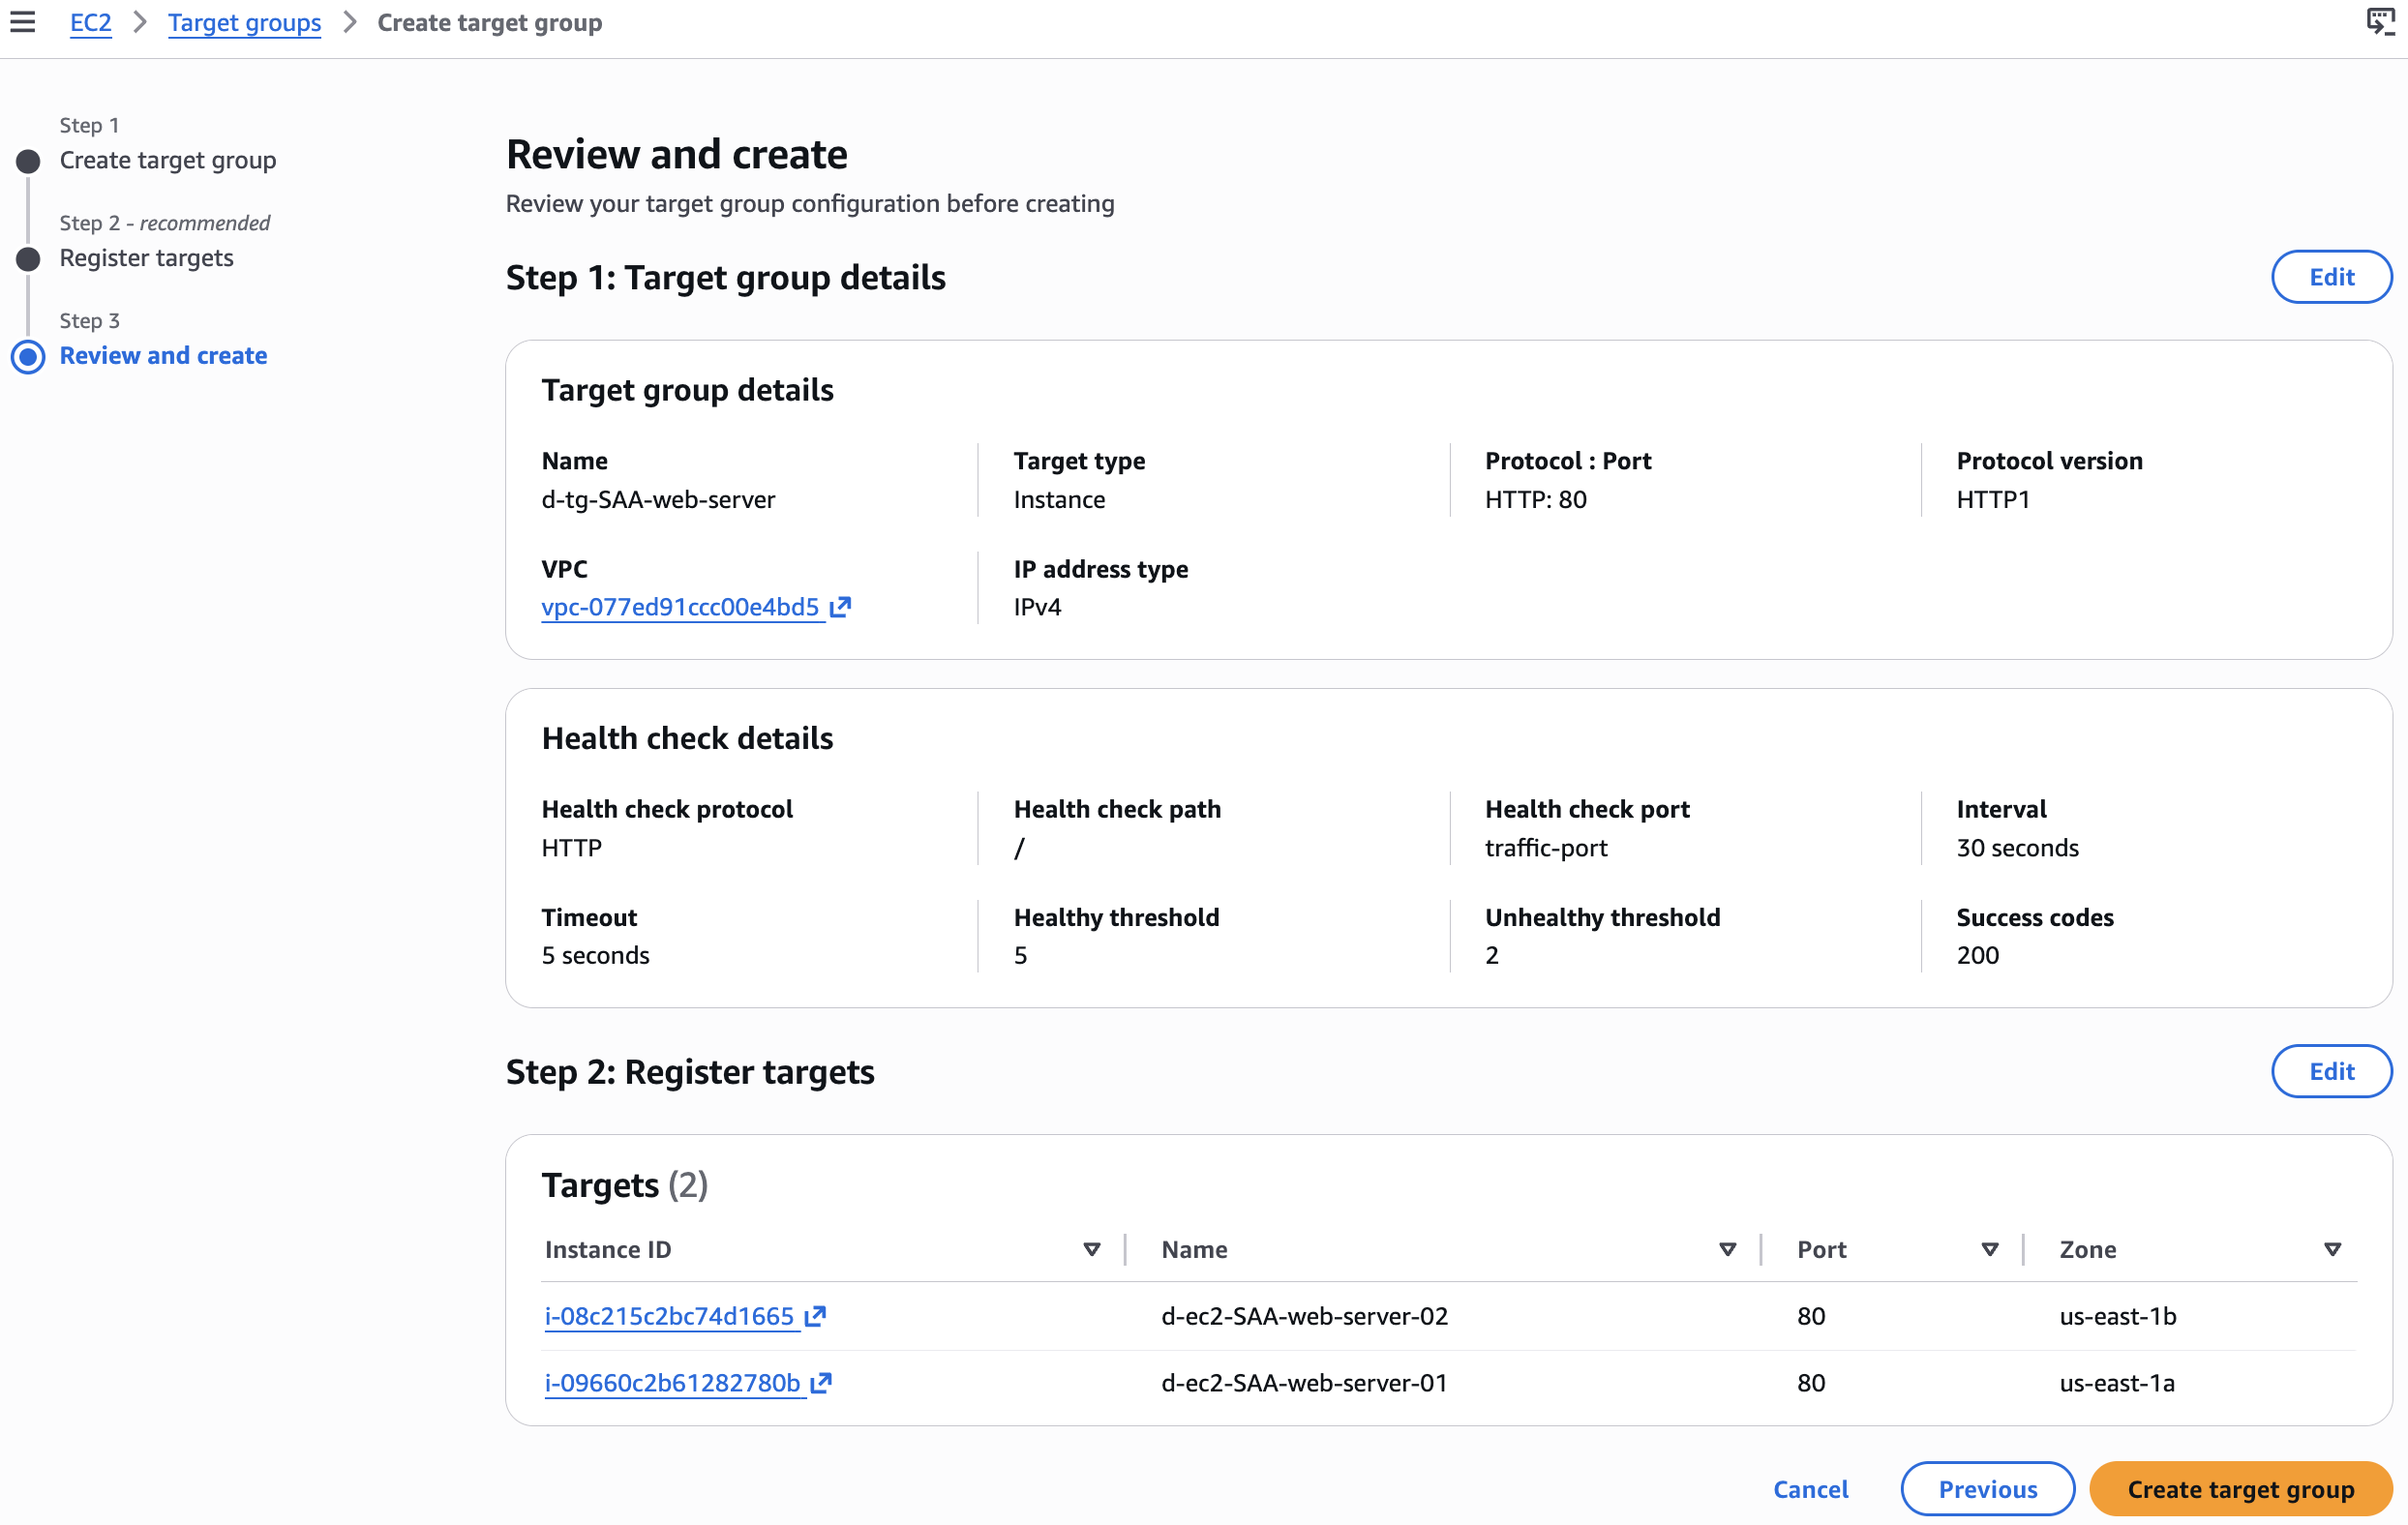
- Review và Create taget group
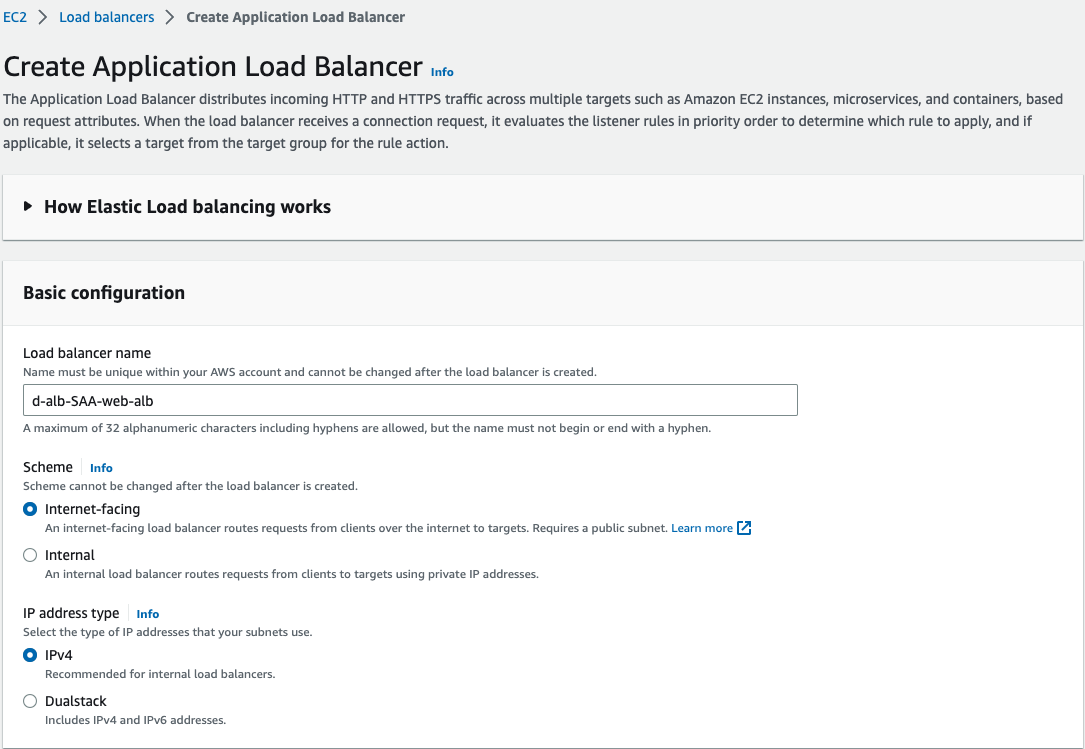
IV. Create ELB
Vào EC2 Console -> Load Balancers -> Nhấn Create load balancer
- Chọn create Application Load Balancer
- Load balancer name:
d-alb-SAA-web-alb - Scheme:
Internet-facing - IP address type:
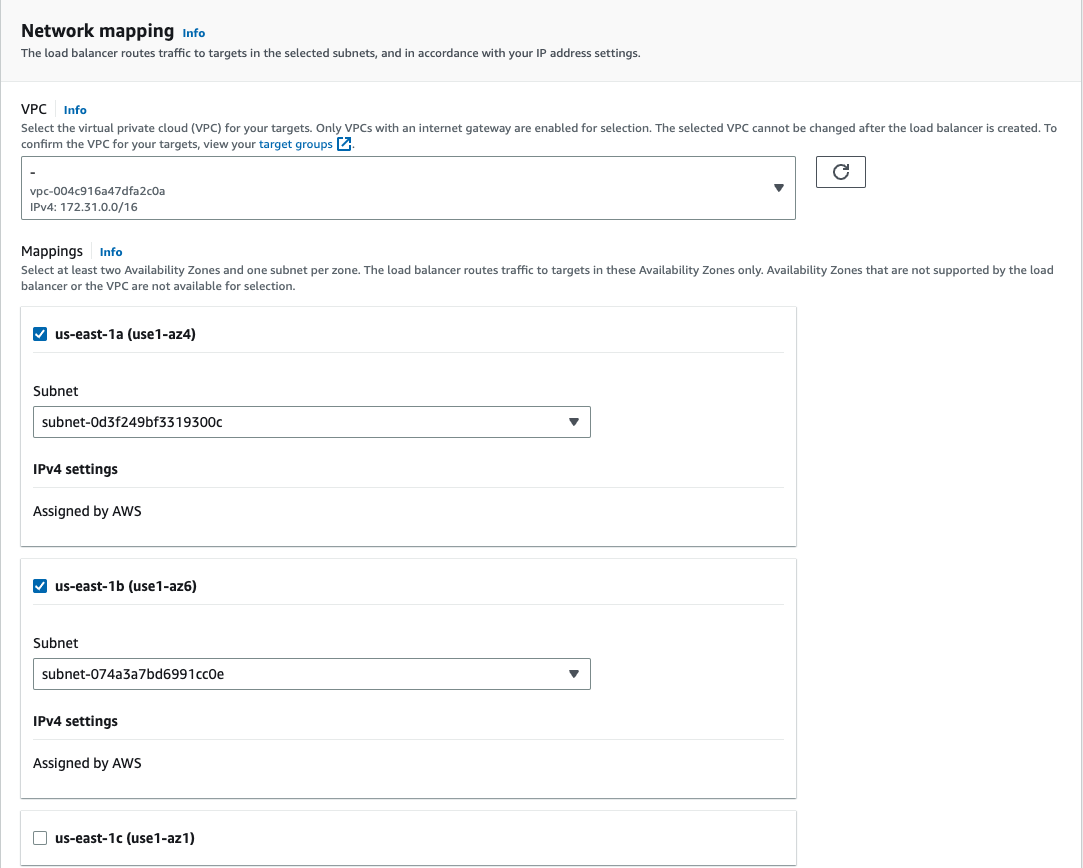
IPv4 - Network mapping
- VPC: Chọn
default VPC - Mappings: Chọn
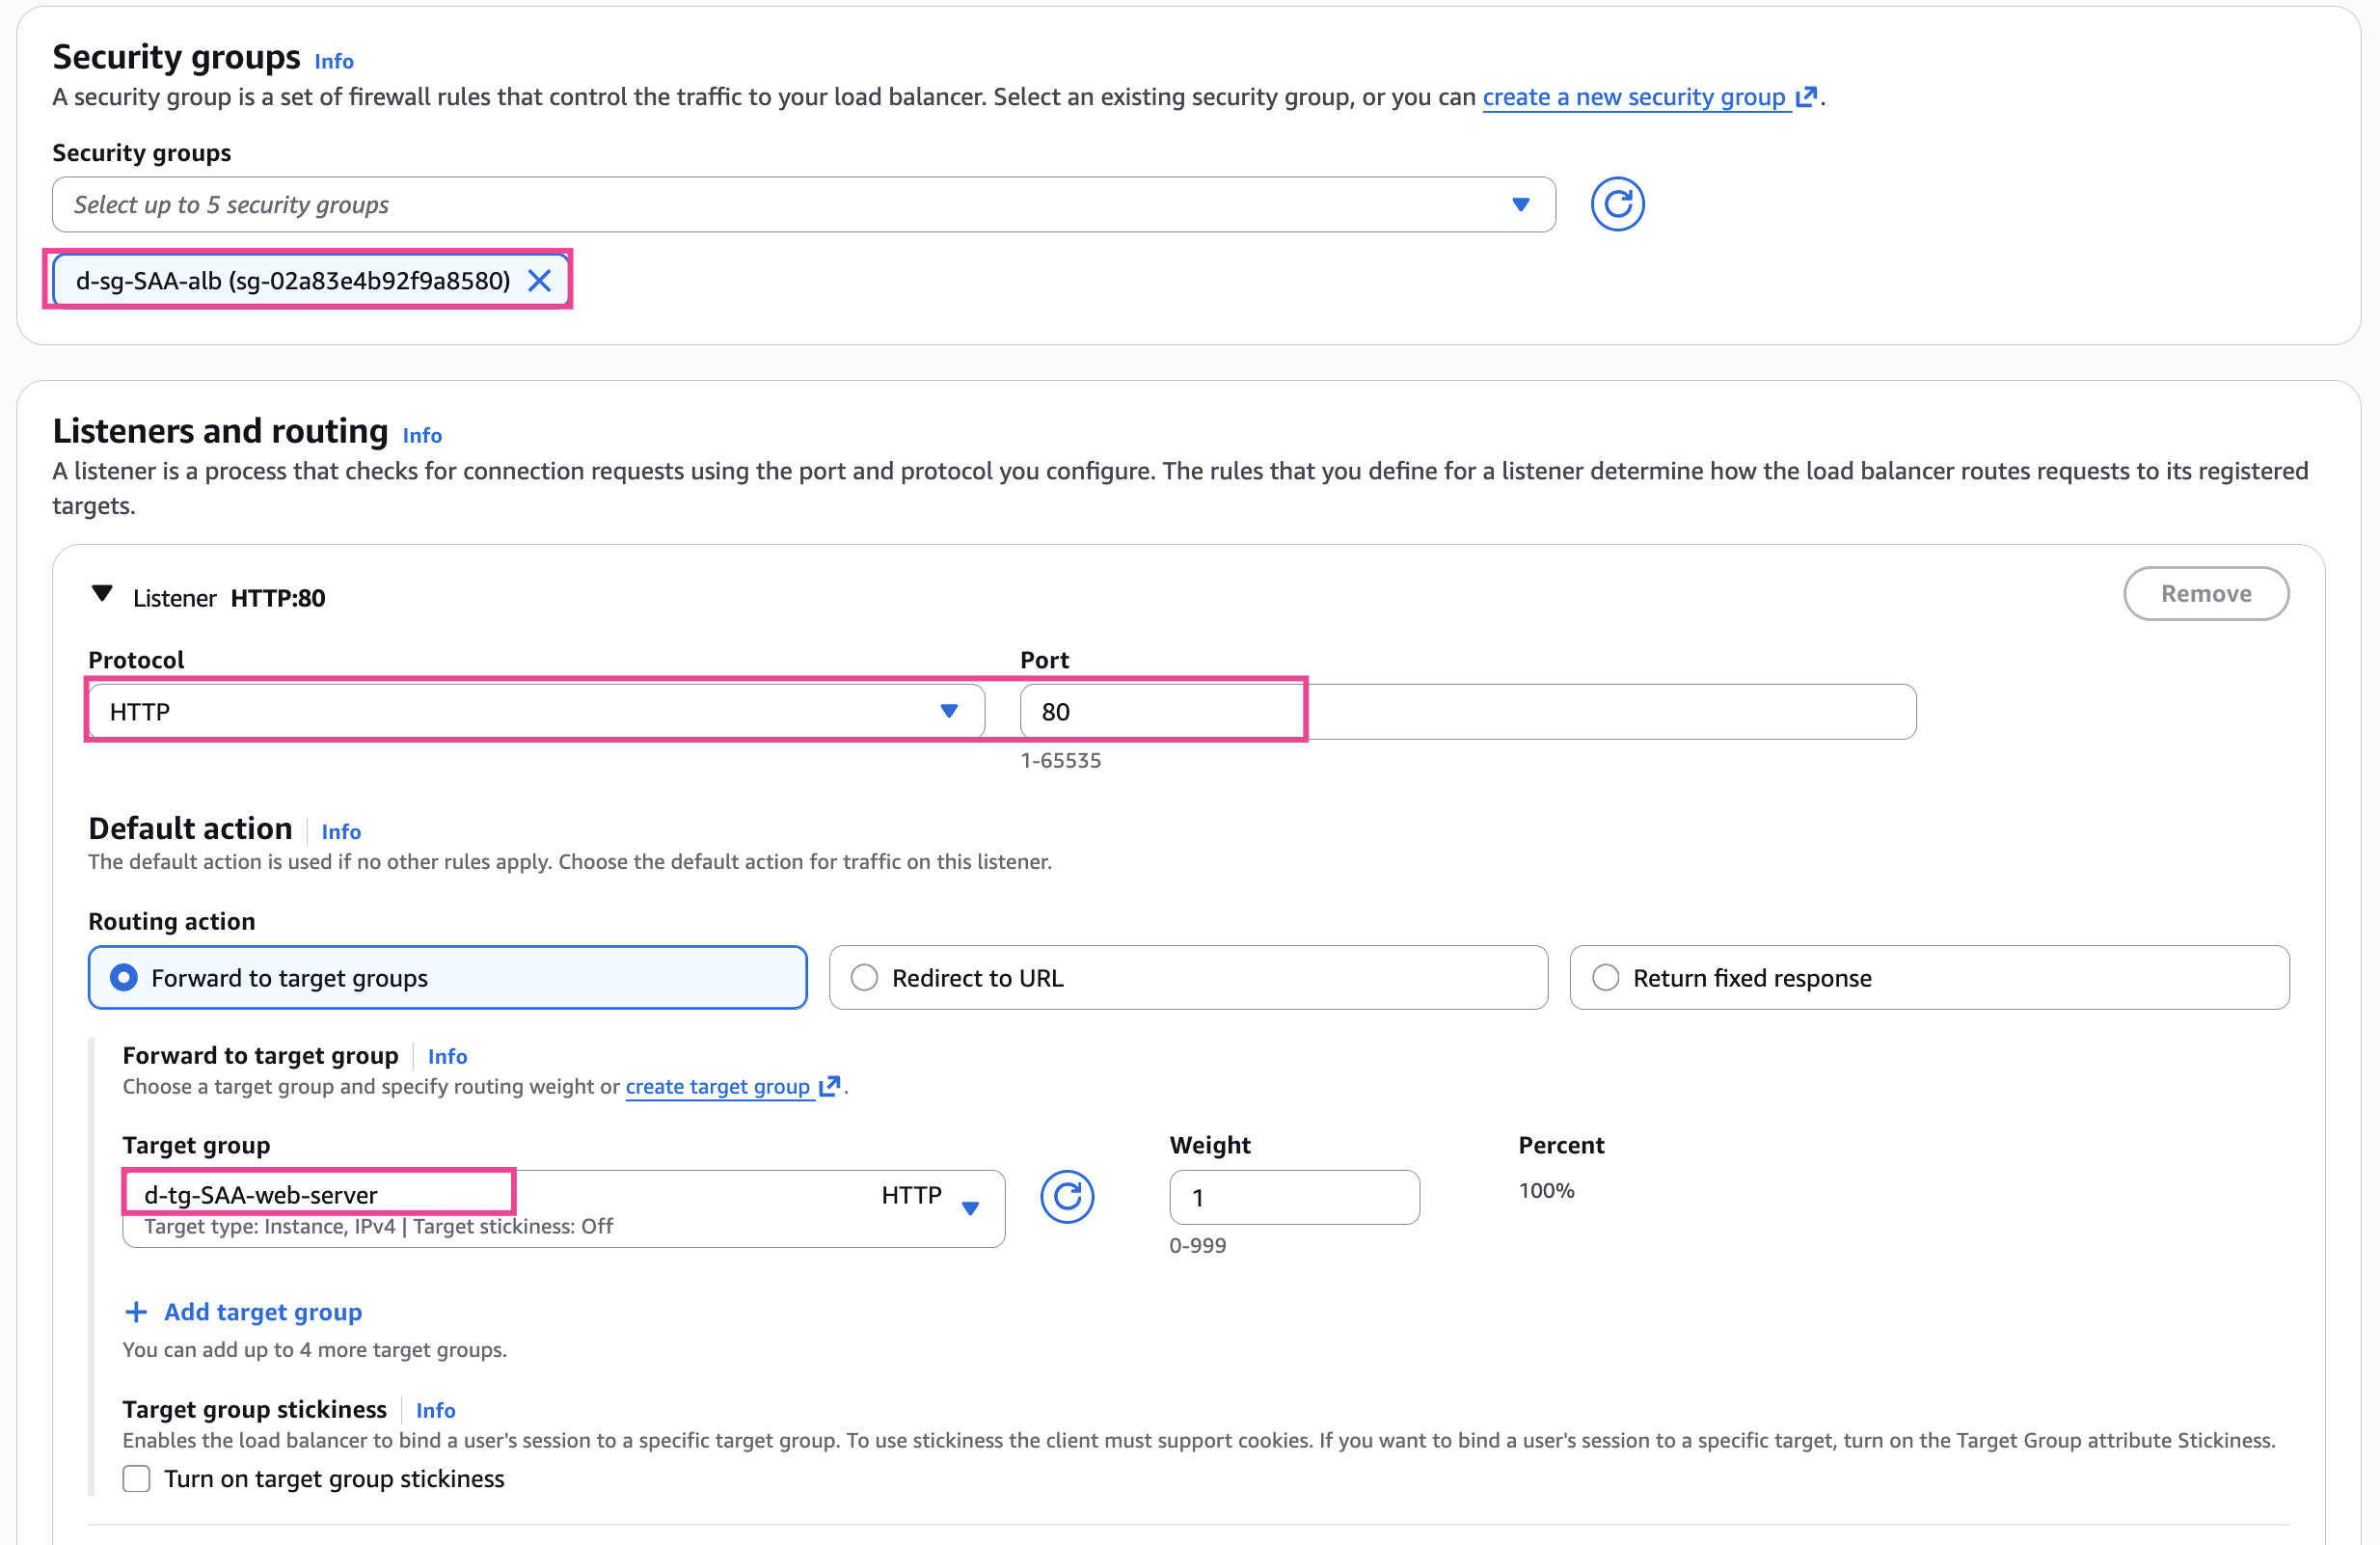
us-east-1avàus-east-1b - Security groups:
d-sg-SAA-alb
- VPC: Chọn
- Listeners and routing
- Protocol:
HTTP - Port:
80 - Default action: Chọn Taget group
d-tg-SAA-web-server
- Protocol:
Sau khi Tạo ALB xong, bạn đợi 1 chút thì sẽ thấy Health status ở Taget group -> healthy
Check ALB
Vào giao diện Load Balancer -> copy DNS name
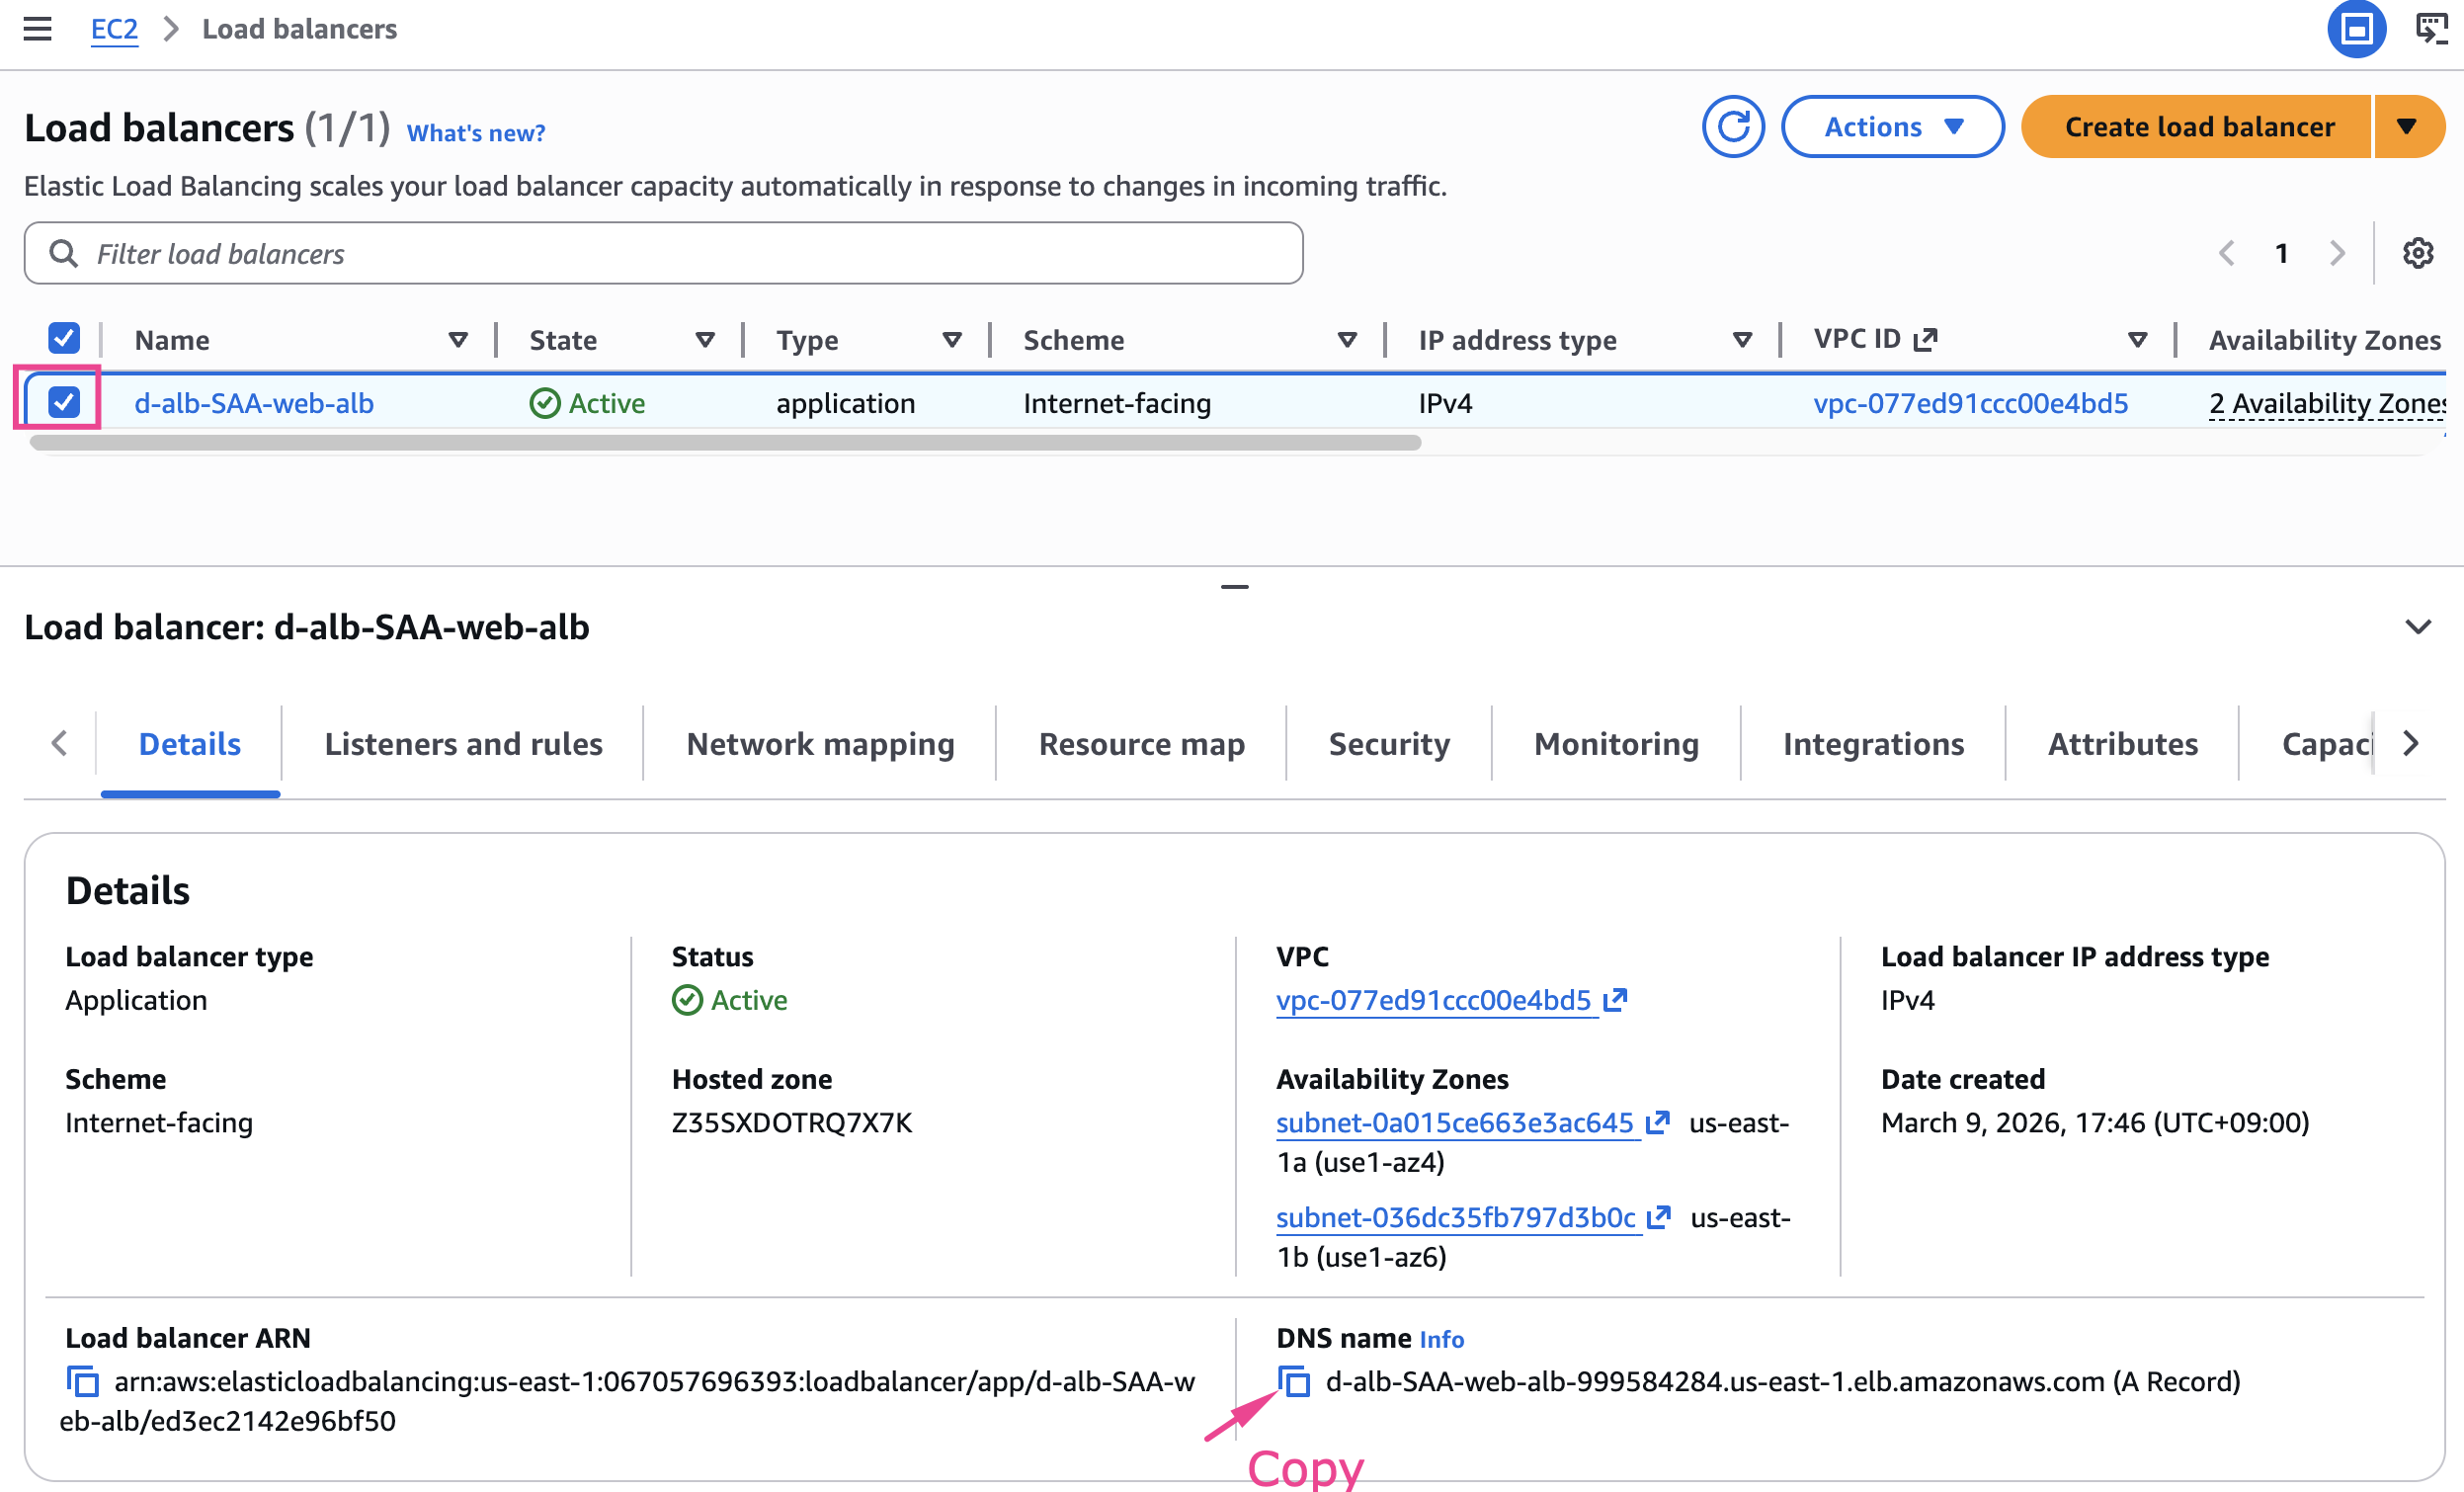
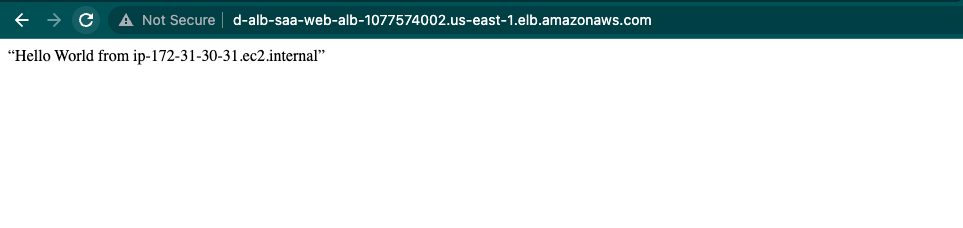
Access từ browser
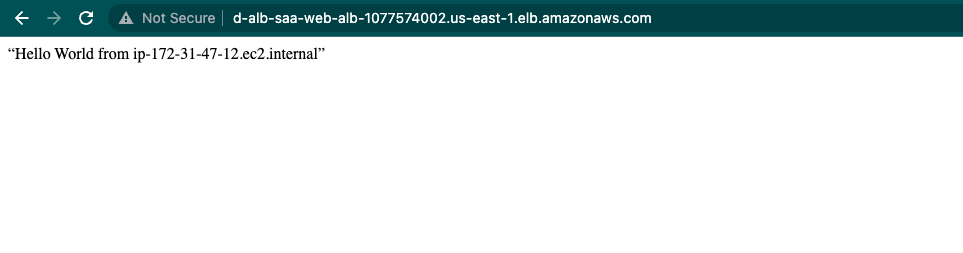
Reload page vài lần để check cân bằng tải
Clean up
Để tiếp tục làm bài thực hành với EC2 Auto Scaling group, chúng ta sẽ giữ lại Taget Ggroup và ALB, chỉ Terminated 2 EC2.
Nếu dừng lại ở đây chúng ta sẽ thực hiện:
- Terminated 2 EC2:
d-ec2-SAA-web-server-01vàd-ec2-SAA-web-server-02 - Delete ALB:
d-alb-SAA-web-alb - Delete Taget Group:
d-tg-SAA-web-server - Delete SG:
d-sg-SAA-web-server - Delete SG:
d-sg-SAA-alb