Lab Introduction
- AWS experience: Intermediate
- Time to complete: 45 minutes
- AWS Region: US East (N. Virginia) us-east-1
- Services used: Elastic Beanstalk, CodeBuild, Code Pipeline
What is AWS CodePipeline
- AWS CodePipeline is a fully managed continuous integration and continuous delivery (CI/CD) service provided by Amazon Web Services (AWS).
- Nó giúp tự động hóa quá trình release software applications cho phép developer cung cấp các bản cập nhật ứng dụng thường xuyên hơn
- CodePipeline cho phép bạn model và visualize các giai đoạn khác nhau trong quá trình release bao gồm source code management, building, testing, and deployment.
- Nó tích hợp với nhiều dịch vụ và công cụ AWS khác nhau cũng như các dịch vụ của bên thứ ba, cho phép tích hợp liền mạch vào quy trình phát triển hiện có.
- CodePipeline supports multiple source code repositories, bao gồm: Amazon S3, CodeCommit, và Git-based repositories như GitHub, Gitlab hay Bitbucket.
- Nó cung cấp sự linh hoạt trong việc cấu hình các giai đoạn và hành động tùy chỉnh, cho phép người dùng xác định quy trình công việc và quy tắc tự động hóa của riêng họ.
- CodePipeline cho phép phê manual approvals, cho phép các stakeholders review và approve những thay đổi trước khi deployment.
- Sơ lược CodePipeline
- Source: Nơi lưu trữ source code, có thể là Amazon S3 Bucket, CodeCommit repository, or Git-based repositories such as GitHub and Bitbucket.
- Build: Ở giai đoạn này 1 file buildspec.yml được chuẩn bị để .để thực hiện các công được build và kiểm thử
- Staging: Tên gọi của testing environment, hay còn được gọi là môi trường pre-production. Tốt hơn hết là chúng ta nên có một môi trường dành riêng cho việc test, và đây cũng là Optional.
- Manual approval: Đây là một step trong quy trình CICD, cho phép bạn thực hiện review và approval trước khi nhưng thay đôi của ứng dụng được Deploy đến môi trường production
- Deploy: Đây là phase cuối cùng cho delivery software. Khi sử dụng CodePipeline, application có thể được deploy lên các EC2 Instance bằng cách sử dụng CodeDeploy, Elastic Beanstalk hoặc AWS OpsWorks Stacks.
Architecture Diagram
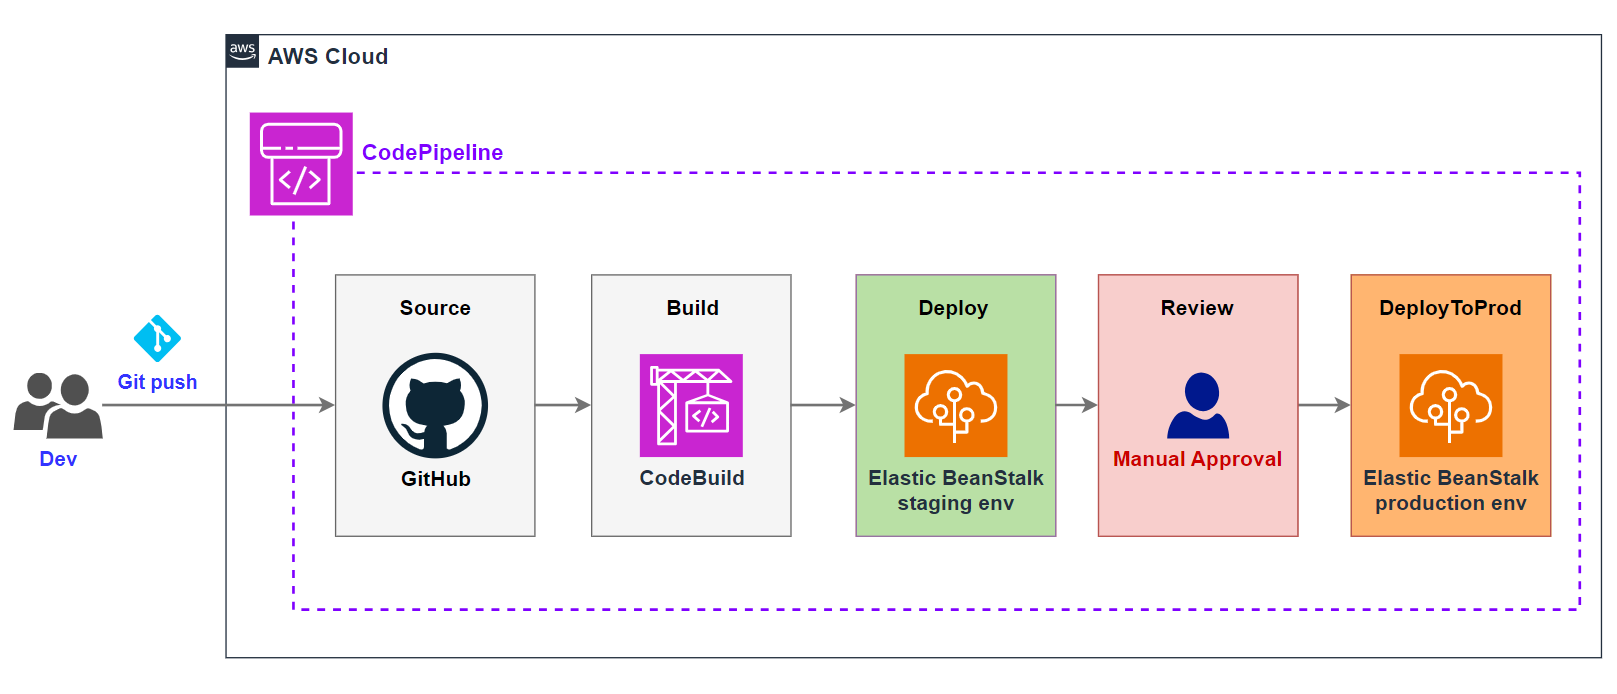
Bài lab này sẽ build kiến trúc CI/CD pipeline sử dụng GitHub để lưu trữ source code, AWS CodePipeline để tự động hóa quá trình CI/CD. Mỗi khi developer push code lên GitHub, pipeline sẽ được trigger và thực hiện các step sau: lấy source code mới nhất từ GitHub, build code với AWS CodeBuild, deploy lên môi trường staging trên Elastic Beanstalk, sau đó sẽ yêu cầu manual approval trước khi deploy lên môi trường Production.
Task Details
- Set Up Git Repo
- Create Elastic Beanstalk Application to Deploy
- Create CodeBuild Project
- Create Code Pipeline
- Create new pipeline
- Configure Source Stage
- Configure Build Stage
- Configure Deploy to staging Stage
- Test pipeline execution
- Finalize Pipeline and test
- Configure Manual approval stage
- Configure Deploy to Prod Stage
- Push new commit to your repo
- Monitor pipeline and manual approve change
Prerequisites
Before starting this tutorial, you will need:
- An AWS account
- Git installed on your computer
- A text editor: Ex: VS Code
1. Set Up Git Repo
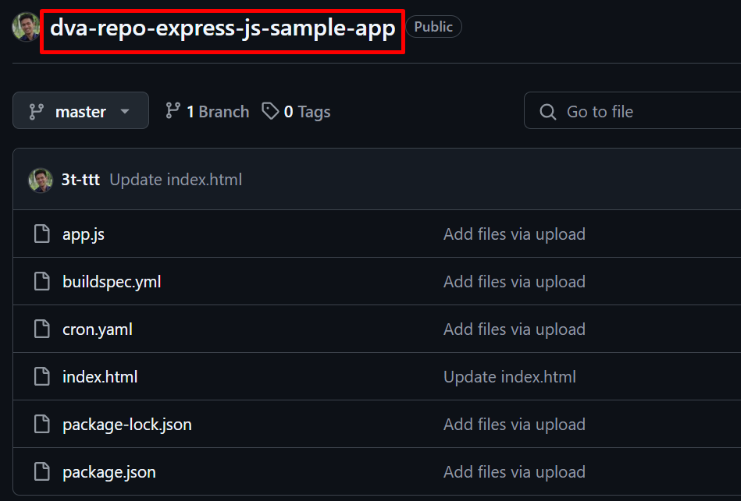
Code sample mình để ở Github, mọi người lấy về rồi đẩy lên Github Repo của các bạn nha.
Sau khi đẩy lên Github Repo
- Repository name:
dva-repo-express-js-sample-app
2. Create Elastic Beanstalk Application to Deploy
2.1. Create Instance Profile (IAM role) cho EC2
Trước khi bắt đầu với Elastic Beanstalk, chúng ta cần tạo Instance Profile cho EC2
Tại Console IAM, thực hiện tạo Role như sau
- Use case:
EC2 - Permissions policies
- AWSElasticBeanstalkWebTier
- AWSElasticBeanstalkWorkerTier
- AWSElasticBeanstalkMulticontainerDocker
- Role name:
DVAElasticBeanstalkEc2Role
2.2. Create Application
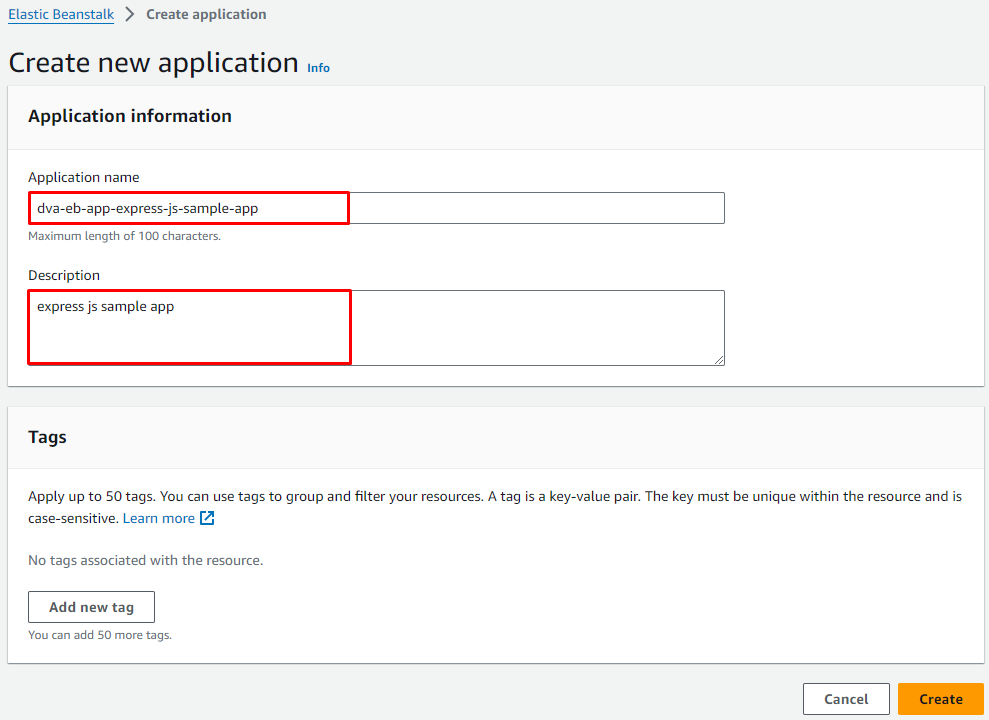
Tại Console của Elastic Beanstalk -> Application -> Create Application

- Application name:
dva-eb-app-express-js-sample-app - Description:
express js sample app
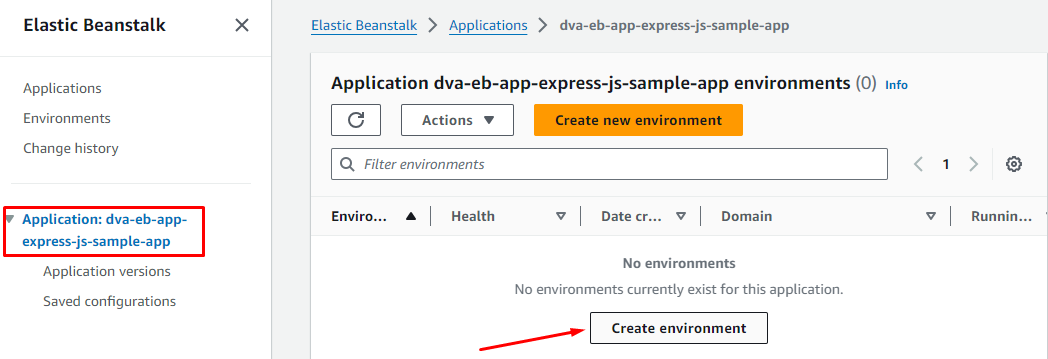
2.3. Create Staging Environments
Step 1: Configure Environment
- Environment tier:
- Environment information:
- Environment name:
dva-eb-env-express-js-sample-app-stg
- Platform
- Platform type:
Managed platform - Platform:
NodeJS - Platform branch:
Nodejs.20 running on 64bit Amazon Linux 2023 - Platform version:
6.2.1 (Recommended)
- Application code
- Presets
- Single instance (free tier eligible)
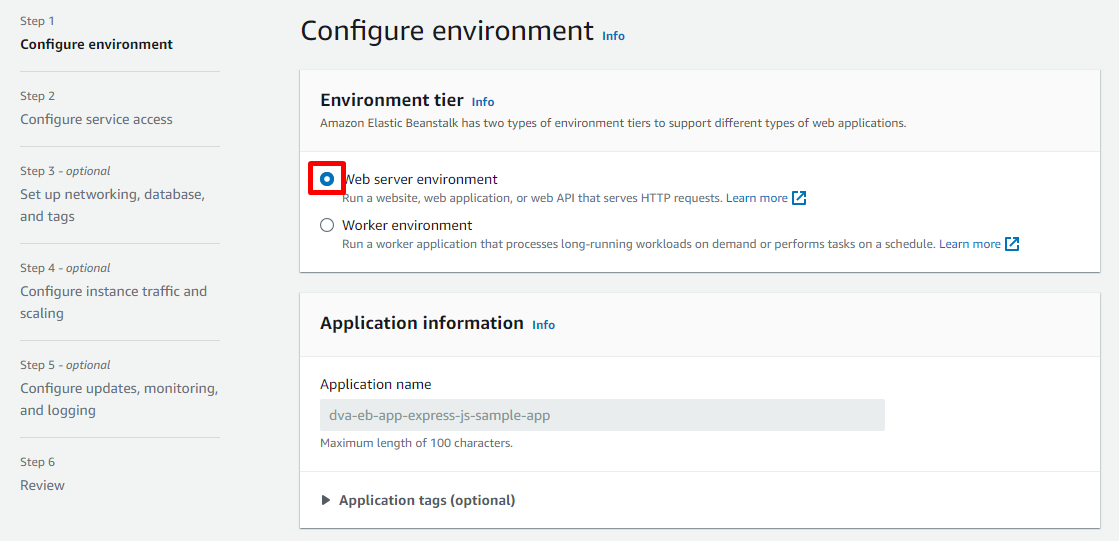
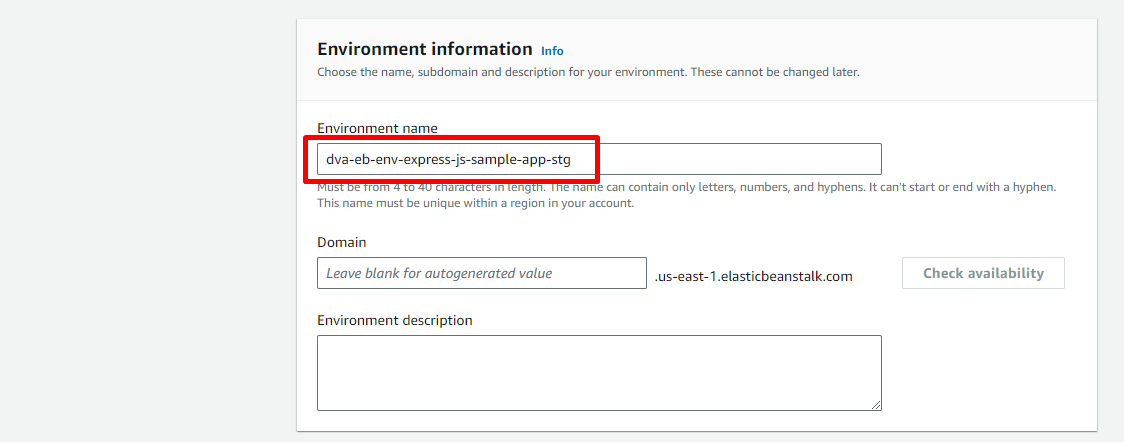
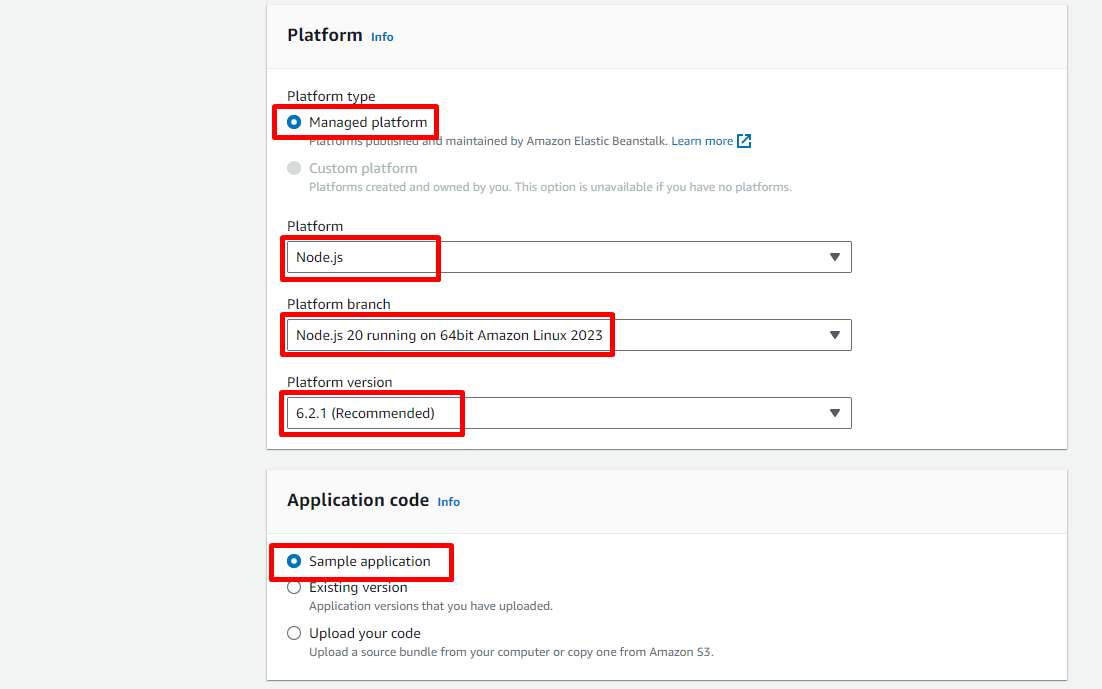
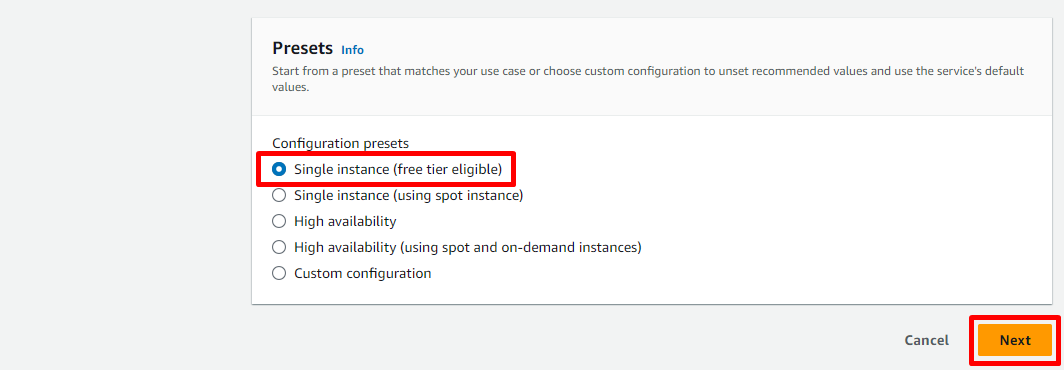
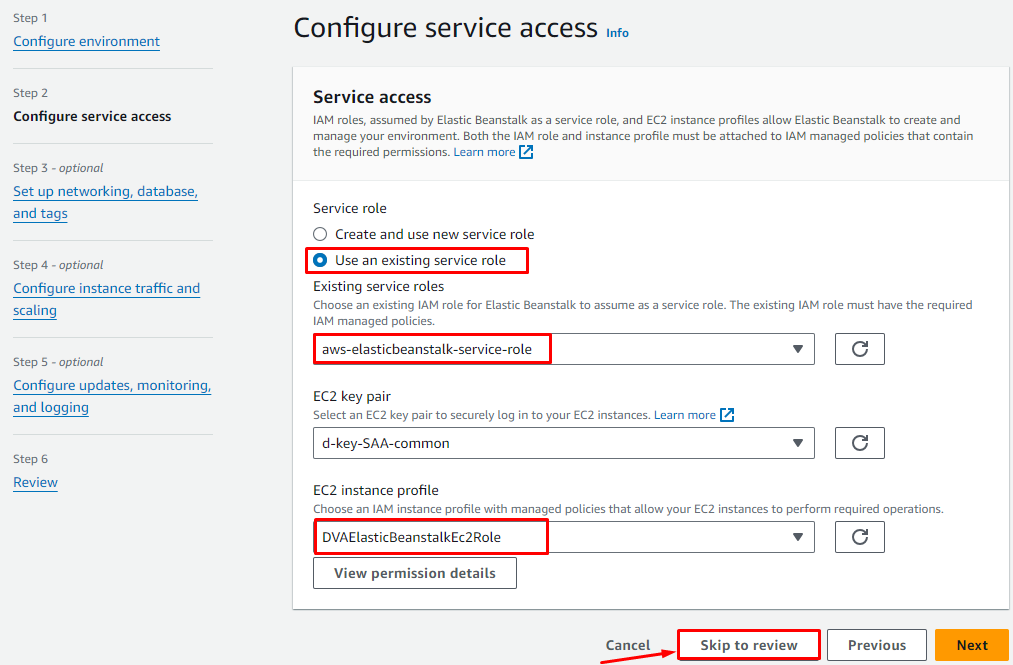
Step 2: Configure service access
- Service access
- Service role: Chọn Use an existing service role và check xem có giá trị
aws-elasticbeanstalk-service-role trong Pulldown không (Nếu bạn đã từng thực hành với Elastic BeanStalk thì khả năng role aws-elasticbeanstalk-service-role đã được tạo rồi). Nếu có thì chọn, nếu chưa tồn tại chọn Create and use new service role - EC2 instance profile:
DVAElasticBeanstalkEc2Role (Đã tạo ở bước 2.1) - Skip to review
Step 6: Review
Elastic Beanstalk is launching your environment. Bạn cần đợi trong vài phút
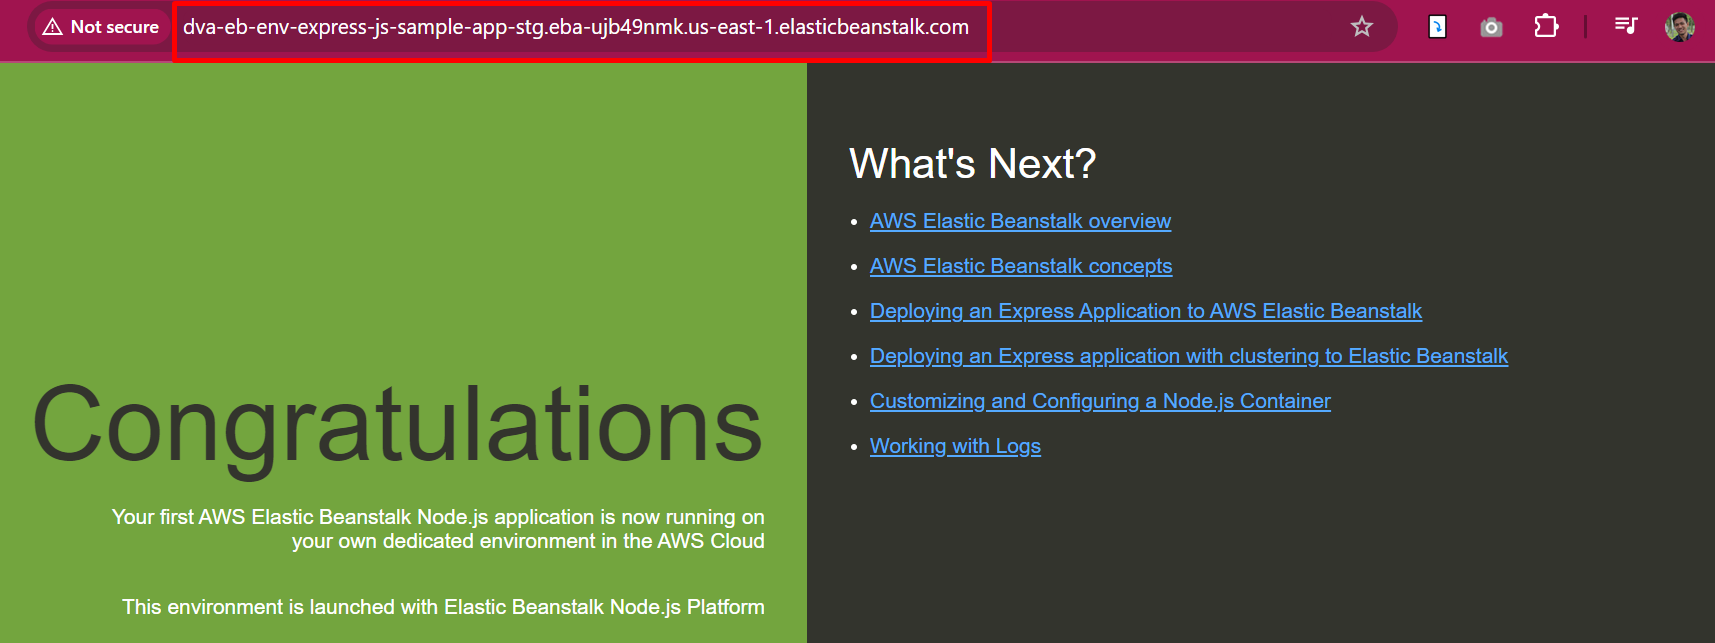
 Sau khi quá trình tạo môi trường
 stg hoàn tất, Click vào domain để verify
2.4. Create Production Environments
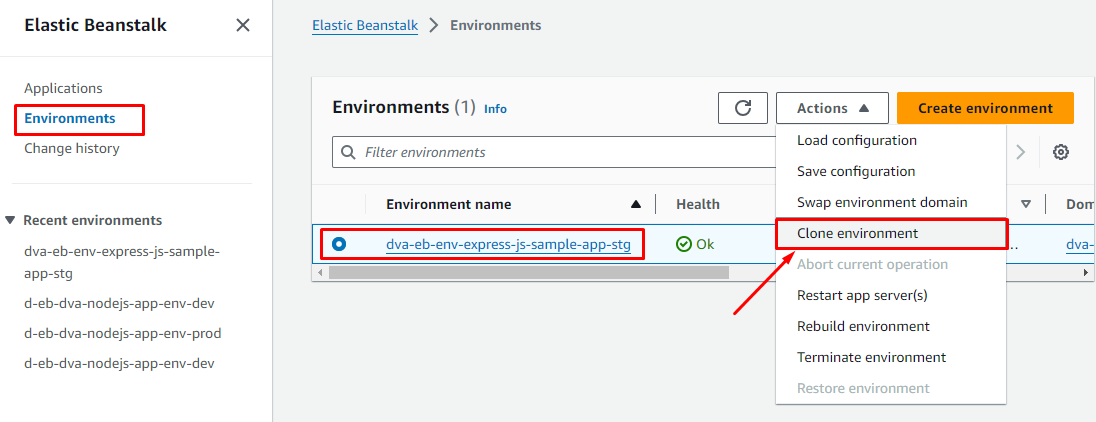
Để tạo môi trường production, ta chỉ cần Clone môi trường đã tạo
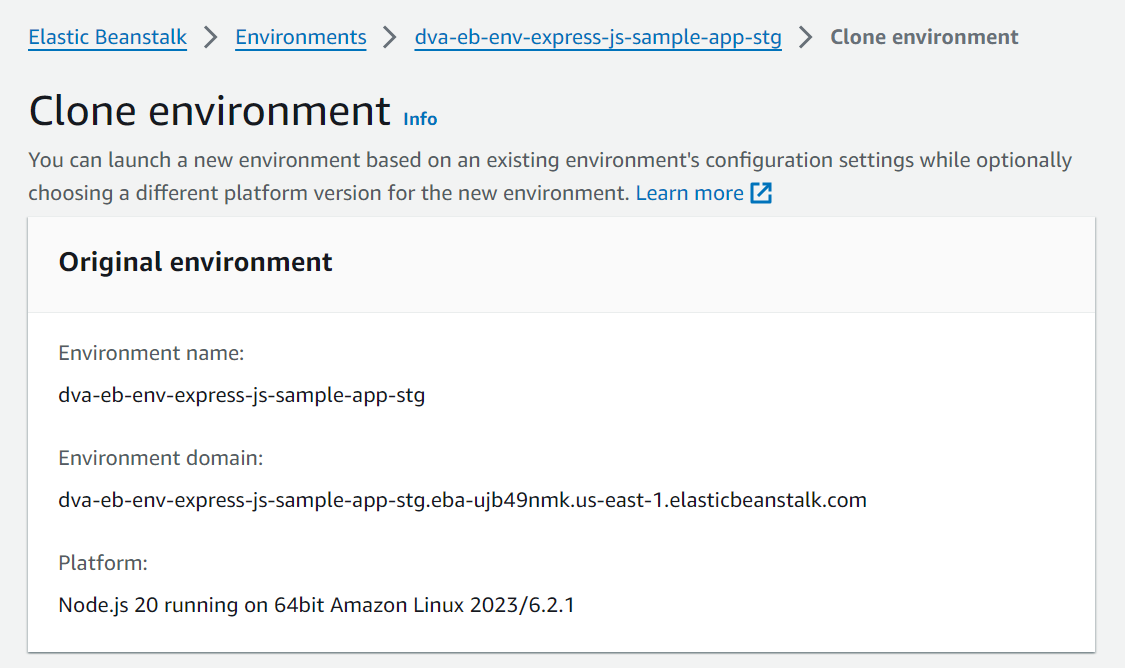
- New environment
- Environment name:
dva-eb-env-express-js-sample-app-prod
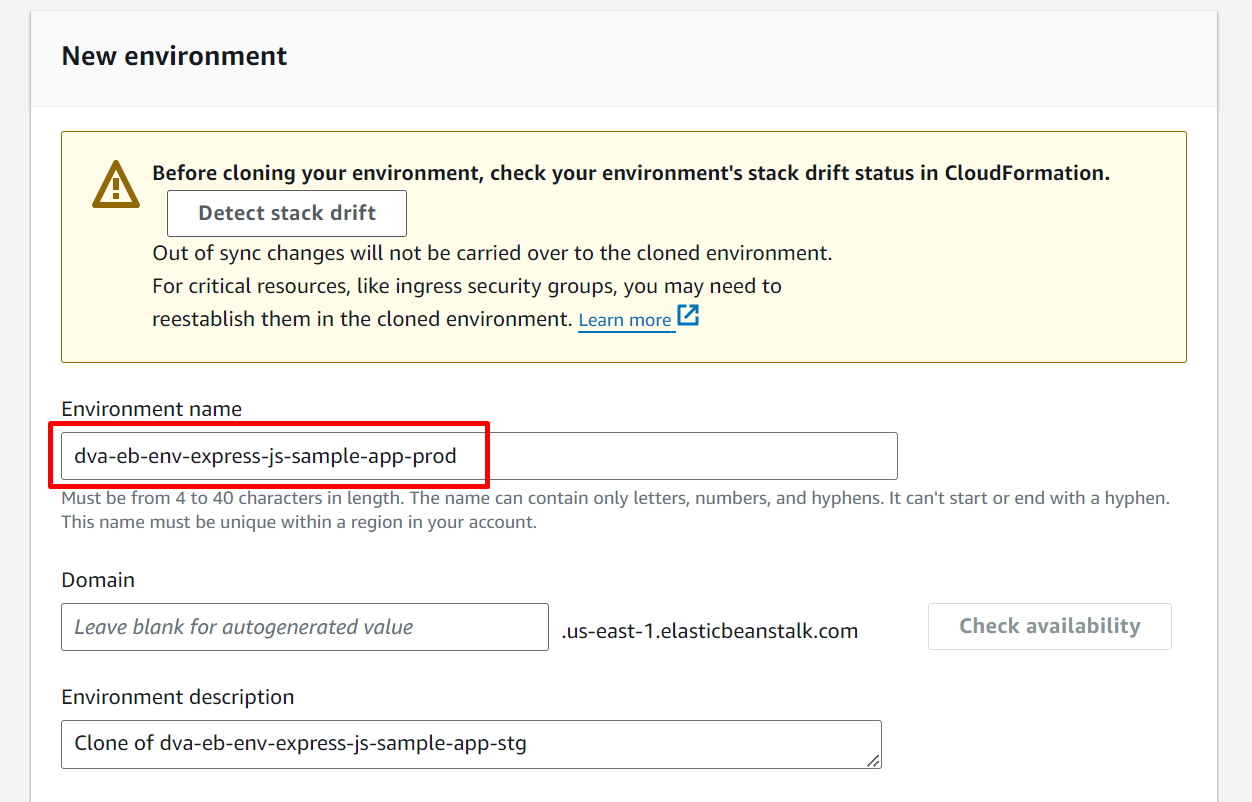
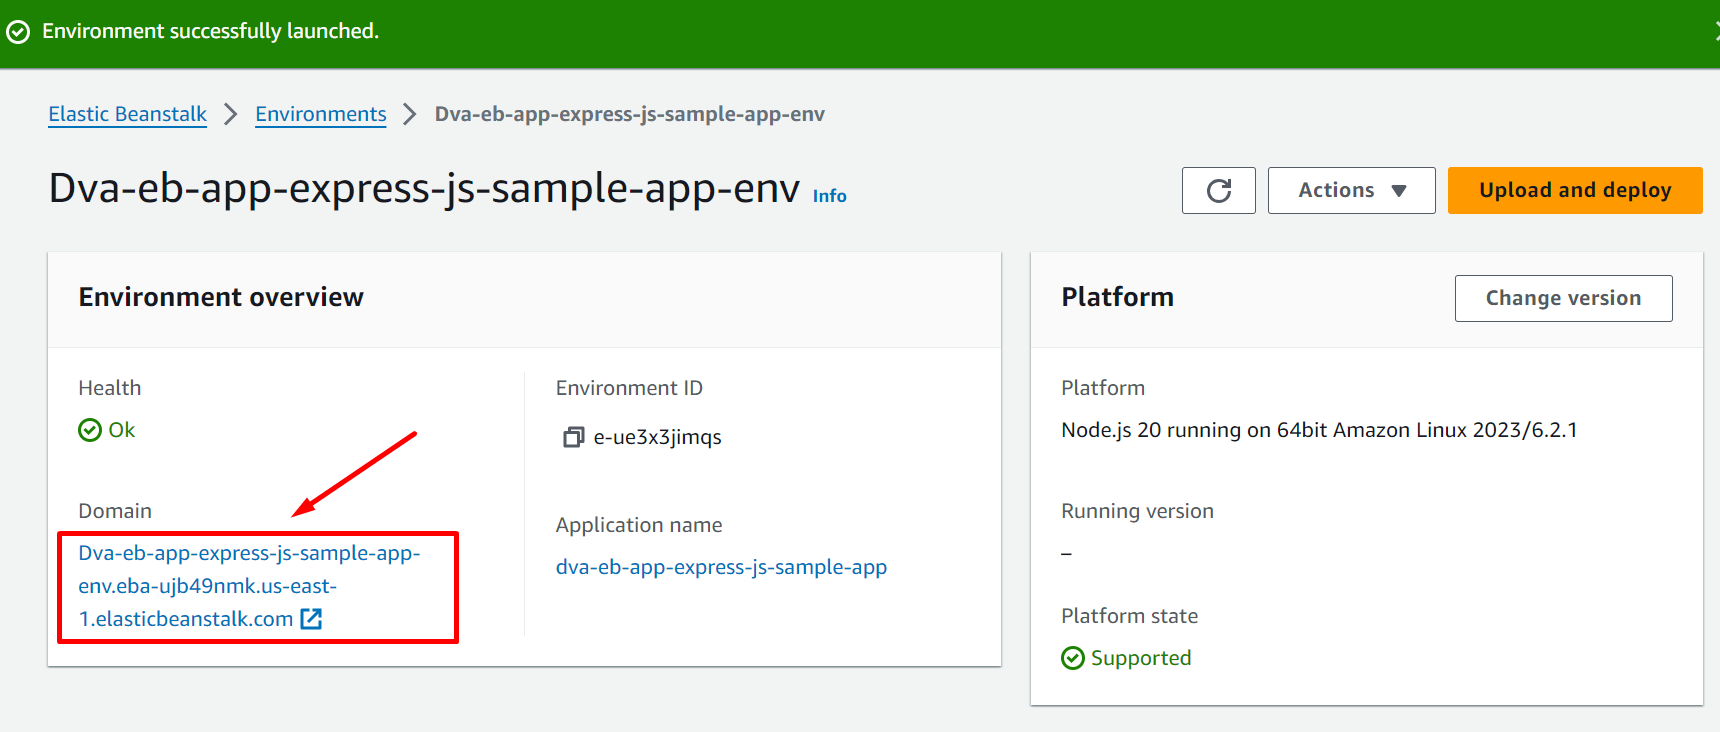
Sau khi quá trình clone môi trường prod hoàn tất, Click vào domain để verify
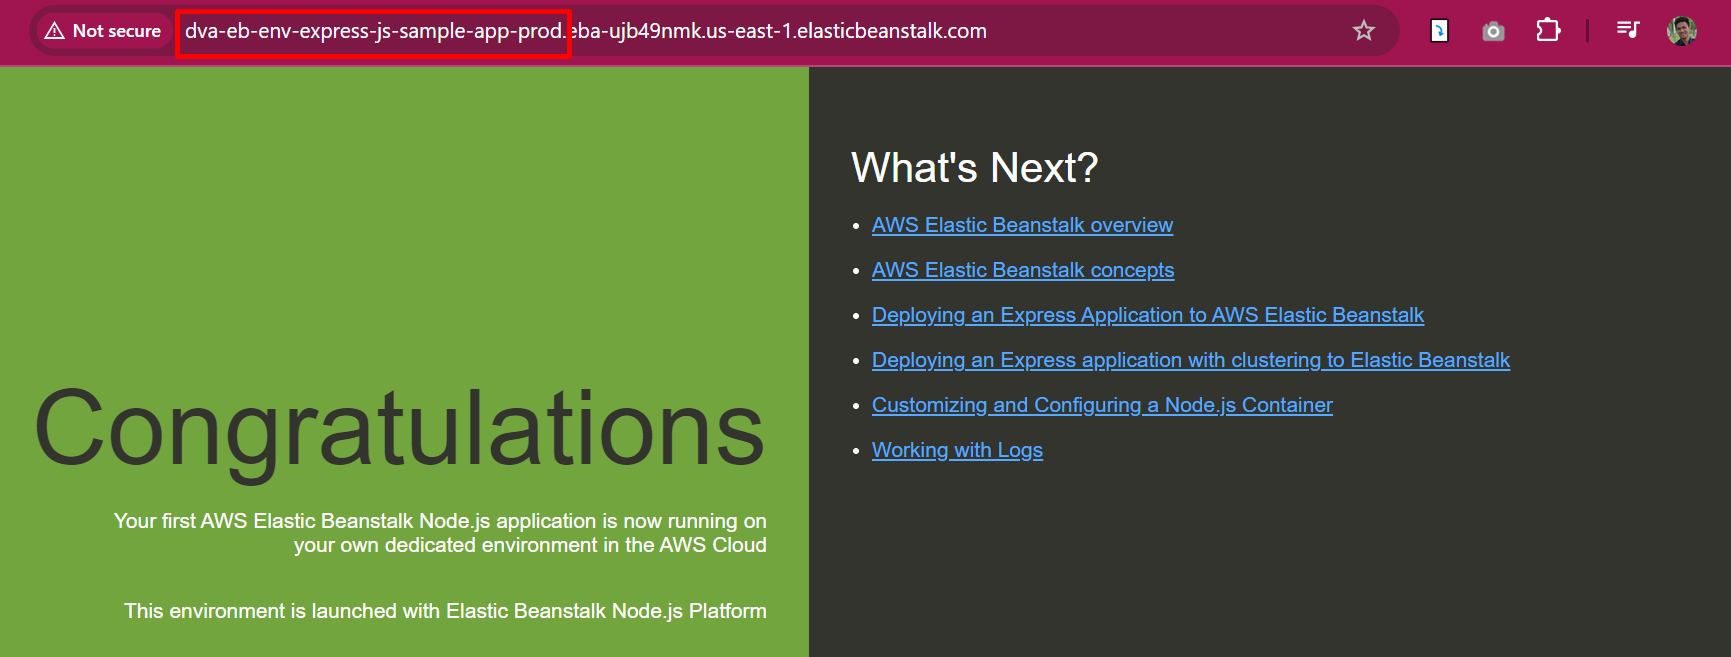
Bạn cũng có thể đợi vài phút để môi trường production chạy xong hoặc trong lúc đợi chúng ta sẽ đi làm các bước tiếp theo
3. Create CodeBuild Project
3.1. Create Connection to Source provider
Tại CodeBuild Console -> Settings -> Connections -> Create connection
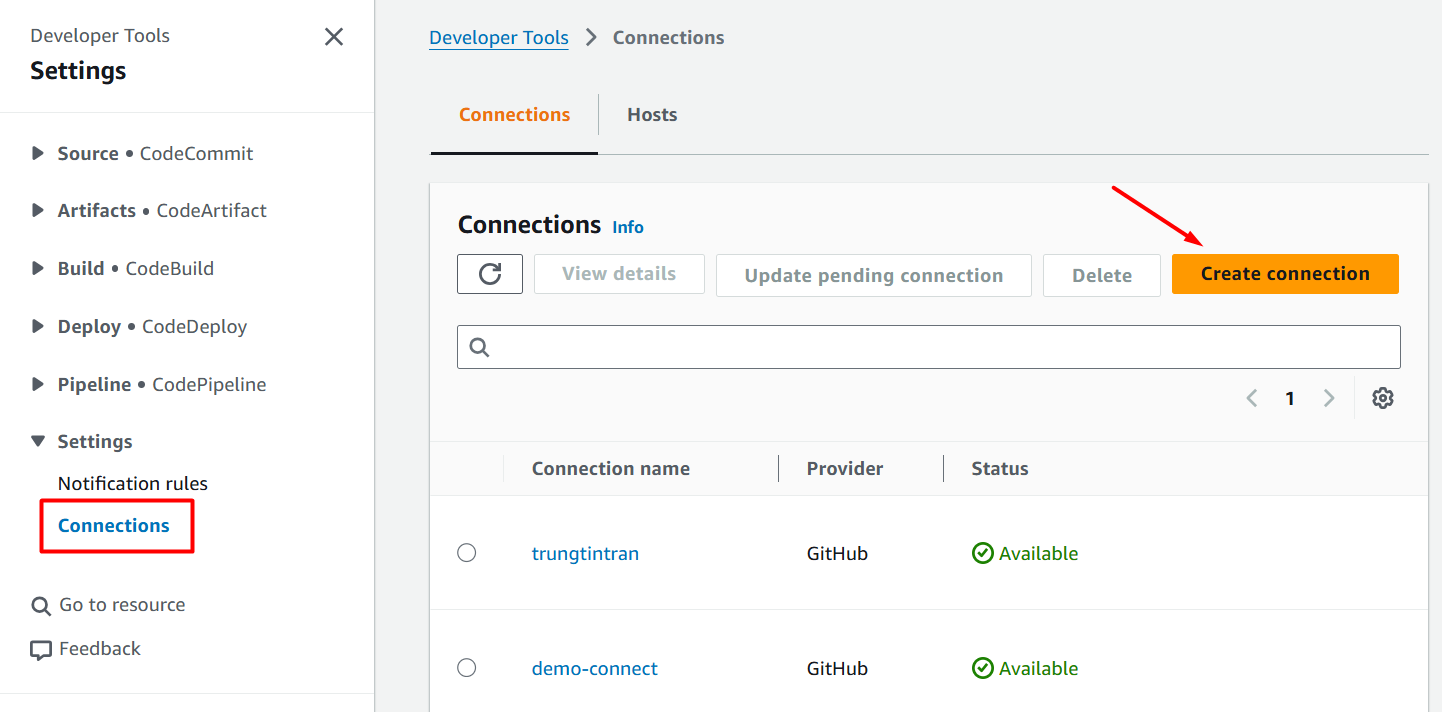
- Source provider:
GitHub - Connection name:
dva-repo-connection
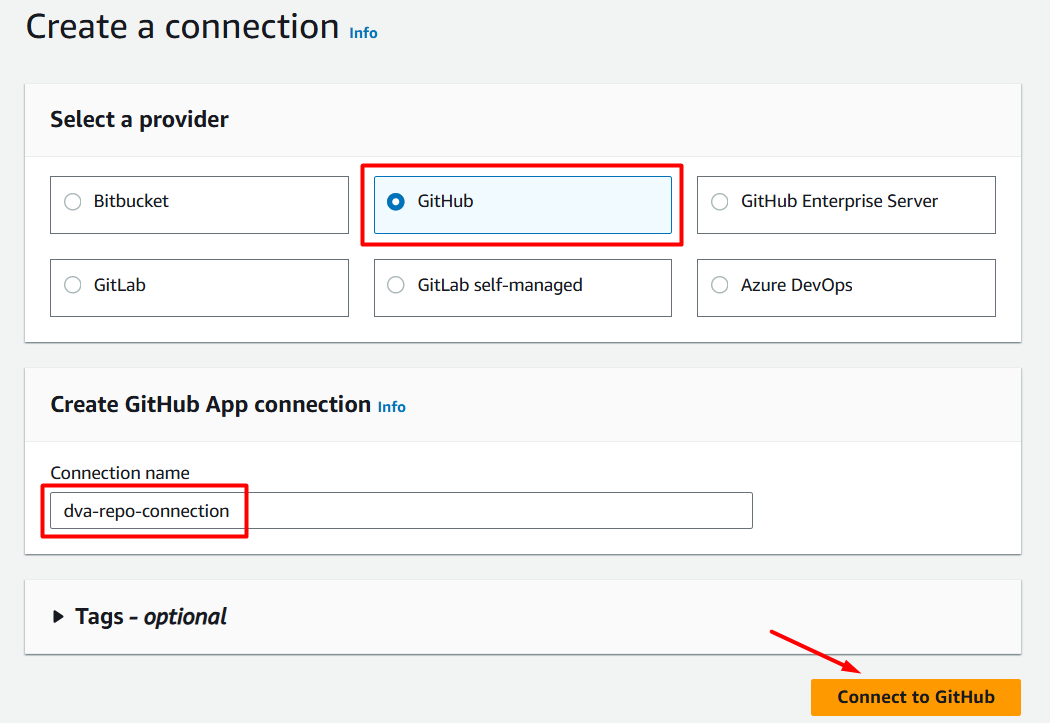
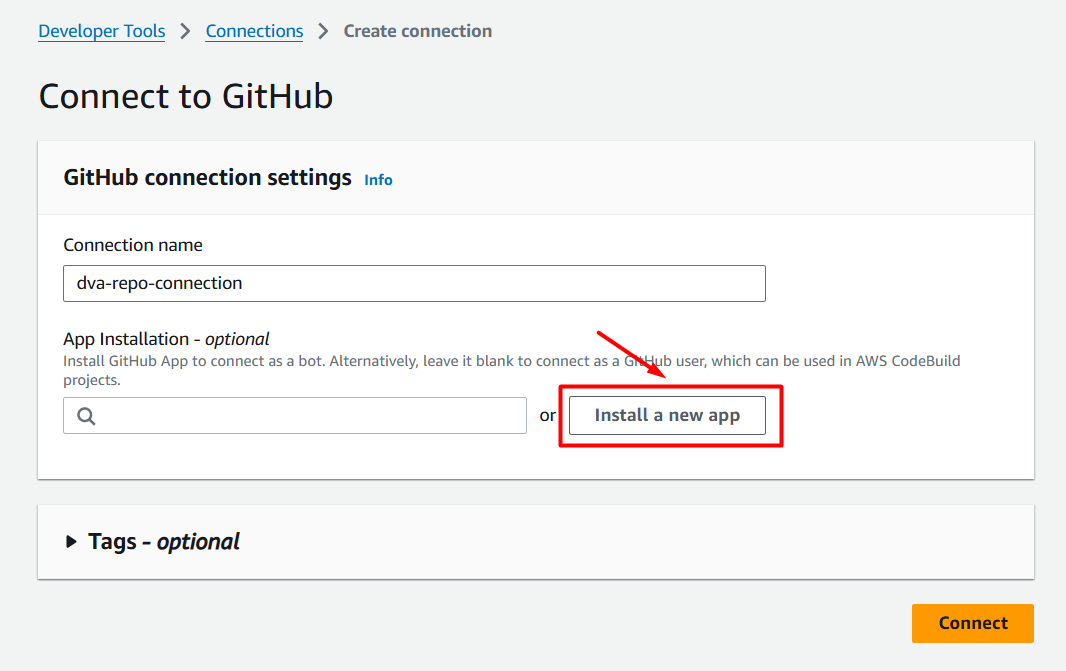
Connect to GitHub
- App installation :
Install a new app
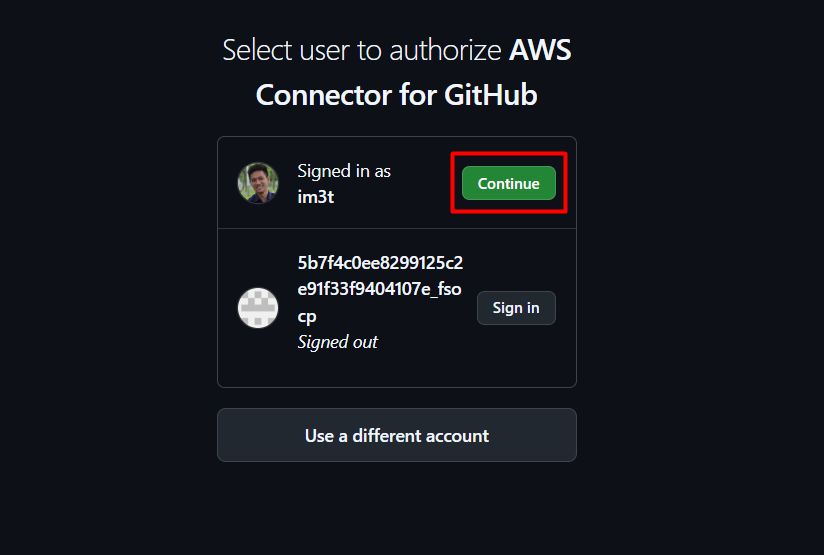
Select GitHub Account
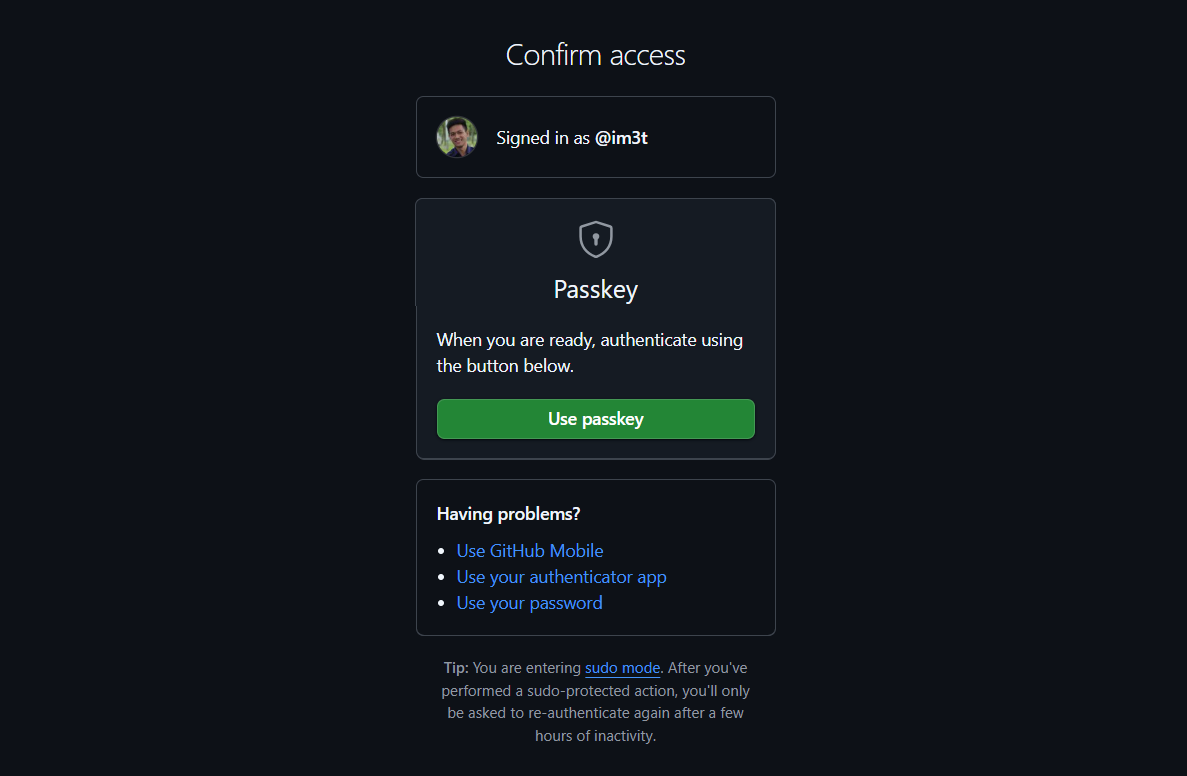
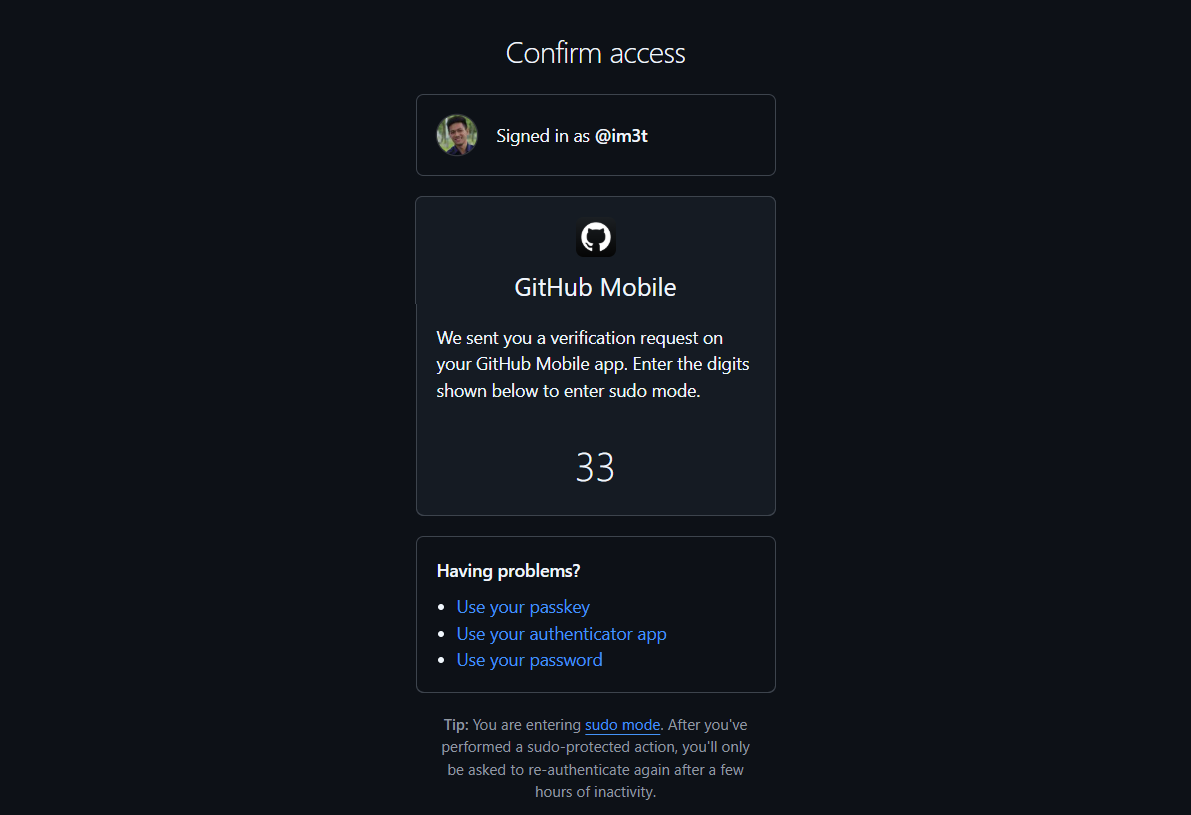
Confirm access
- Dùng GitHub Mobile hoặc nhập password Github
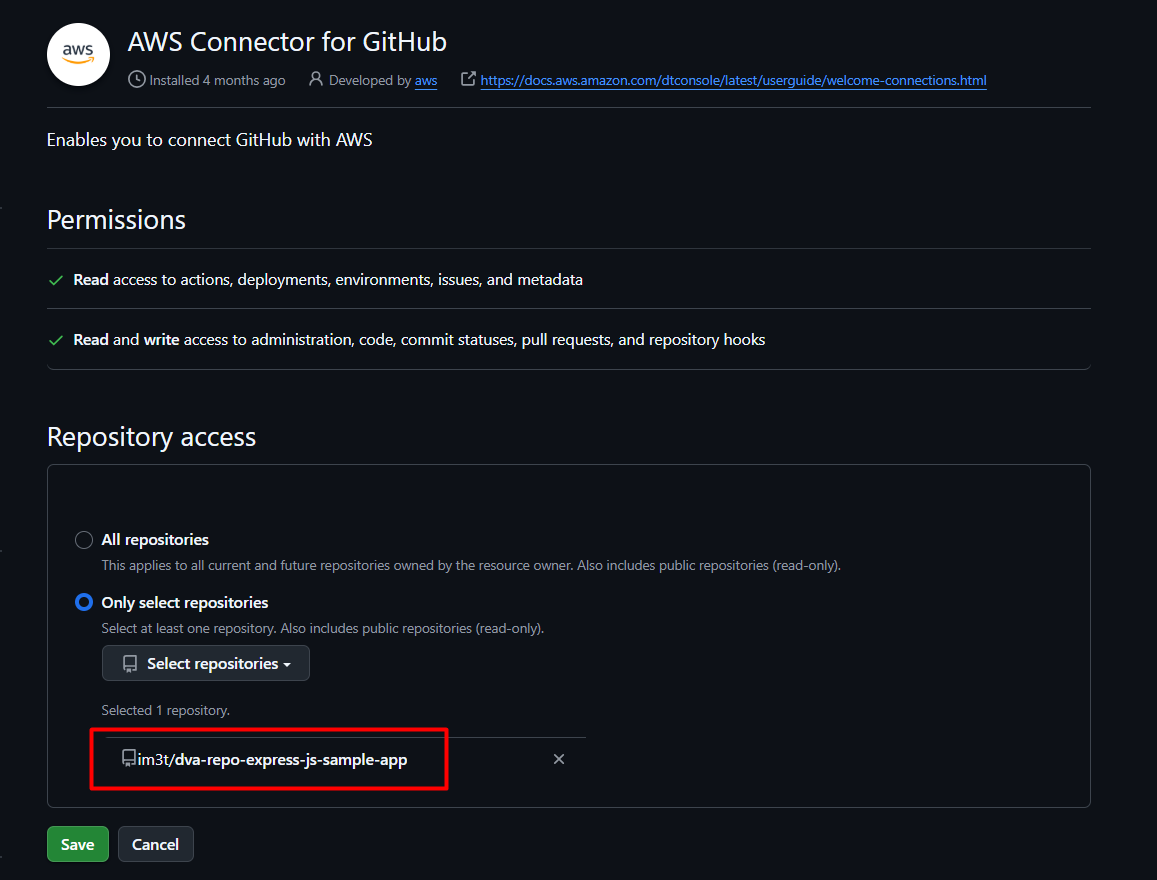
AWS Connector for GitHub
Repository access : chọn repositoy đã set up ở bước 1. Set Up GitHub Repo rồi Save
- Repository của demo này là:
dva-repo-express-js-sample-app
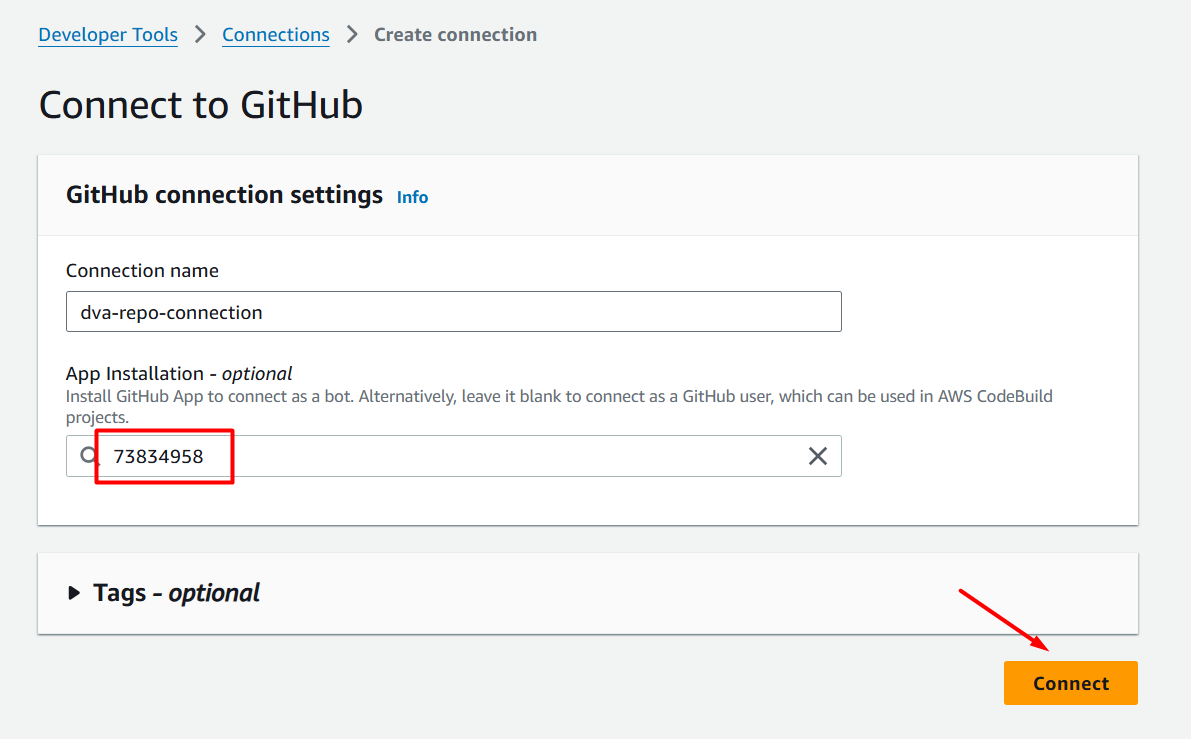
Connect to GitHub
Sau khi liên kết với GitHub, App installation sẽ tự động gen mã số connection -> chọn connect
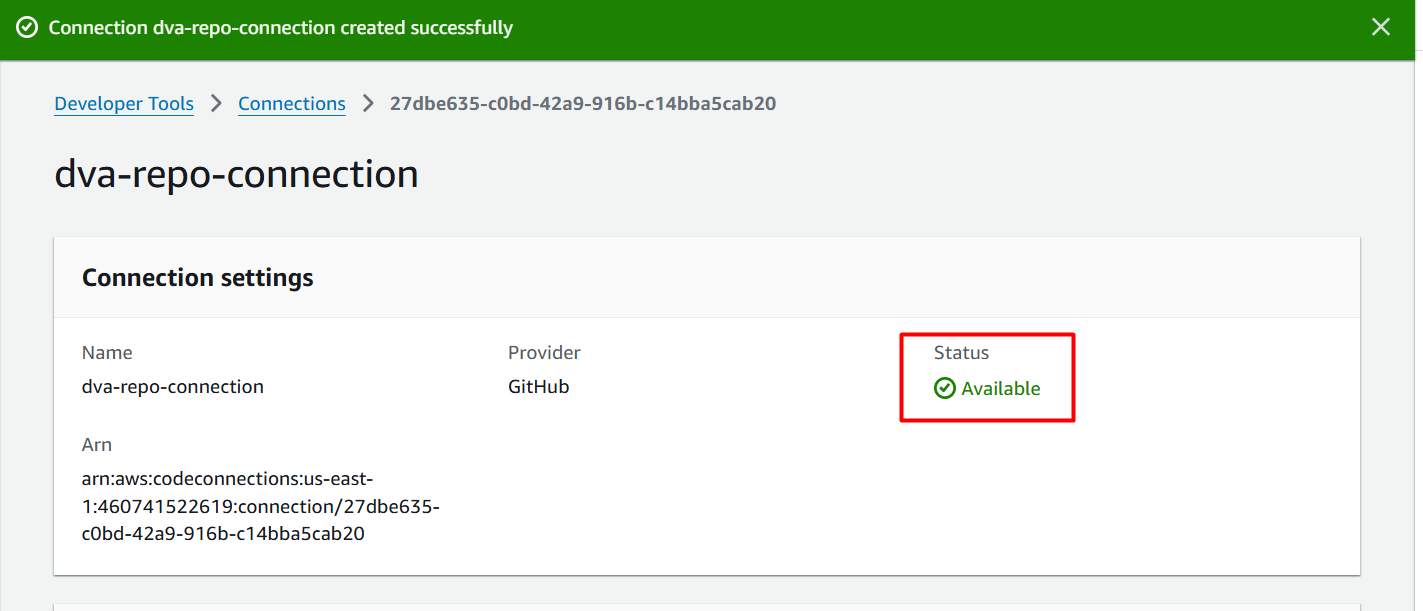
Đã tạo connection thành công!!
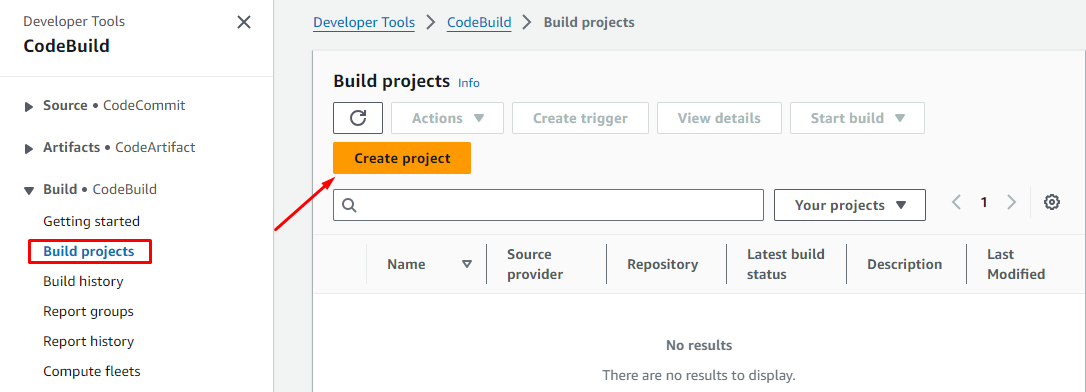
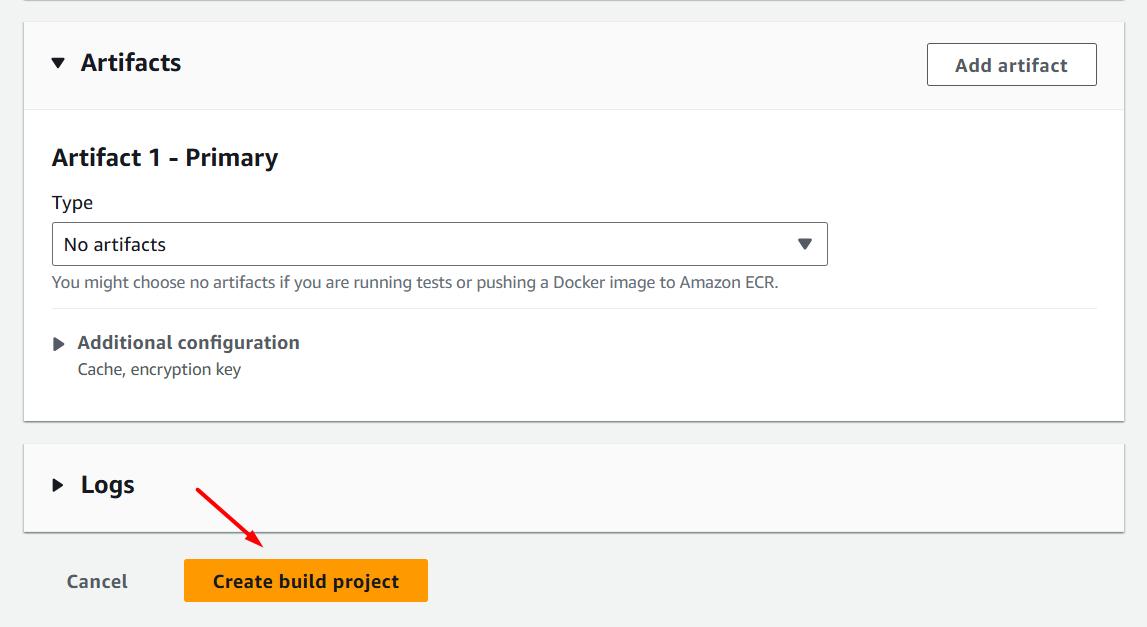
Tại CodeBuild Console -> Build projects -> Create project
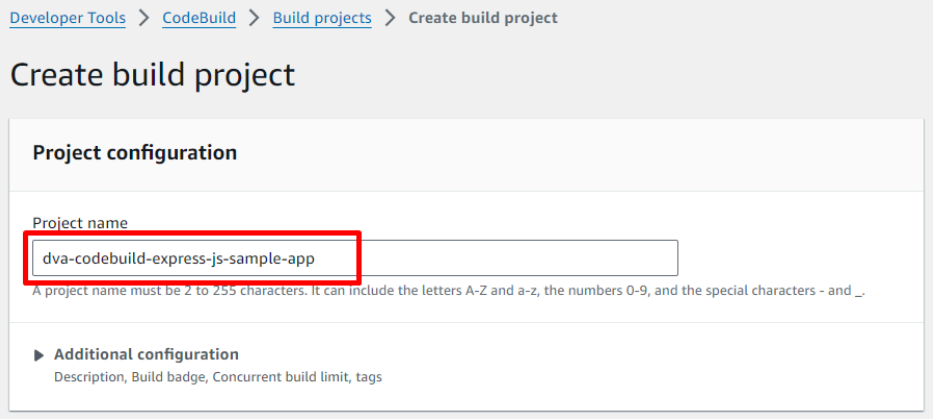
- Project name:
dva-codebuild-express-js-sample-app
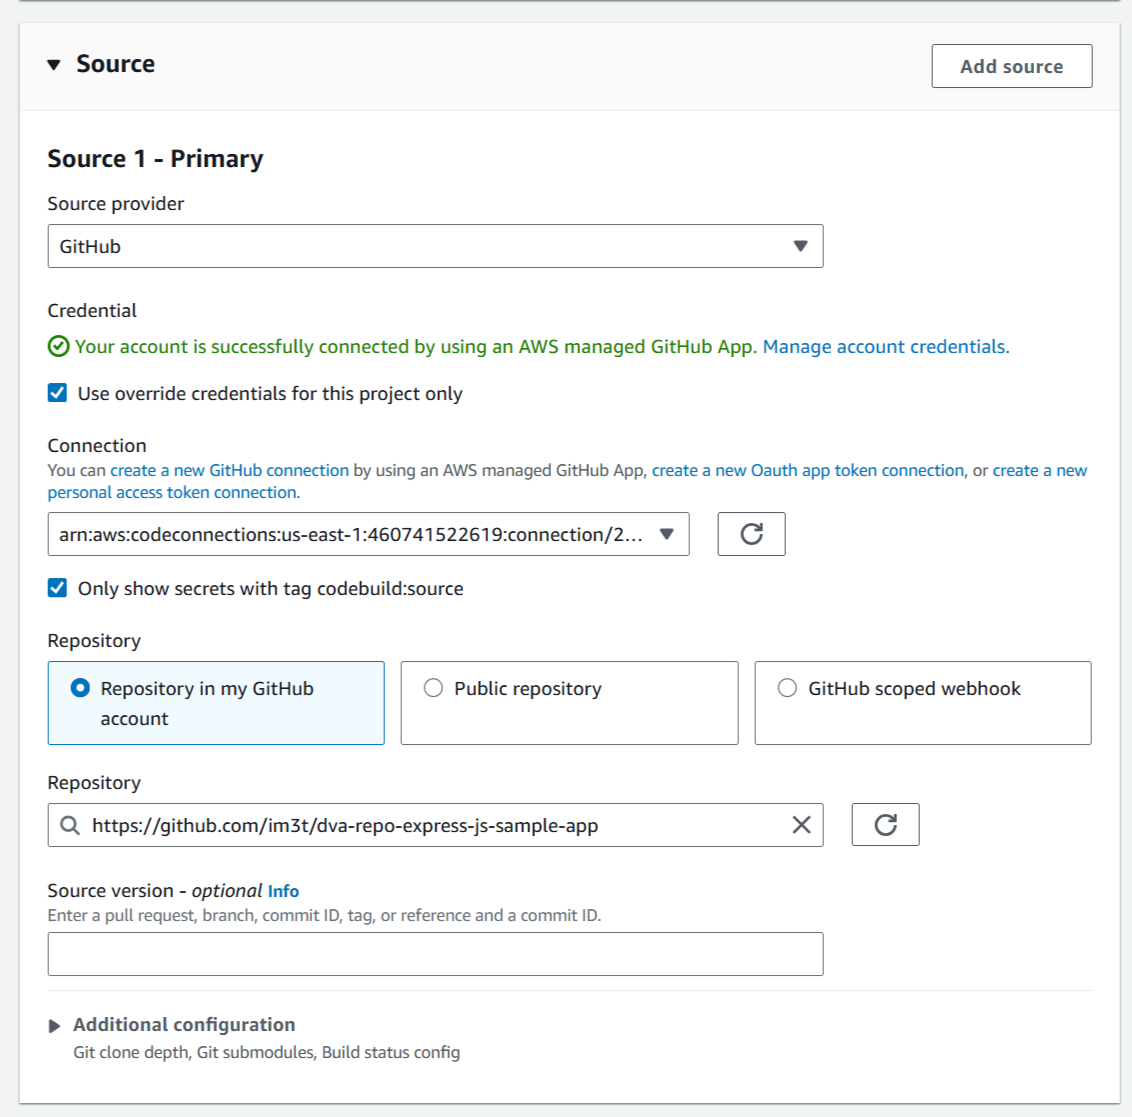
Source 1 - Primary
- Source provider:
GitHub - Use override credentials for this project only: ✅
- Connection:
dva-repo-connection - Repository:
dva-repo-express-js-sample-app
- Primary source webhook events
- Environment
- Service role:
New service role - Role name: để default hoặc đặt lại tùy ý
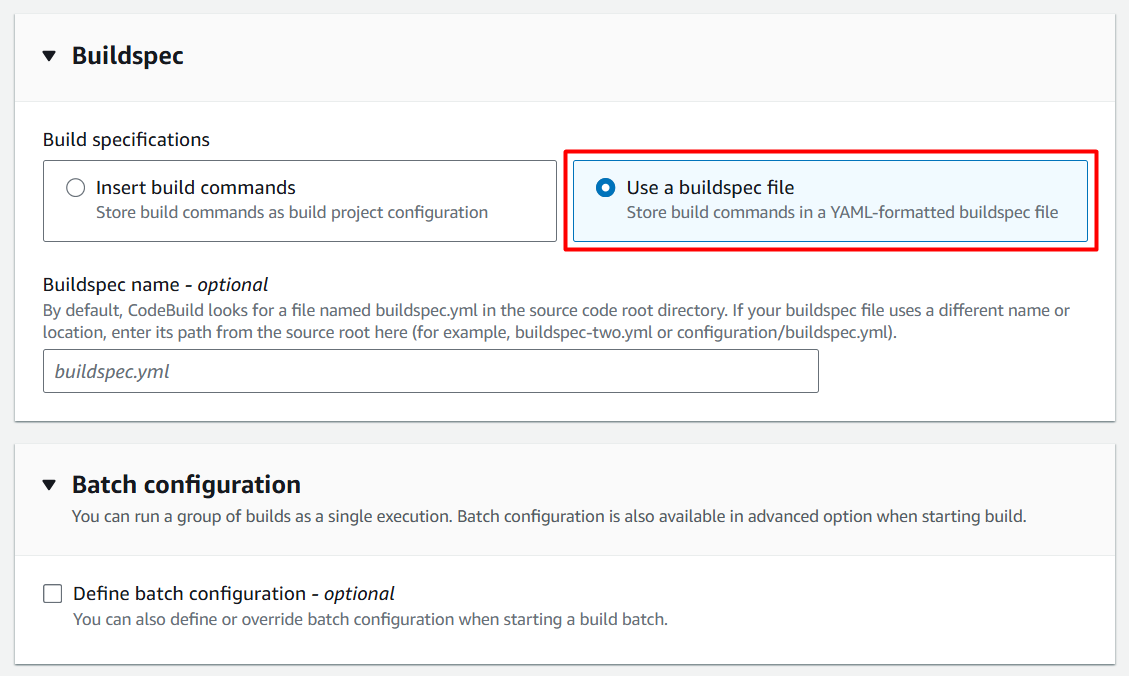
- Buildspec
- Buildspec:
Use a buildspec file - Các setting khác để default
Vì trong source code của chúng ta đã có file tên buildspec.yml nên không cần phải ghi rõ tên
3.3. Test CodeBuild project
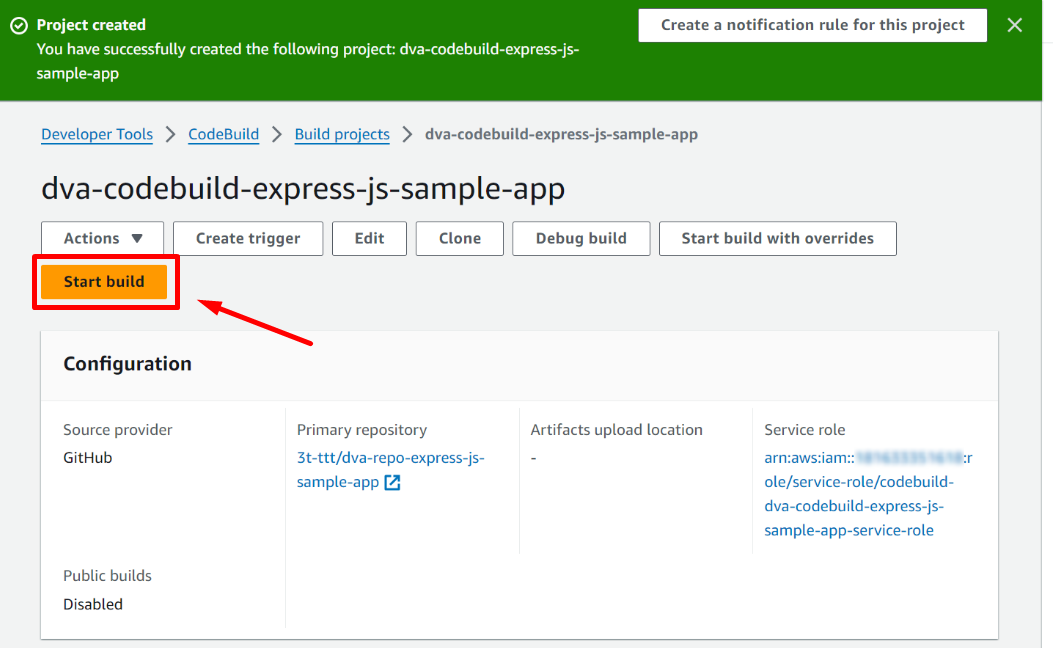
Click Start build
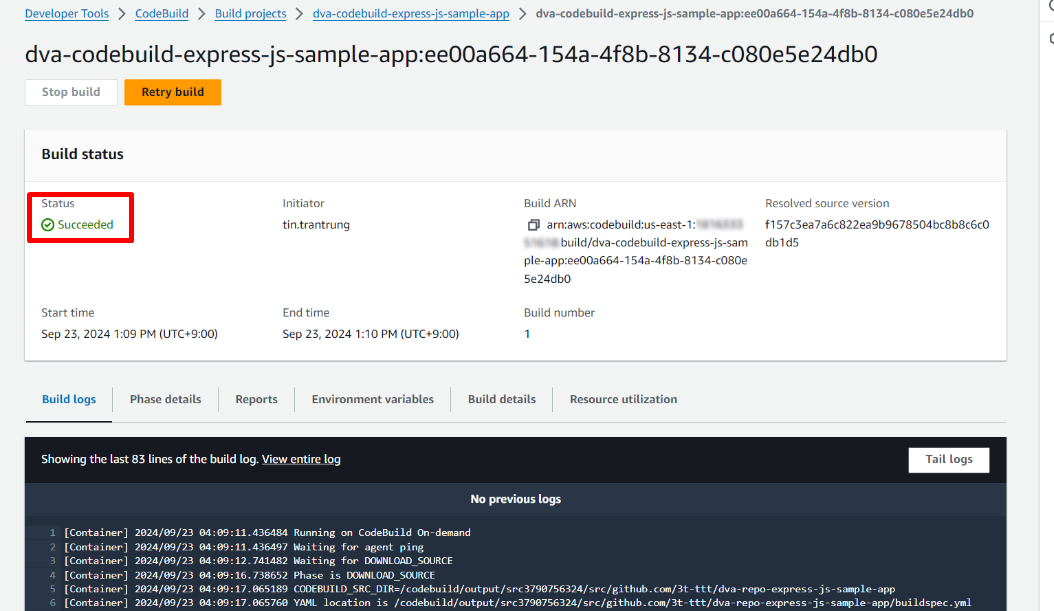
Quá trình build hoàn tất thành công và chúng ta có thể xem log cụ thể nhưng gì được chạy (Nội dung trong file buildspec.yml)
4. Create Code Pipeline
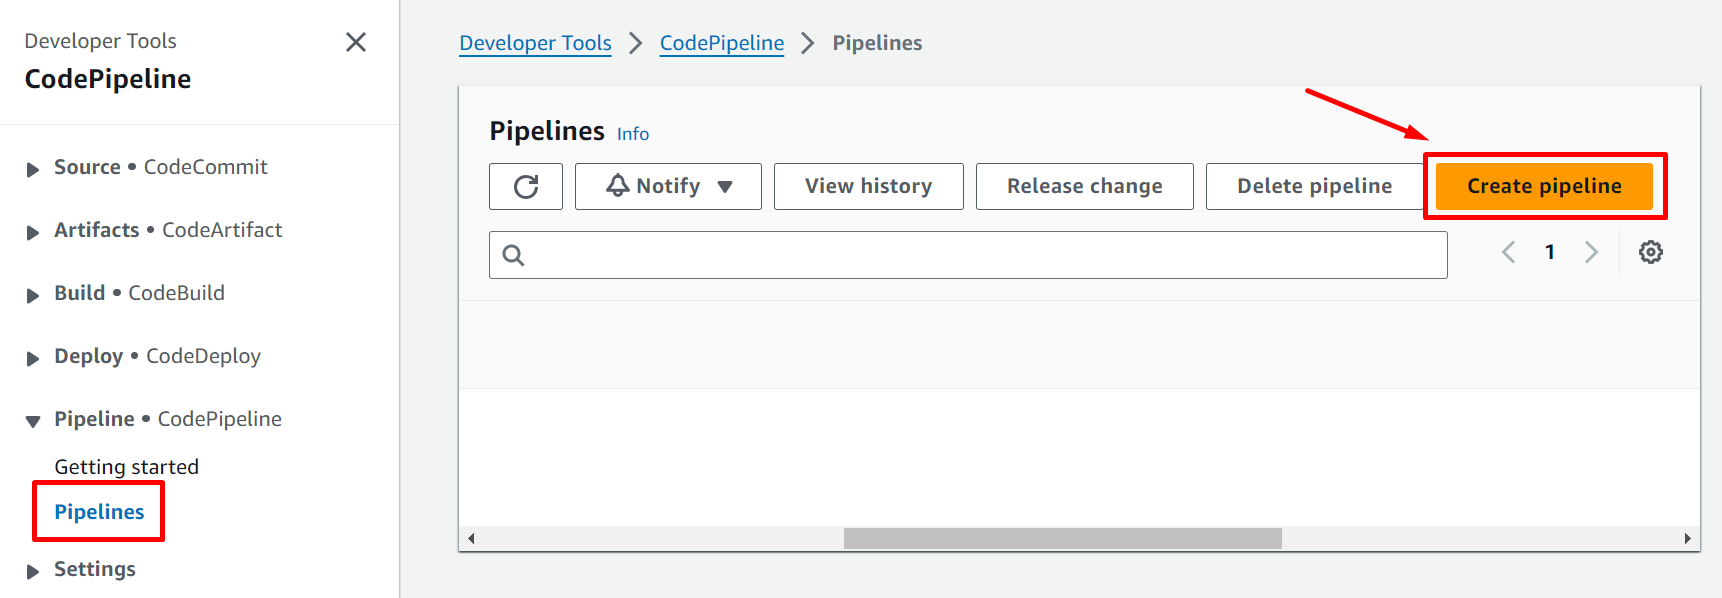
Tại Console CodePipeline -> Pipelines -> Create pipeline
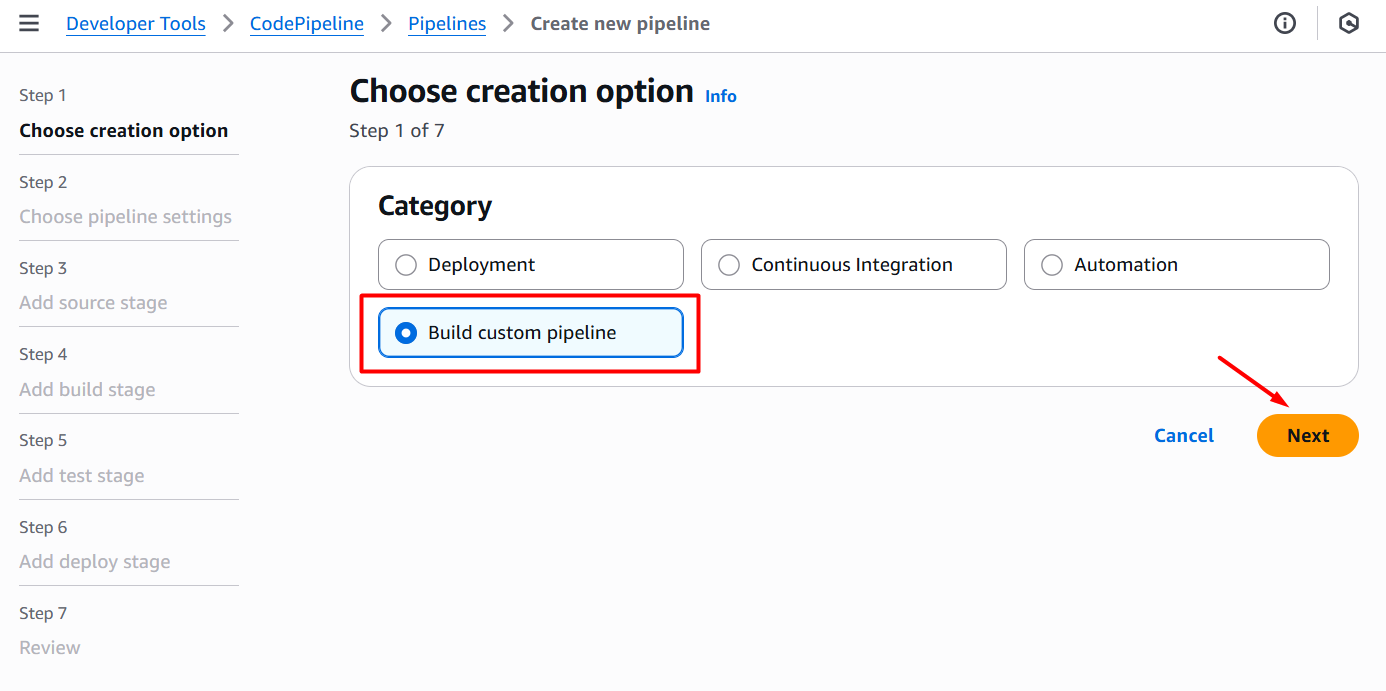
Step 1: Choose creation option
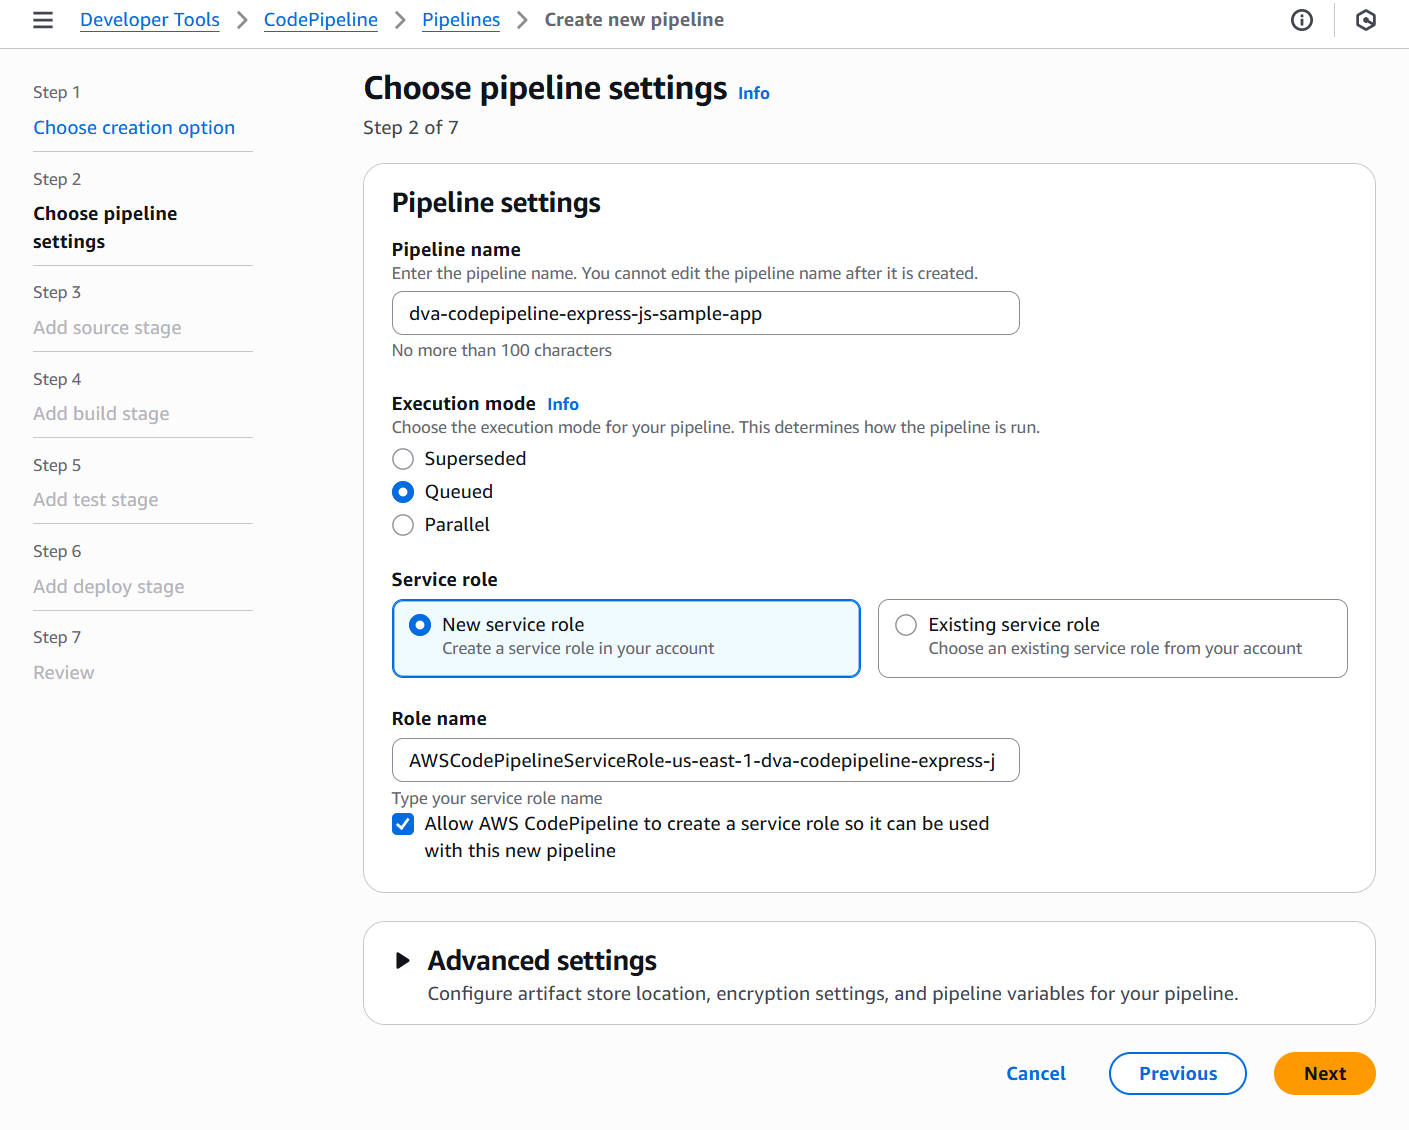
Step 2: Choose pipeline settings
- Pipeline name:
dva-codepipeline-express-js-sample-app - Service role:
New service role - Role name: để default hoặc đặt lại tùy ý
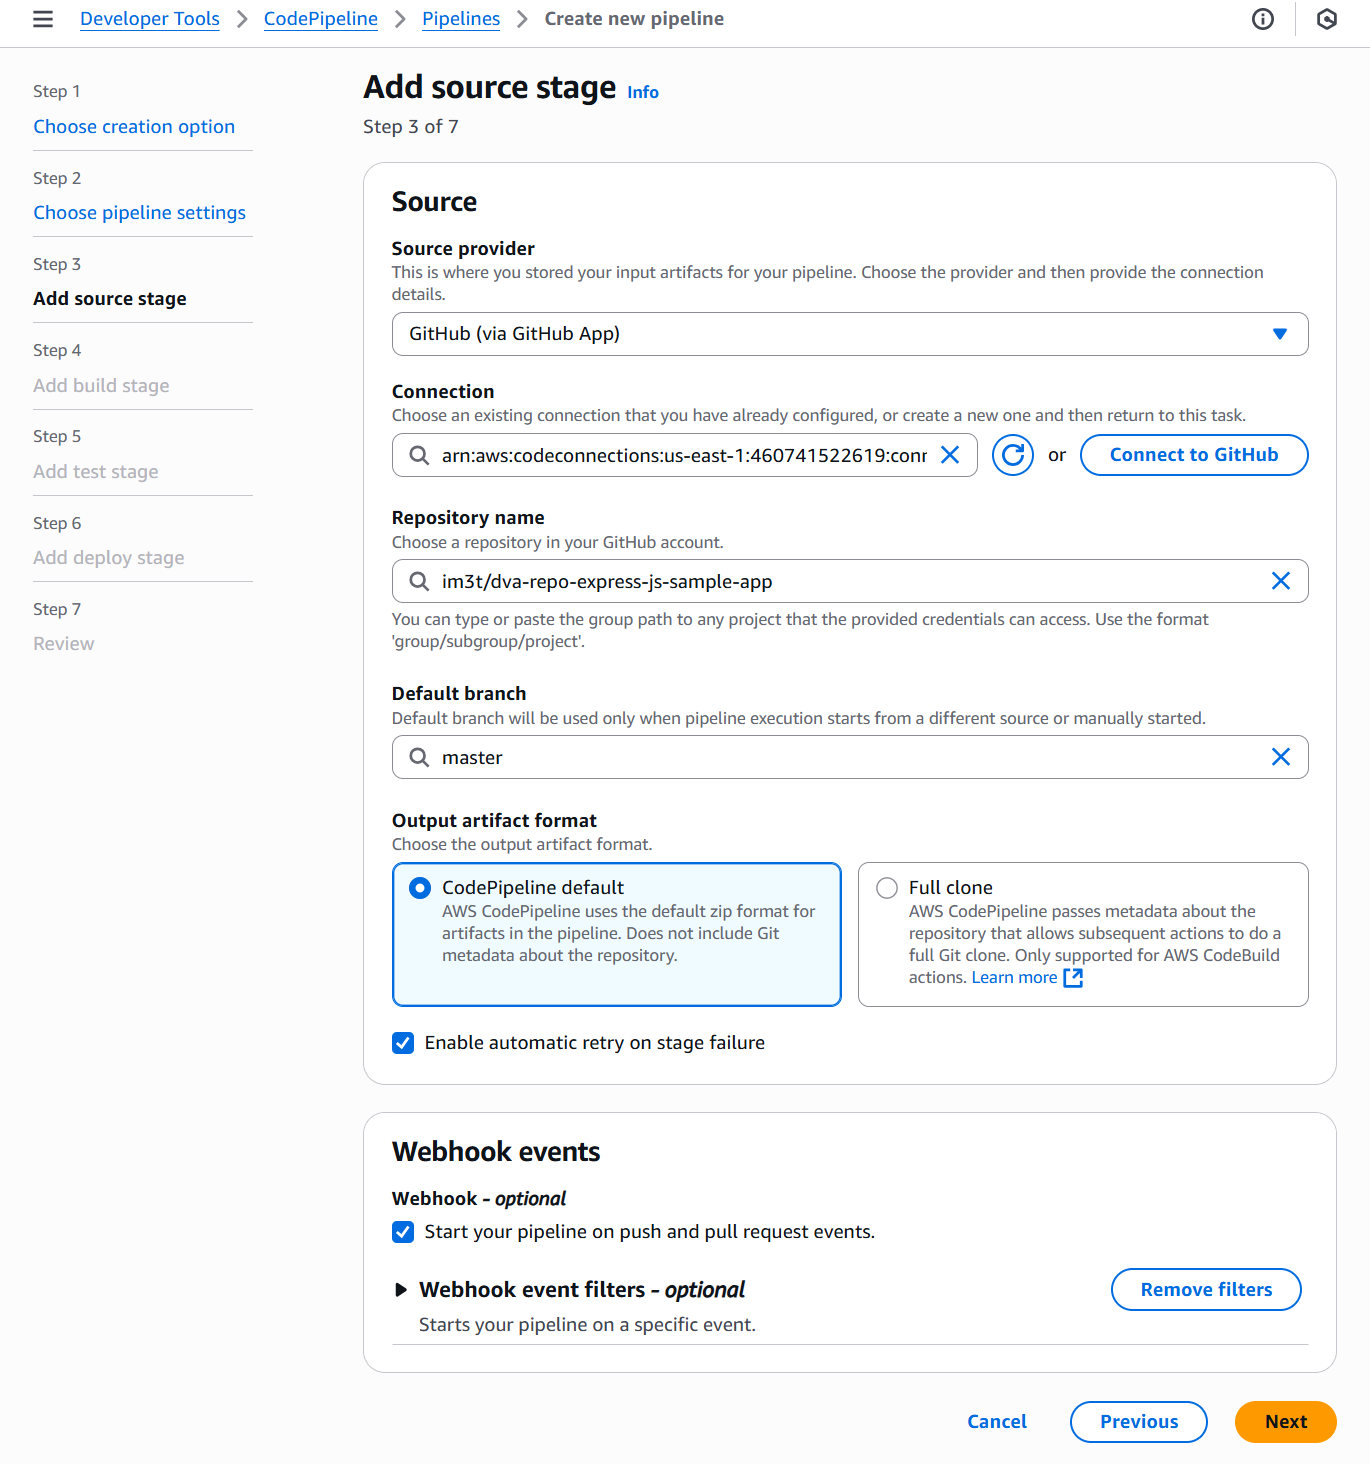
Step 3: Add source stage
Source
- Source provider:
GitHub (via GitHub App) - Connection:
dva-repo-connection - Repository name: Chọn Repository name ( demo này là
dva-repo-express-js-sample-app) - Branch name: Chọn branch name ( demo này là
master) - Output artifact format:
CodePipeline default
Webhook events
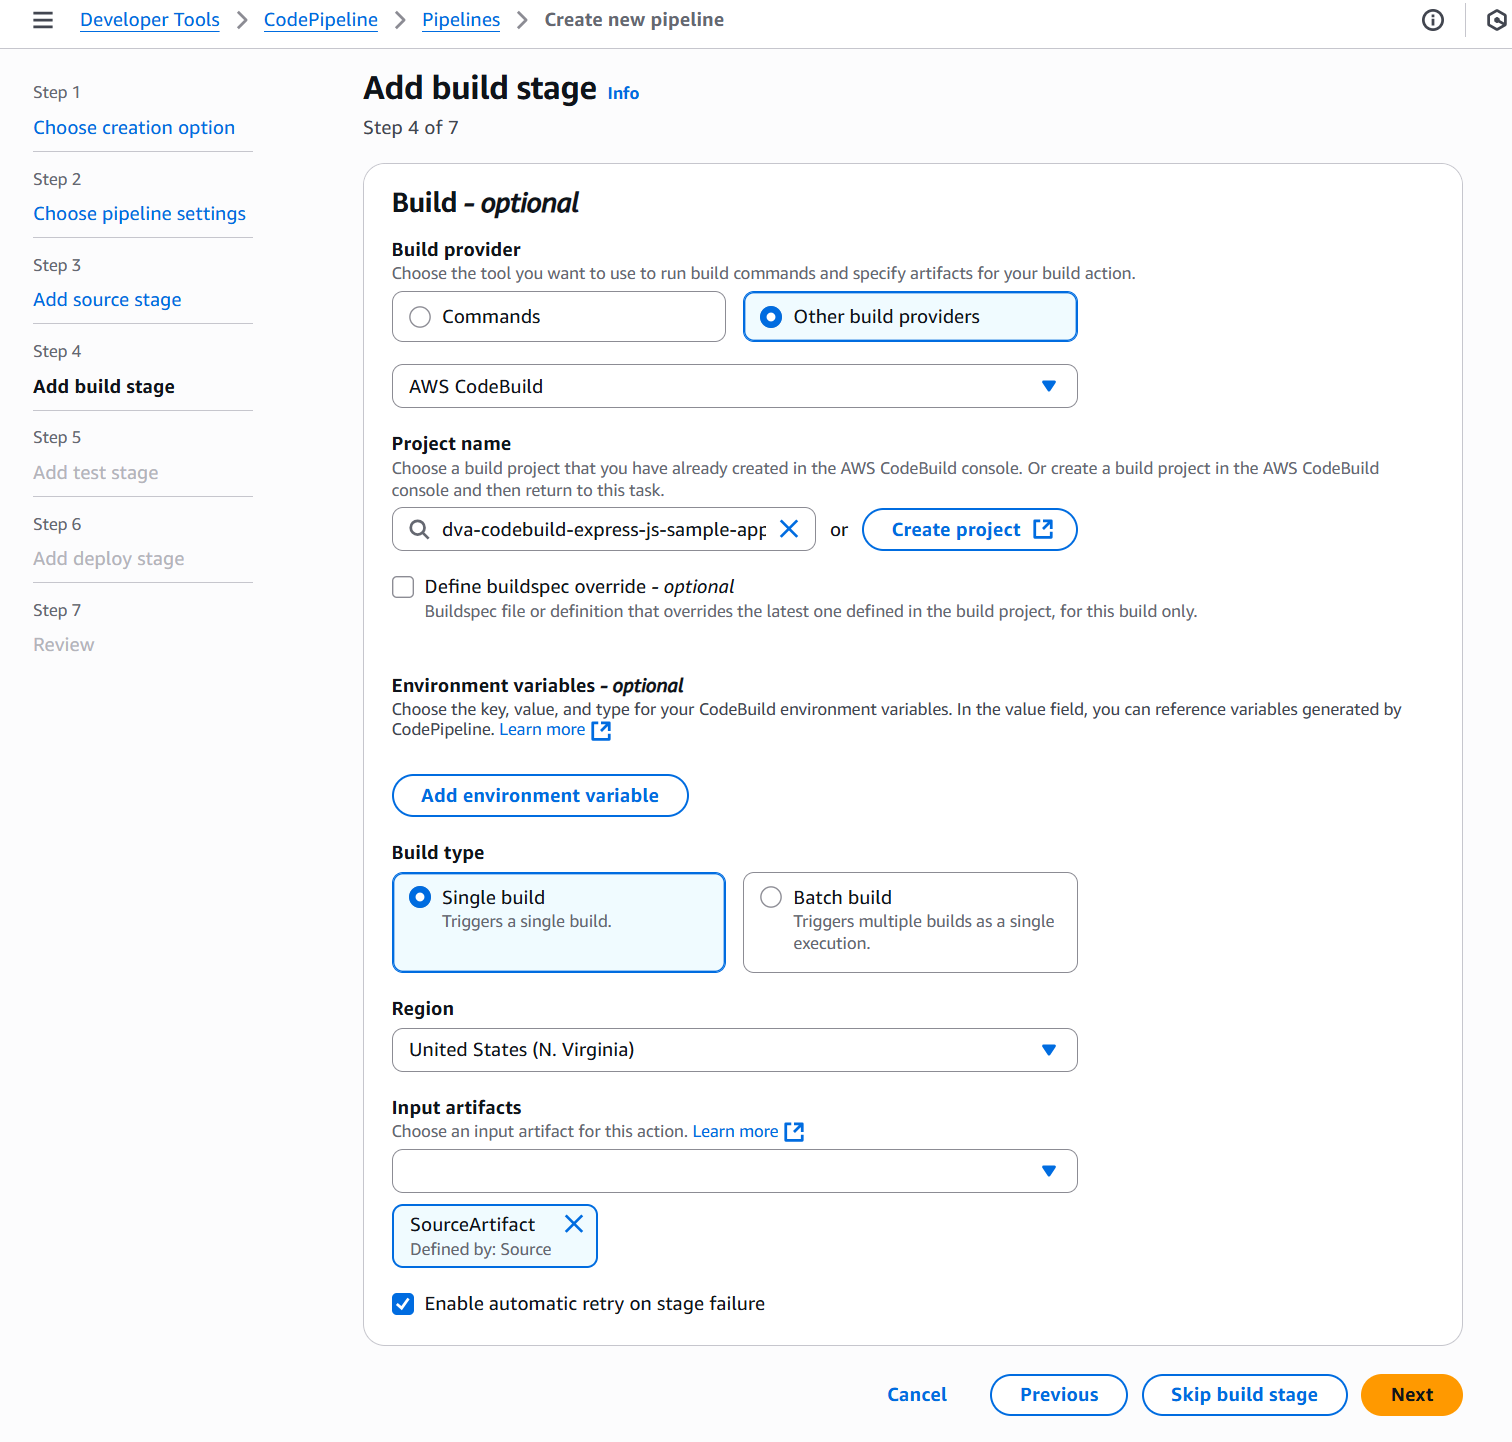
Step 4: Add build stage
Build
- Build provider:
AWS CodeBuild - Project name:
dva-codebuild-express-js-sample-app
Step 5: Add test stage
Skip test stage
Step 6: Add deploy stage
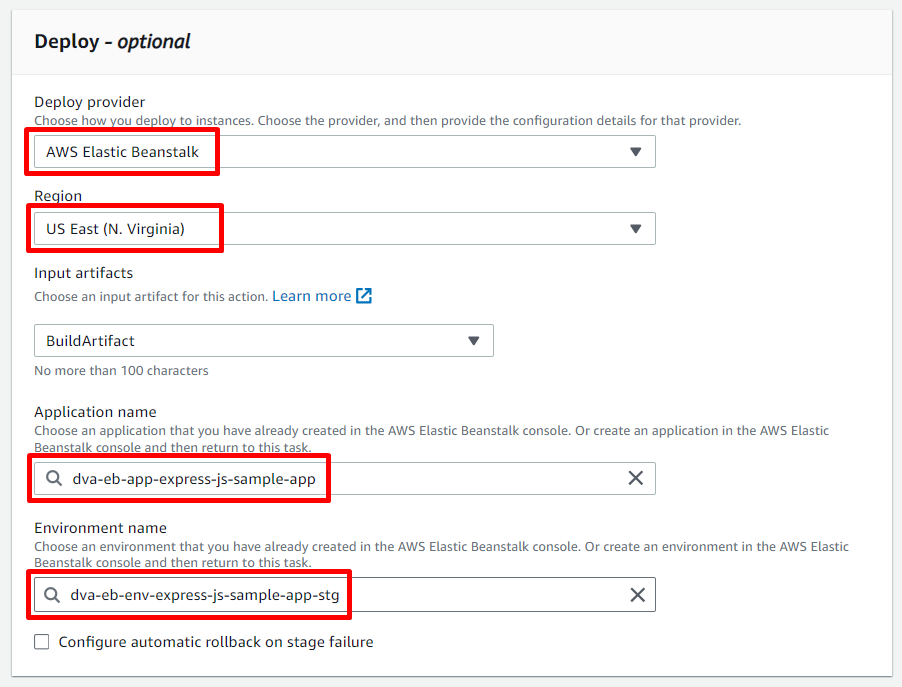
Step 7: Review
Test pipeline execution
Sau khi create pipeline thì quá trình Build và Deploy bắt đầu chạy trong pipeline
★ Nếu bị lỗi không thể deploy được lên AWS ElasticBeanstalk thì kiểm tra role của Codepipeline xem có policy AdministratorAccess-AWSElasticBeanstalk chưa, nếu chưa có thì Attach vào Role.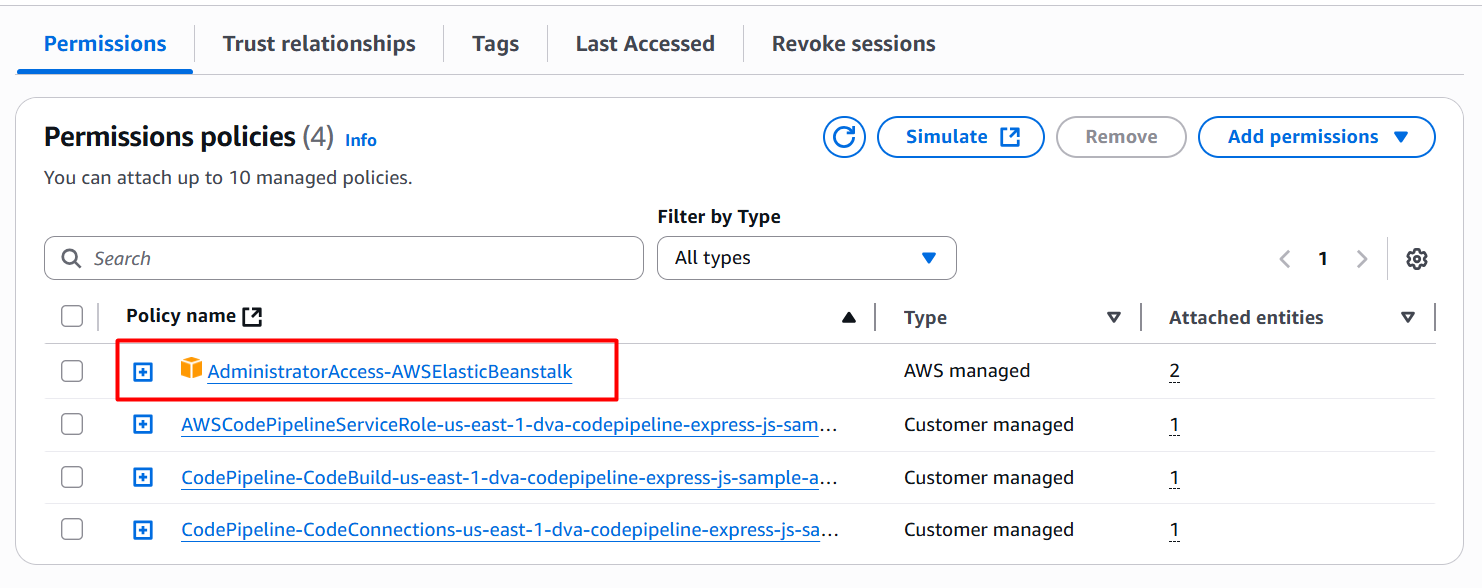
Sau đó sẽ retry lại step deploy và verify kết quả
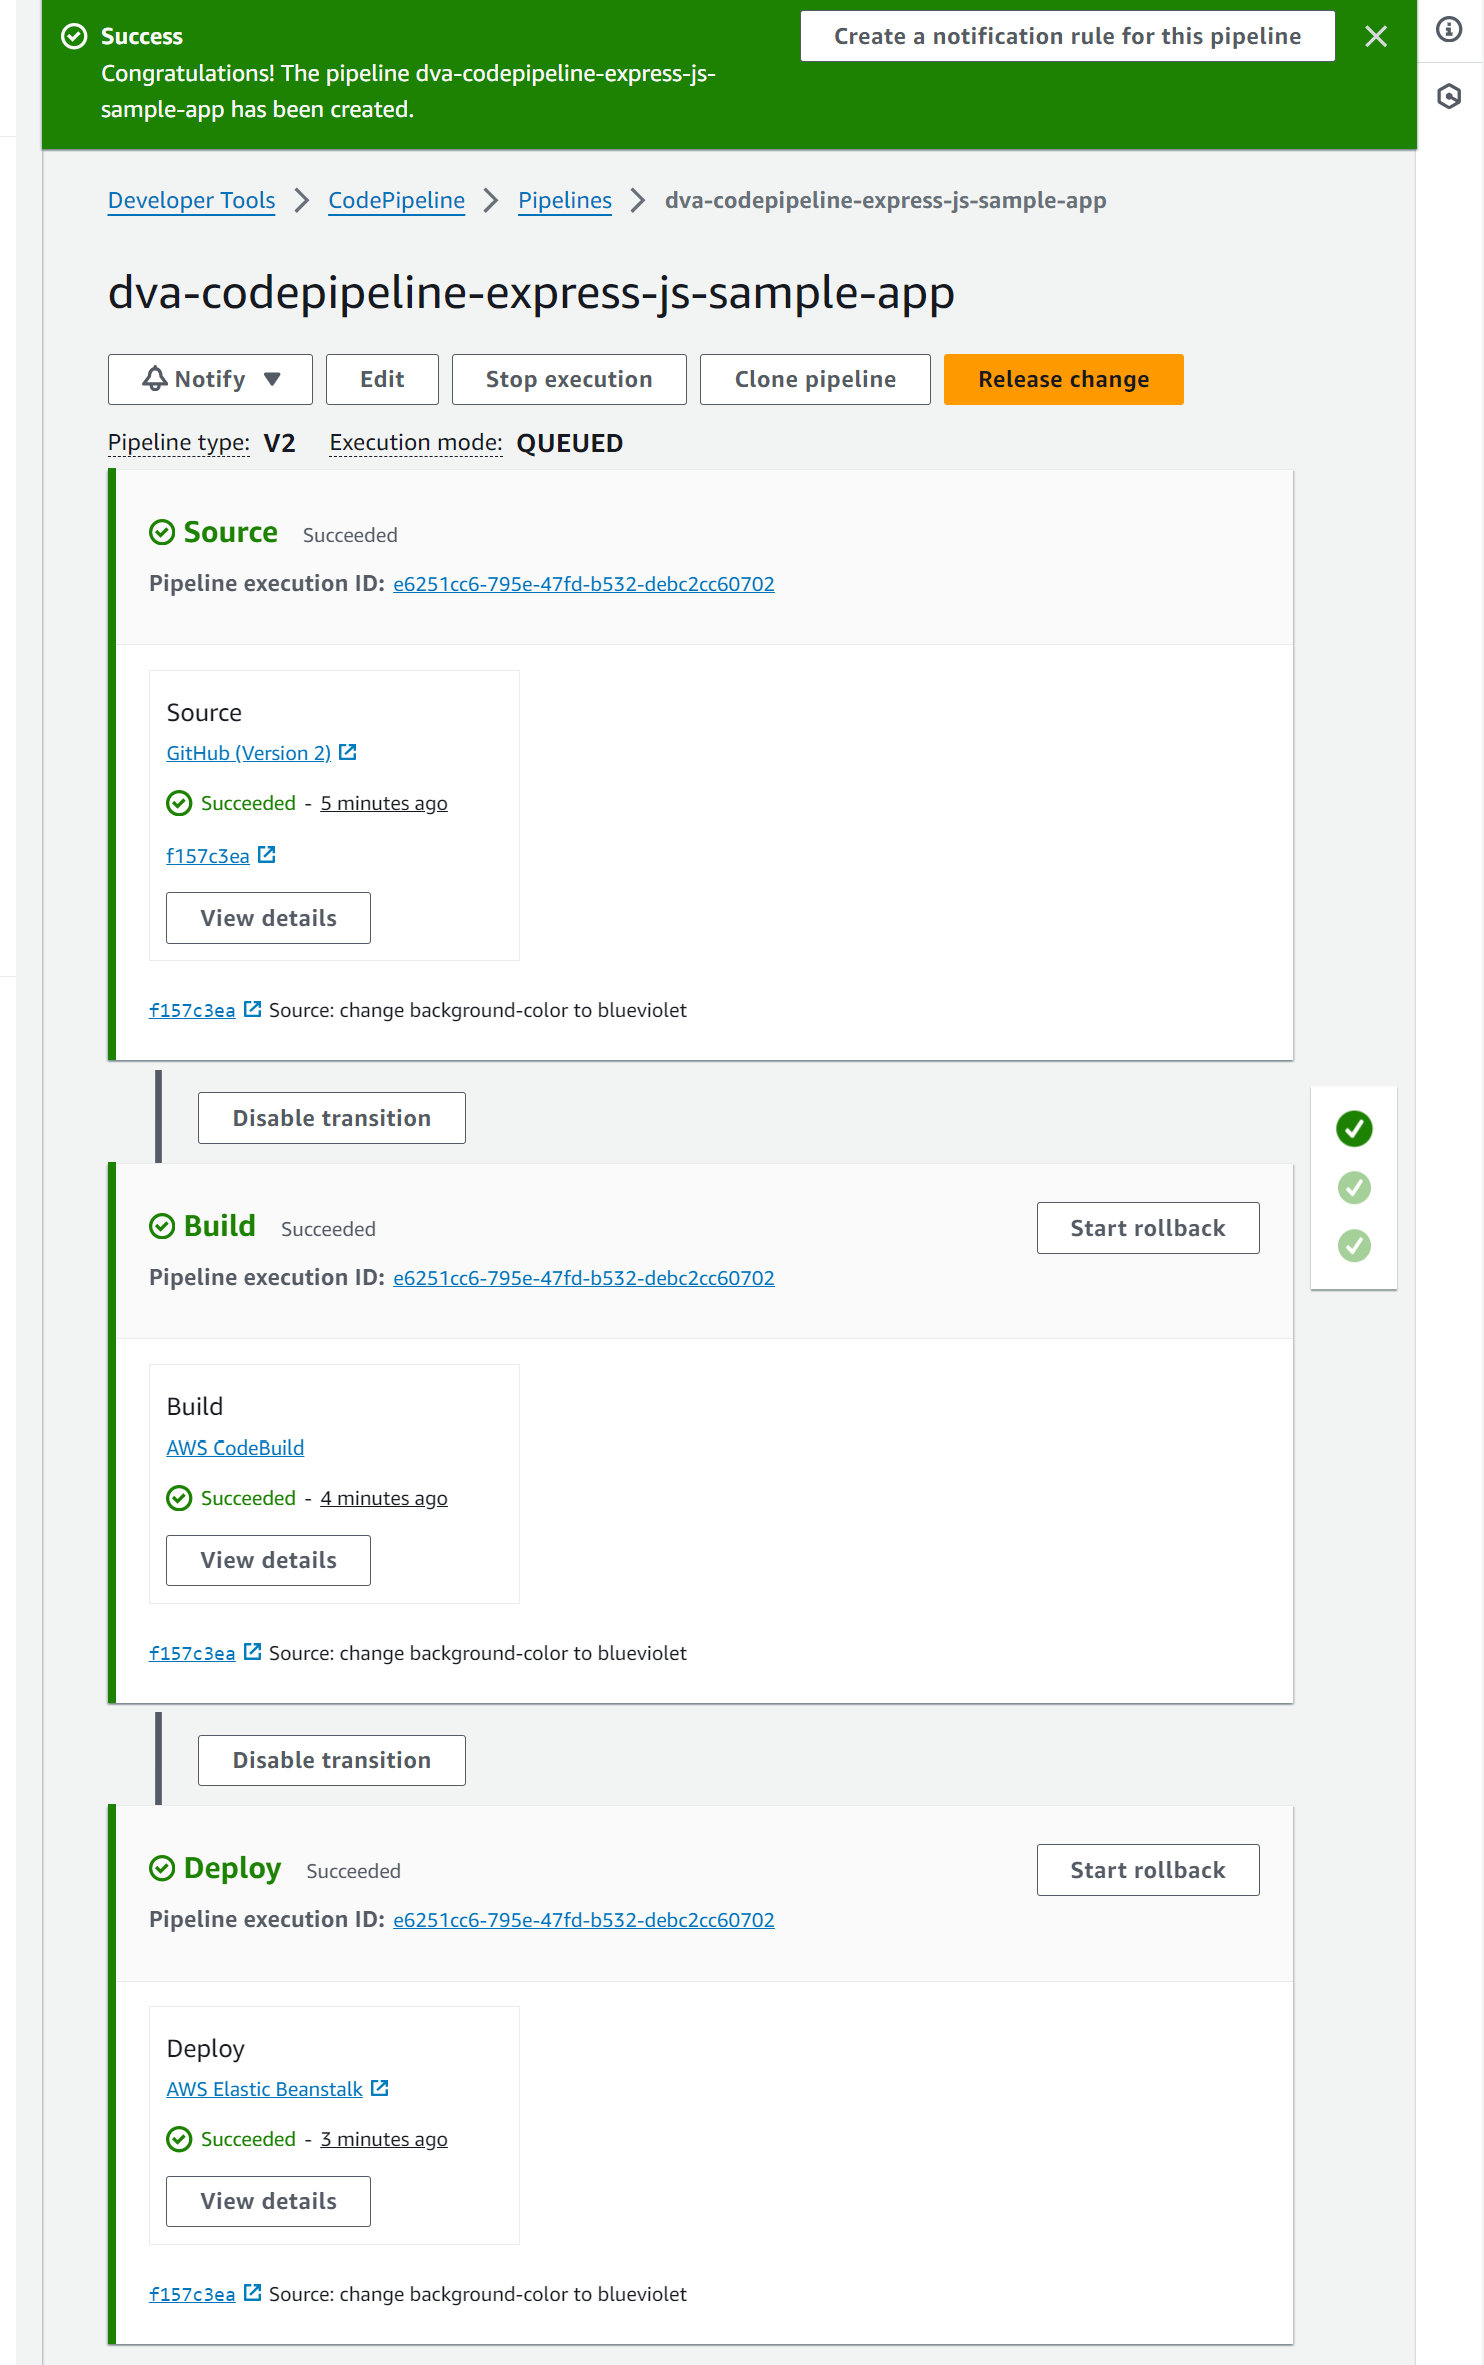
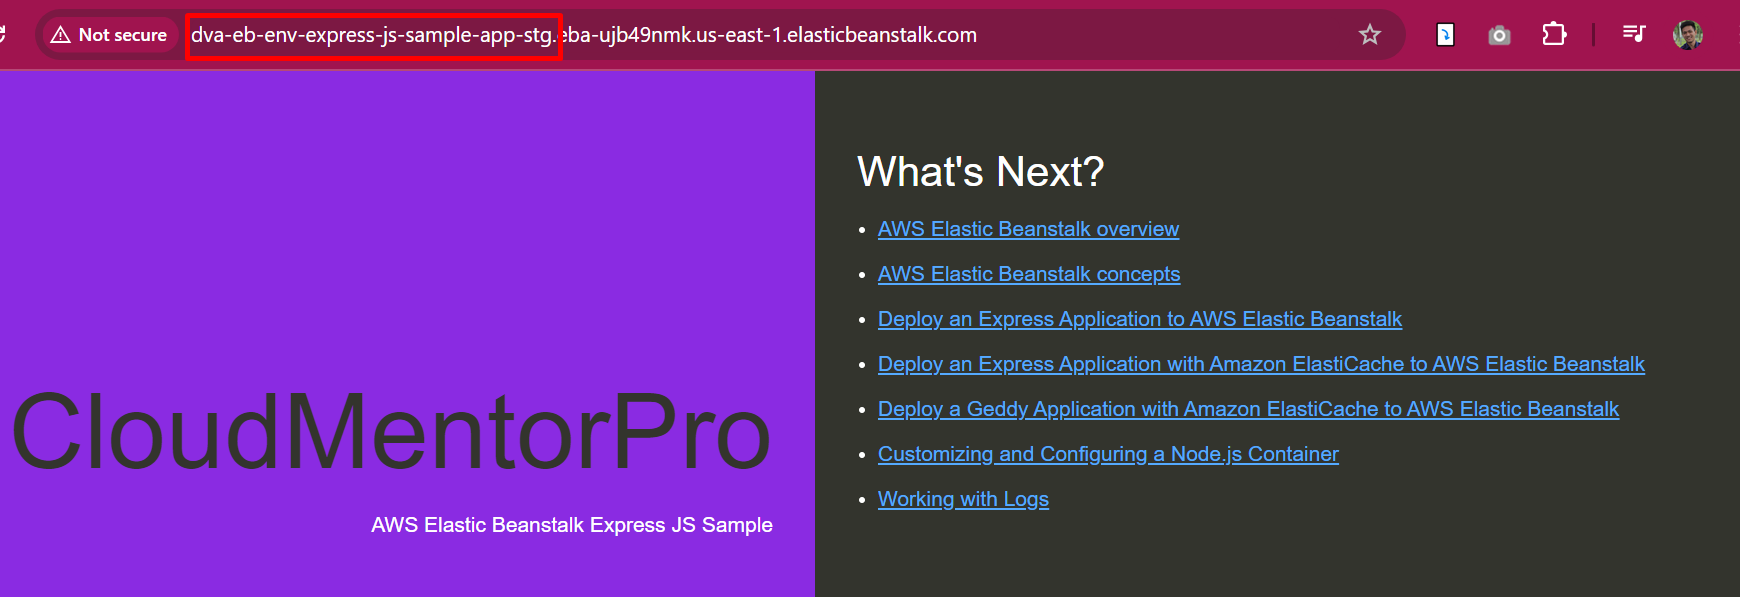
Đến khi pipeline thành công, Mở Elastic Beanstalk và access domain môi trường staging
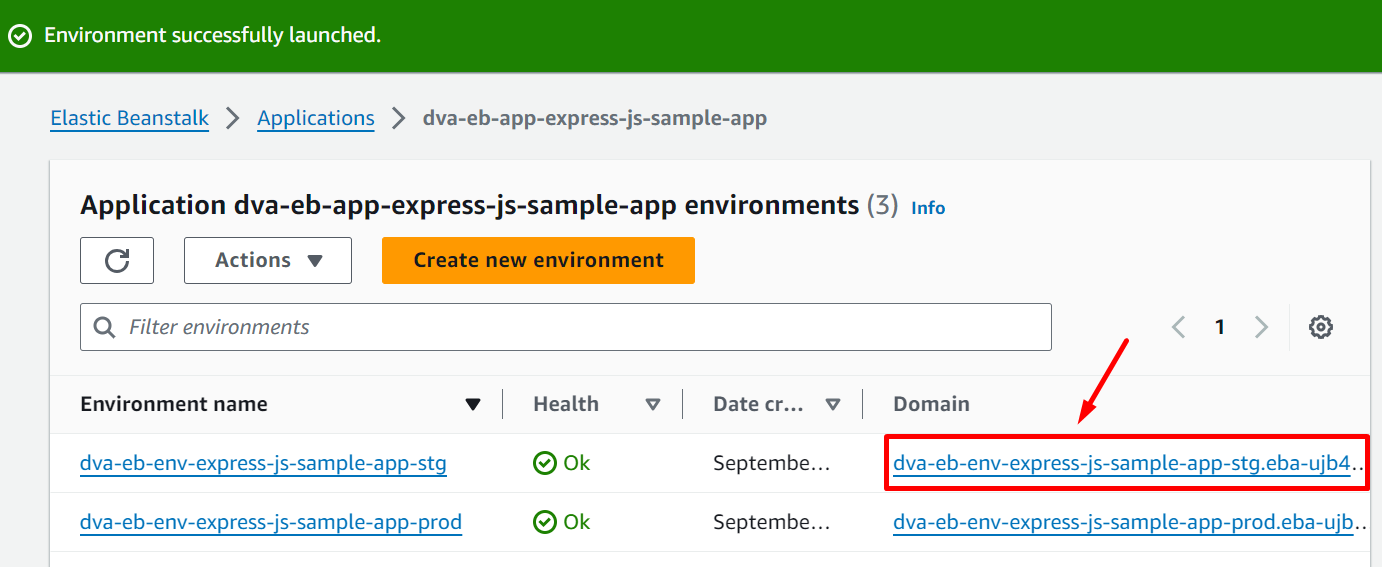
Kết quả là application của chúng ta đã được Deploy lên môi trường staging
5. Finalize Pipeline and test
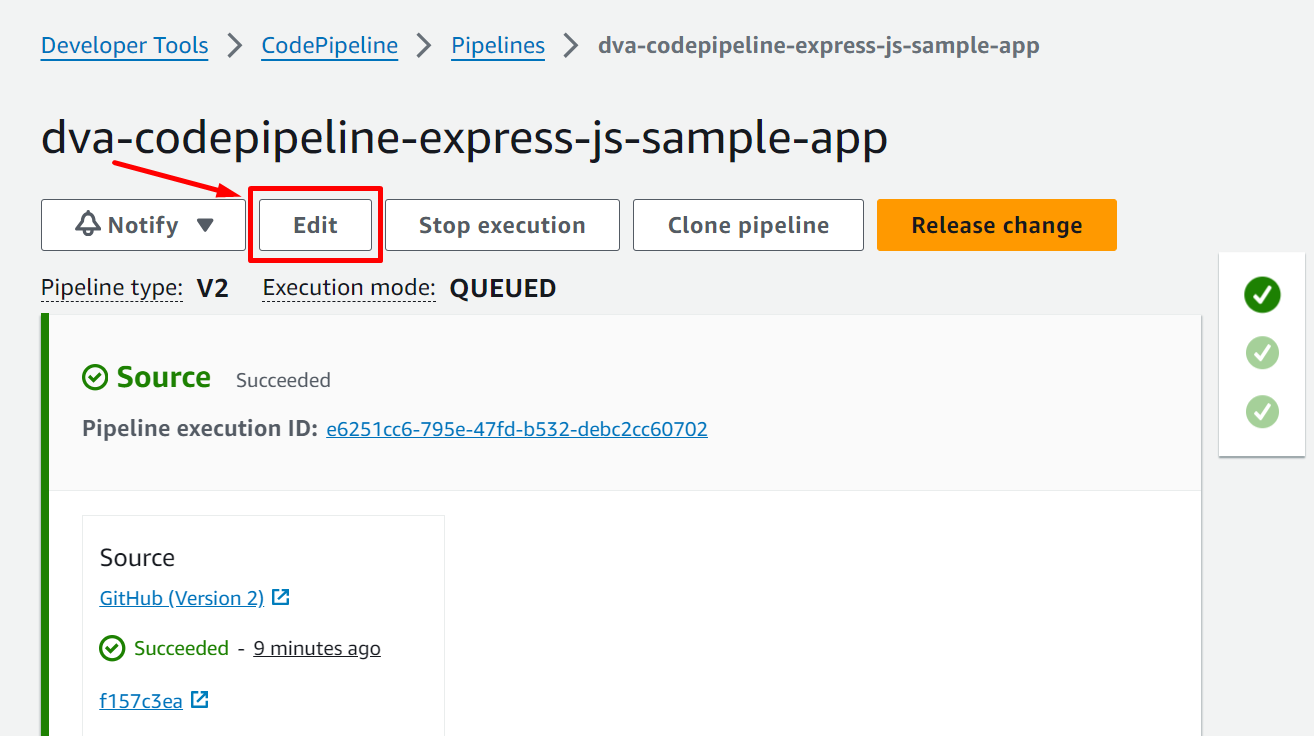
Ở Console CodePipeline -> chọn Edit
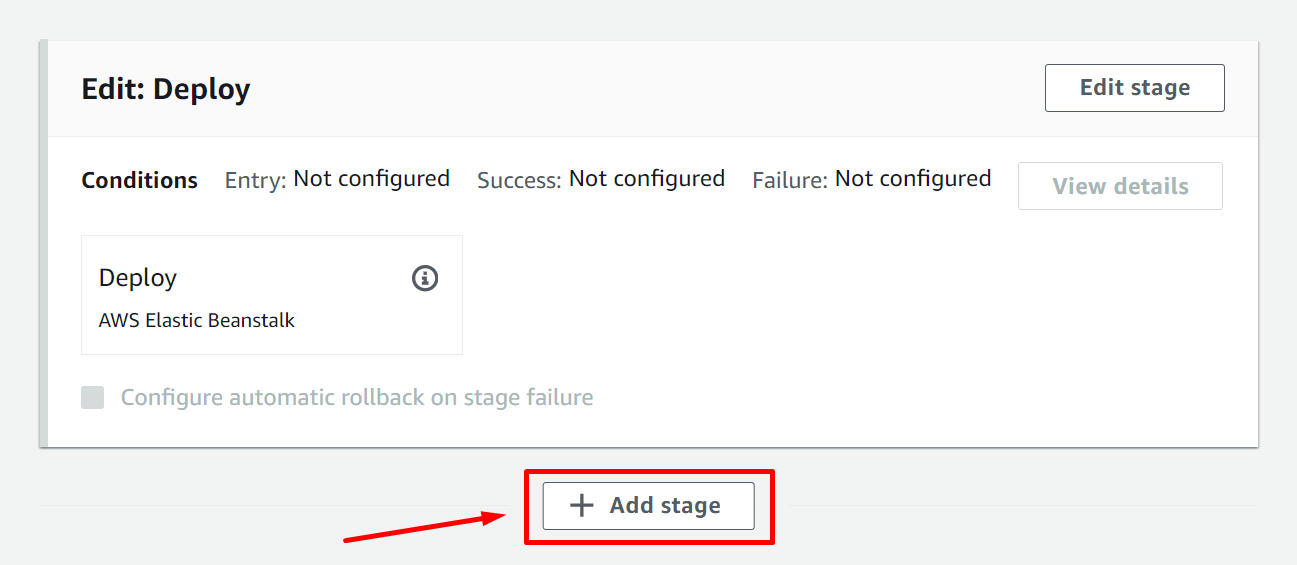
Add thêm 1 Stage bên dưới cùng của Pipeline
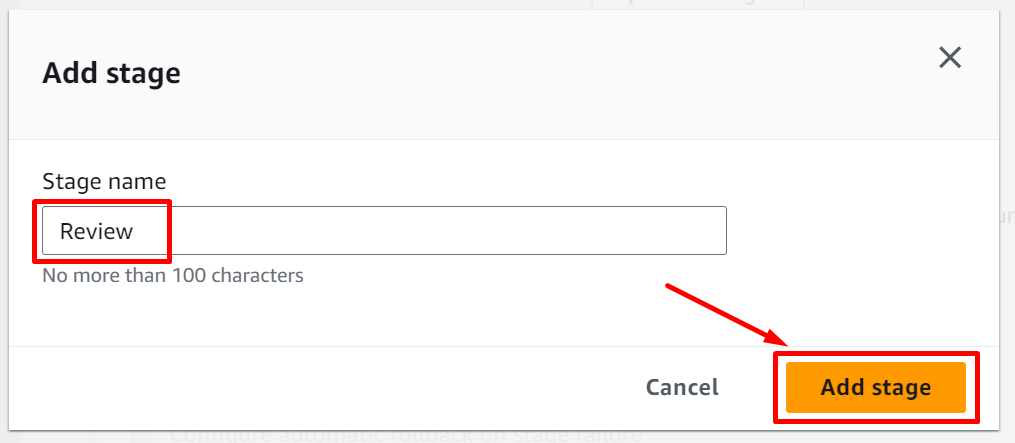
- Đặt Stage name:
Reviewvà Add stage
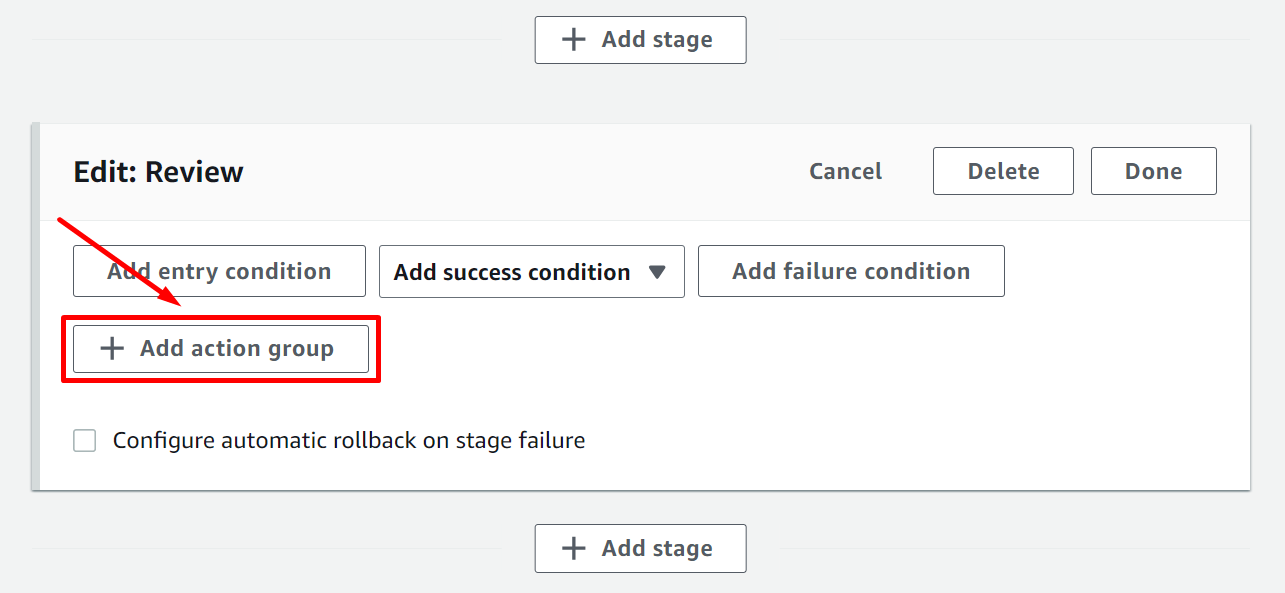
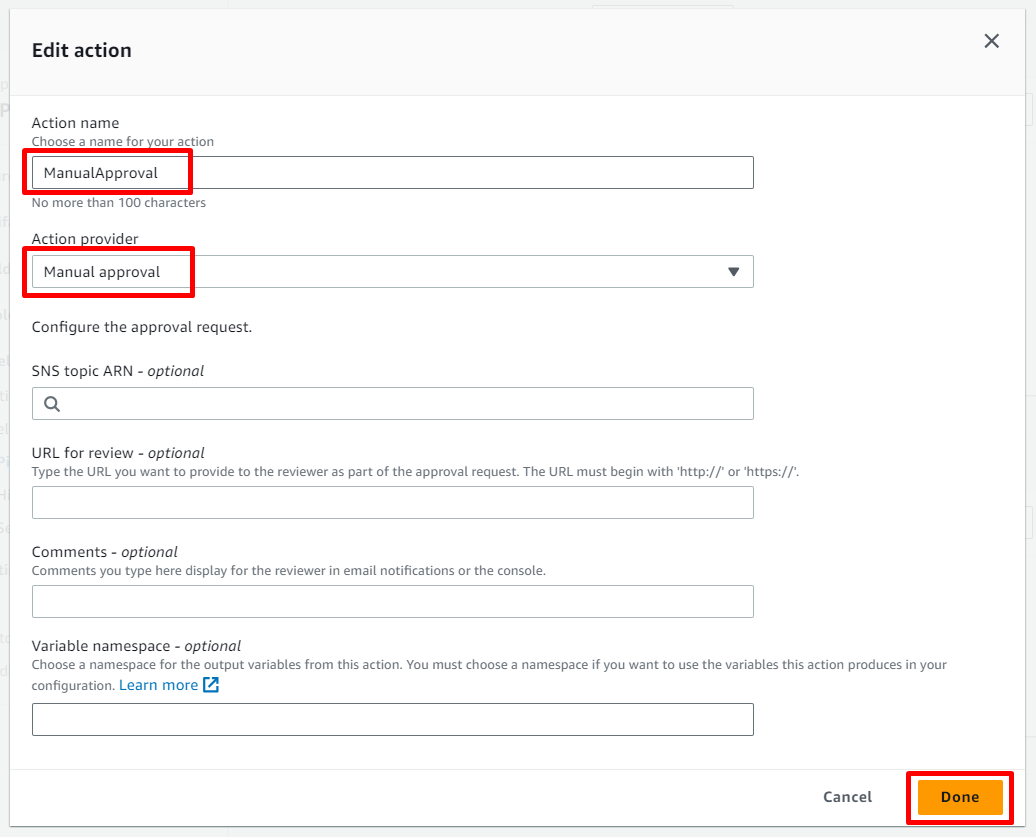
- Action name:
ManualApproval - Action provider:
Manual approval
Tiếp tục add thêm 1 stage vào dưới cùng
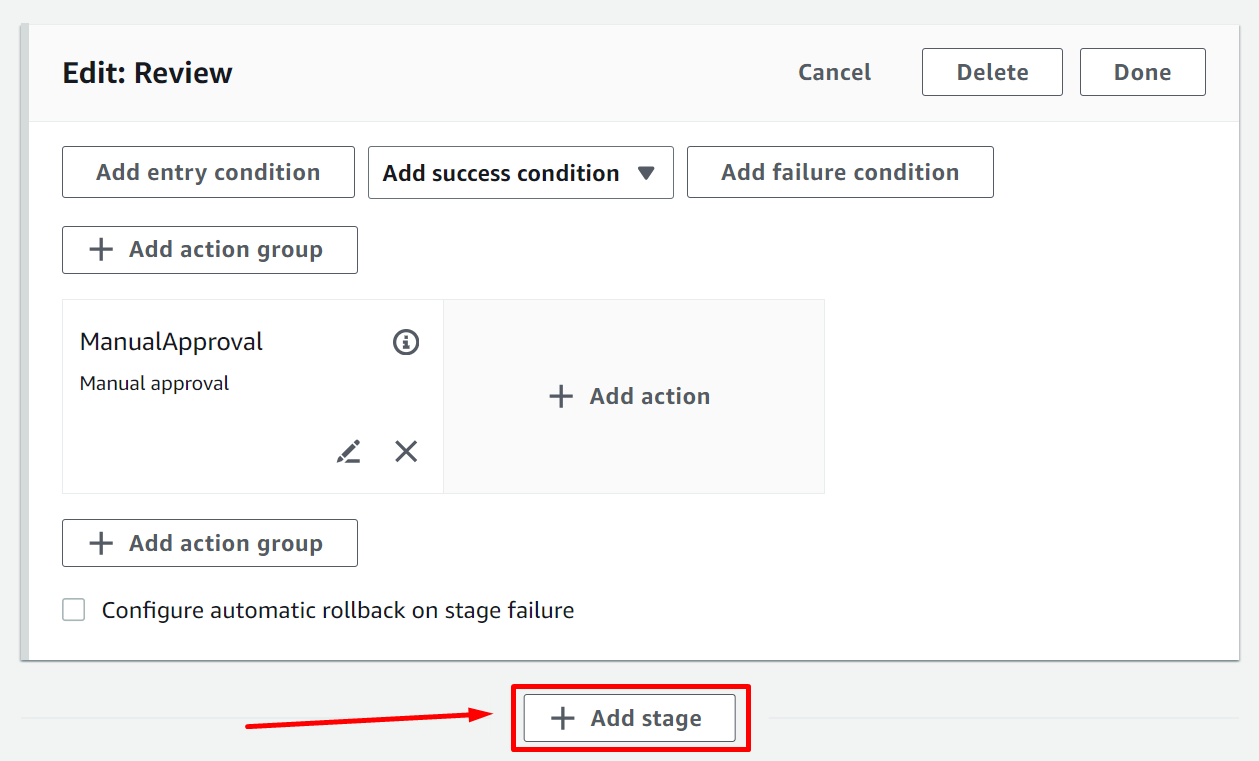
- Stage name:
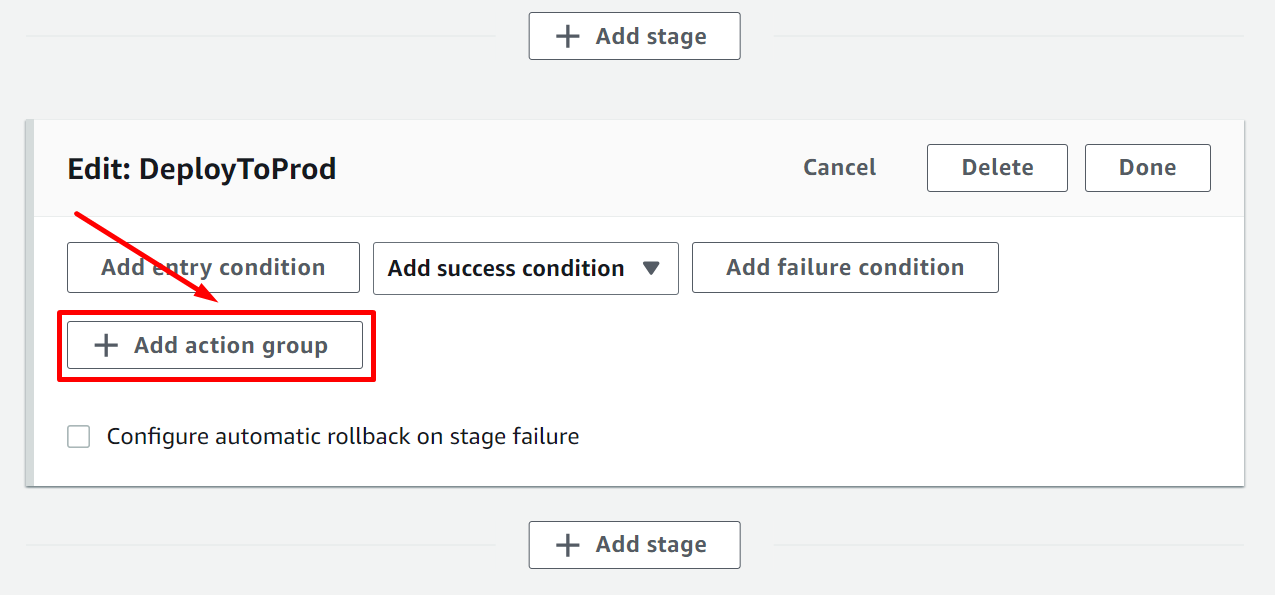
DeployToProd và Add stage
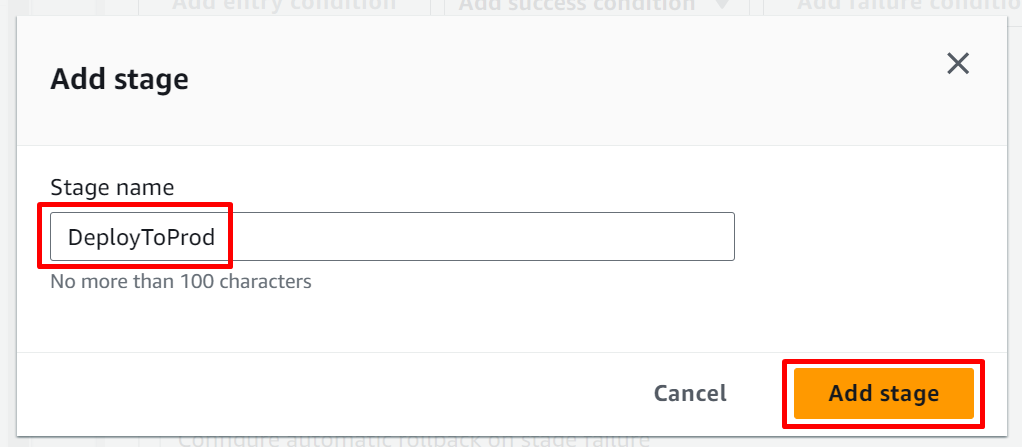
Click Add action group
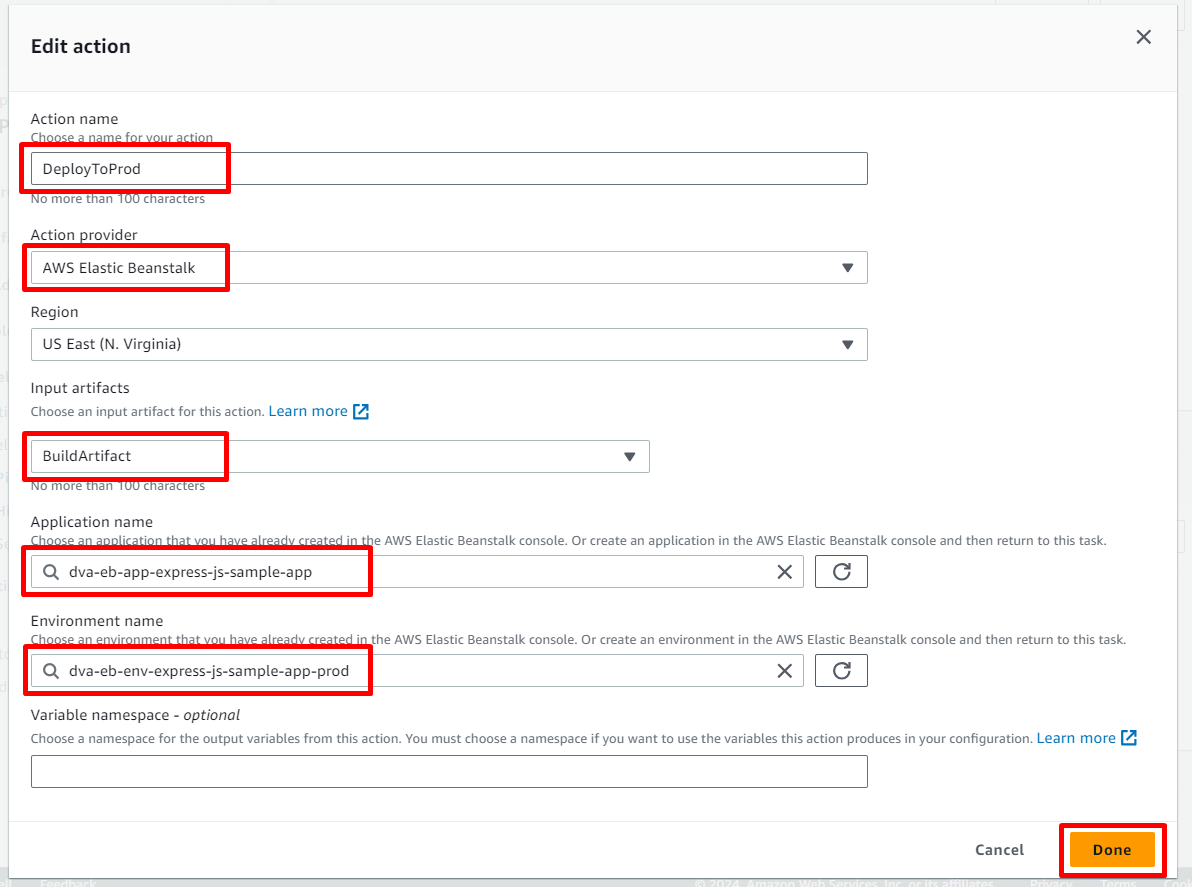
- Action name:
DeployToProd
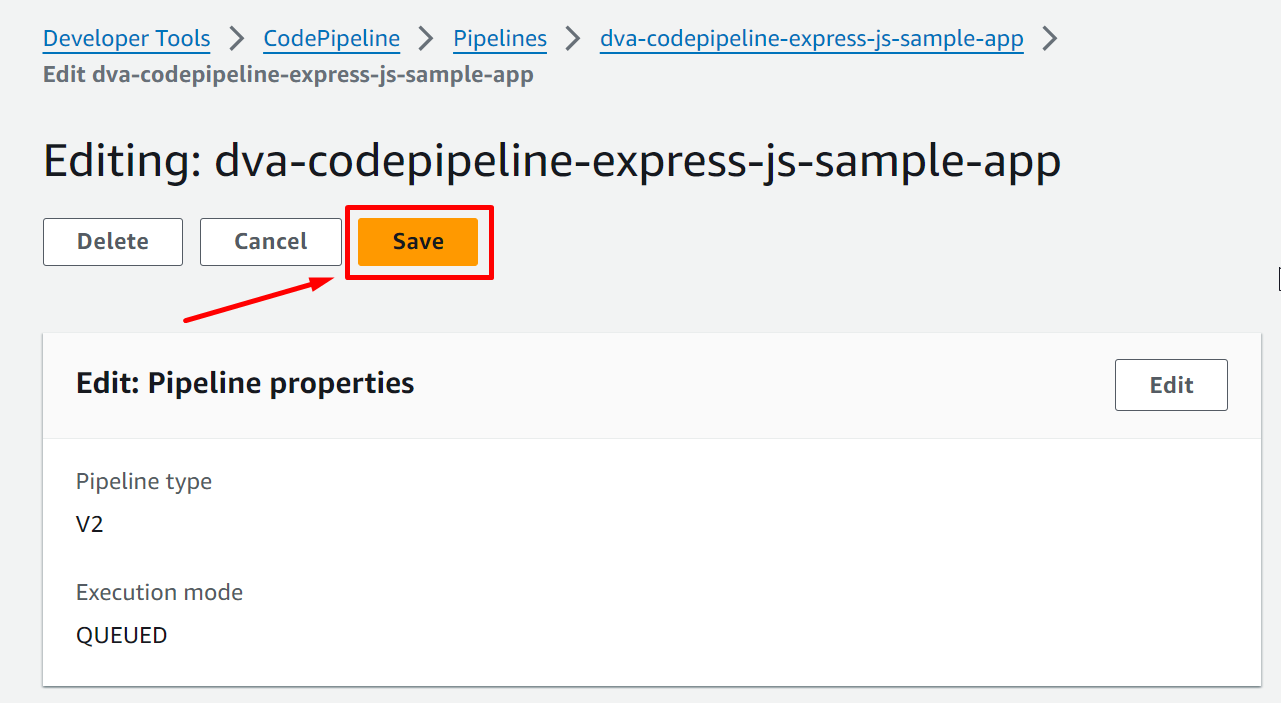
Sau khi add hoàn tất chúng ta tiến hành Save
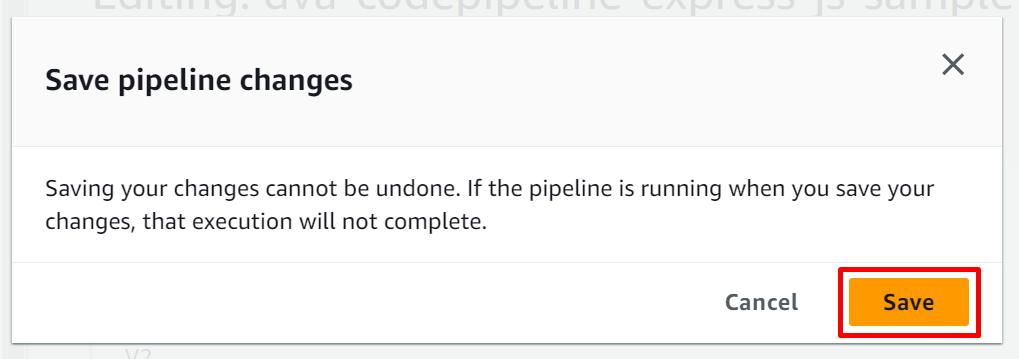
Codepipeline đã update thành công!!!
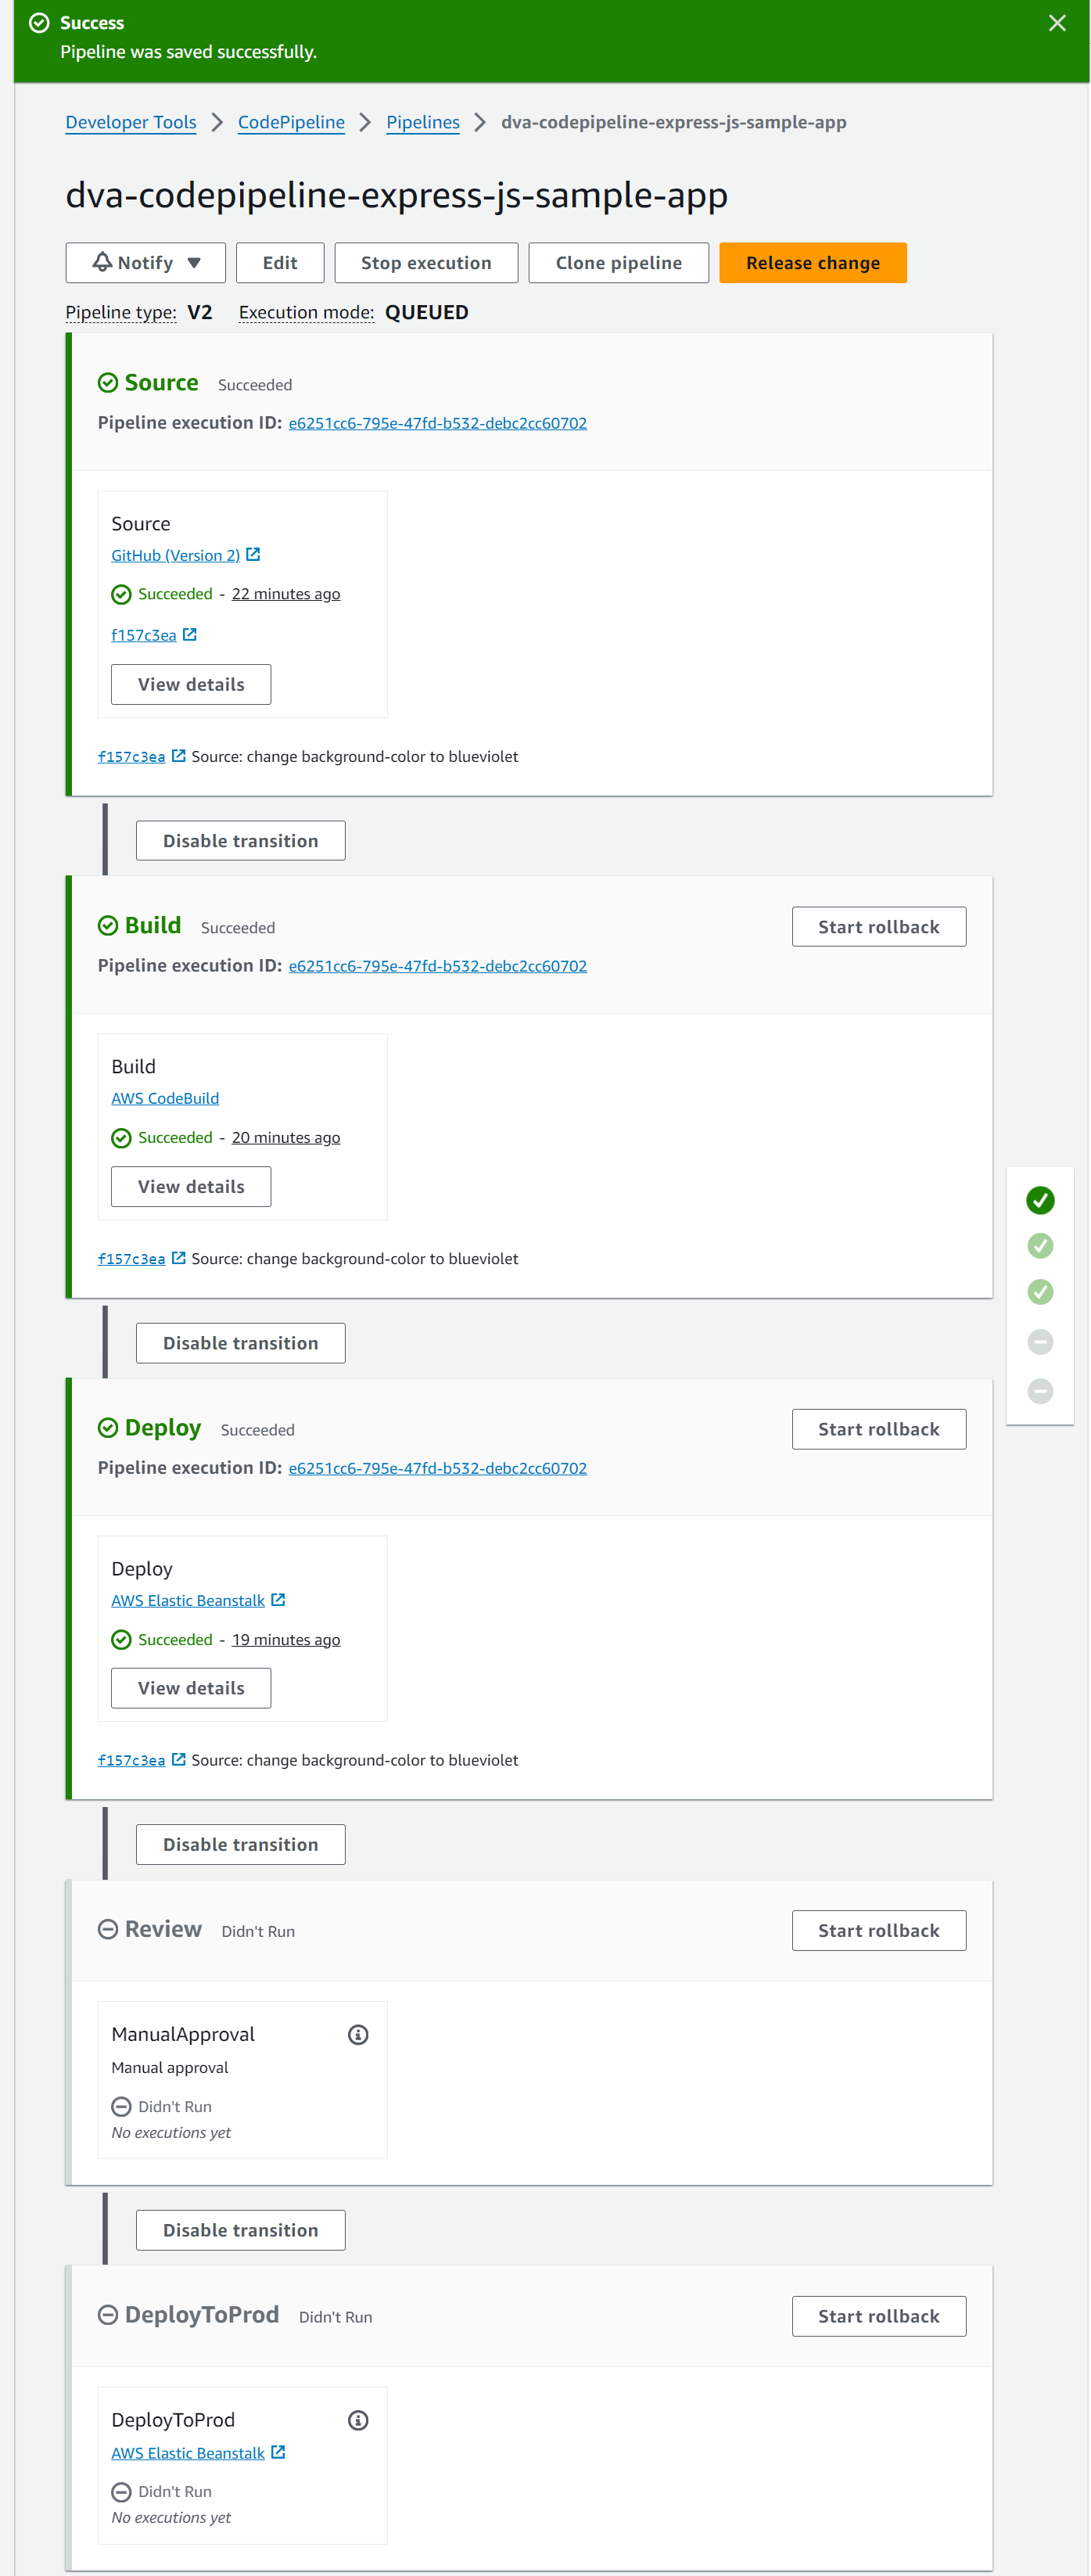
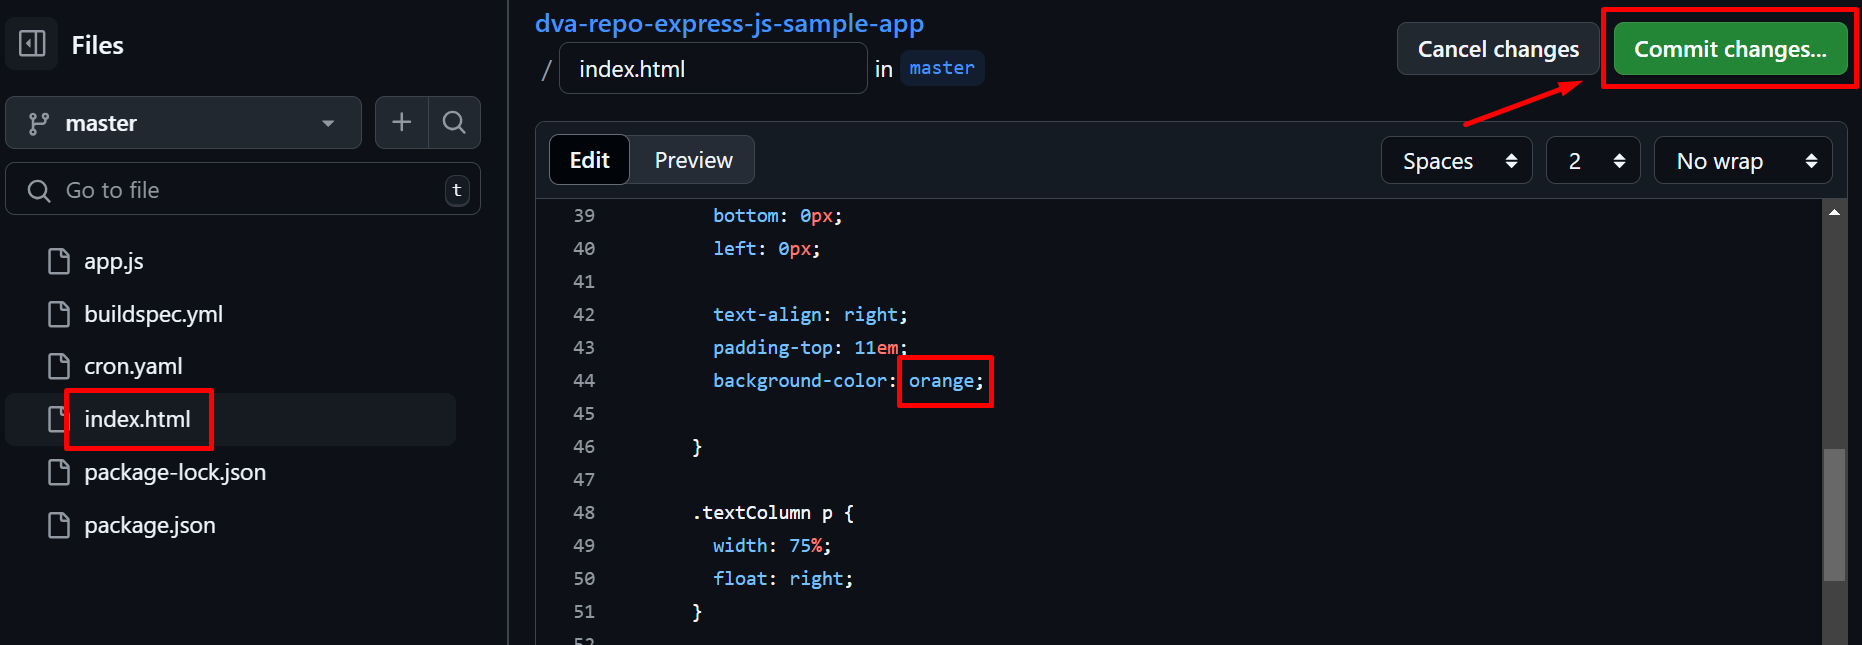
5.3. Push new commit to your repo
Update file index.html, thay đổi background-color: orange;
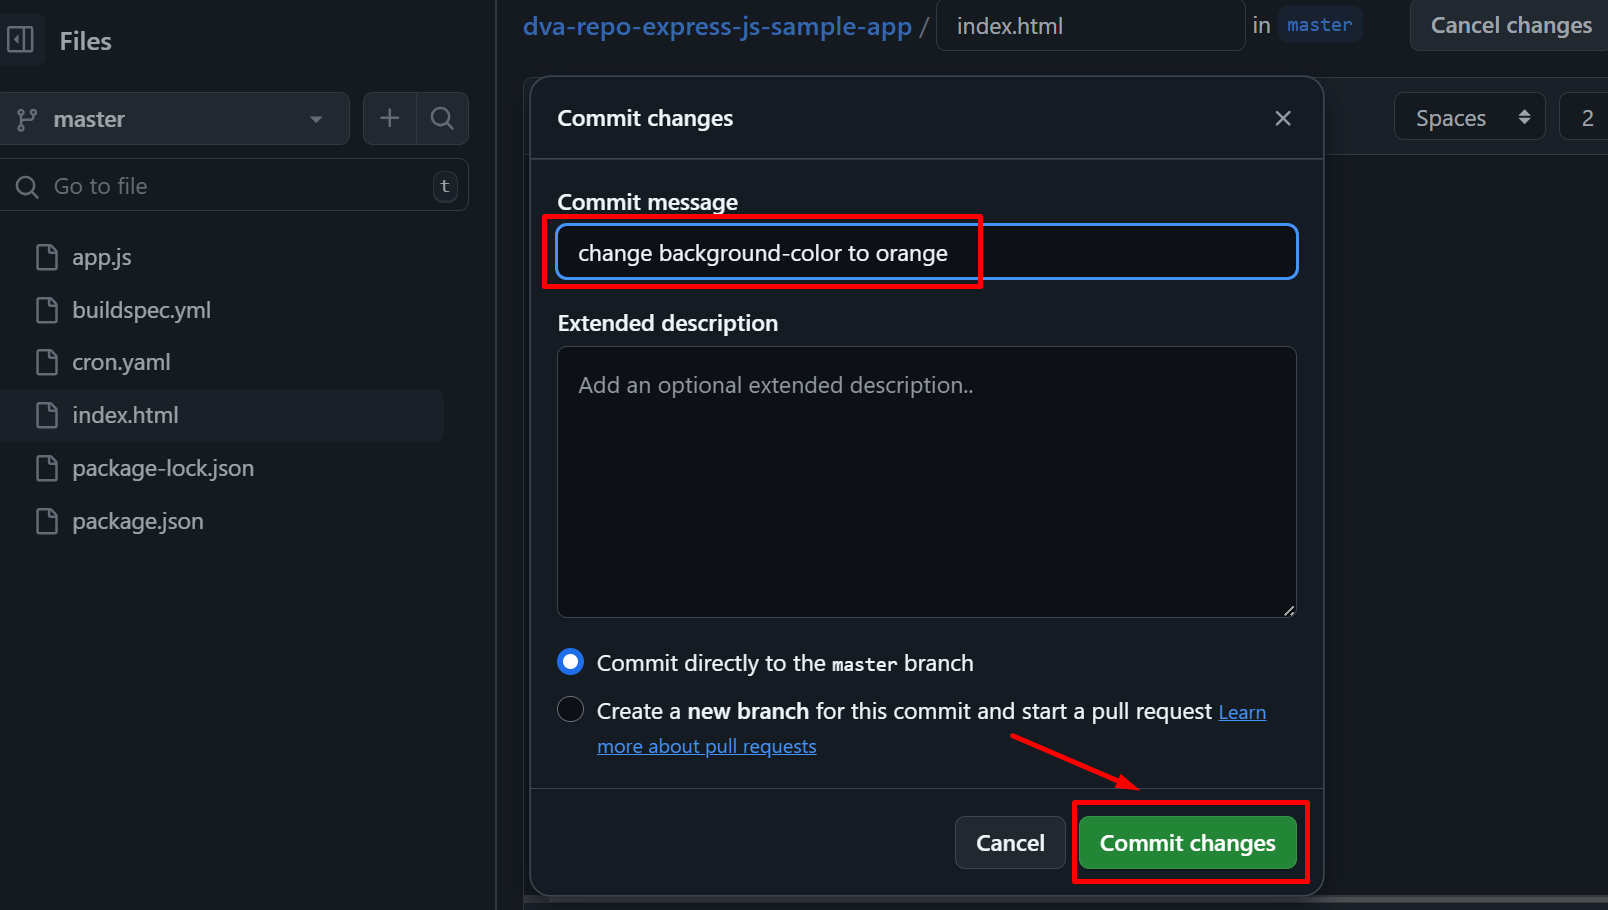
CodePipeline đã được trigger và đang quá trình thực thi.
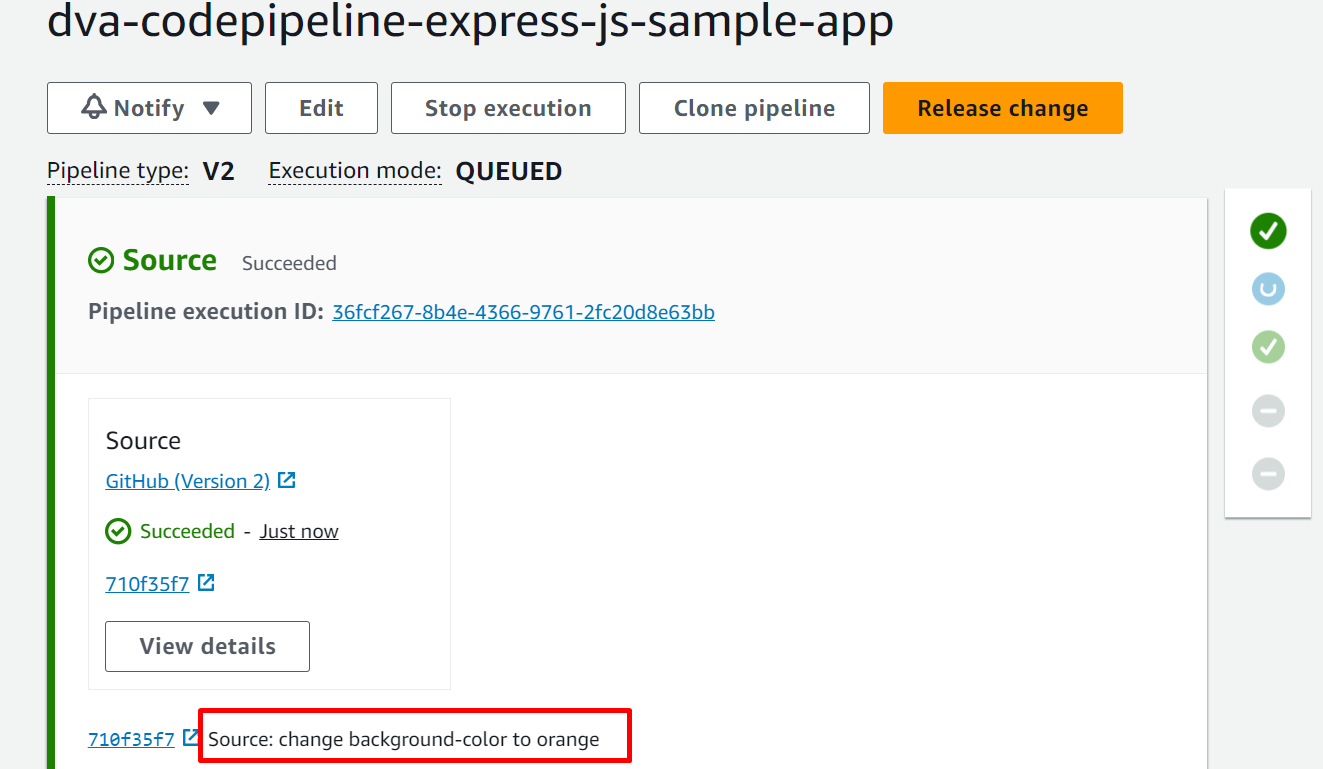
Chúng ta sẽ đợi vài phút cho đến quá trình deploy lên staging hoàn tất
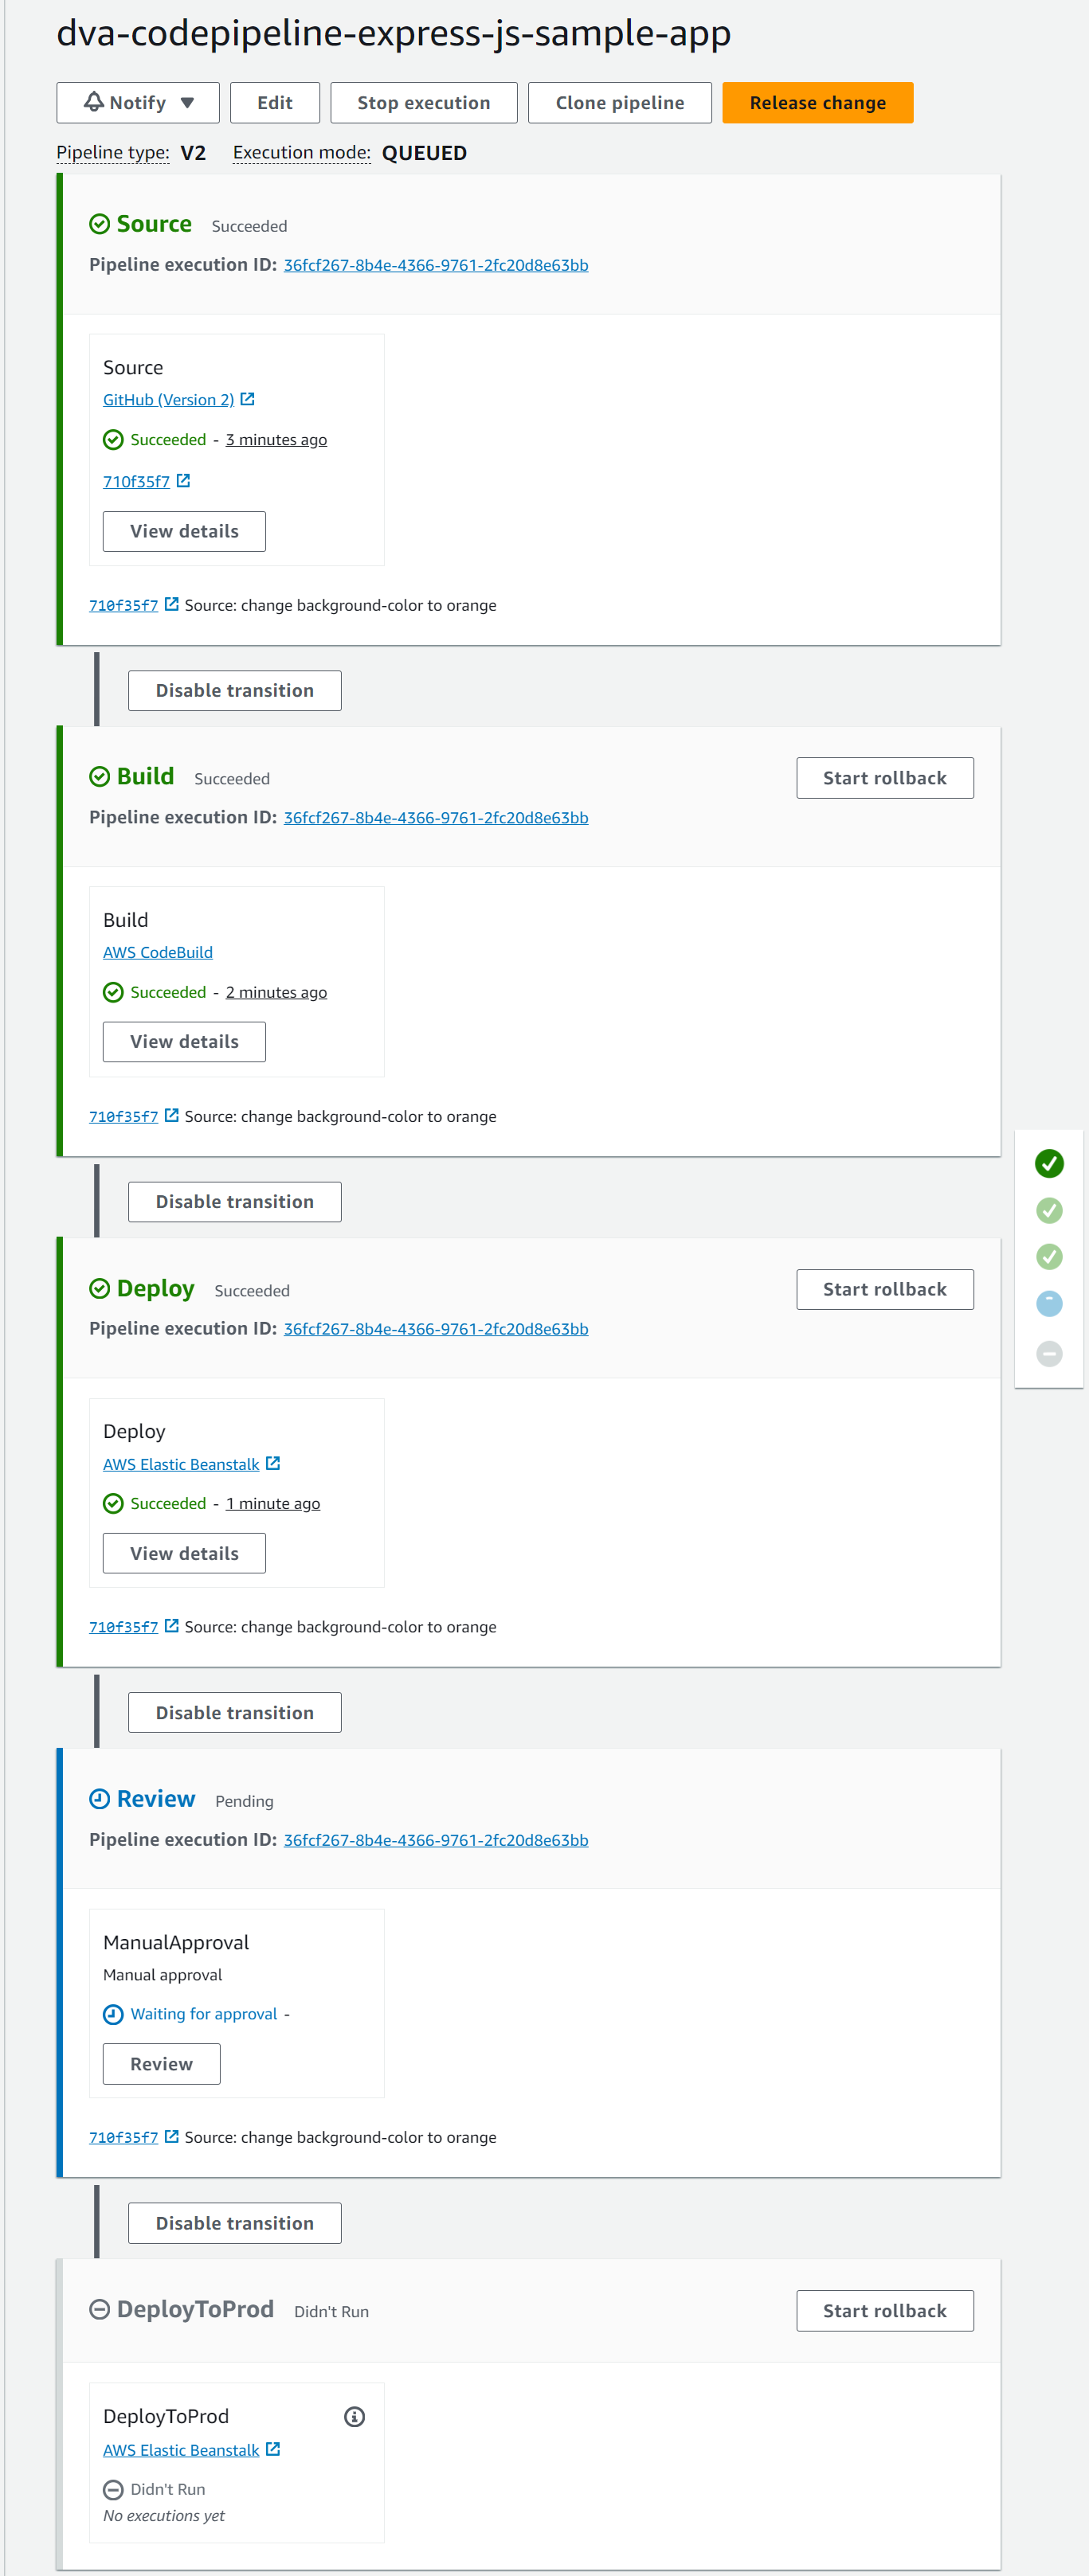
Deploy stg hoàn tất và đang dừng ở Review. Access domain môi trường staging để kiểm tra
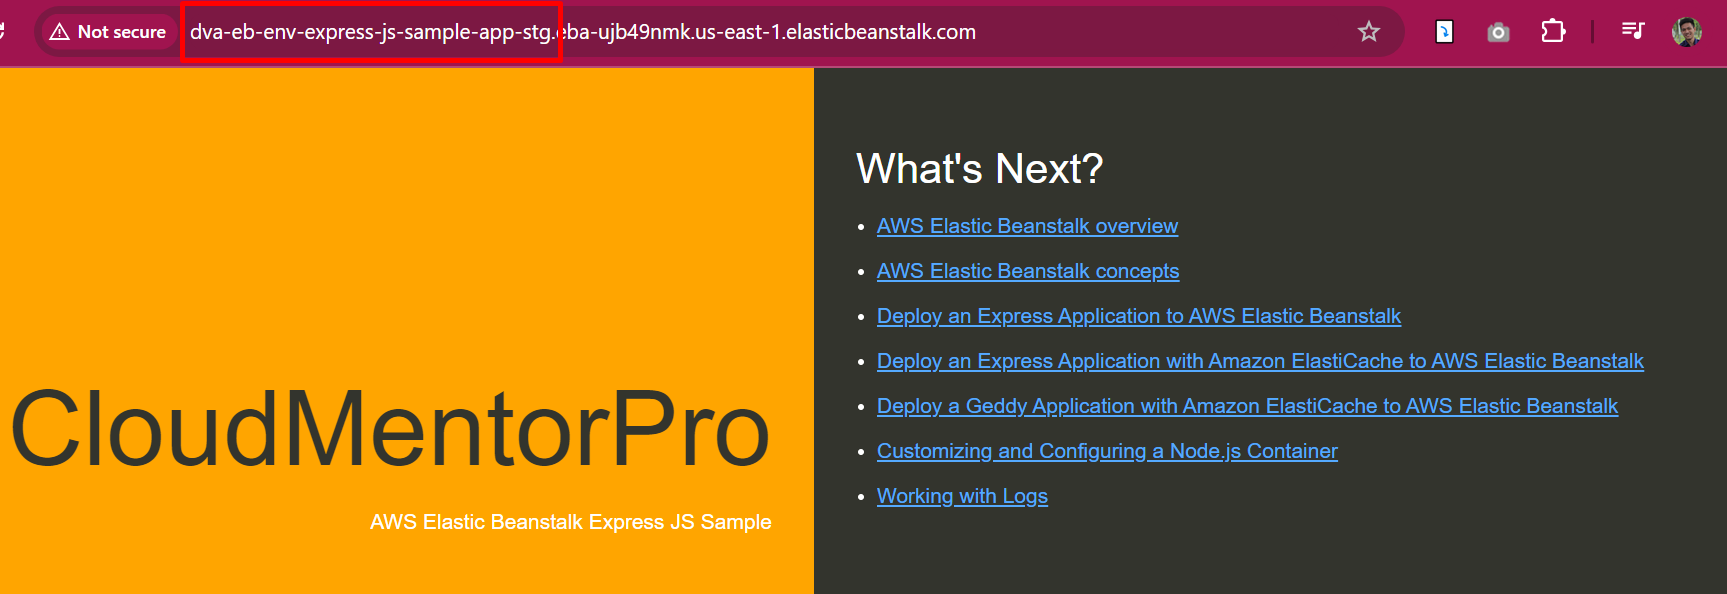
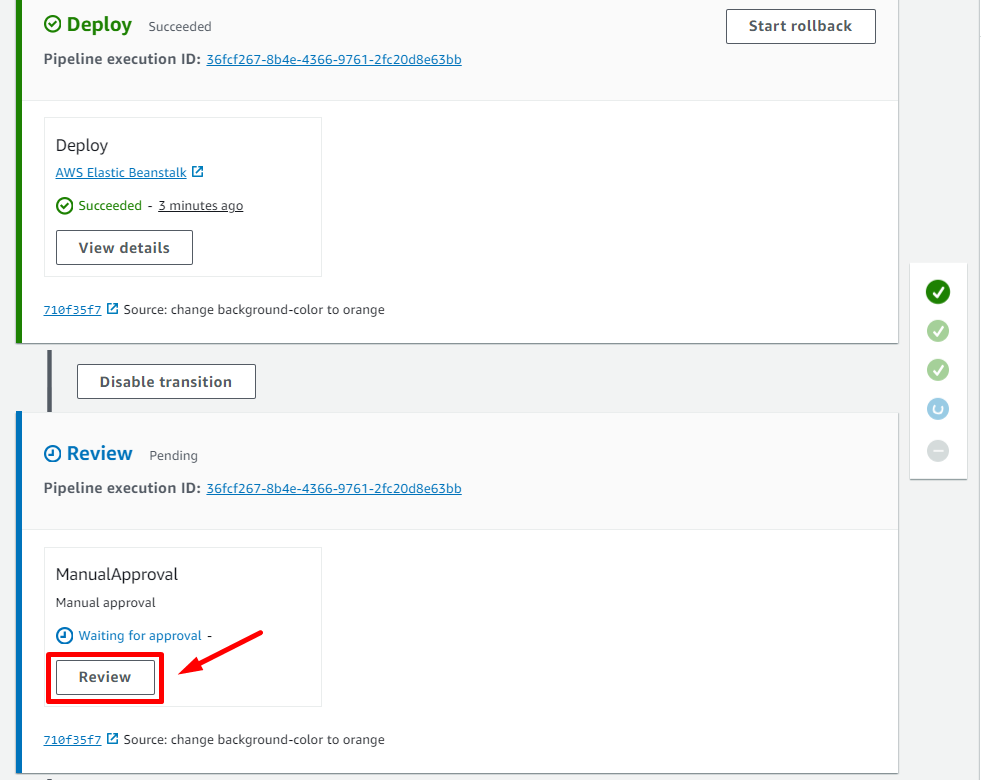
Chúng ta tiếp tục bước review
5.4. Monitor pipeline and manual approve change
Click chọn Review rồi Approve
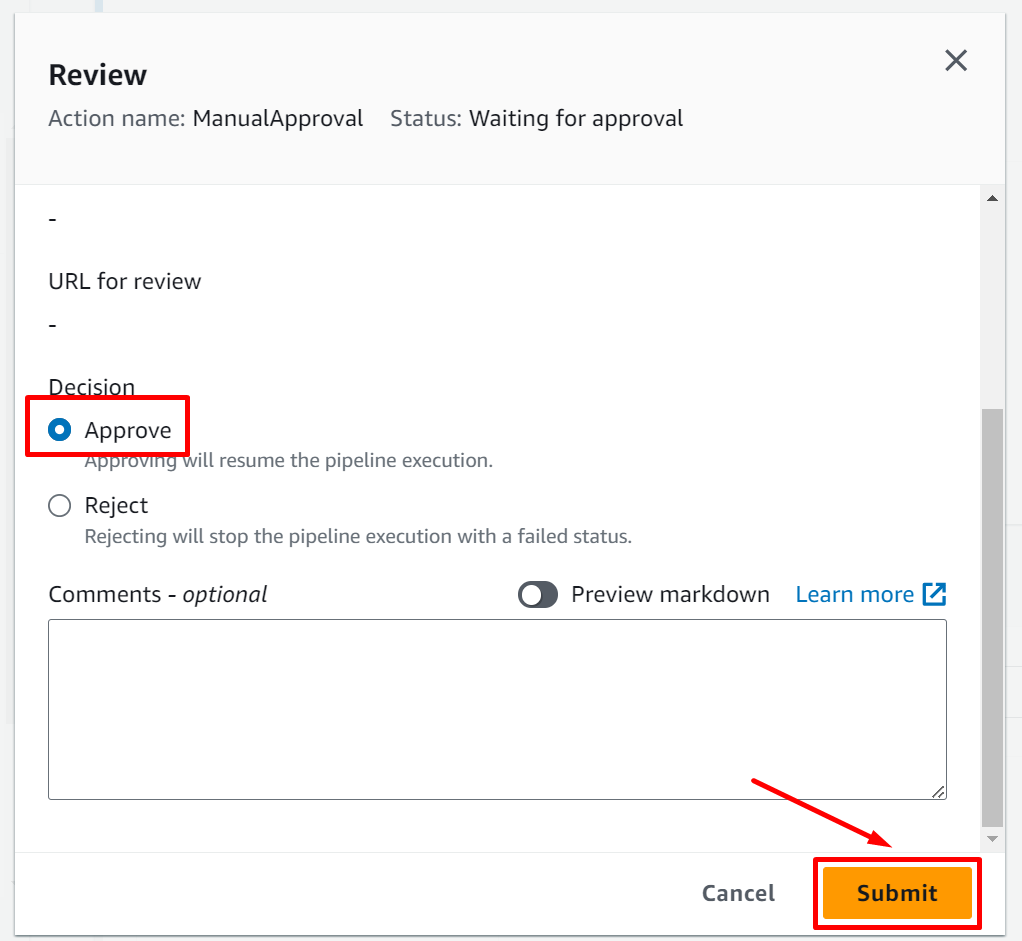
PipeLine tiếp tục triển khai deploy lên môi trường production
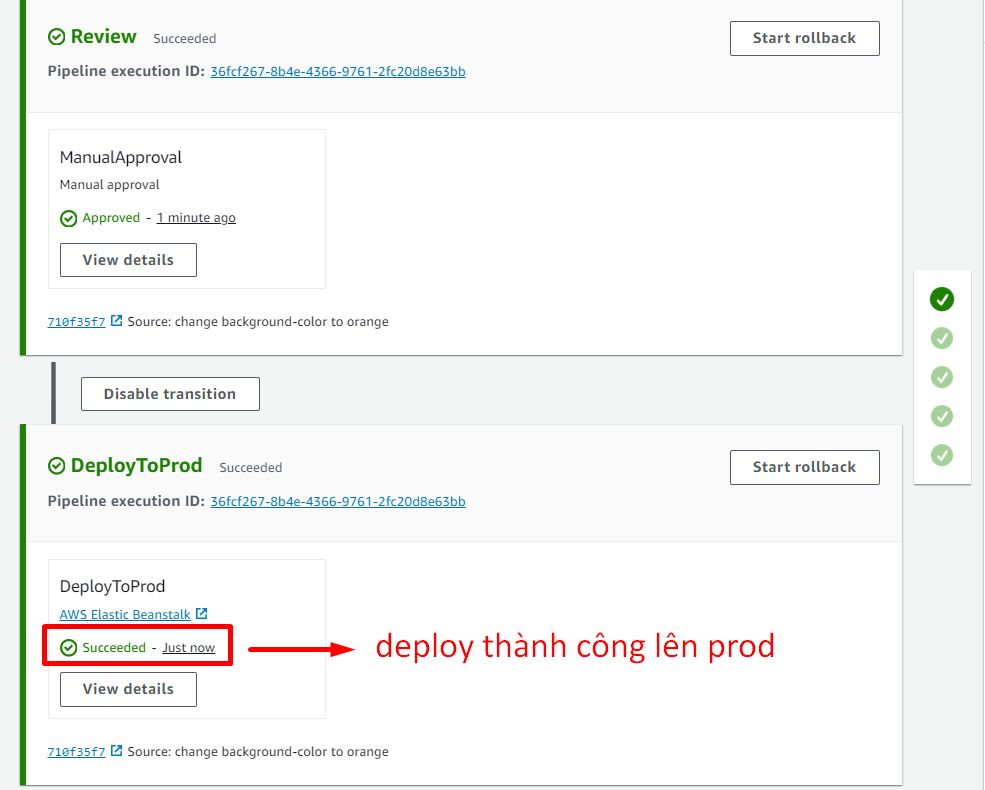
Access domain môi trường prod để kiểm tra
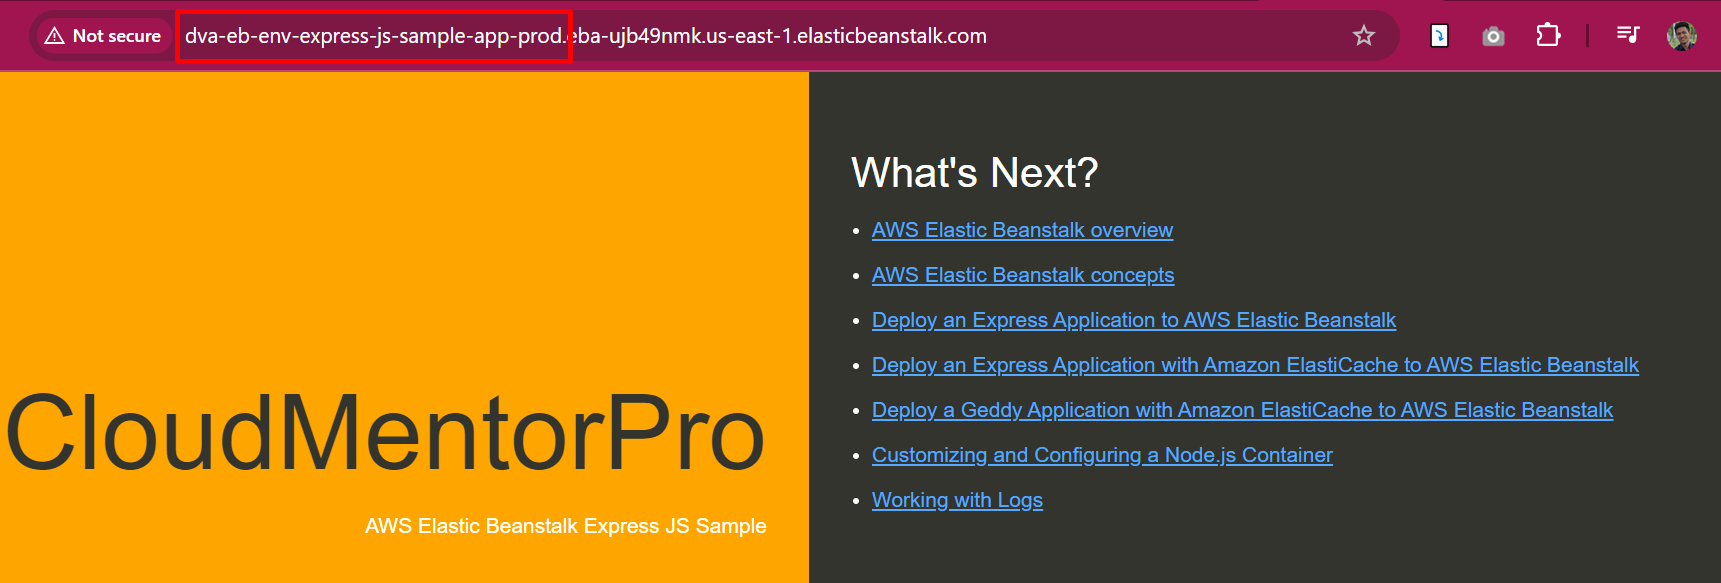
Congratulations! Bạn đã hoàn thành việc xây dựng CICD pipeline trên AWS.
Clean up resources
- Delete Elastic Beanstalk application

- Delete pipeline from CodePipeline:
dva-codepipeline-express-js-sample-app
- Delete pipeline resource from S3 Bucket:
codepipeline-us-east-1***- Empty bucket
- Delete bucket
- Delete build project in CodeBuild:
dva-codebuild-express-js-sample-app
- Delete Connections:
dva-repo-connection


 Sau khi quá trình tạo môi trường


