Share RDS snapshots across AWS account
Lab Introduction
- AWS experience: Intermediate
- Time to complete: 40 minutes
- AWS Region: US East (N. Virginia) us-east-1
- VPC: Default (Nếu bạn đã xoá Default VPC thì hãy tạo lại)
- Cost to complete: (Optional) Free Tier eligible
- Services used: RDS, KMS, AWS Organizations
Giới thiệu
Có những trường hợp bạn muốn migration RDS cross-account, hoặc muốn tái hiện lại trên environment khác khi thực hiện troubleshooting, hoặc muốn chia sẻ dữ liệu cho một bên thứ 3 (có AWS account).
Tình huống:
- Bạn đang chạy RDS Mysql DB
- Bạn sử dụng mã hoá mặc định
aws/rds
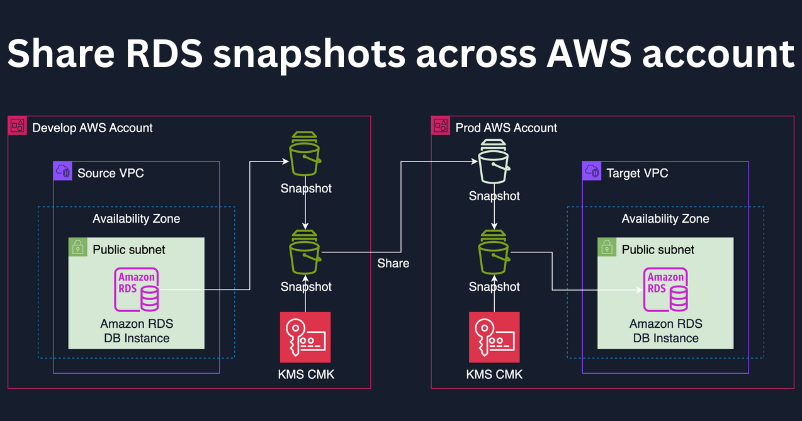
Architecture Diagram
Task Details
- Thiết lập môi trường multiple accounts using IAM Identity Center
- Setting phía Source Account
- Setting phía Target Account
1. Thiết lập môi trường multiple accounts using IAM Identity Center
Tham khảo Blog sau đây để tạo 2 Member Account và setting cần thiết để truy cập đến 2 Account
LƯU Ý:
- Bài blog tham khảo trên tạo 2 Account cho 2 môi trường Prod và Develop
- User
cmp-phongcó quyền AdministratorAccess trên Develop nhưng chỉ ReadOnlyAccess trên Prod
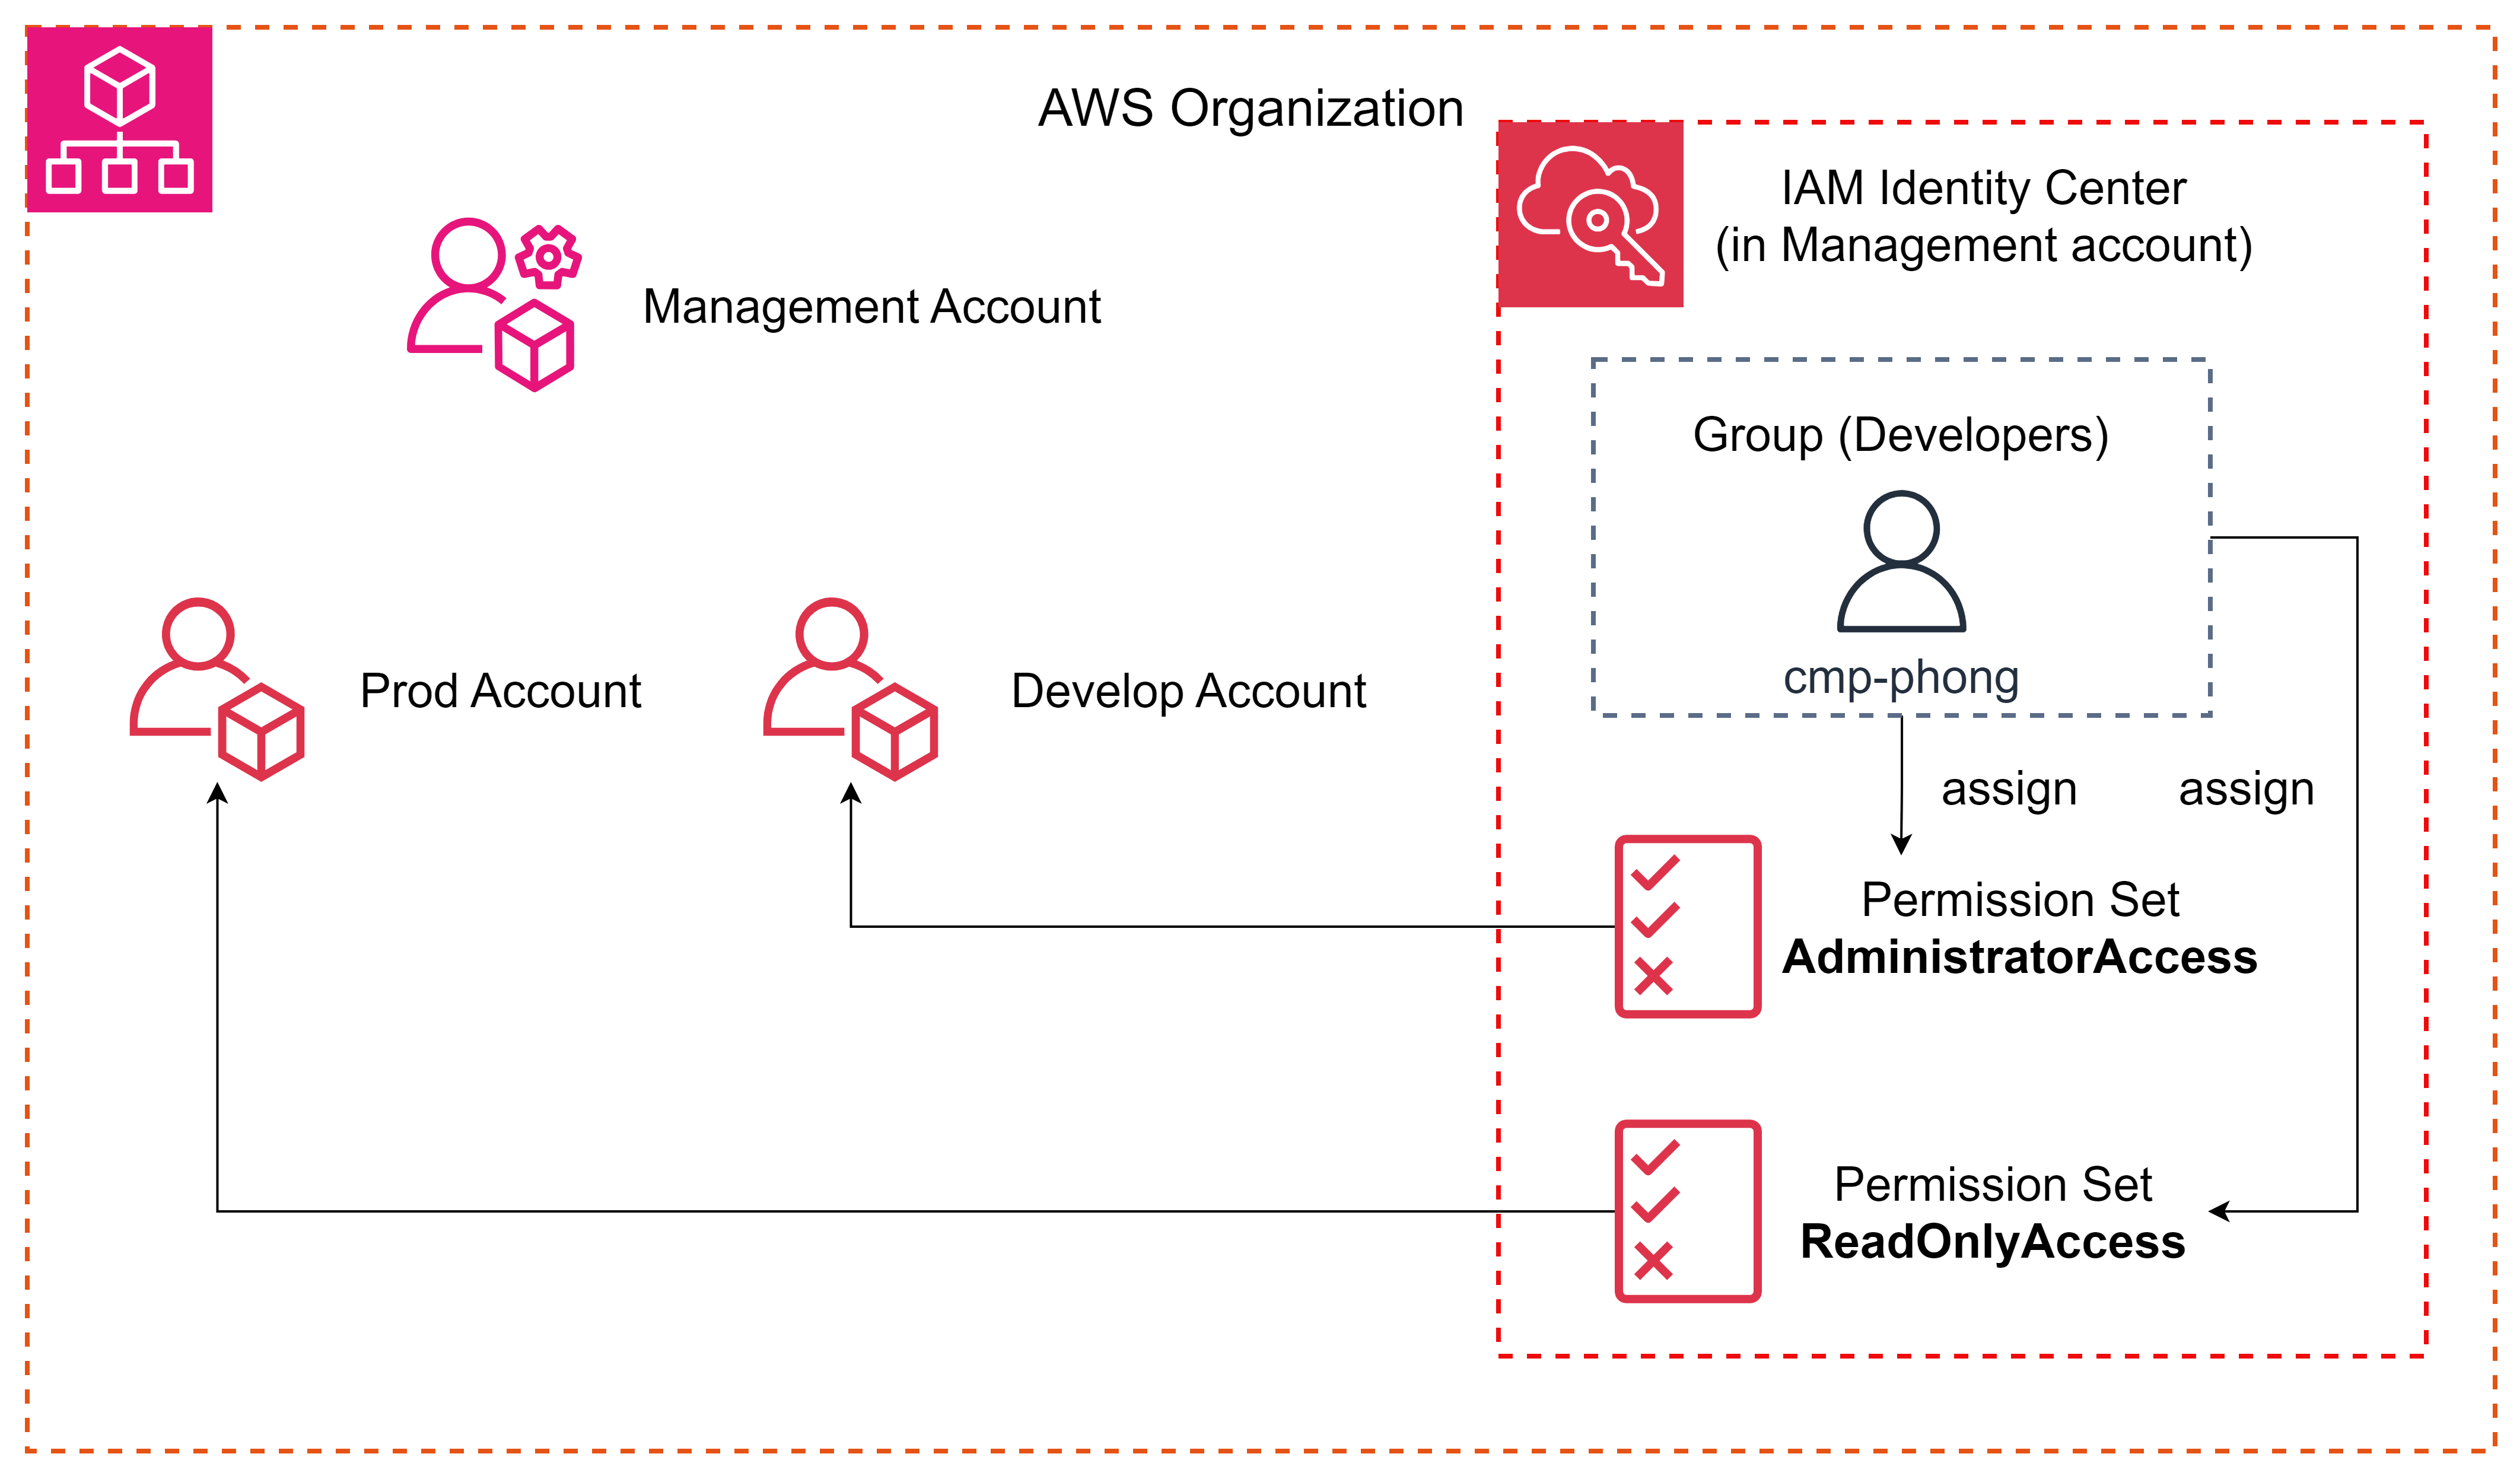
Bạn cần thay đổi
- Cho phép user
cmp-phongcó quyền AdmninistratorAccess cho cả Prod và Develop
2. Setting phía Source Account (Develop)
Các setting ở mục 2 này là trên Develop Account
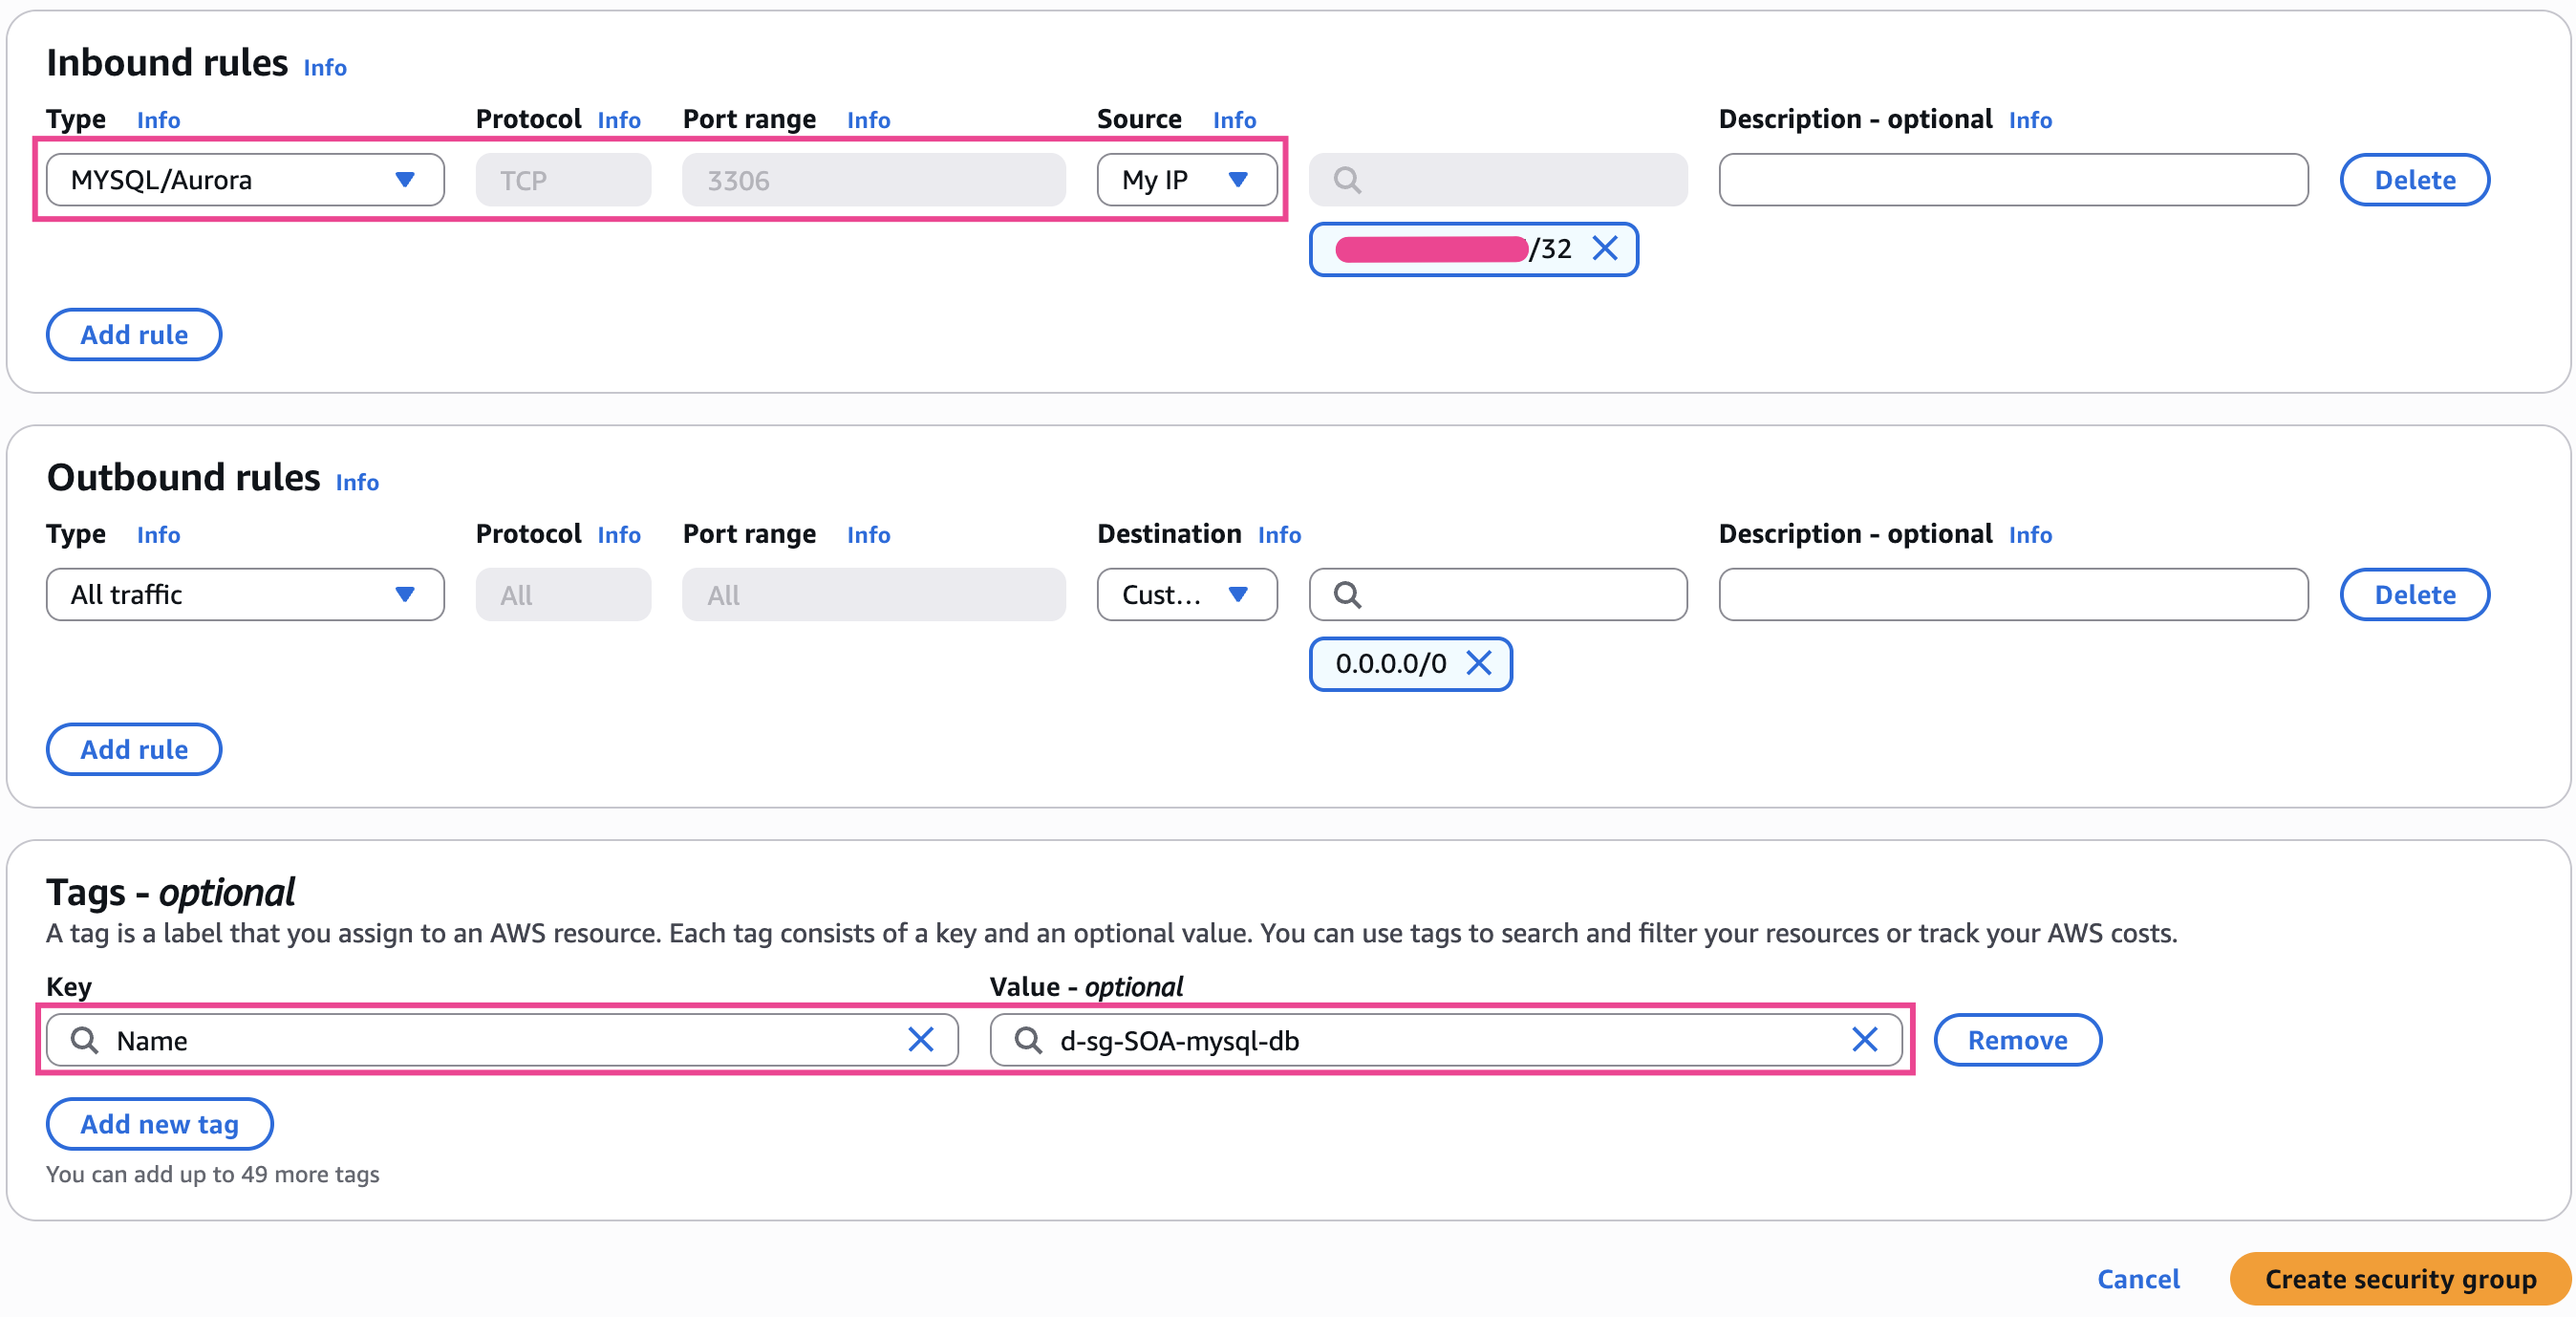
2.1. Create Security group cho DB
- Security group name:
d-sg-SOA-mysql-db - Description:
Allow ssh from My IP - VPC: Default
- Inbound rules, Outbound rules và tag như hình bên dưới
- ⚠️ LƯU Ý: My IP là IP của mạng bạn đang kết nối, nếu bạn đổi địa điểm thì sẽ không kết nối được đến DB vì My IP đã thay đổi
2.2. Create RDS Mysql
Dưới đây là các parameter setting: Các setting mình không đề cập thì để Default. Lưu ý những chỗ ⚠️
- Choose a database creation method:
Standard create - Engine options:
- Engine type:
MySQL - Engine version:
MySQL 8.*
- Engine type:
- Templates:
Free tier - Availibility & durablity:
Default (Single DB Instance) - Settings
- DB Instance identifier (DB Name):
d-rds-soa-mysql-db - Master username: Ex
admin - Master password: Ex
MyPassword1!
- DB Instance identifier (DB Name):
- Instance configuration
- Burstable classes (includes t classes):
db.t3.micro
- Burstable classes (includes t classes):
- Connectivity:
- Compute resource:
Don’t connect to an EC2 compute resource - VPC:
Default VPC - DB subnet group:
default - Public access:
Yes⚠️ - Security Group:
d-sg-SOA-mysql-db⚠️ - Availability Zone:
No preference - RDS Proxy:
Uncheck
- Compute resource:
- Database authentication
- Database authentication options:
Password authentication
- Database authentication options:
- Additional configuration:
- Initial database name:
mydb⚠️
- Initial database name:
Sẽ mất tầm 3-5 phút để DB tạo xong

2.3. Kết nối và tạo data test
Lấy thông tin kết nối và truy cập đến DB từ local. Sử dụng Tool như
- MySQLWorkbench
- hoặc Beekeeper Studio
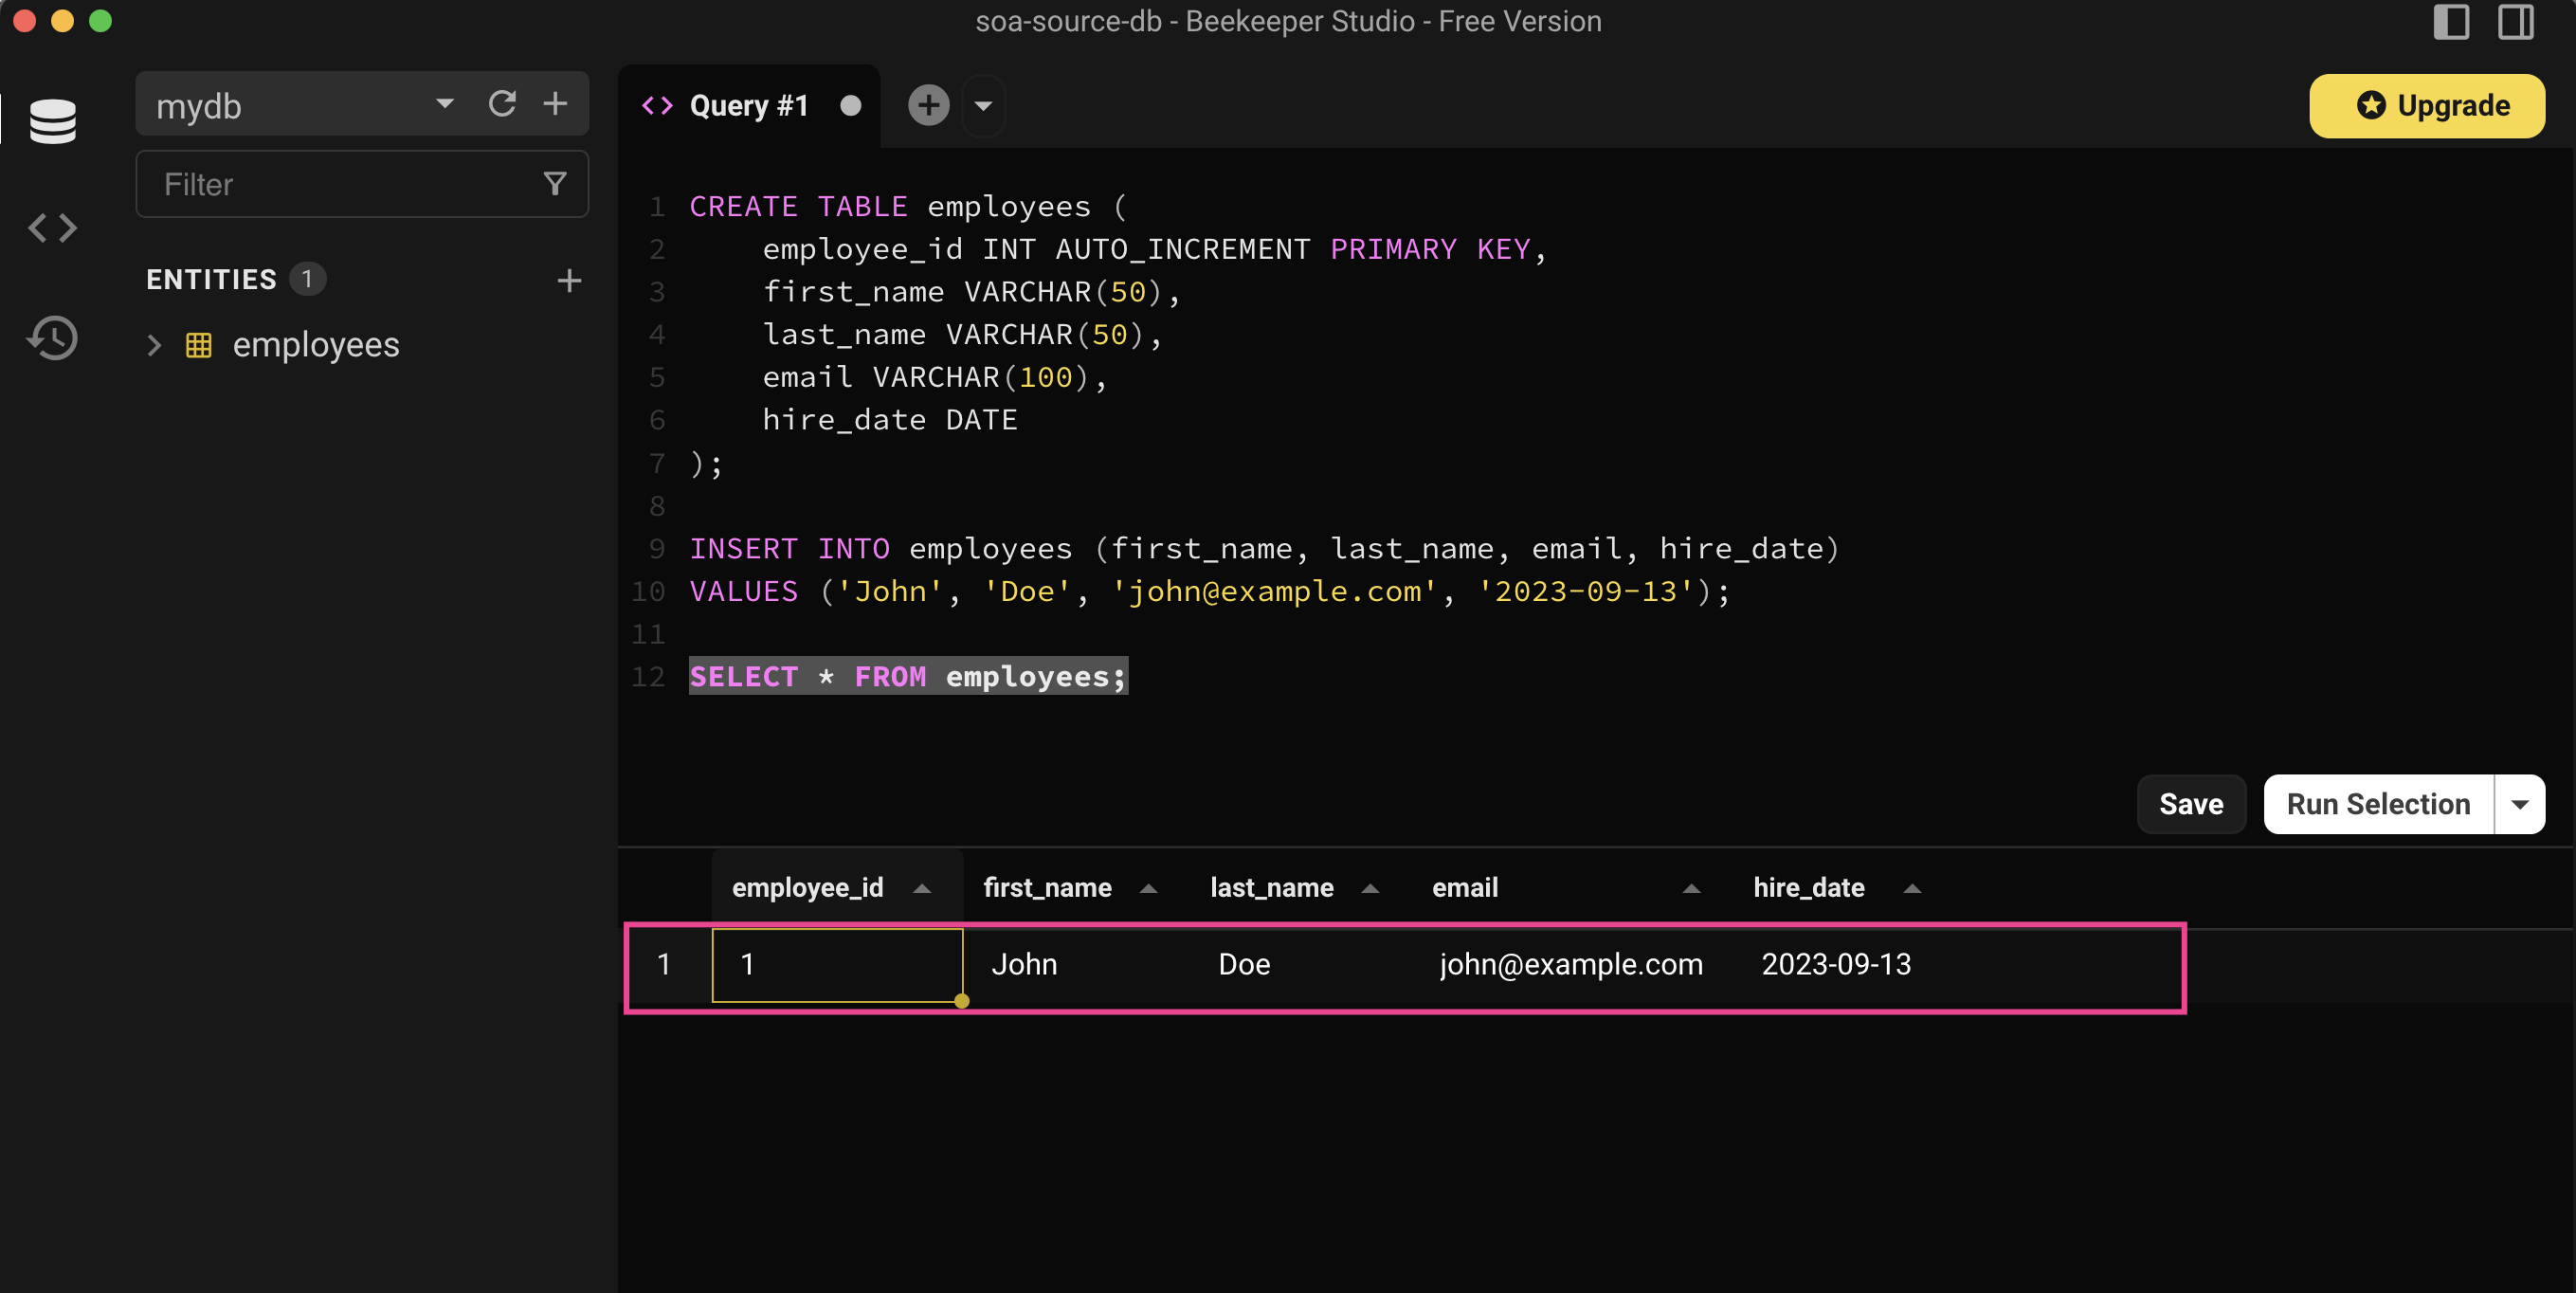
Kết nối và thực hiện các thao tác dữ liệu sau:
CREATE TABLE employees (
    employee_id INT AUTO_INCREMENT PRIMARY KEY,
    first_name VARCHAR(50),
    last_name VARCHAR(50),
    email VARCHAR(100),
    hire_date DATE
);

INSERT INTO employees (first_name, last_name, email, hire_date)
VALUES ('John', 'Doe', 'john@example.com', '2023-09-13');

SELECT * FROM employees;
2.4. Create KMS Key
Chúng ta sẽ tạo 1 key với mục đích để mã hoá lại data với key này, sau đó mới share cho Account khác được.
Vì data mã hoá với default AWS KMS key aws/rds thì không thể share được.
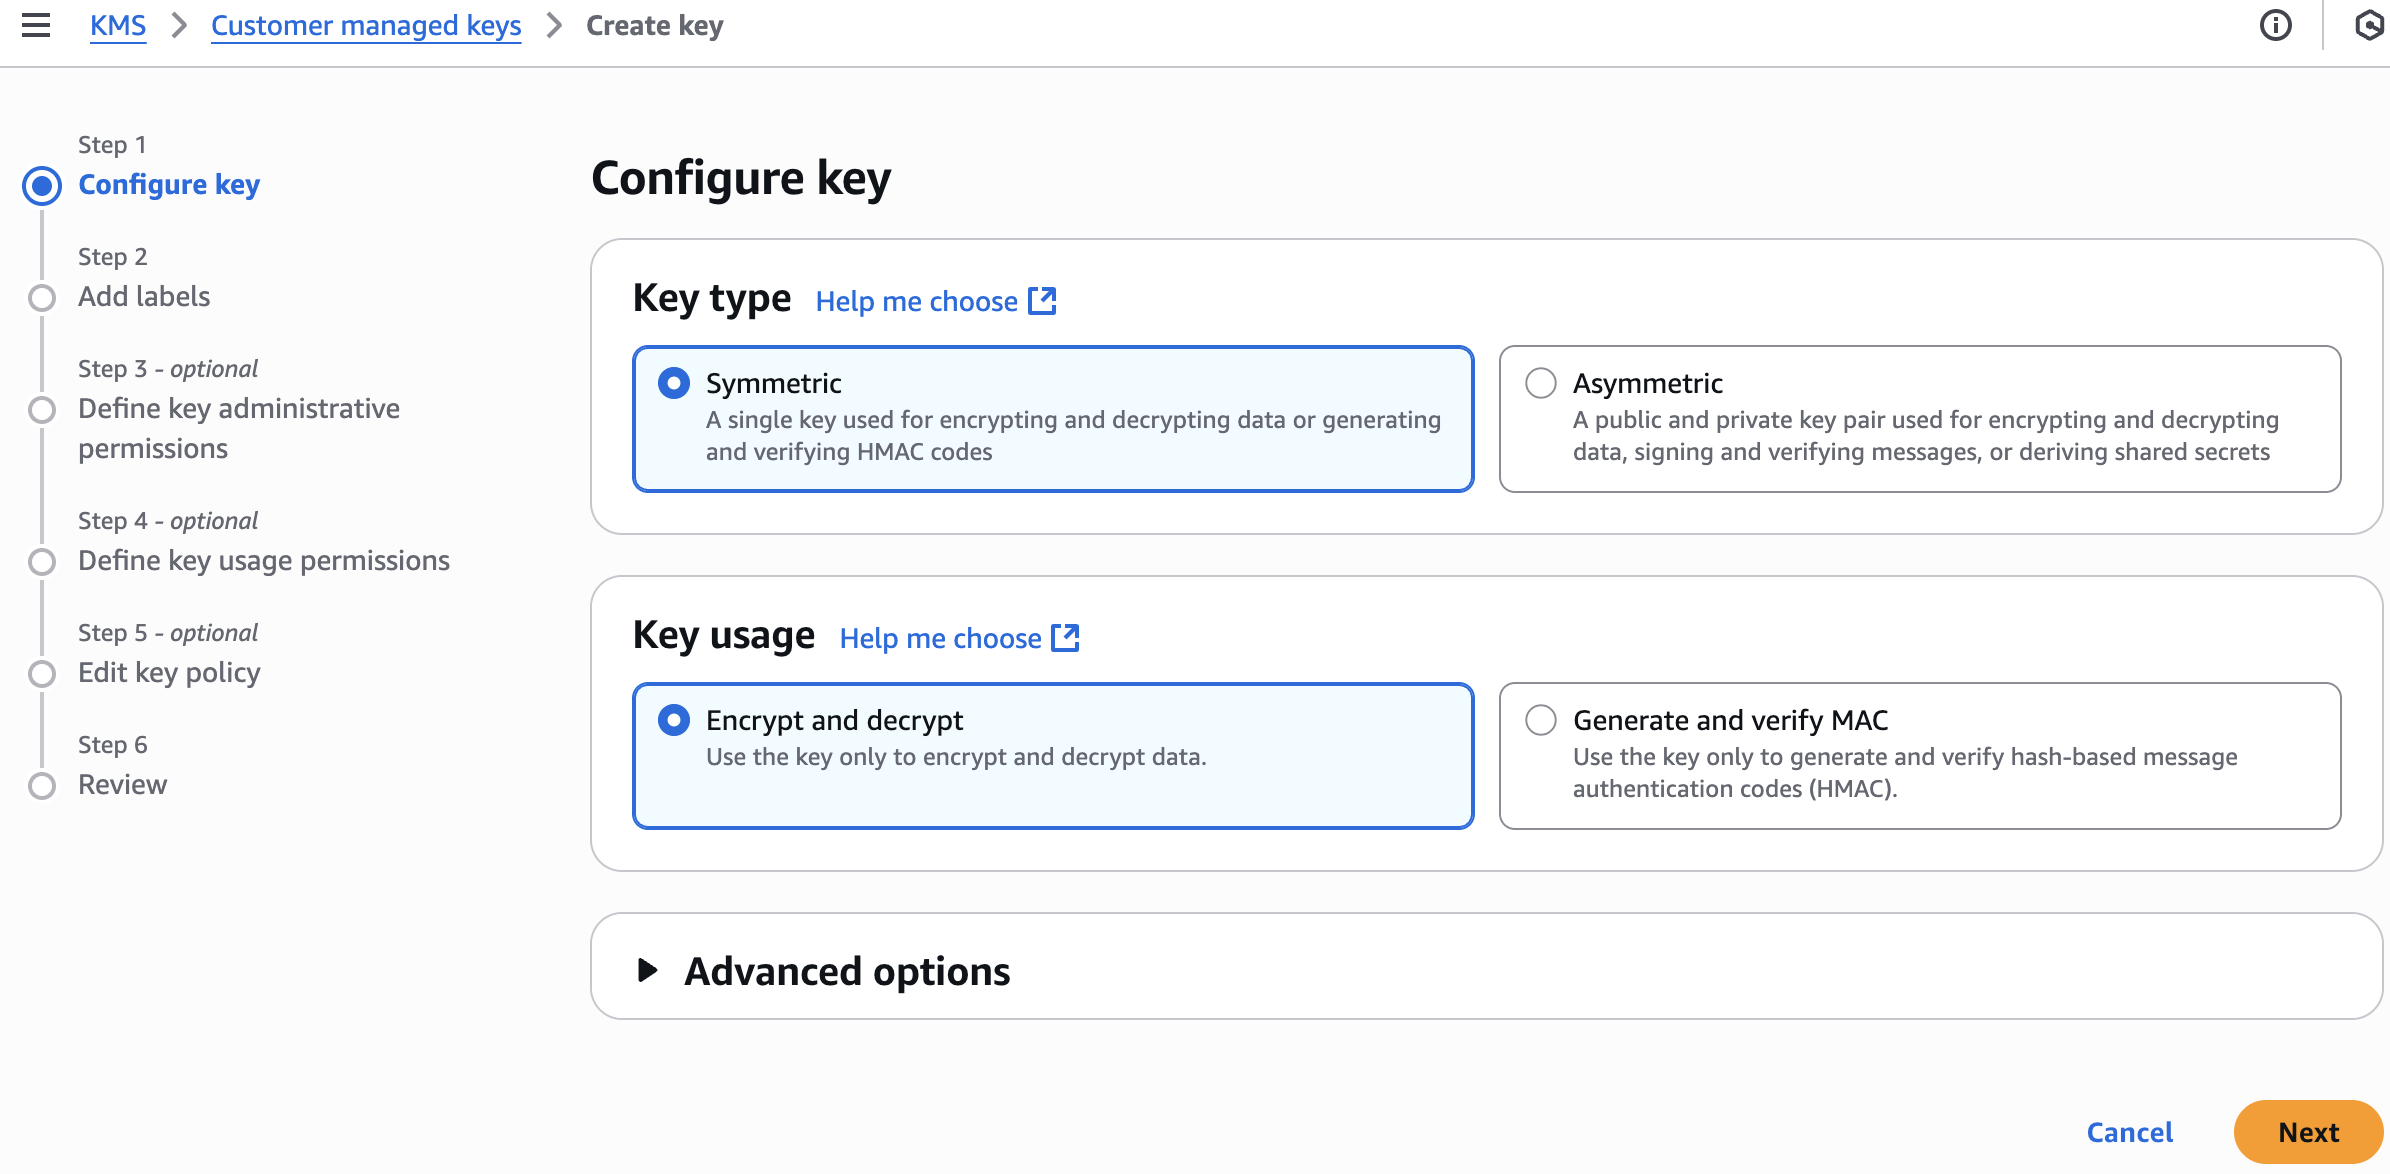
KMS -> Customer managed keys -> Create key
- Step 1: Configure key
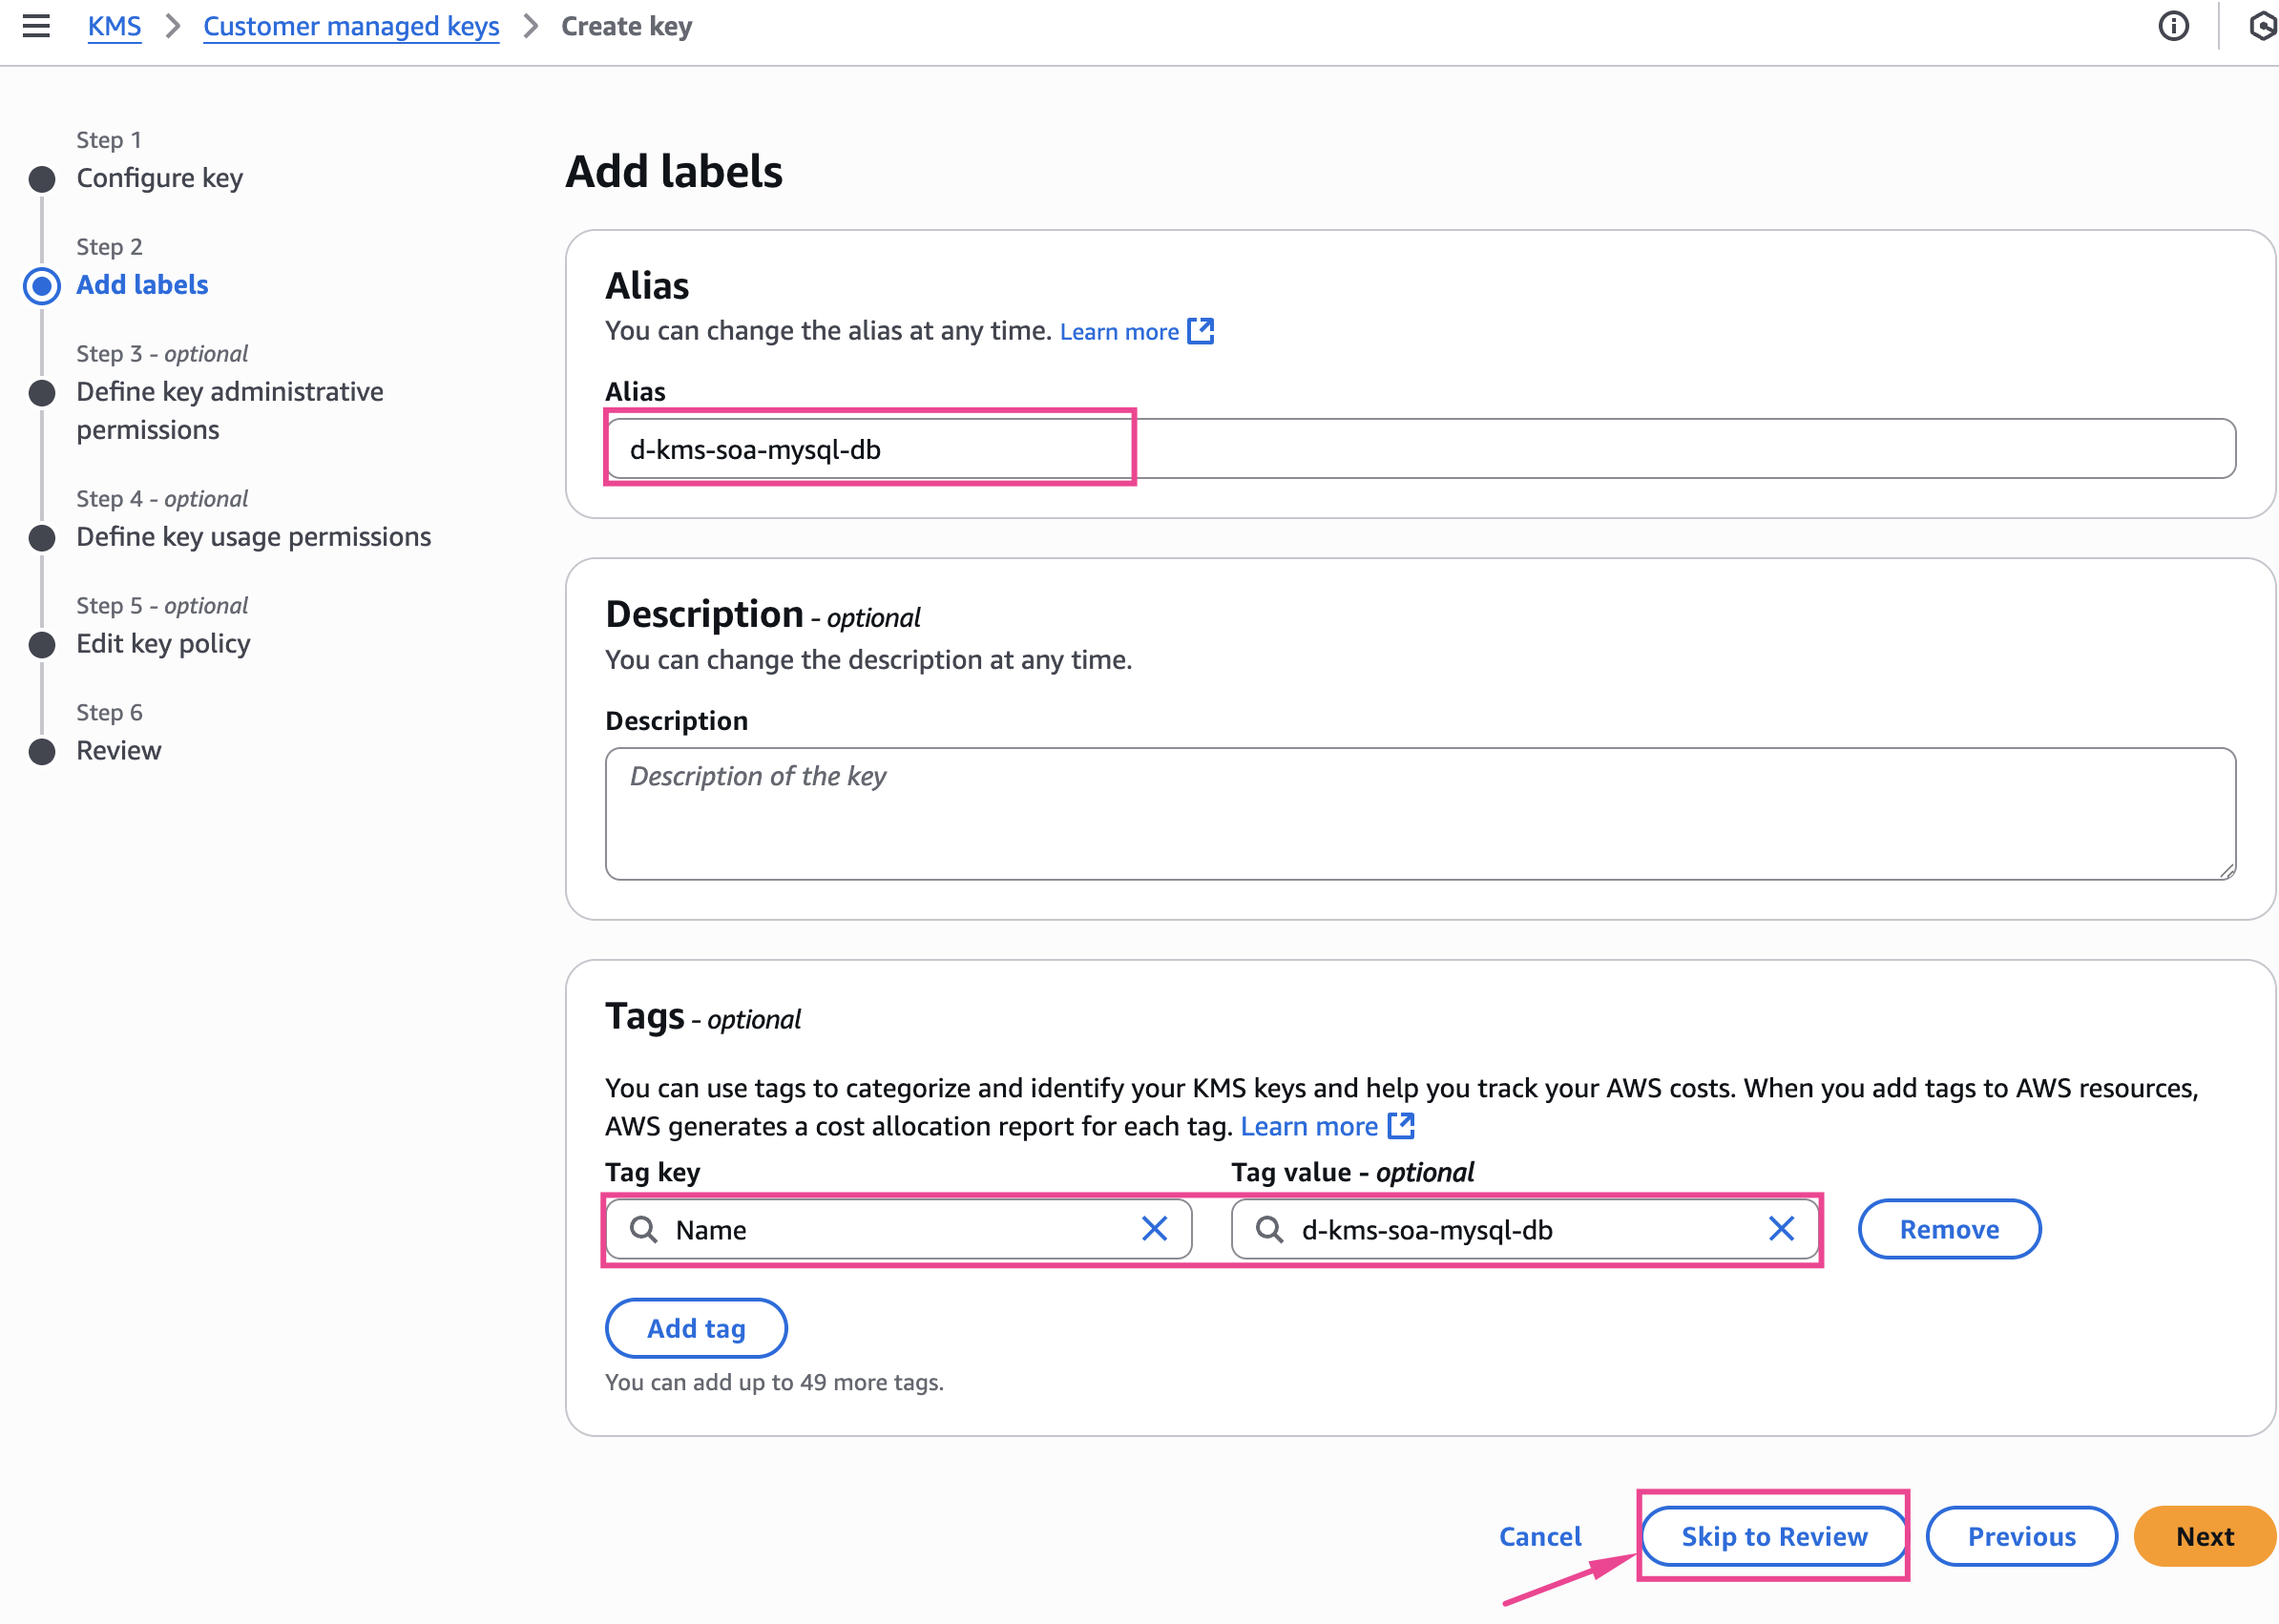
- Step 2: Add labels
- Alias: d-kms-soa-mysql-db
- Step 6: Review
- Finish

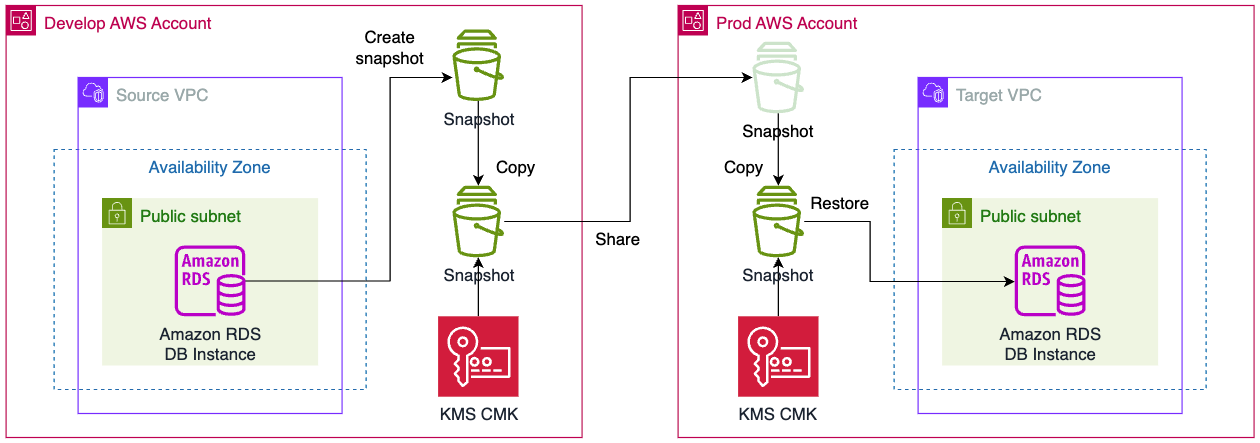
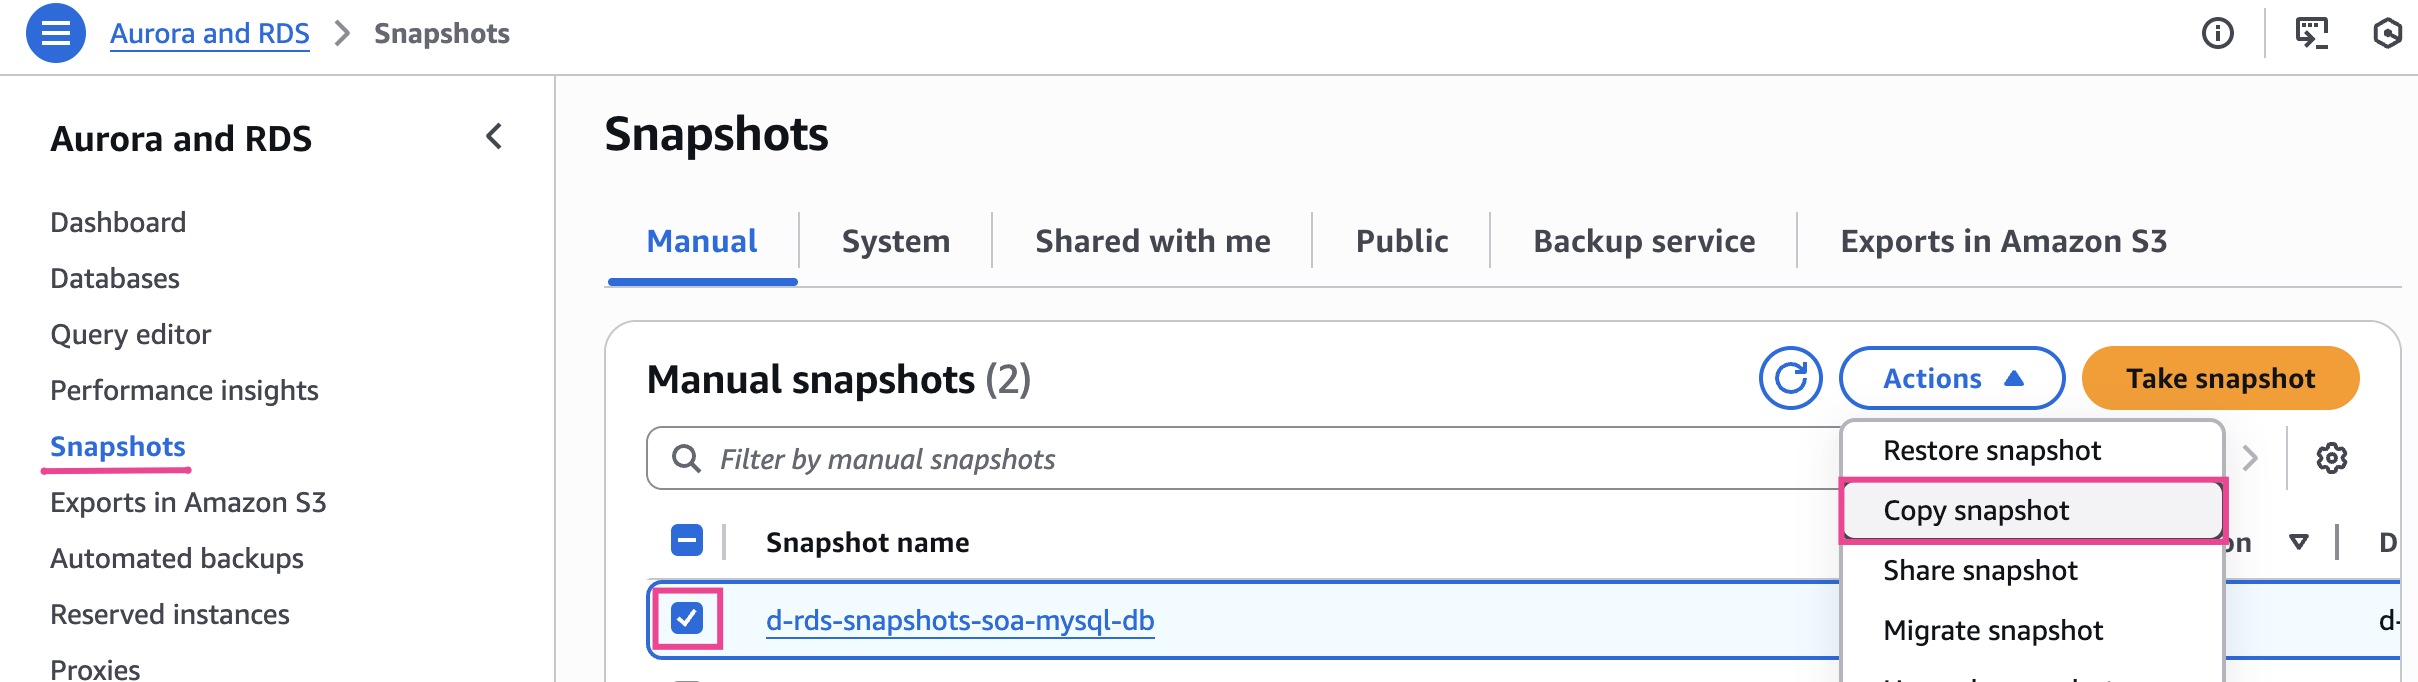
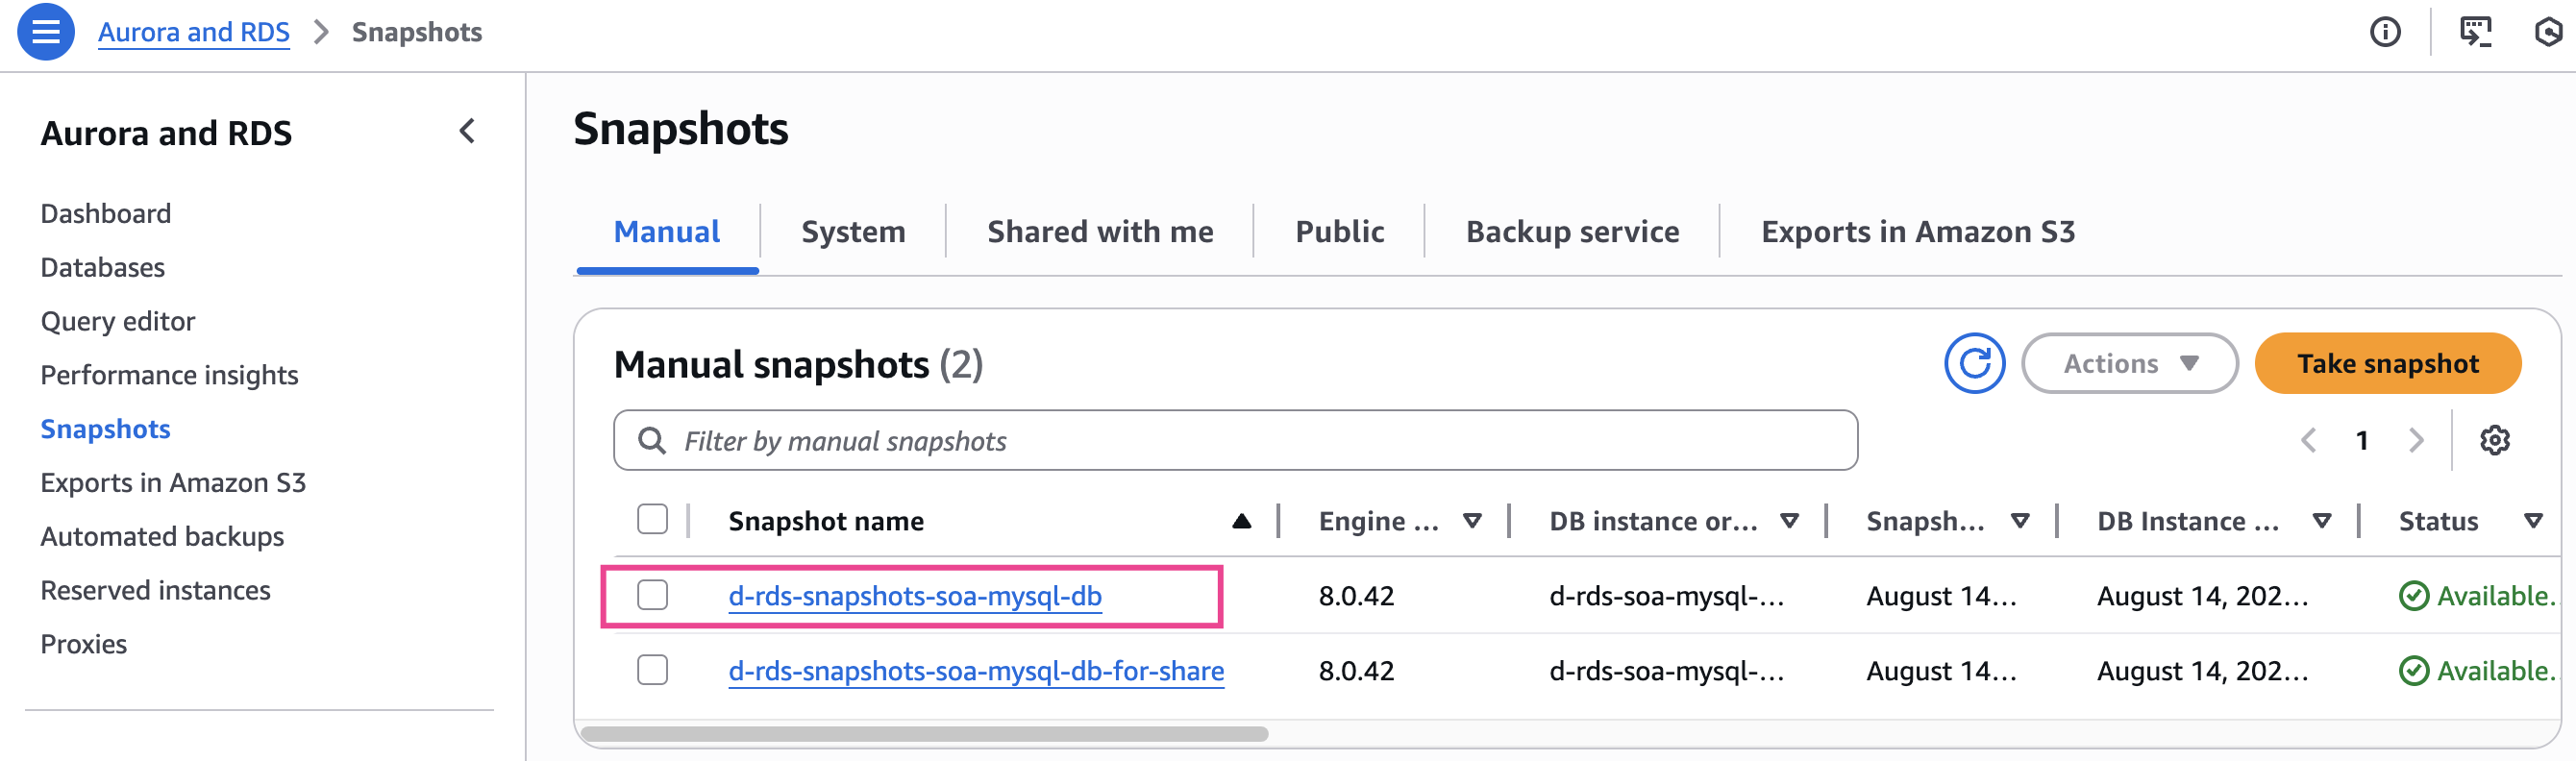
2.5. Create Snapshots
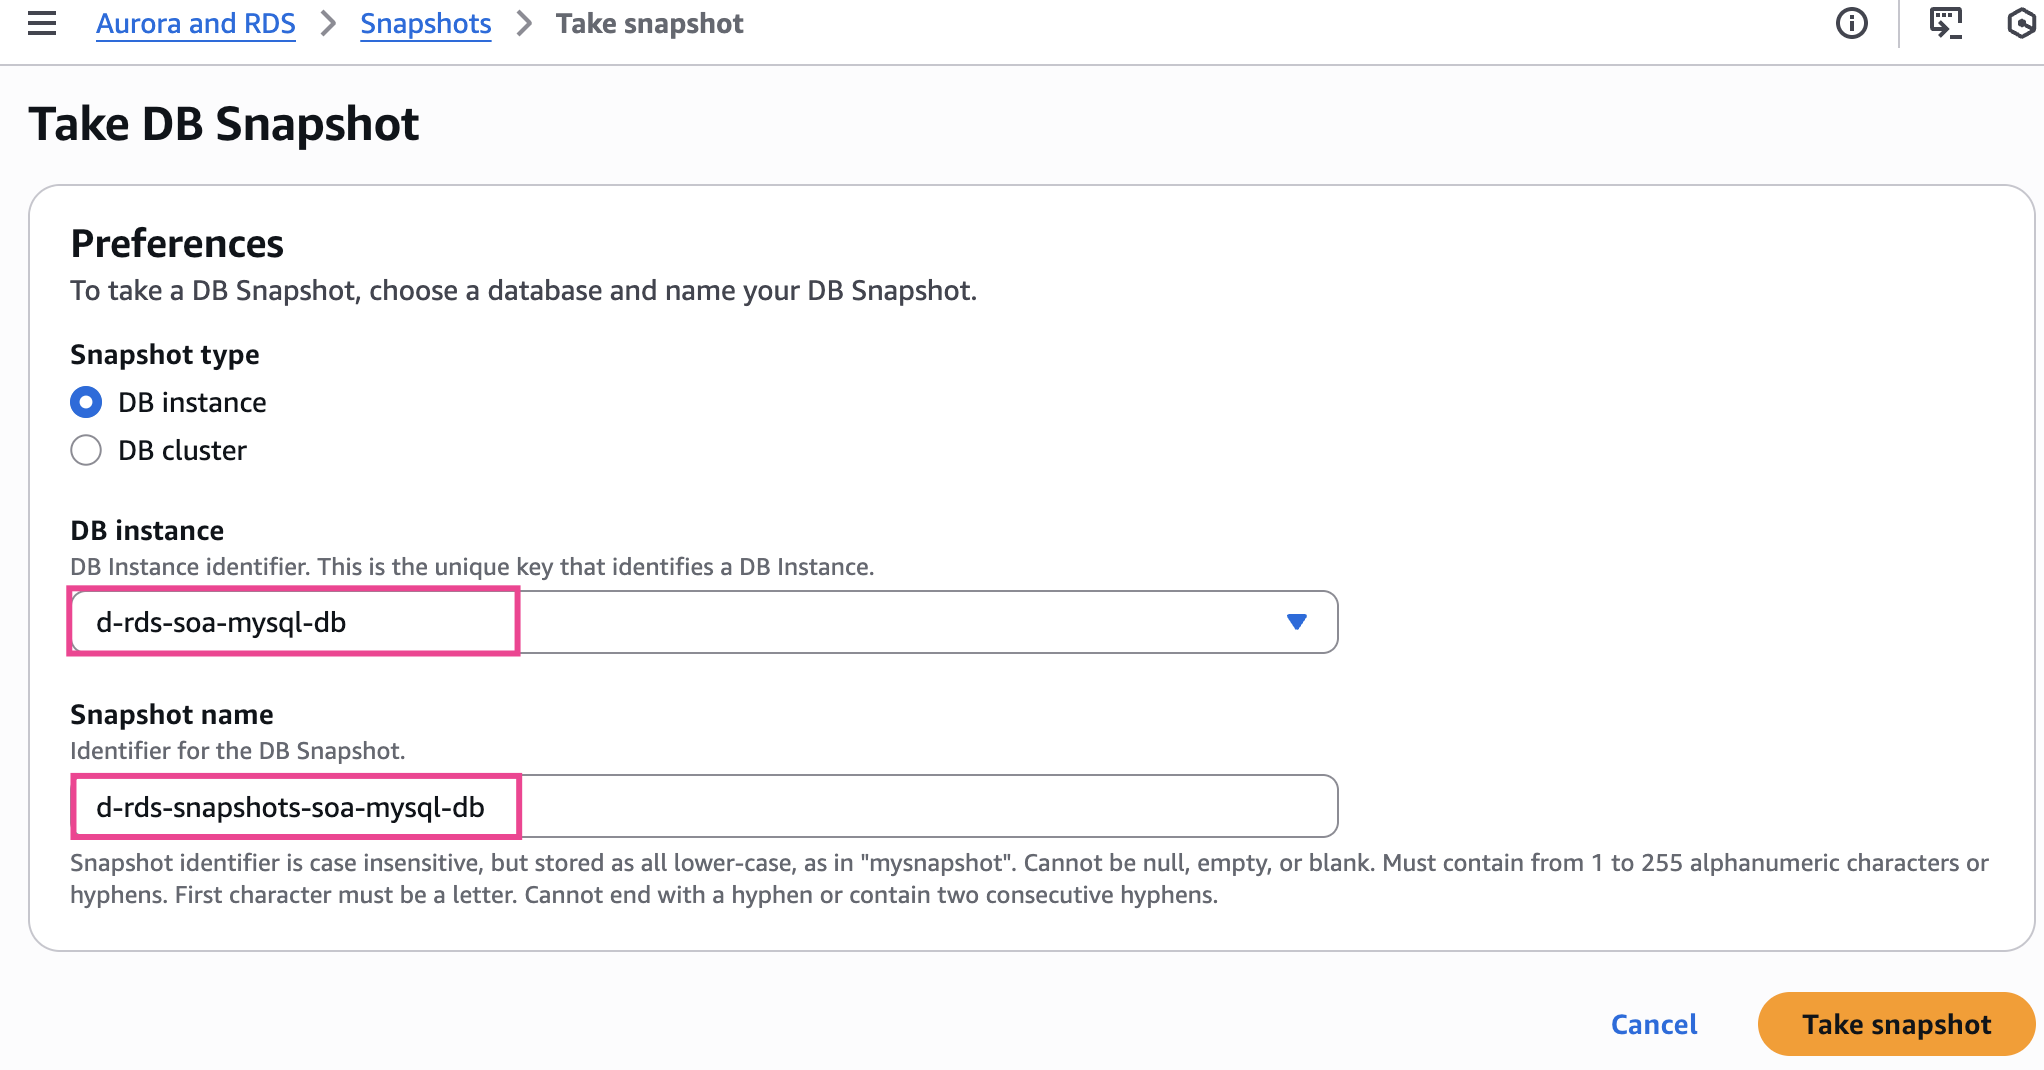
Aurora and RDS -> Snapshots -> Take snapshot
- Snapshot type: DB instance
- DB instance:
d-rds-soa-mysql-db - Snapshot name:
d-rds-snapshots-soa-mysql-db
Đợi 3-5 phút để quá trình snapshot hoàn tất
Bản snapshot vừa tạo cũng được mã hoá với default AWS KMS key aws/rds (không thể share được)
2.6. Copy Snapshots và encrypt với KMS key
Để share snapshot cho Account khác, chúng ta cần mã hoá lại bằng cách copy snapshot và chỉ định key mã hoá
- New DB snapshot identifier:
d-rds-snapshots-soa-mysql-db-for-share - Destination Region:
US East (N. Virginia) - AWS KMS key:
d-kms-soa-mysql-db
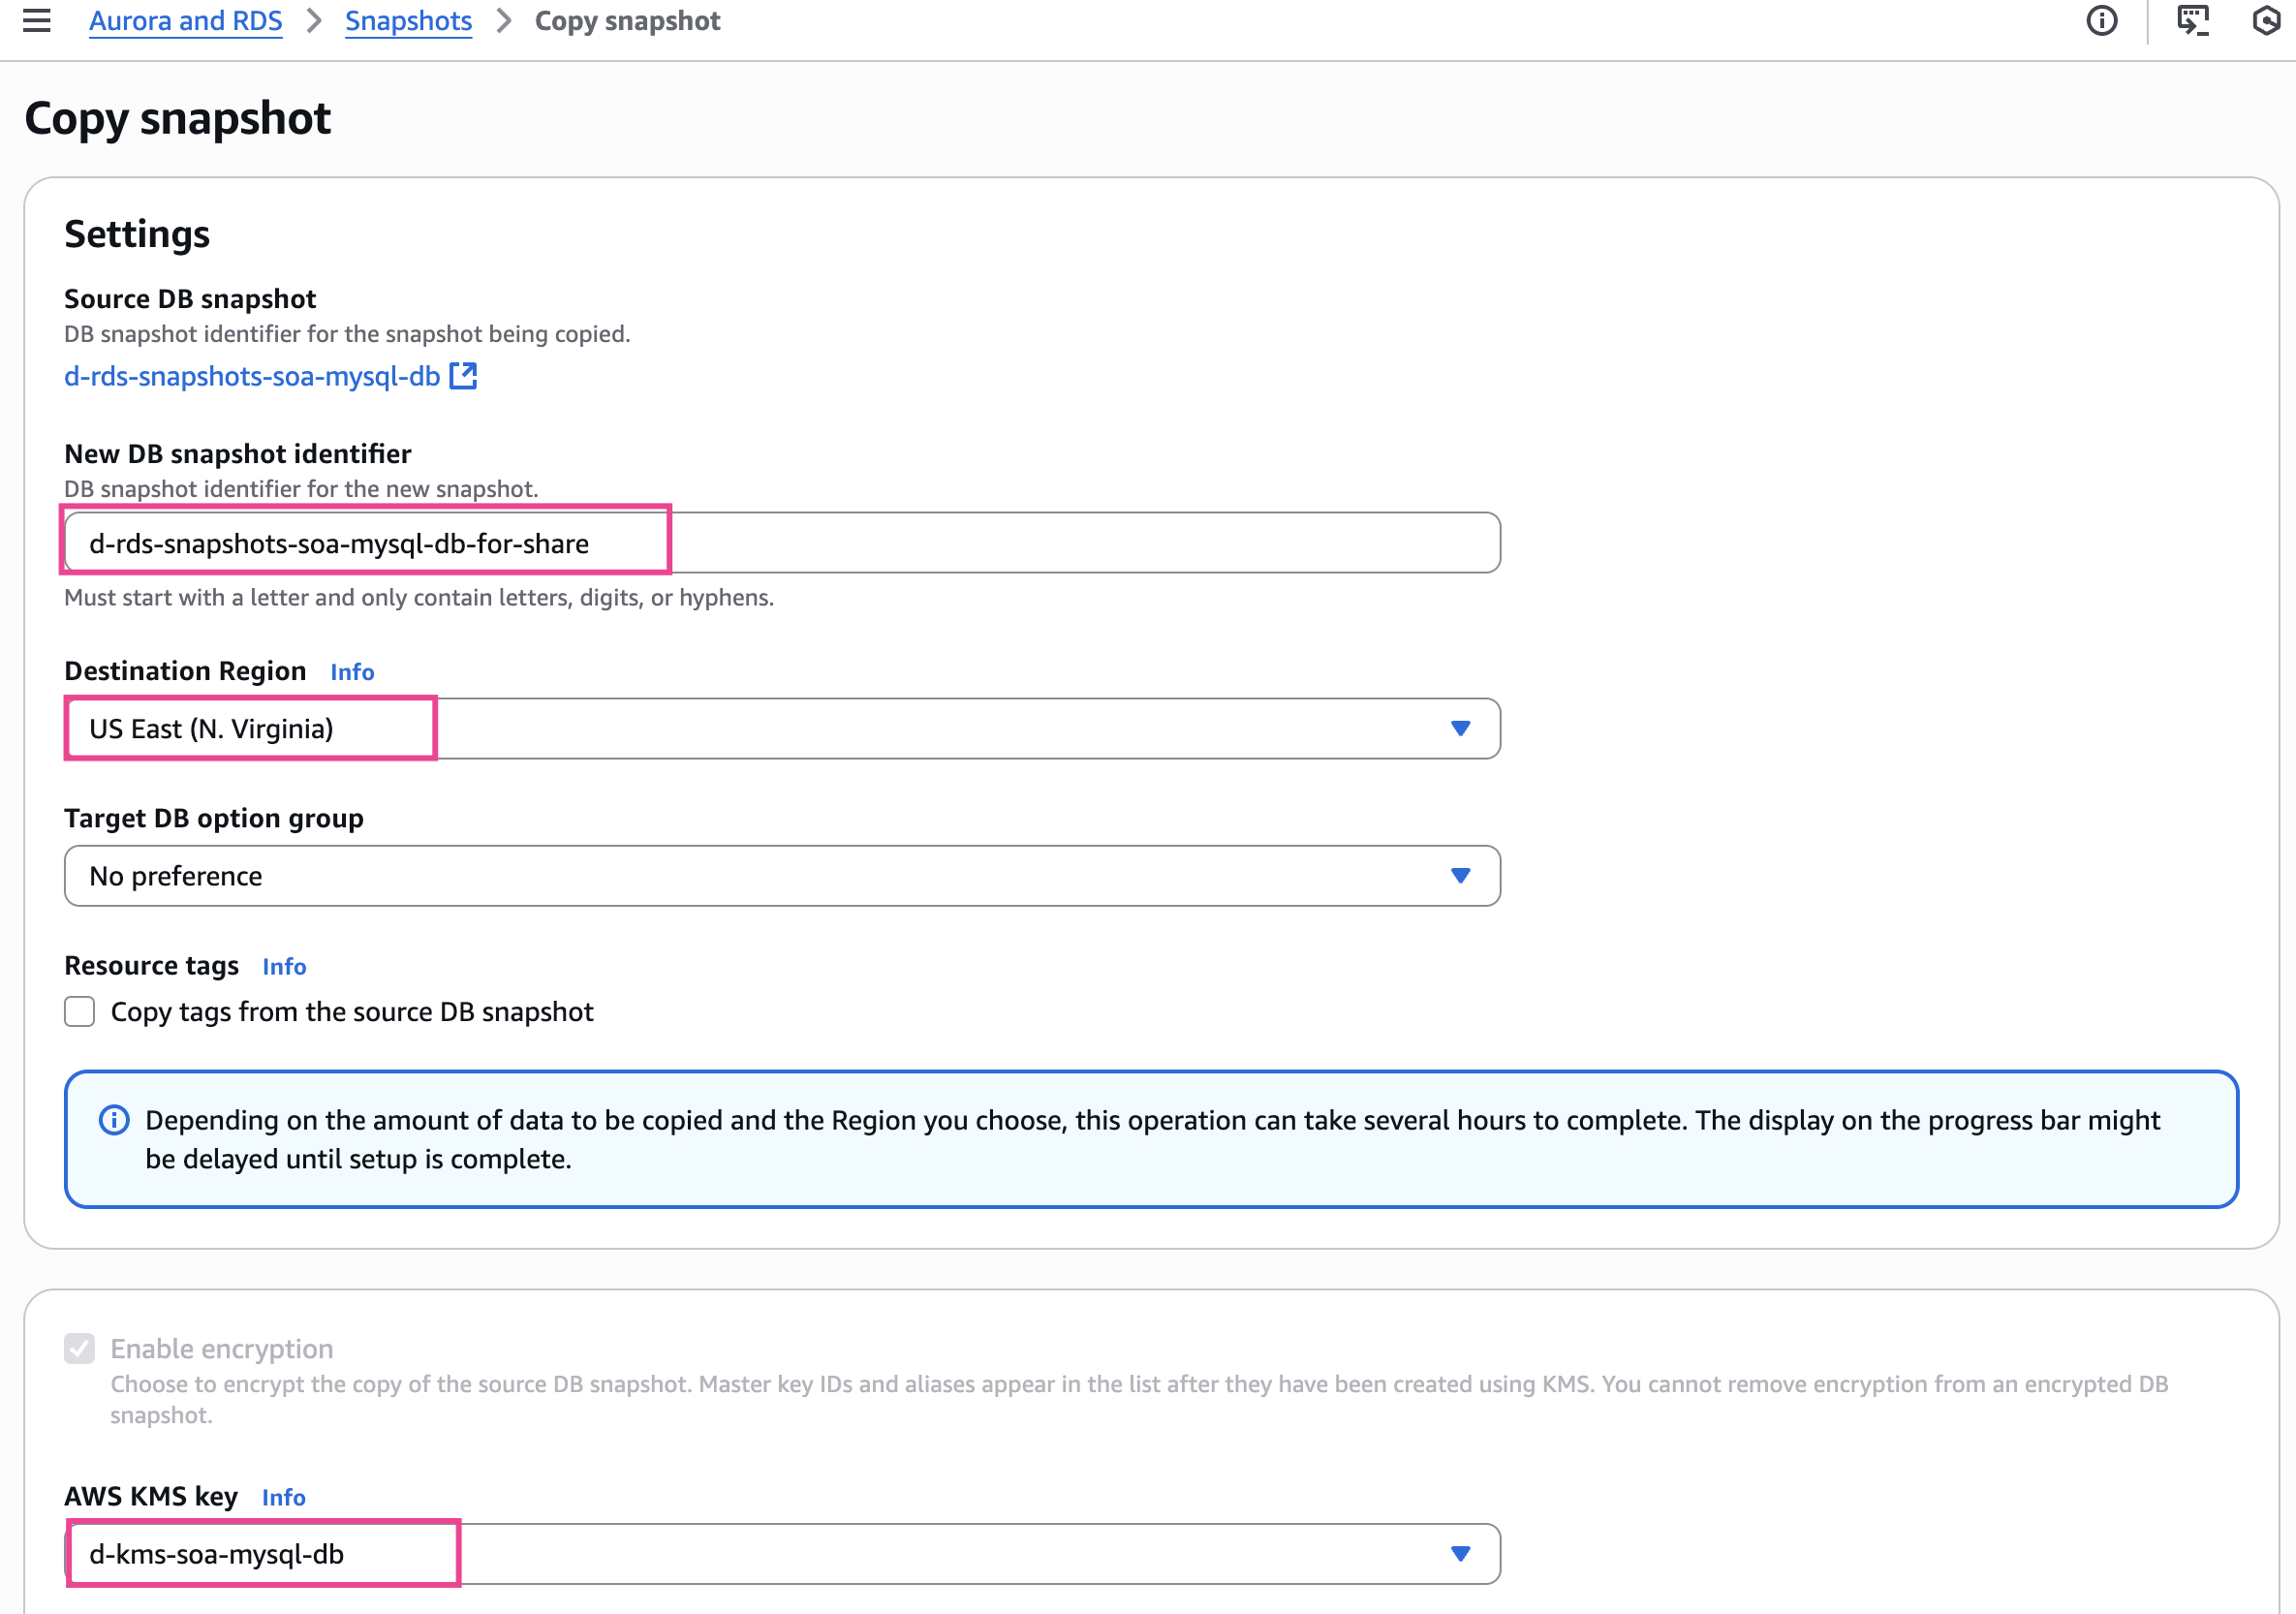
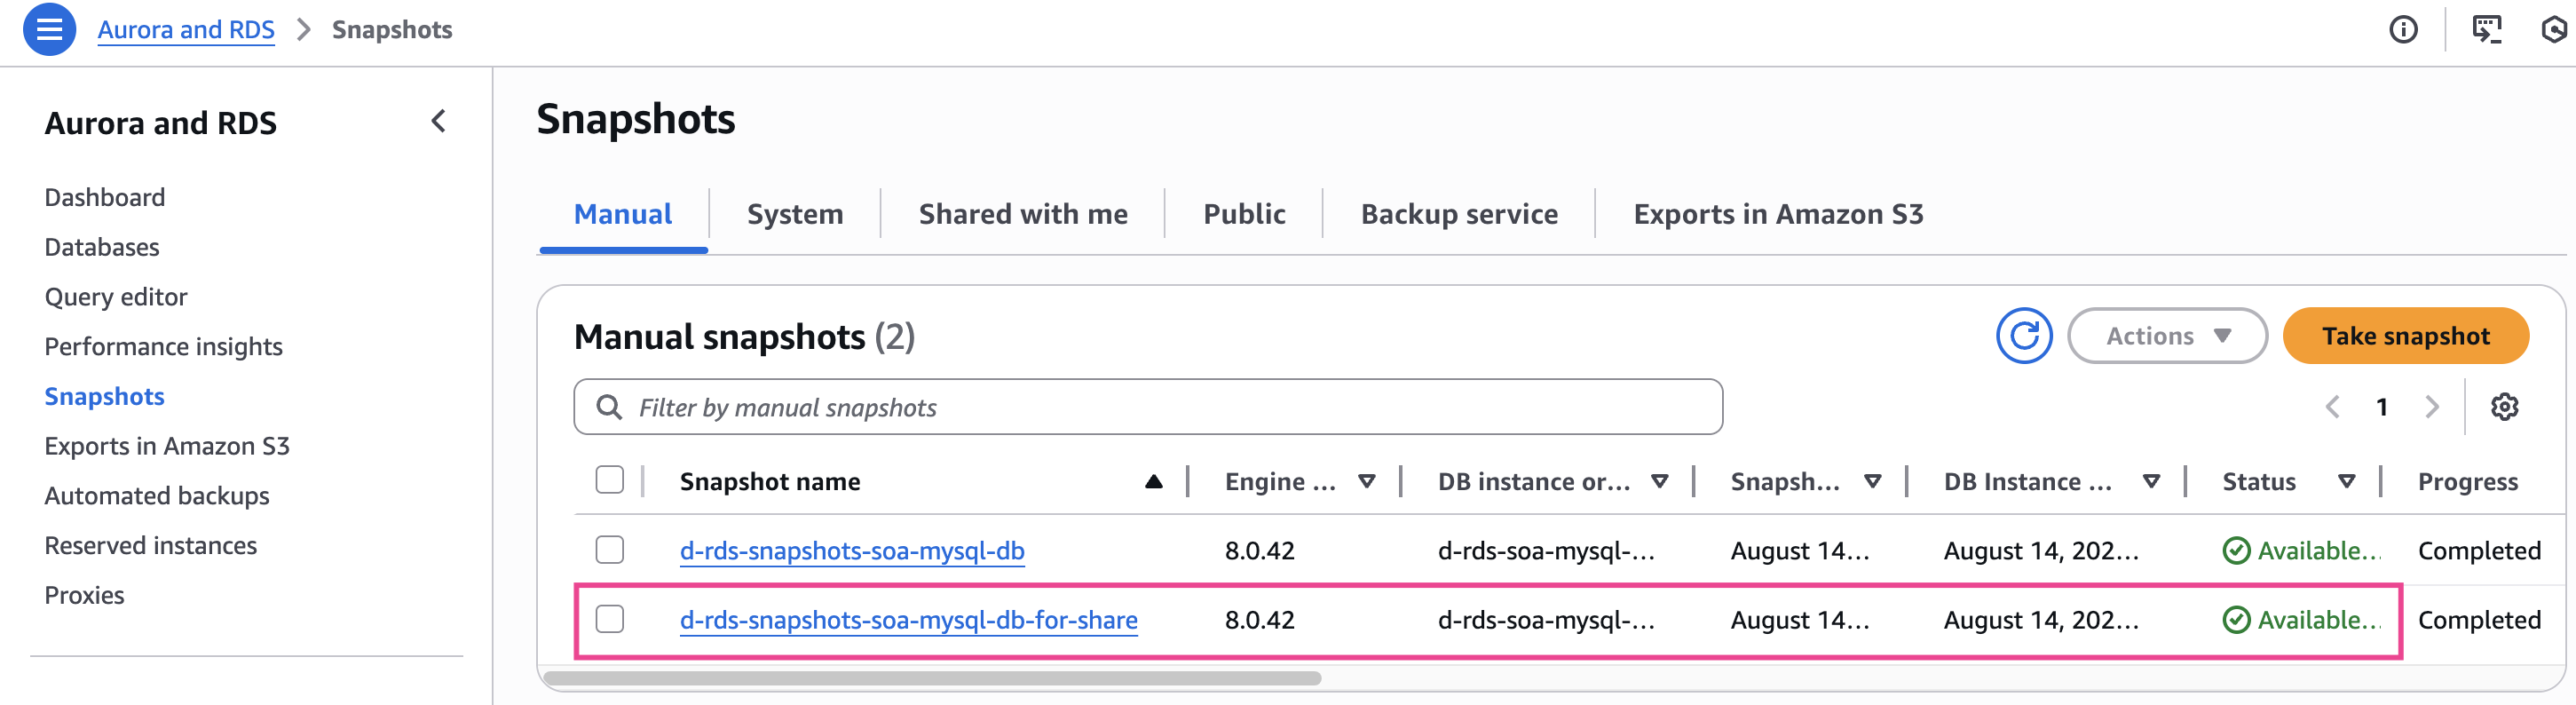
Chúng ta tiếp tục đợi 3-5 phút để bản copy snapshot ở trạng thái Available
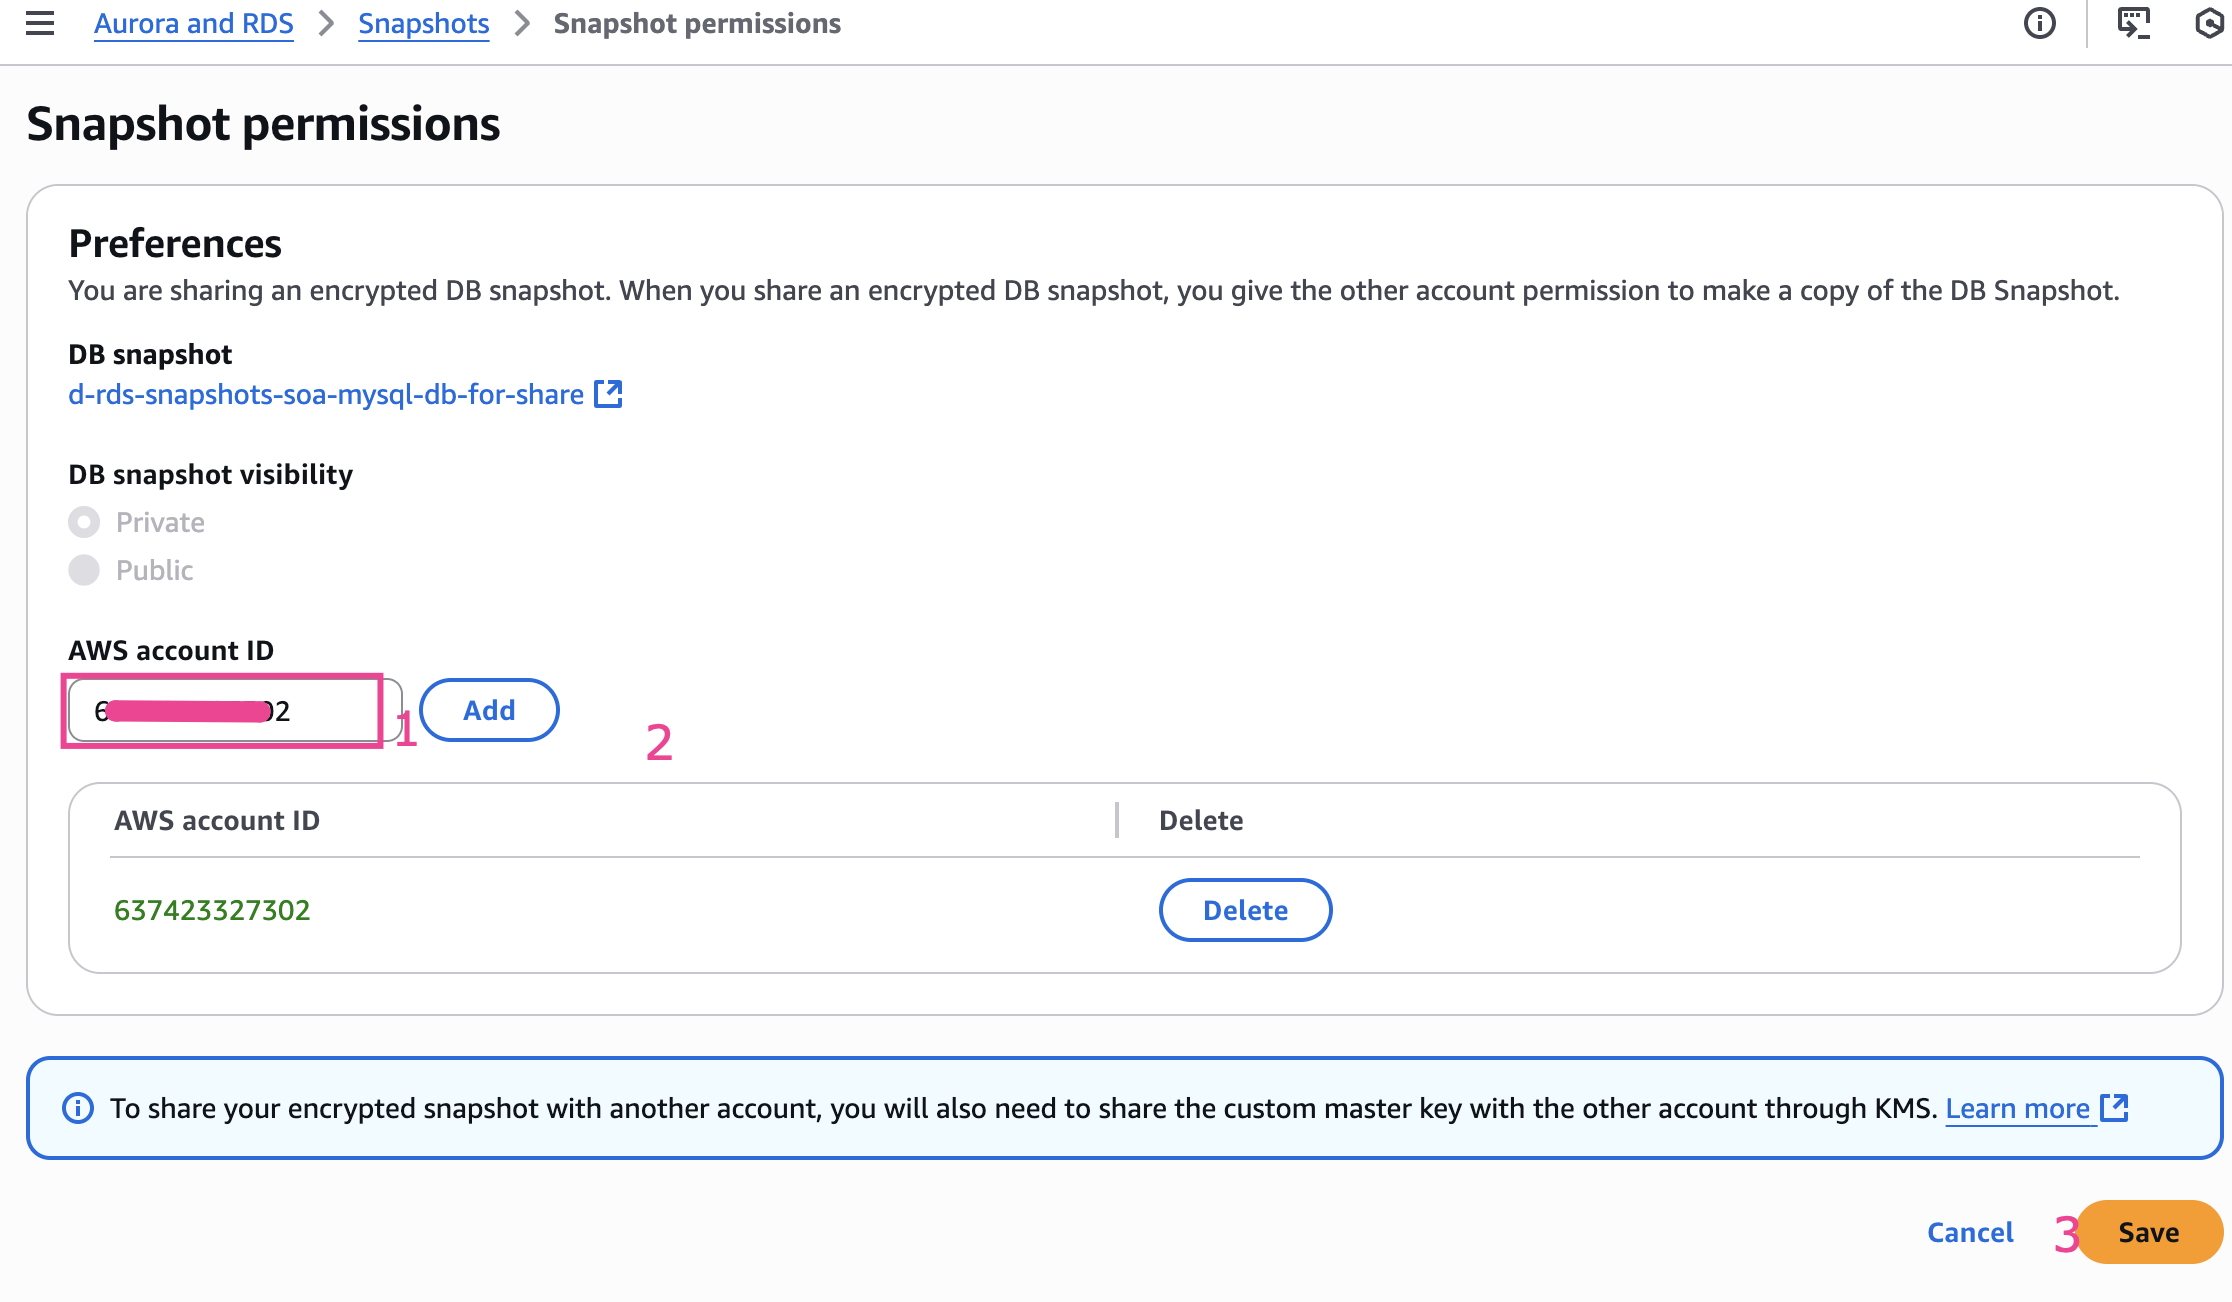
2.7. Share Snapshots across account
Đầu tiên chúng ta sẽ share snapshot
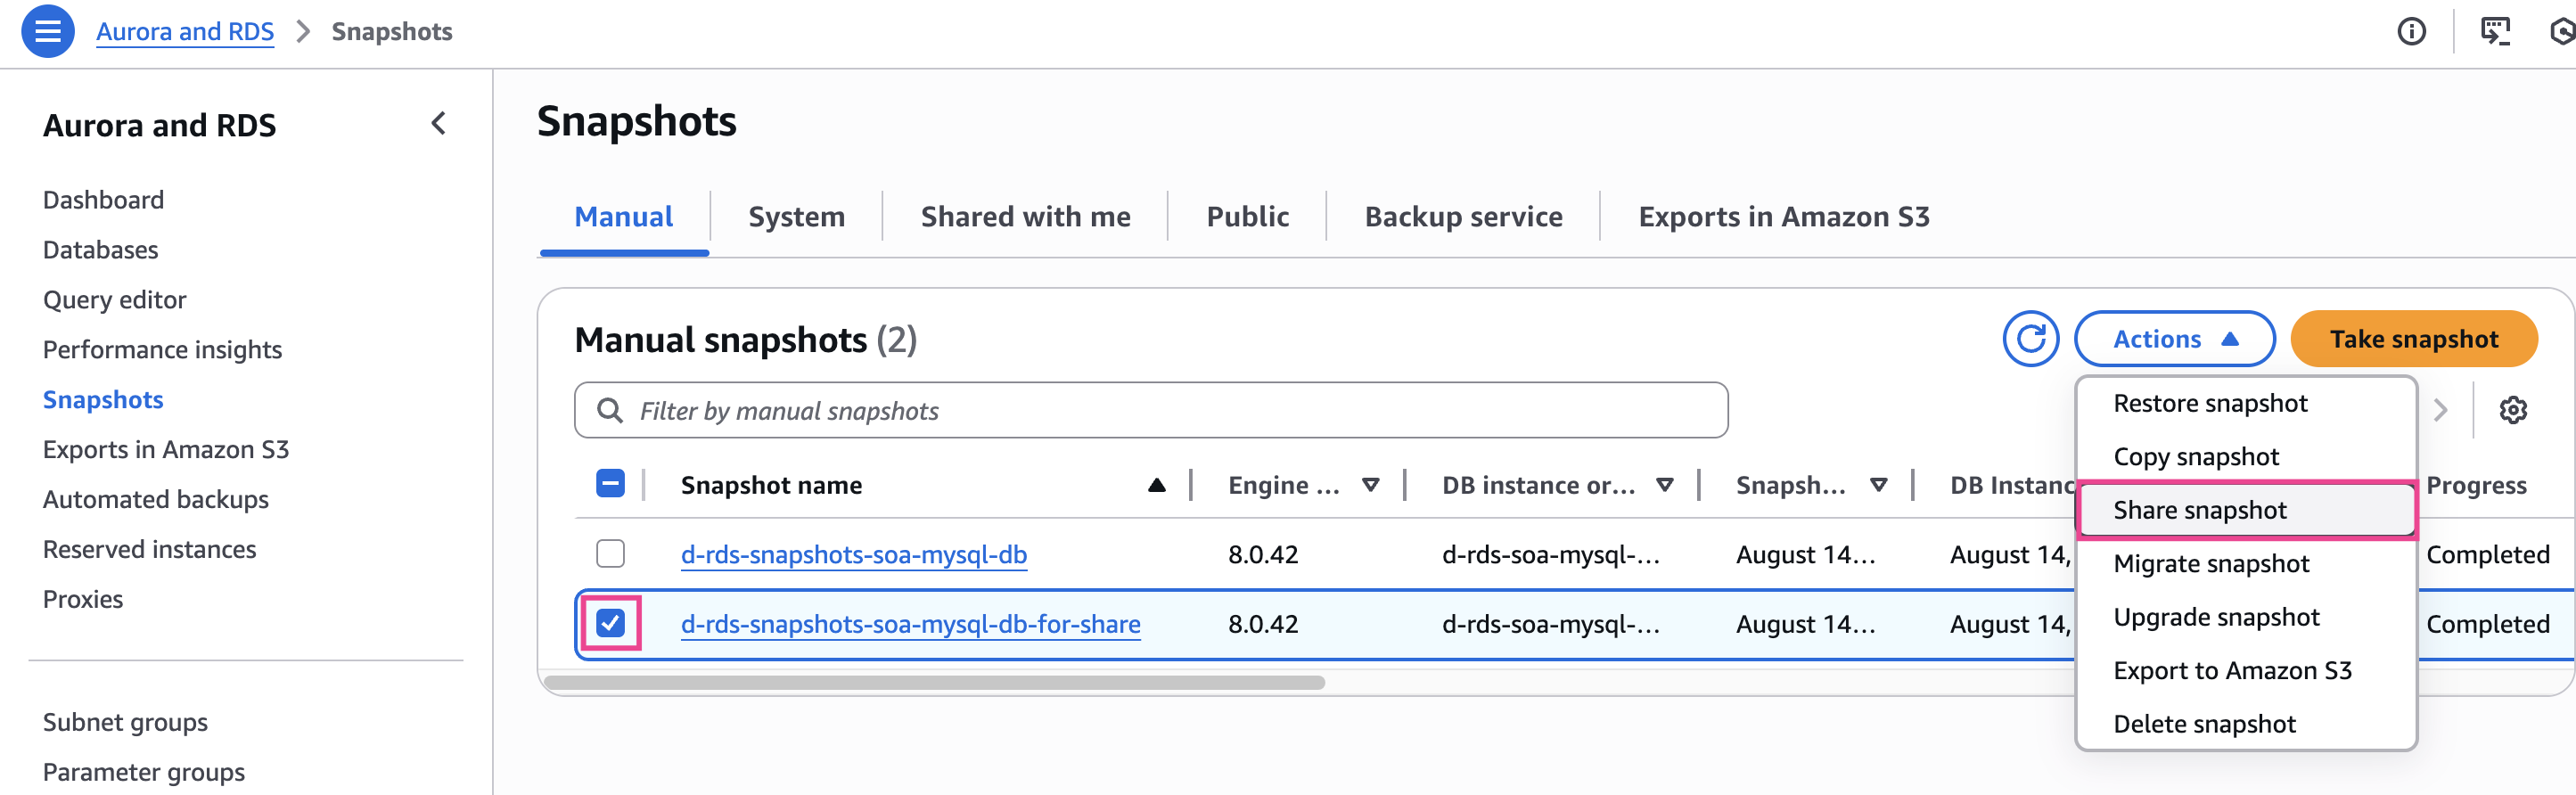
- Nhập Prod Account ID (Account mà mình muốn share)
- Nhấn Add
- Save
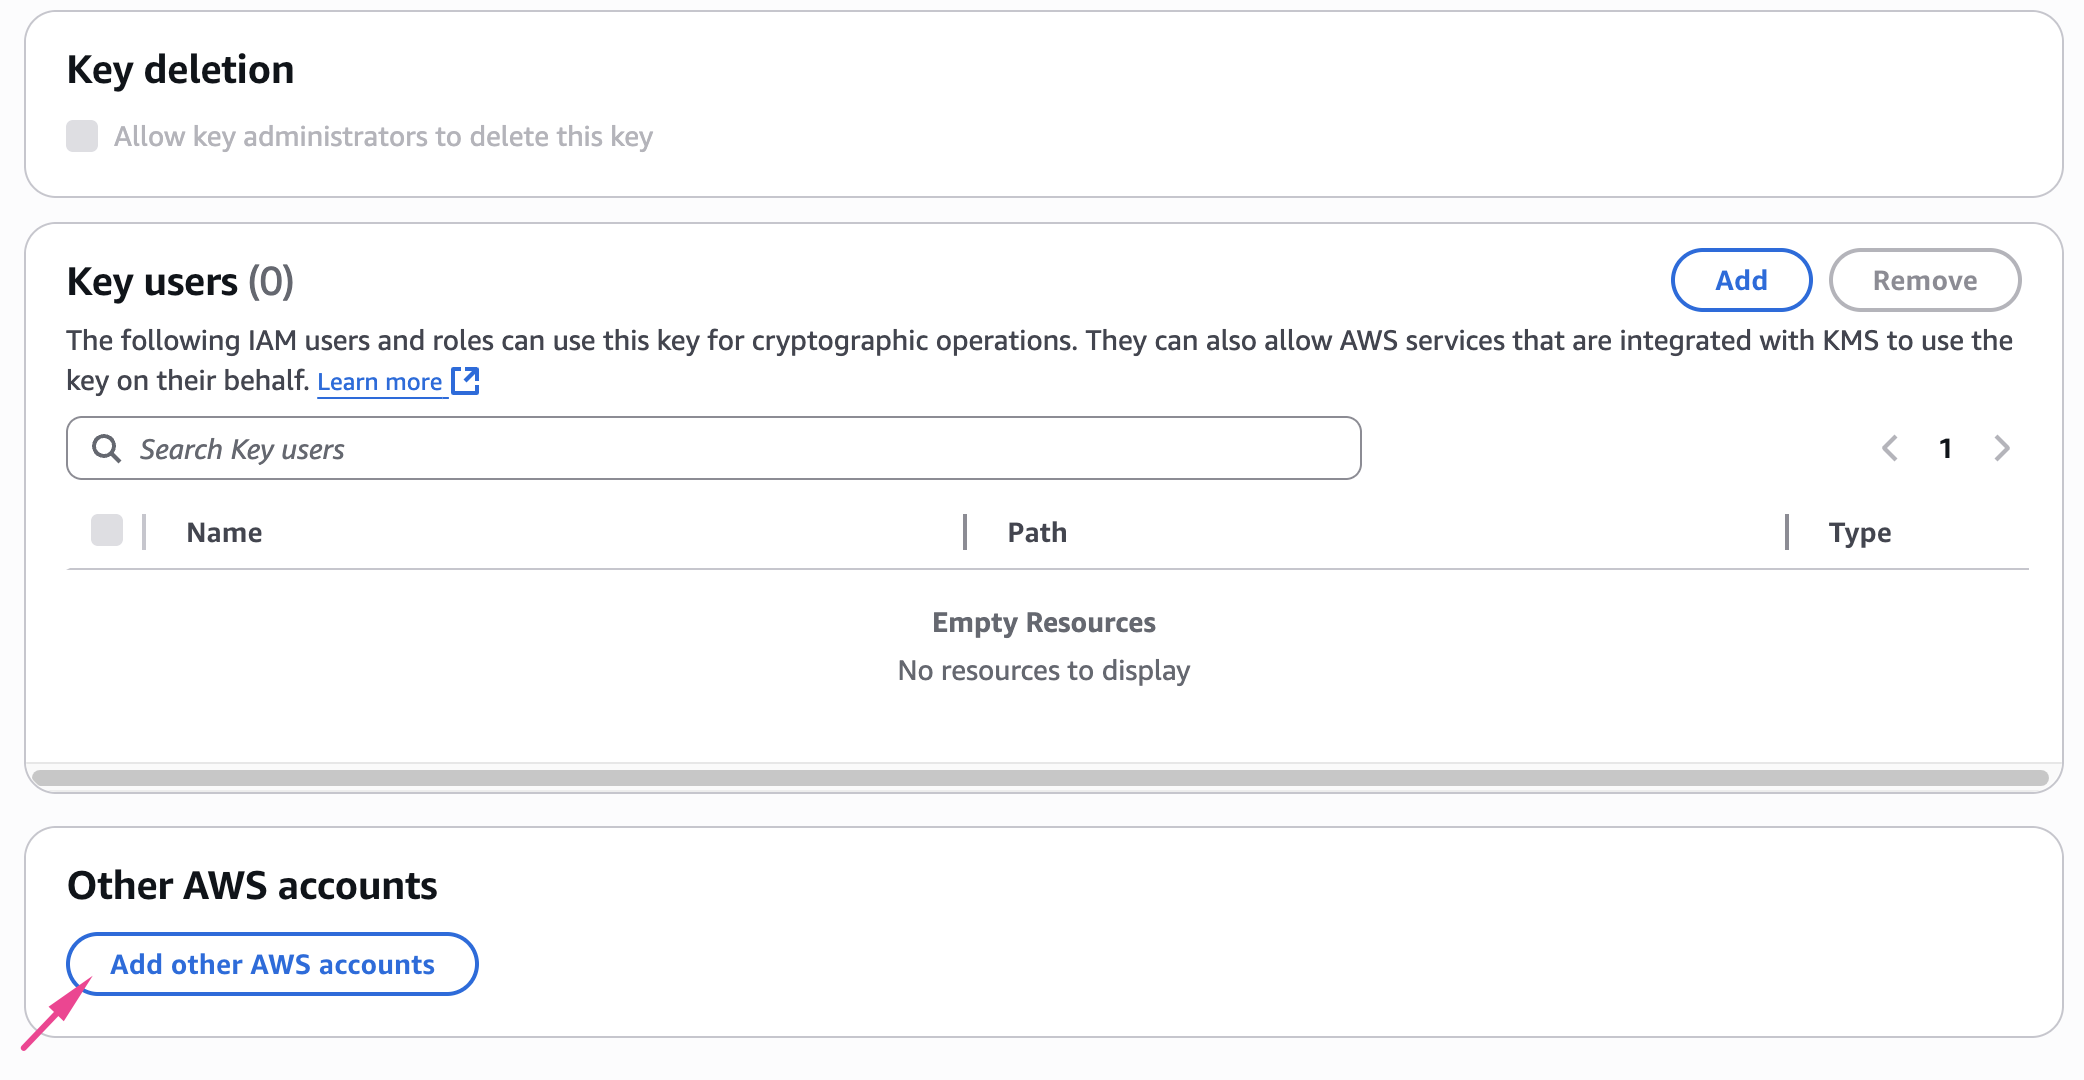
Tiếp theo chúng ta cần share quyền truy cập đến KMS Key thông qua việc update Key policy

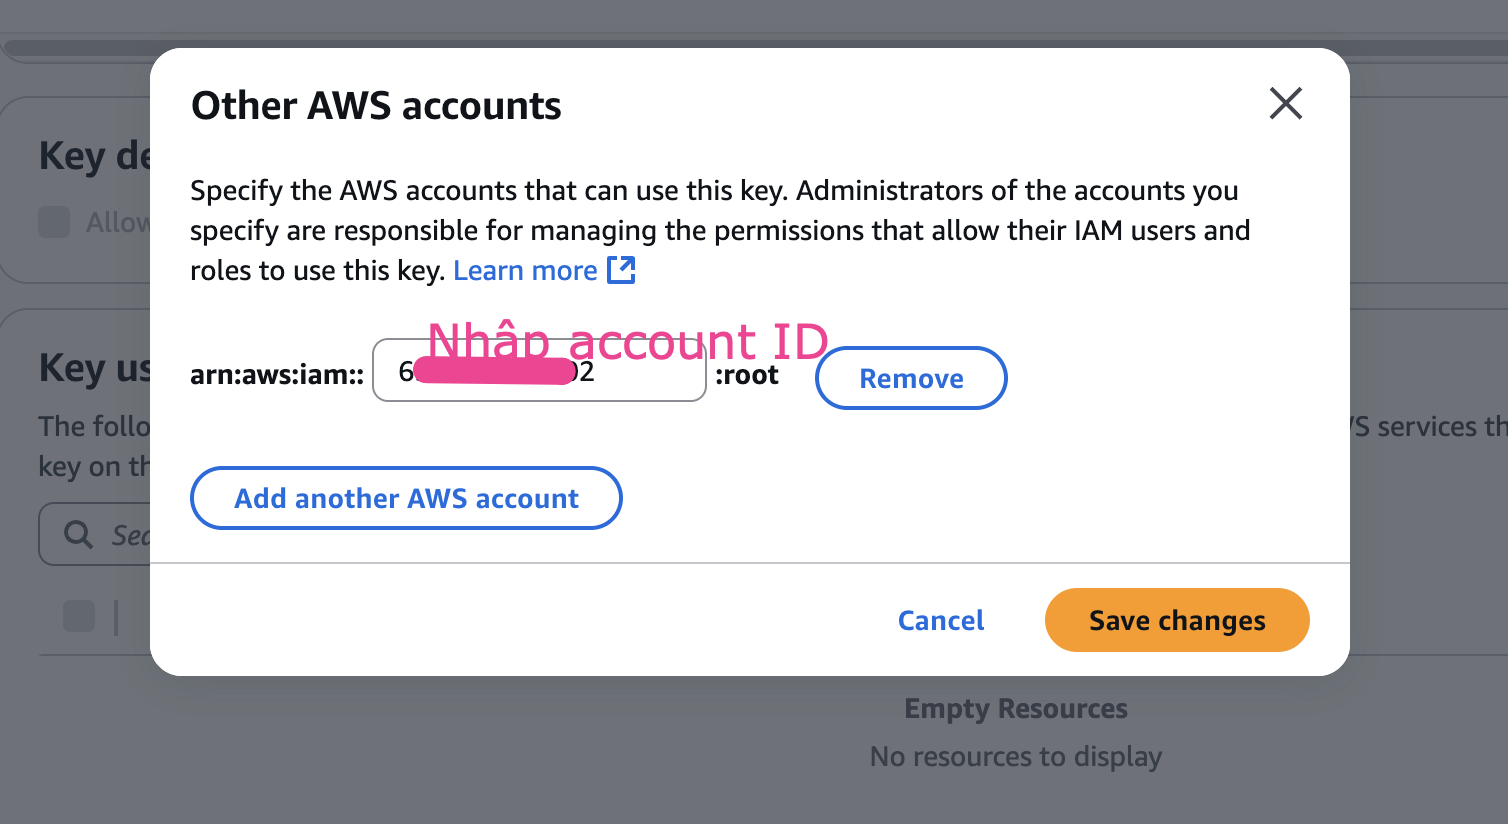
Tại Tab Key policy -> Add other AWS account
Nhập Account ID của Prod (account mình muốn share quyền access)
Đến đây thì setting phía Source Account (Develop) đã xong, chuyển sang Account Prod để thực hiện việc restore DB từ snapshot
💡 BỔ SUNG:
- Bản snapshot trước đó (mã hoá bằng default key) dù có thể share được nhưng không thể restore nên cần chú ý.
3. Setting phía Target Account (Prod)
Các setting ở mục 3 này là trên Prod Account
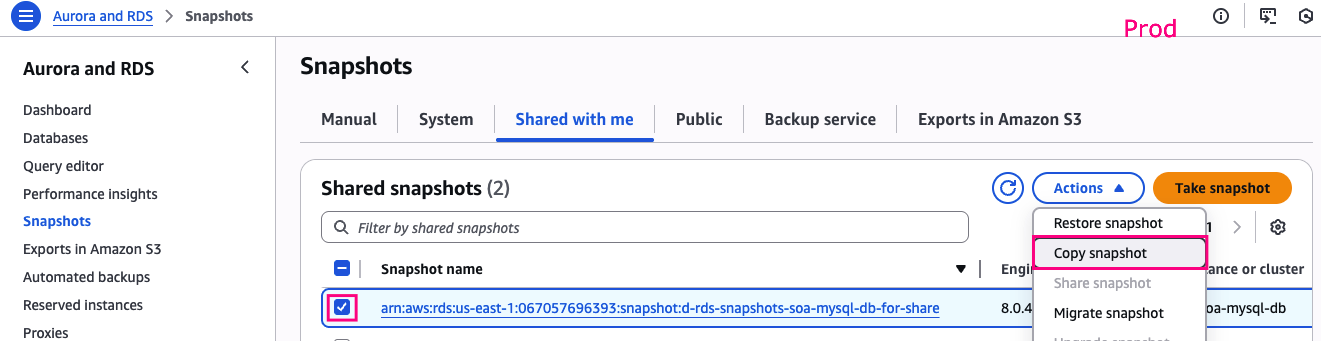
Nếu trong AWS Target Account có snapshot ở mục shared with me thì OK. Shared snapshot không thể restore trực tiếp nên cần copy snapshot để sử dụng.

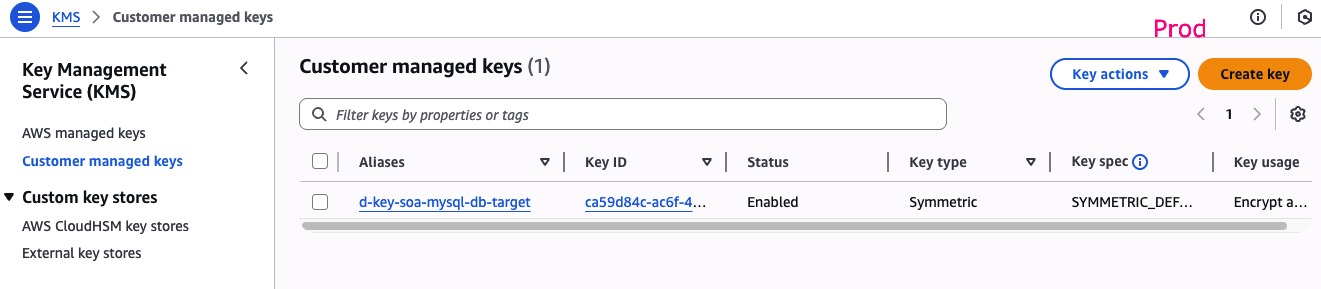
3.1 Create KMS Key
KMS -> Customer managed keys -> Create key
Cách tạo key xem ở bước 2.4
- Name:
d-key-soa-mysql-db-target
3.1 Copy snapshot và mã hoá lại
- New DB snapshot identifier:
d-rds-snapshots-mysql-db-for-share - Destination Region:
US East (N. Virginia) - AWS KMS key:
d-key-soa-mysql-db-target
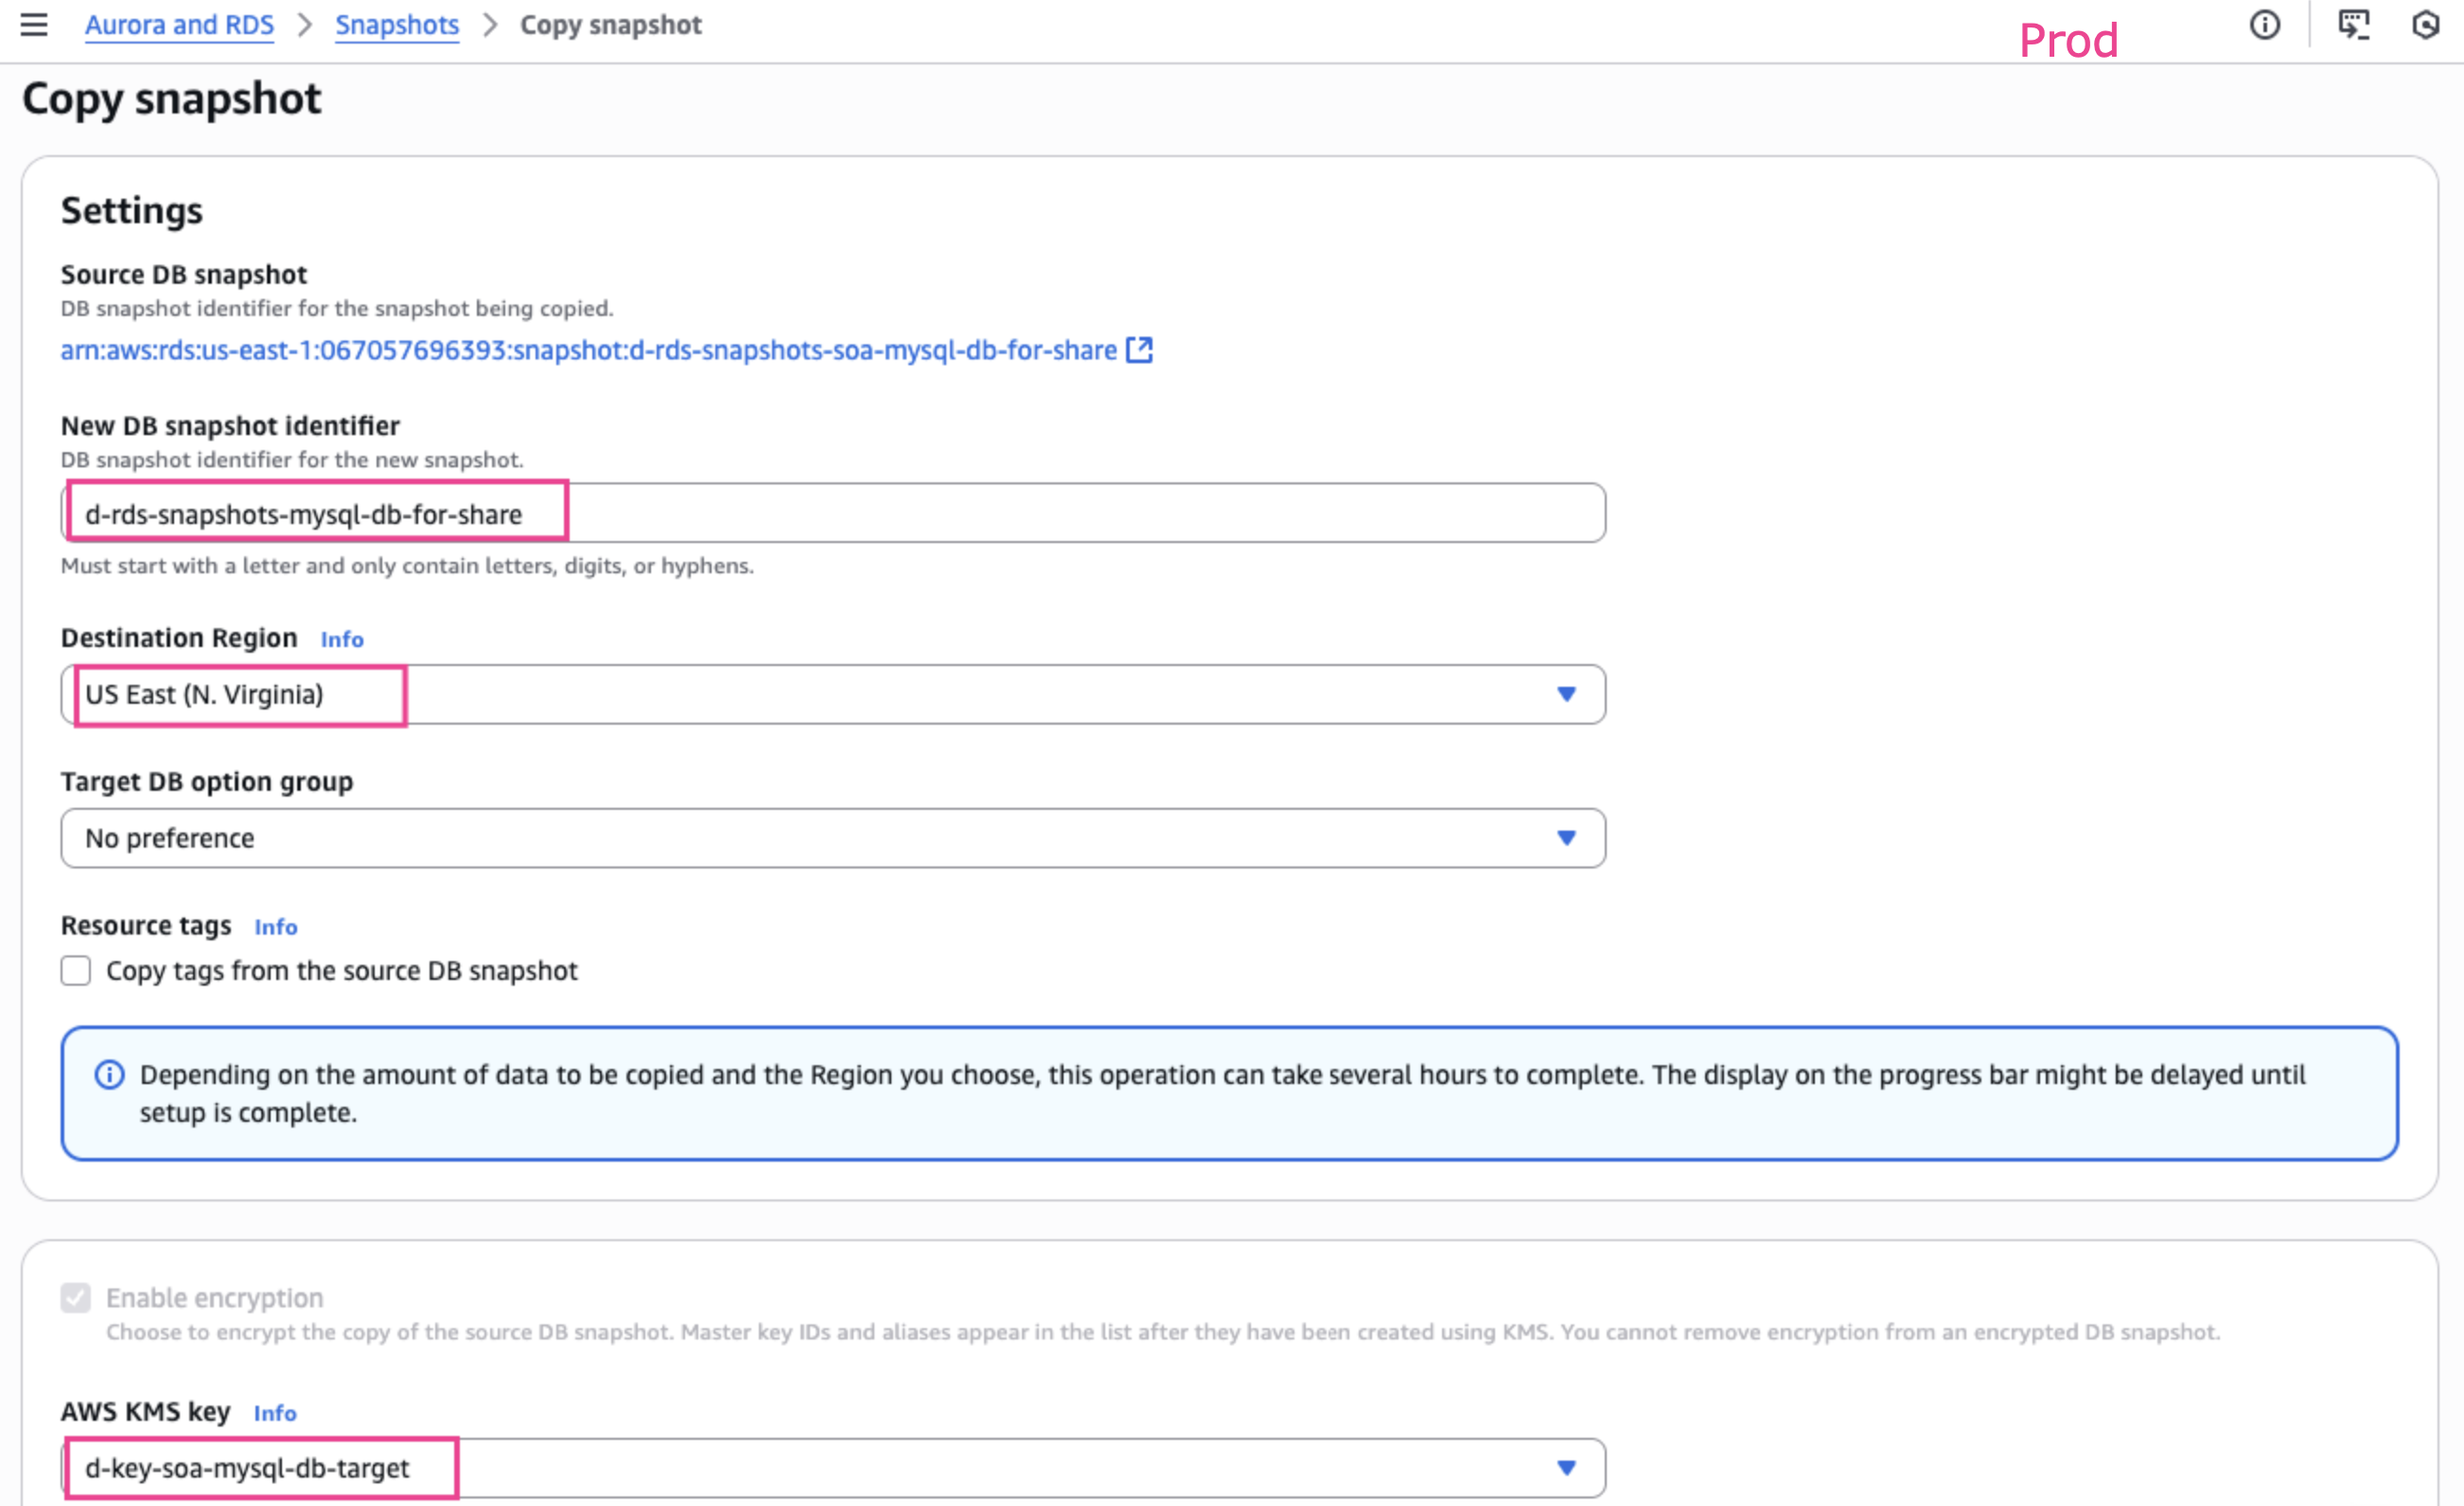
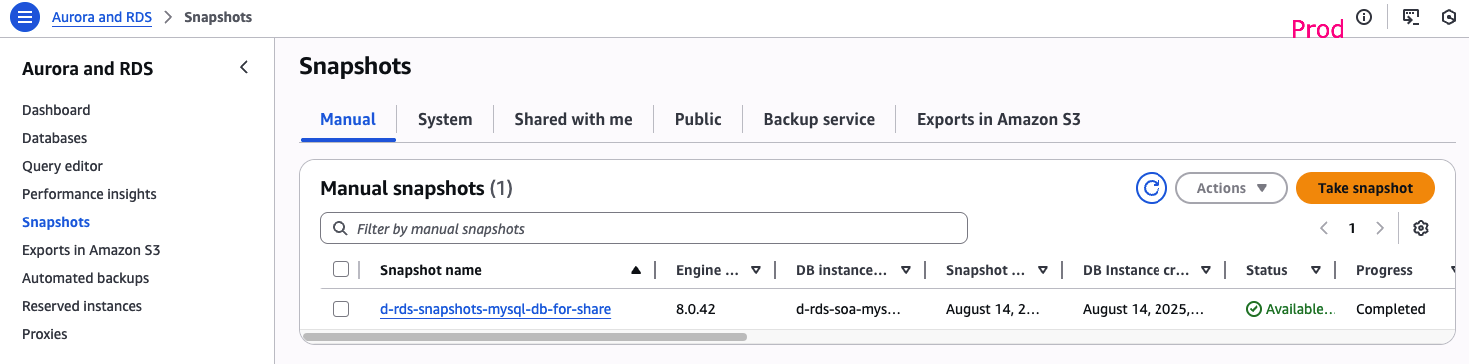
Đợi 3-5p thì bản copy snapshot sẽ Available
3.2 Restore DB từ snapshot
Đầu tiên chúng ta đi tạo Security group:
- Name:
d-sg-soa-mysql-db-target - Cho phép access Mysql from My IP (Cách làm tương tự như 2.1)
Tiếp theo Restore snapshot
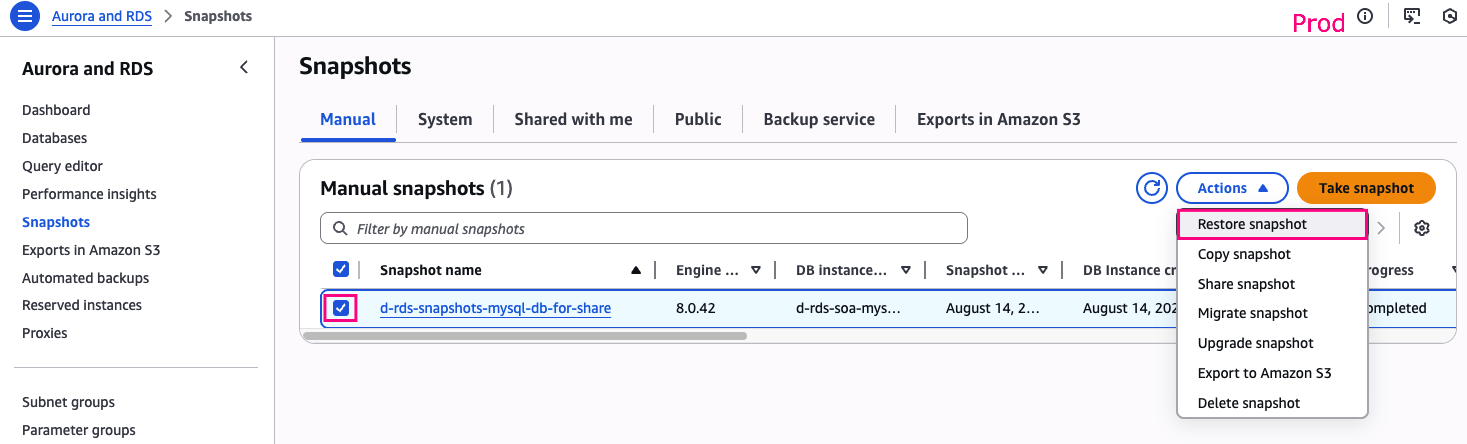
Restore snapshot
- DB engine: MySQL Community
- Deployment options: Single-AZ ⚠️
- DB instance identifier:
d-rds-soa-mysql-db-target - DB instance class: Burstable classes db.t3.micro
- Virtual private cloud (VPC): Default
- DB subnet group: default-vpc...
- Public access: yes ⚠️
- Existing VPC security groups:
d-sg-soa-mysql-db-target⚠️ - AWS KMS key:
d-key-soa-mysql-db-target⚠️
Kết quả:

3.3. Access New DB sau khi restore và kiểm tra dữ liệu
- Username:
admin - Password:
MyPassword1!- chính là Password của source DB
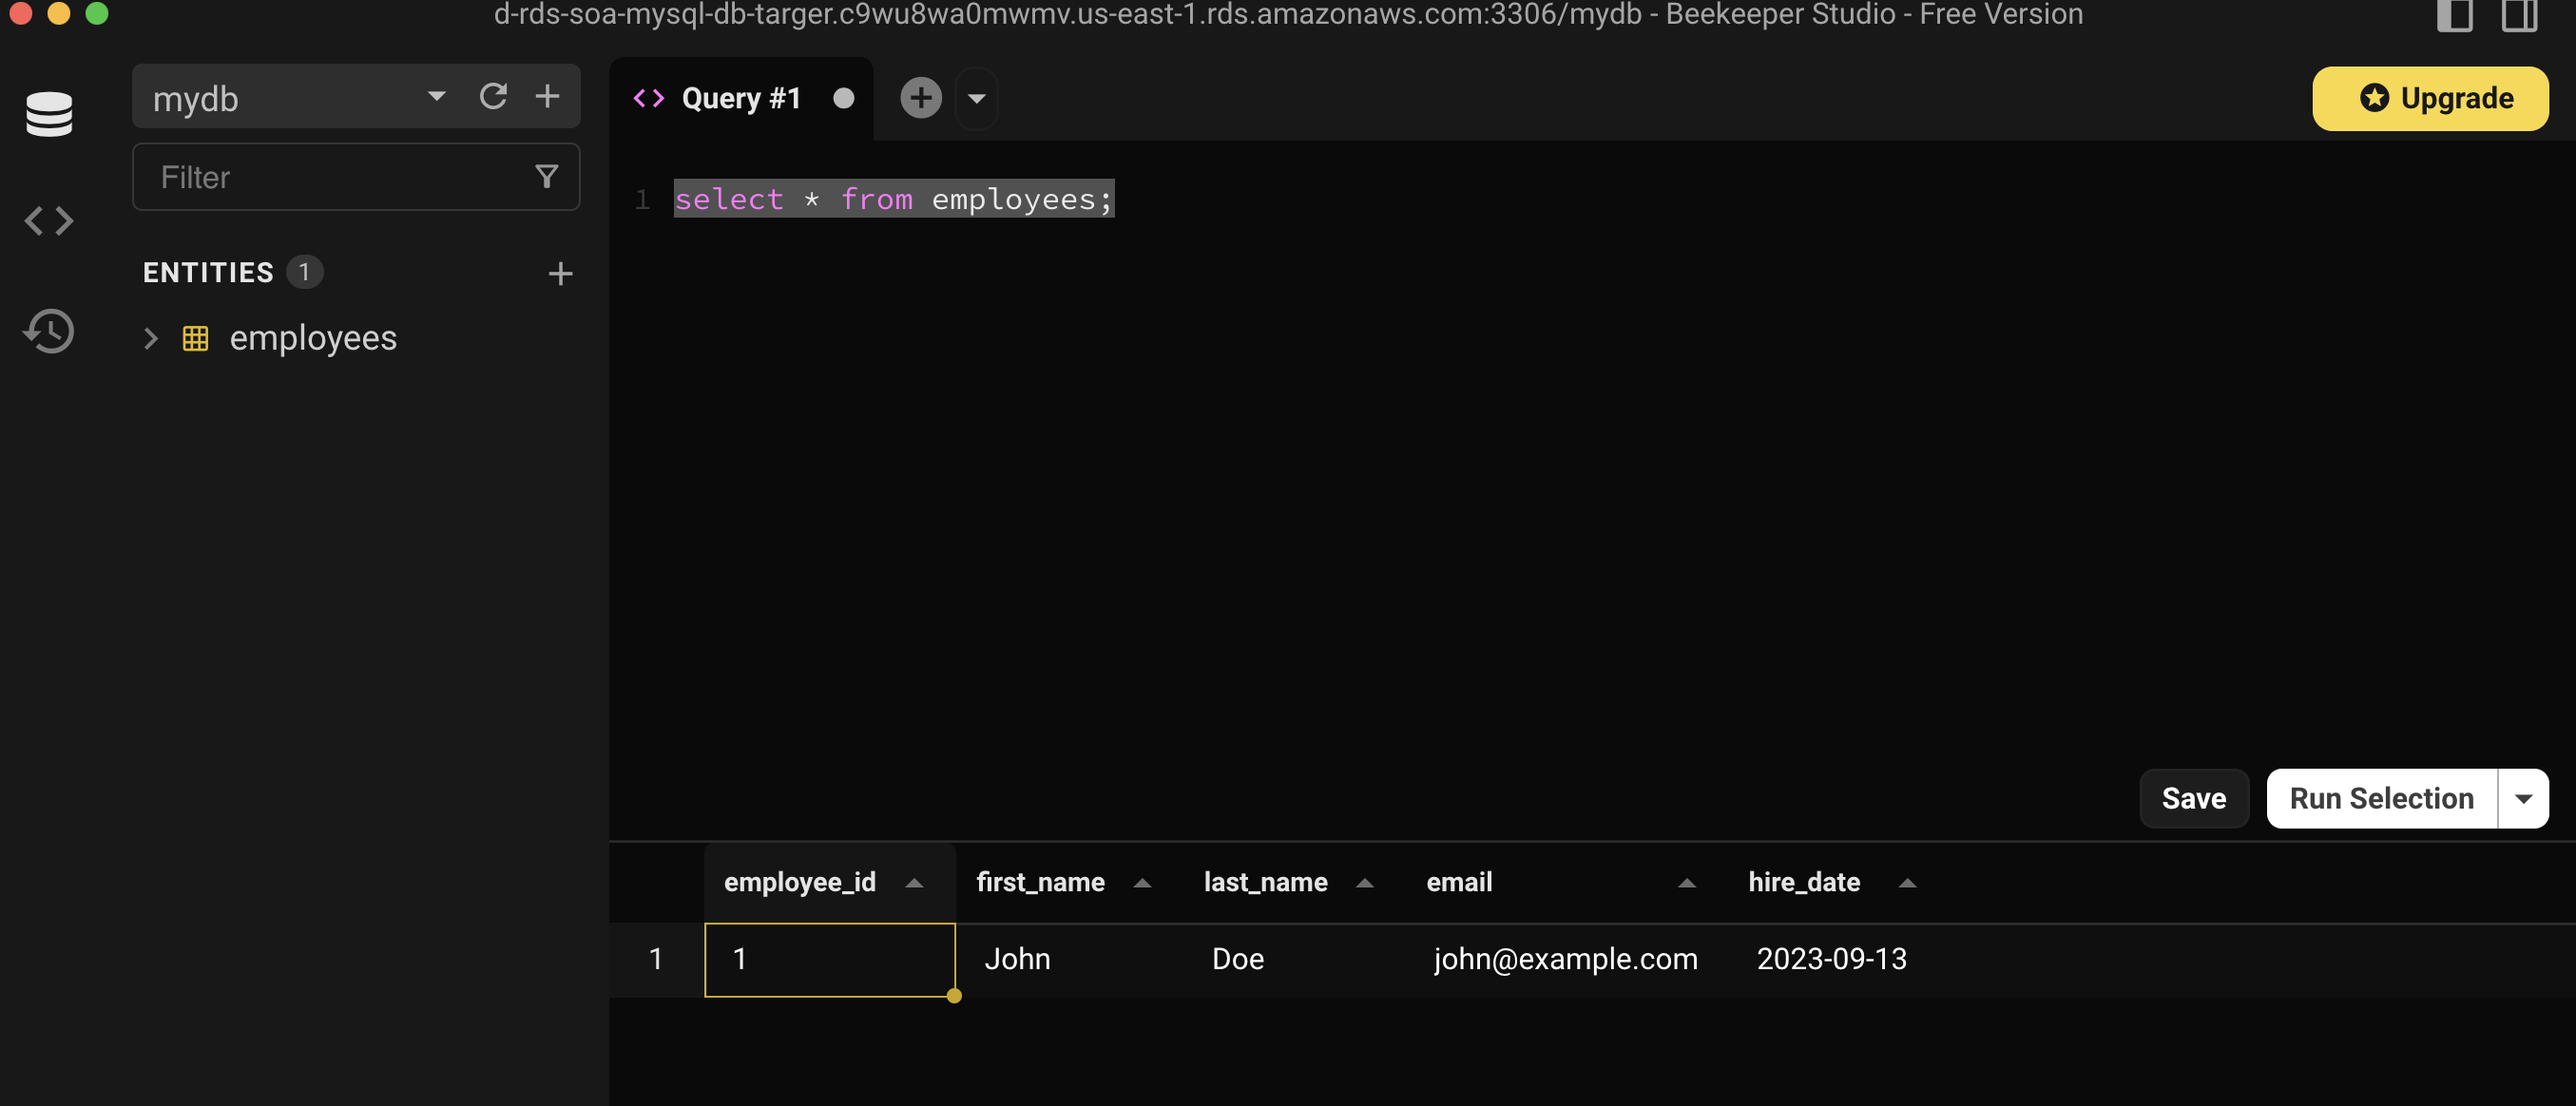
Vậy là DB sau khi restore đã có dữ liệu giống DB gốc
Clean up resources
Phía Account Develop
- Xoá snapshot
d-rds-snapshots-soa-mysql-dbd-rds-snapshots-soa-mysql-db-for-share
- Xoá database:
d-rds-soa-mysql-db - Xoá key:
d-kms-soa-mysql-db - Xoá security group:
d-sg-SOA-mysql-db
Phía Account Prod
- Xoá snapshot:
d-rds-snapshots-mysql-db-for-share - Xoá database:
d-rds-soa-mysql-db-target - Xoá key:
d-key-soa-mysql-db-target - Xoá security group:
d-sg-soa-mysql-db-target
Giữ lại cấu hình multi account để dùng cho các bài lab khác (nếu cần)