Creating and Subscribing to SNS Topics, Adding SNS event for S3 bucket
Chúng ta sẽ đi xây dựng kiến trúc gồm nhừng thành phần sau:
- Create an SNS Topic
- Create 2 SQS Queue
- Subscribe to an SNS Topic (2 SQS Queue và Email)
- Create an S3 bucket
- Update an SNS Topic Access Policy
- Create an S3 Event
- Testing the SNS Notification
Lưu ý
- AWS Region: US East (N. Virginia) us-east-1
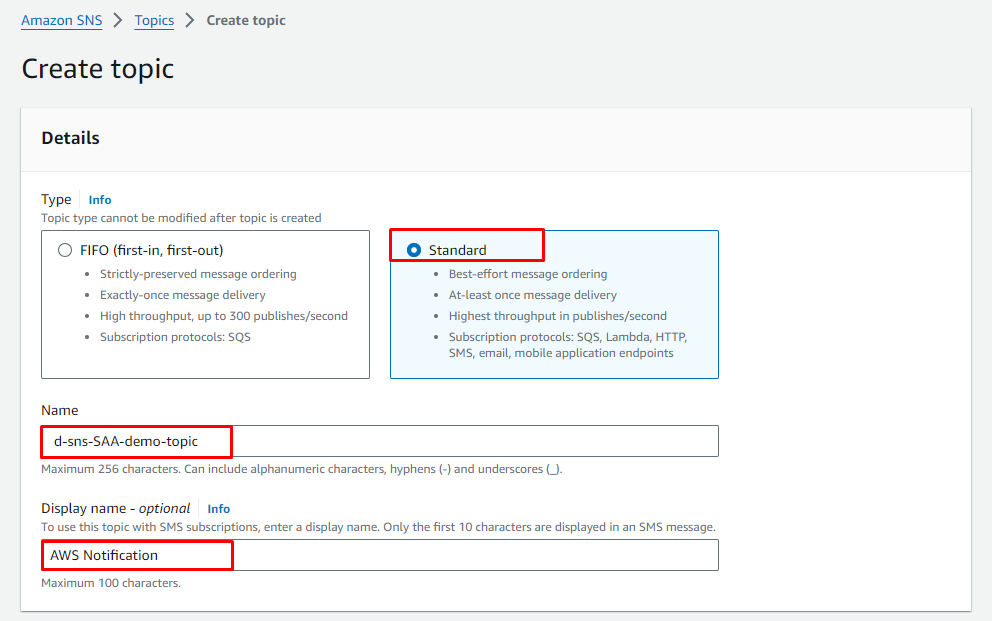
Create SNS Topic
Vào Console của SNS -> Click Topic -> Create topic
- Type:
Standard - Name:
d-sns-SAA-demo-topic - Display name - optional:
AWS Notification - Tags - optional:
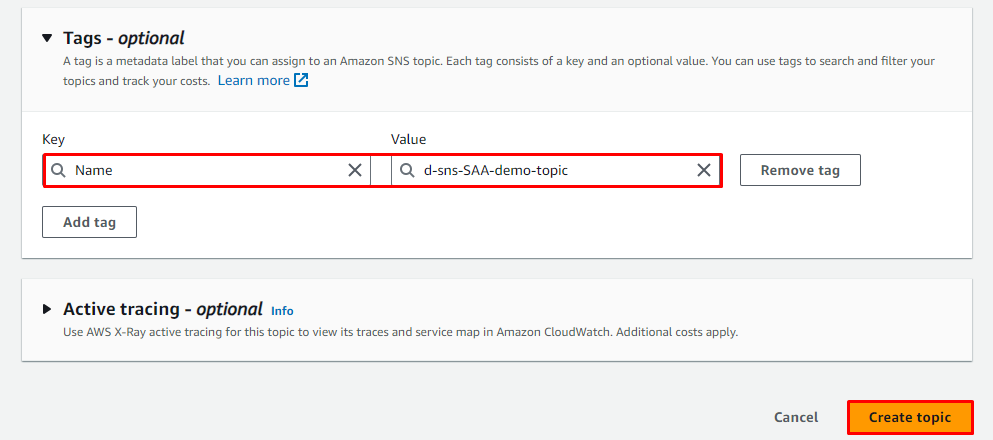
- Key:
Name - Value:
d-sns-SAA-demo-topic
- Key:
- Các thuộc tính khác để như default

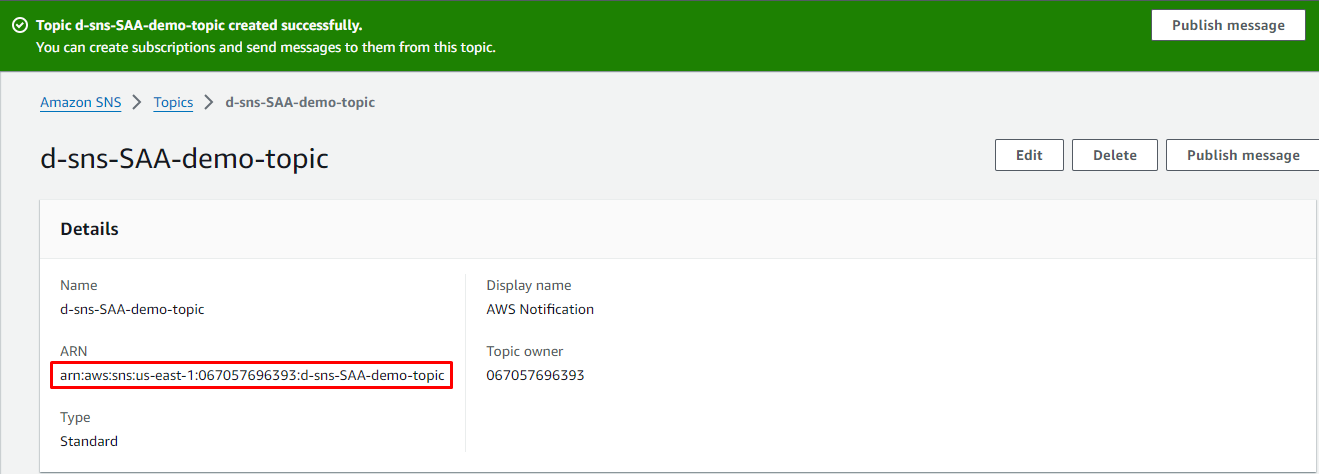
Sau khi tạo xong thì chúng ta sẽ copy giá trị ARN của SNS để lát nữa Setting policy sẽ dùng giá trị này.
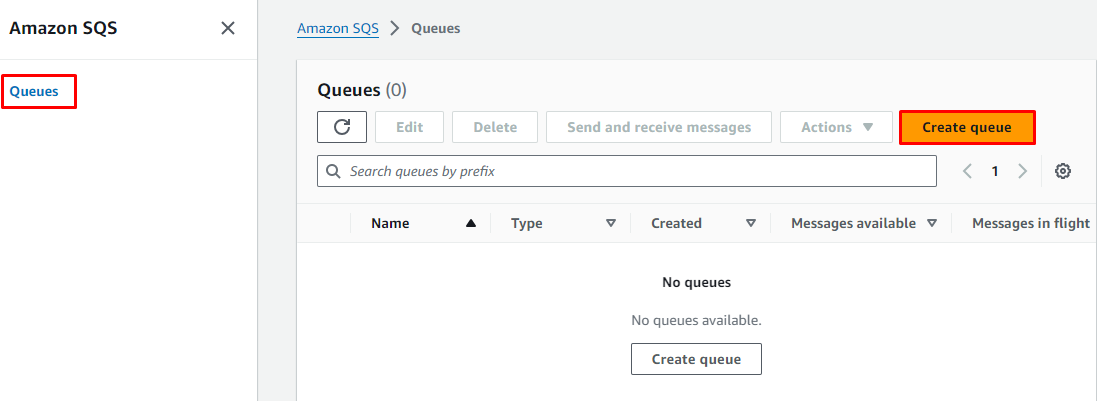
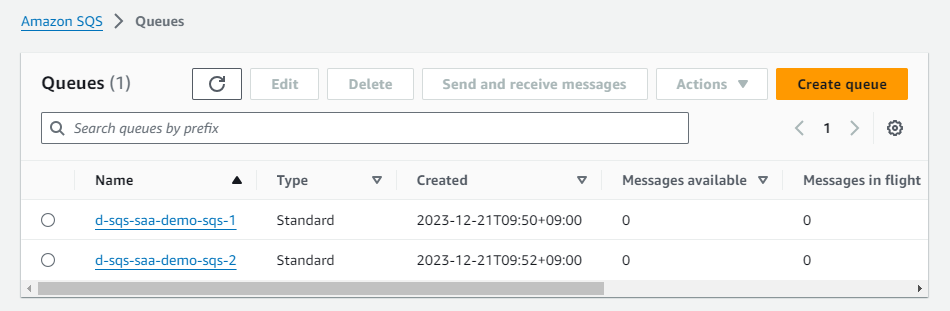
Create 2 SQS Queue
Vào Console của SQS -> CLick Create queue
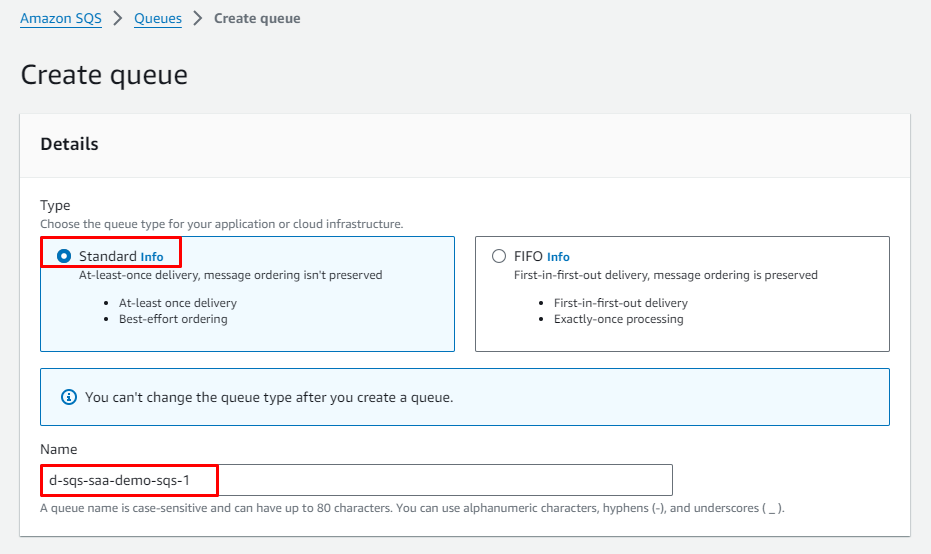
Create SQS Queue 1
- Type:
Standard - Name:
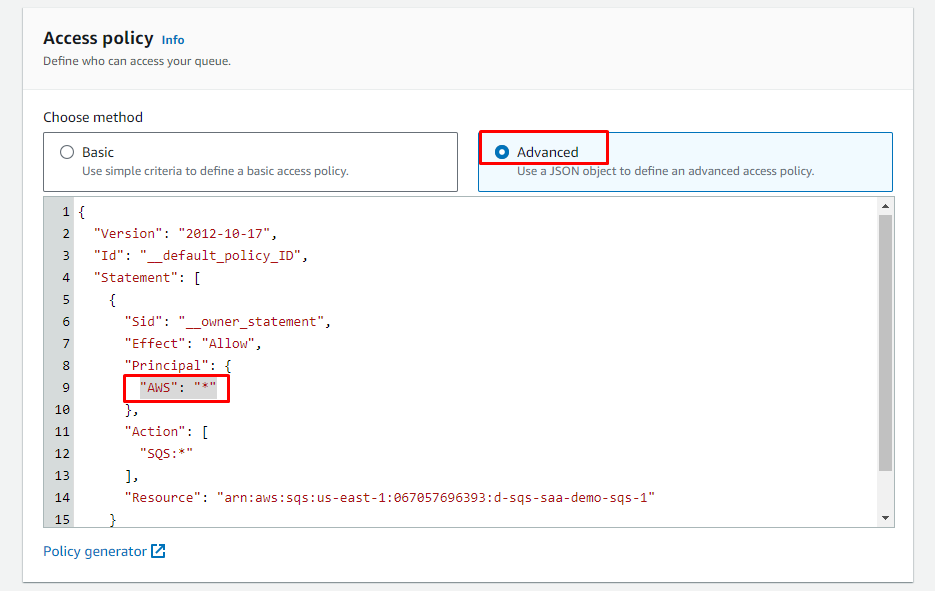
d-sqs-saa-demo-sqs-1 - Access policy:
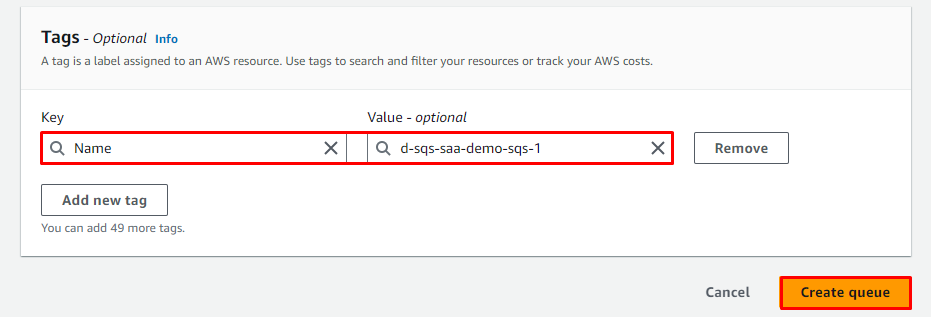
Advanced-> Edit policy chổ Principal cho phép user / service nào cũng có thể gửi message đến SQS"Principal": { "AWS": "*" }, - Tags - optional:
- Key:
Name - Value:
d-sqs-saa-demo-sqs-1
- Key:
- Các thuộc tính khác để như default
Create SQS Queue 2
Thực hiện tương tự như trên:
- Type:
Standard - Name:
d-sqs-saa-demo-sqs-2 - Access policy:
Advanced-> Edit policy chổ Principal cho phép user / service nào cũng có thể gửi message đến SQS"Principal": { "AWS": "*" }, - Tags - optional:
- Key:
Name - Value:
d-sqs-saa-demo-sqs-2
- Key:
- Các thuộc tính khác để như default
Kết quả chúng ta đã tạo xong 2 SQS queue
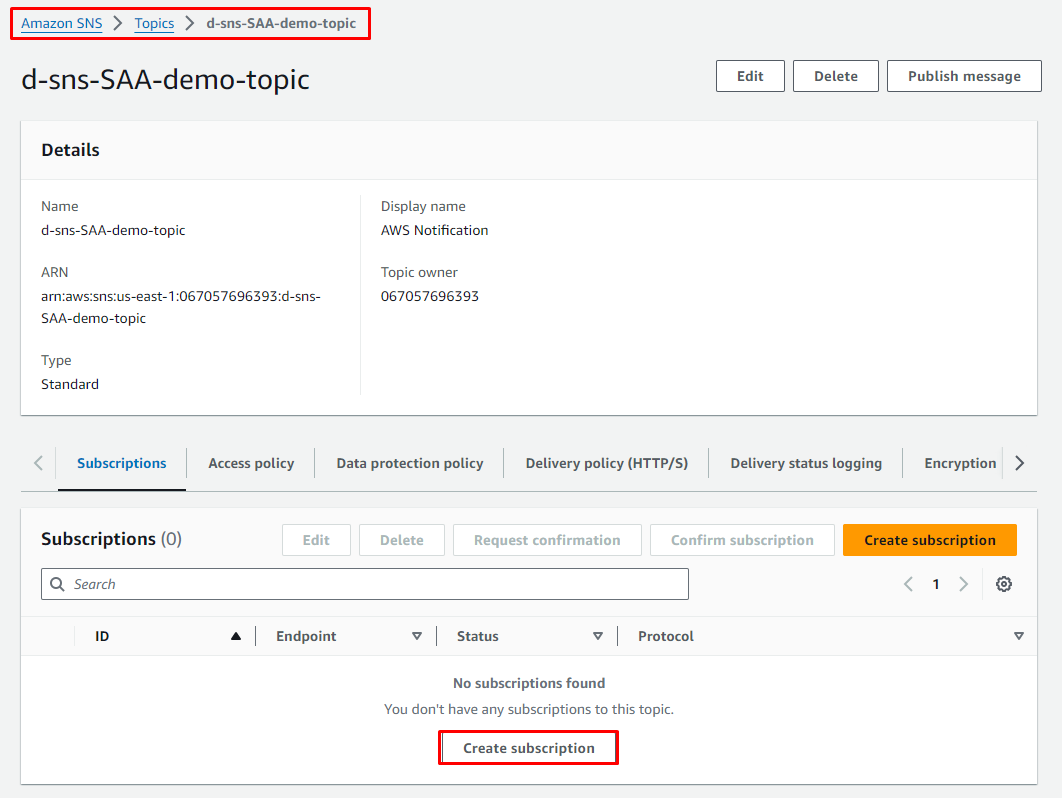
Subscribe to an SNS Topic (2 SQS Queue và Email)
Vào Console SNS -> Topic -> Click vào topic vừa tạo (d-sns-SAA-demo-topic) -> Create subscription:
-
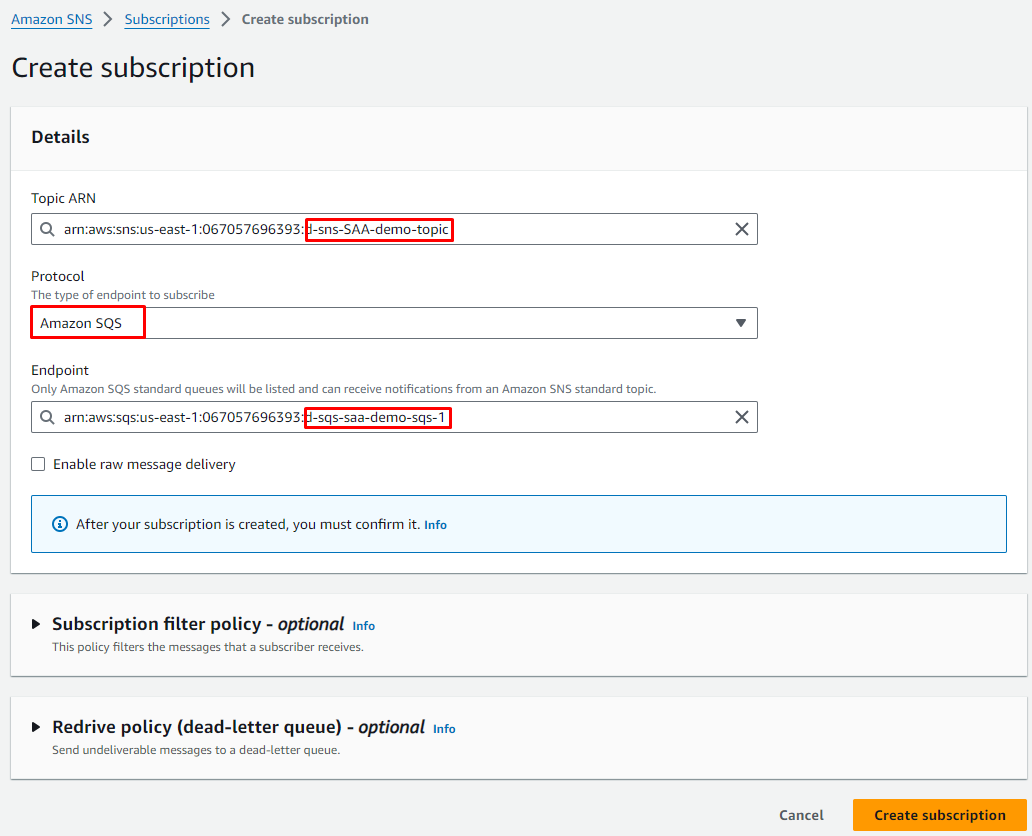
Subscribe SQS 1 to SNS topic
-
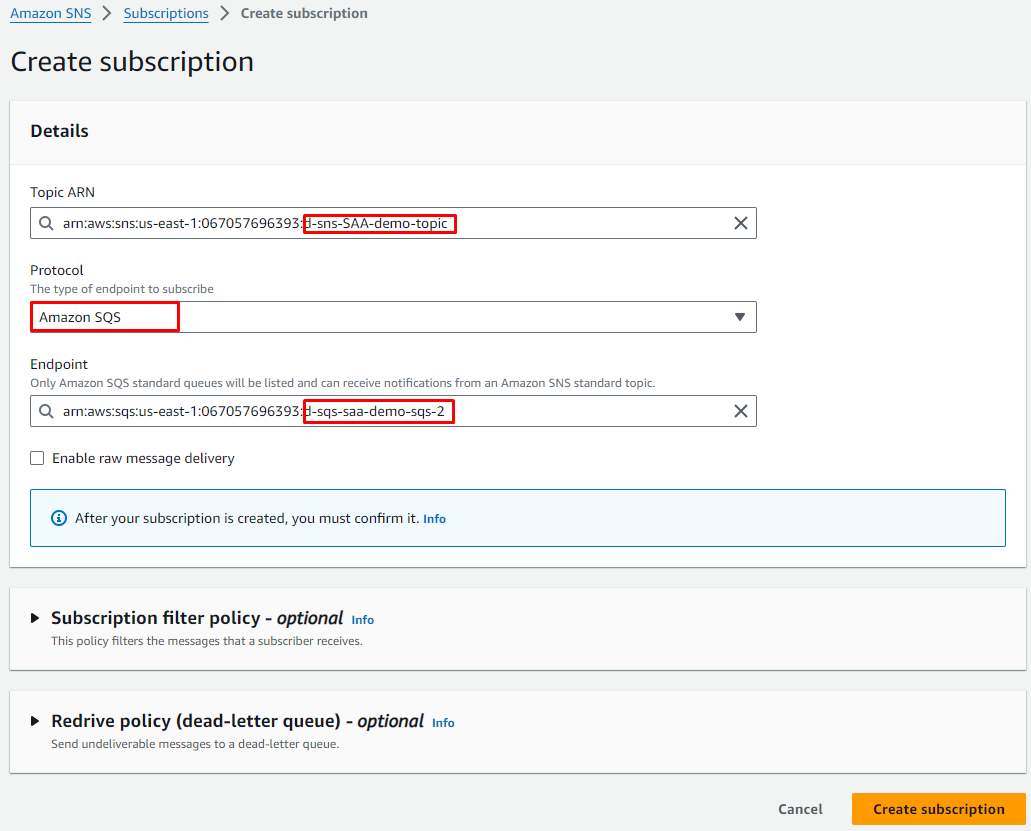
Subscribe SQS 2 to SNS topic (Tương tự như trên)
-
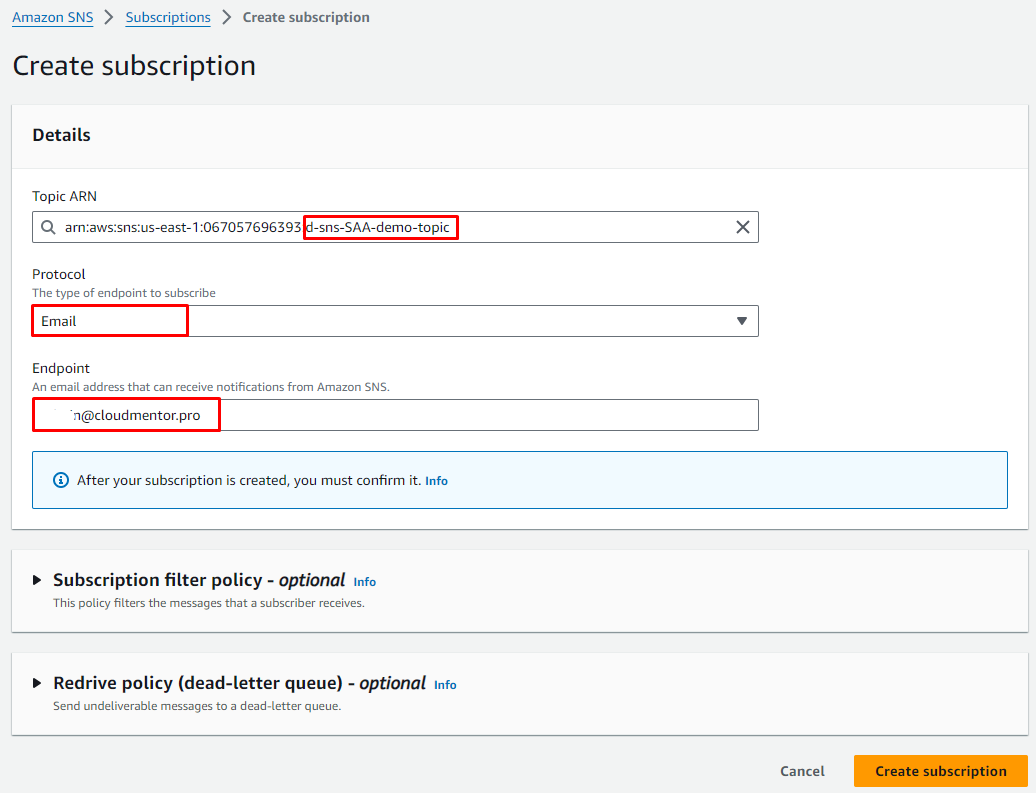
Subscribe Email to SNS topic
-
Sau khi hoàn thành thì trạng thái của subscription như bên dưới. Endpoint email đang
Pending confirmation.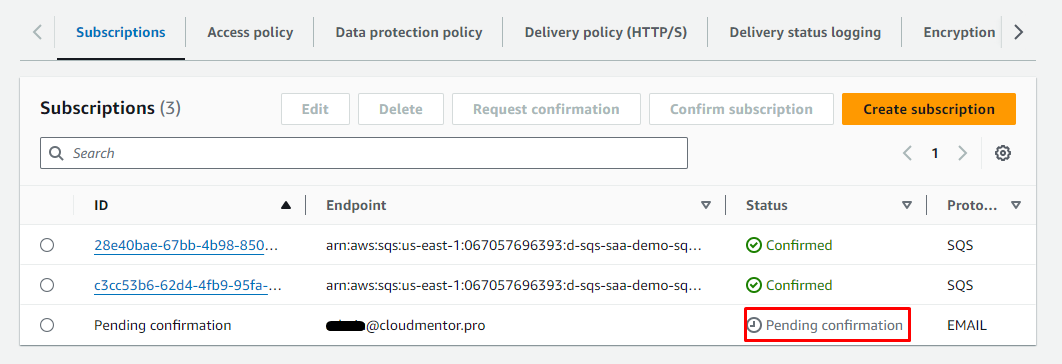
-
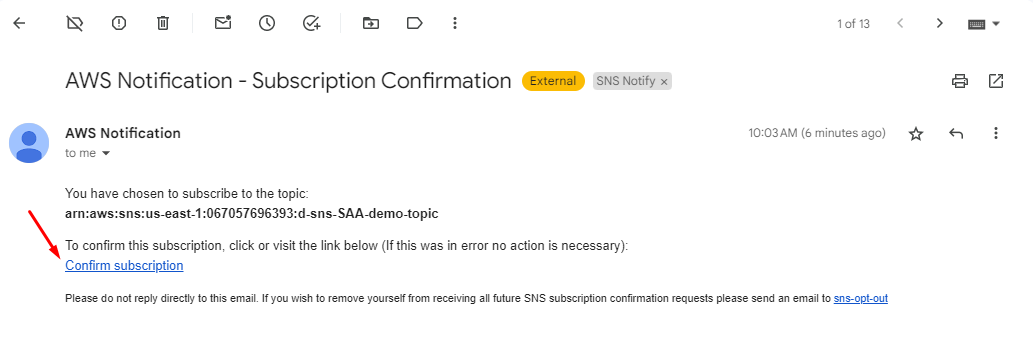
Bạn sẽ nhận 1 email confirming your subscription to your email. Trường hợp không có trong Inbox, bạn kiểm tra trong mục Spam.
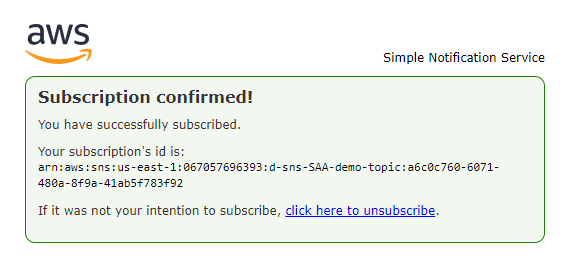 Hoàn tất

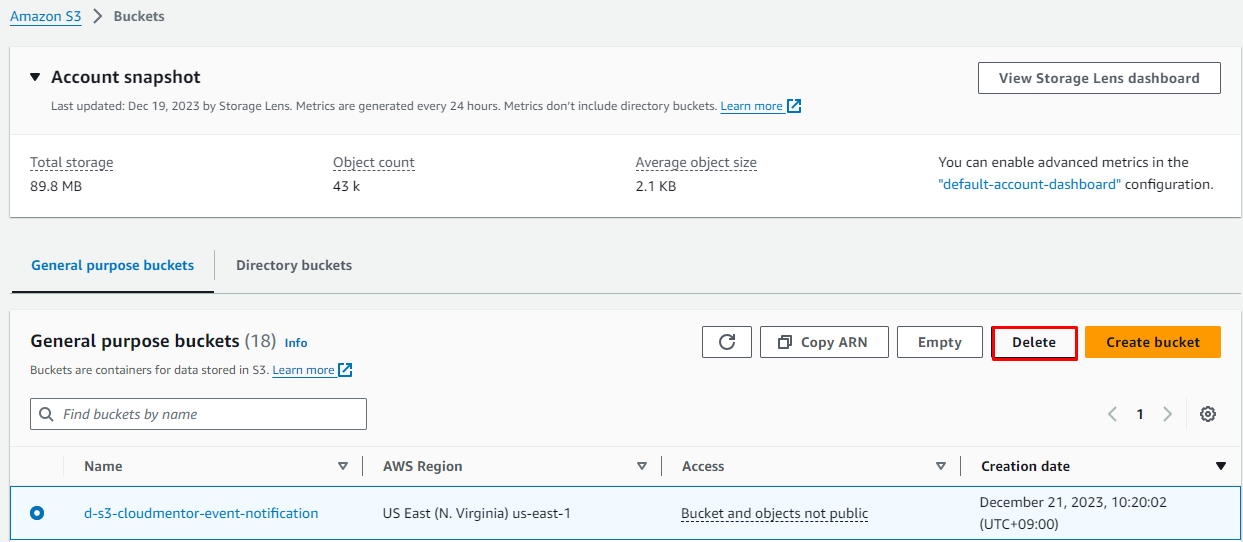
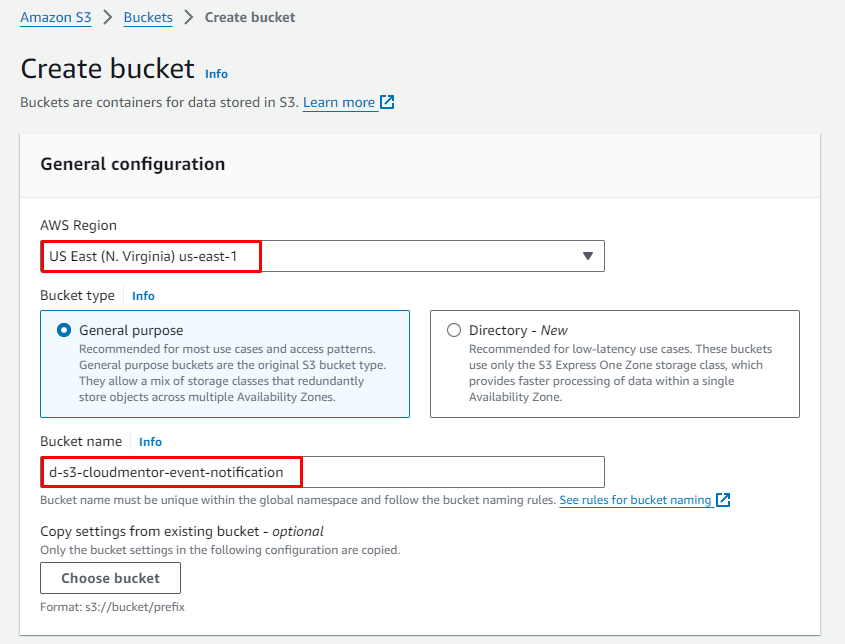
Create an S3 bucket
- AWS Region:
US East (N. Virginia) us-east-1 - Bucket name:
d-s3-{your-name}-event-notification- Ex:
d-s3-cloudmentor-event-notification(Note: The Bucket Name must be unique across all existing bucket names in Amazon S3)
- Ex:
- Các thuộc tính khác để như default
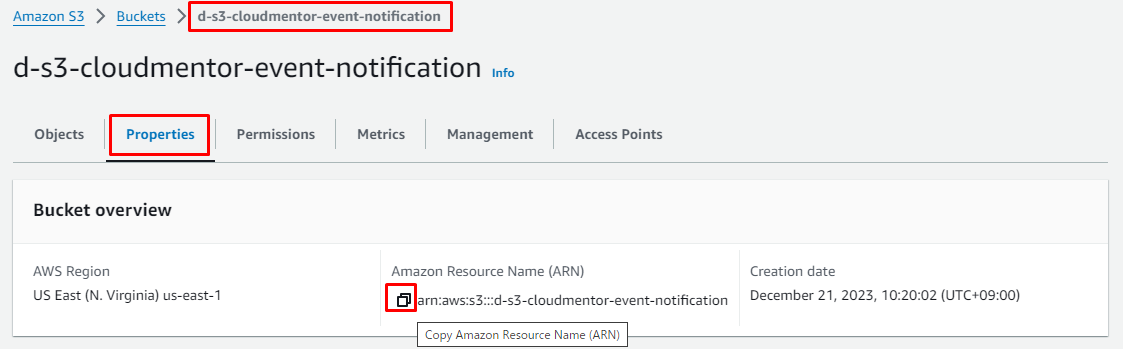
Sau khi tạo xong chúng ta sẽ copy ARN của Bucket để lát nữa dùng cho Setting SNS Policy
Create an S3 Event
Ở bước này chúng ta sẽ enable event notifications trên S3 Bucket đã tạo trước đó:
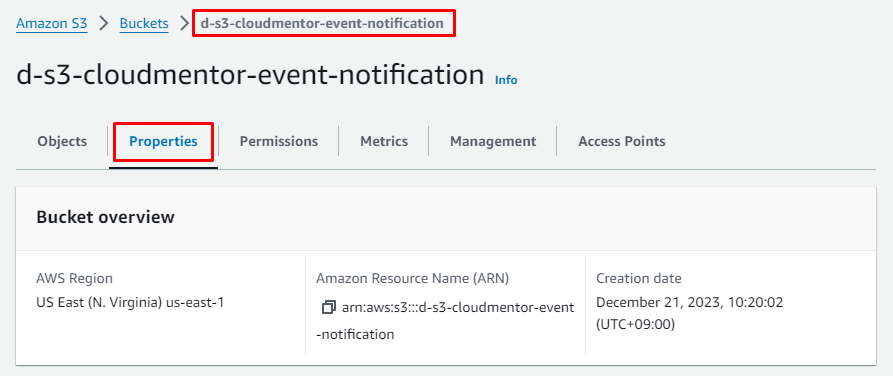
- Vào S3 Console.
- Click vào S3 bucket mà bạn đã tạo ở step trước.
- Go to the Properties tab and scroll down to Event notifications.
- Click on Create event notification button.
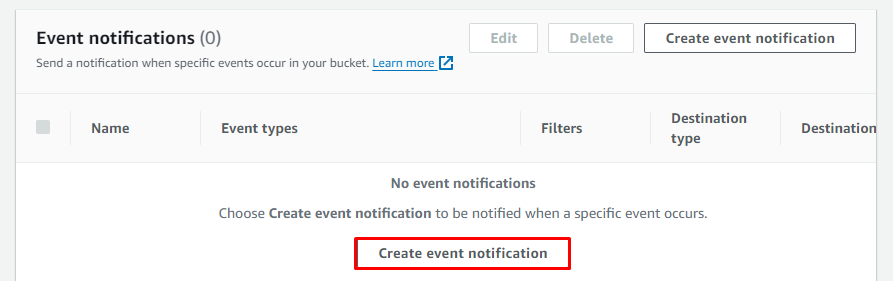
- Event name:
Notify-To-SNS - Event types -> Check
PUT - Destination: select
SNS Topic - SNS topic: Select
d-sns-SAA-demo-topic
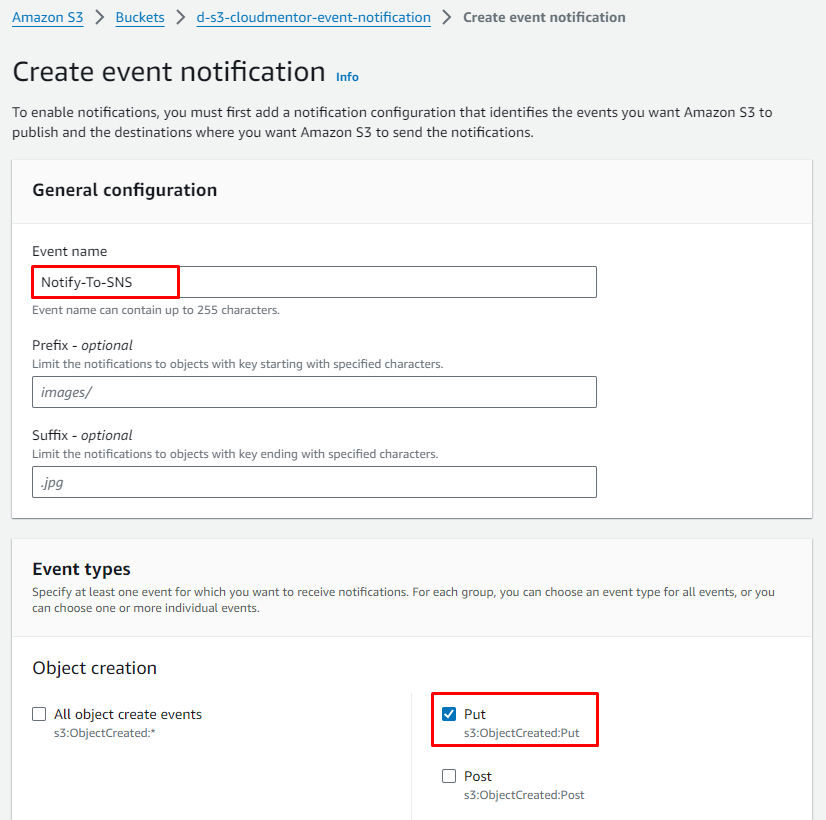
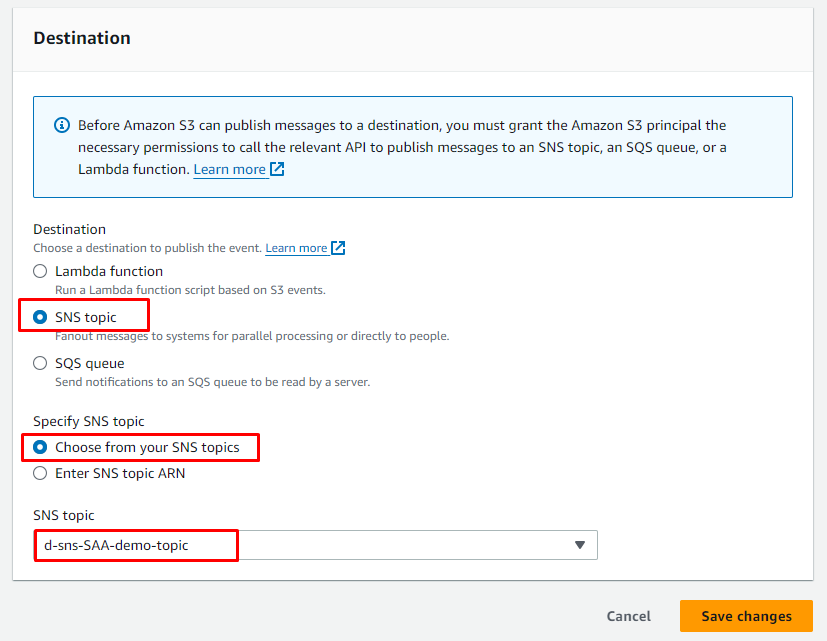
- Save changes
Bây giờ, S3 bucket đã được enabled event notifications cho việc putting new objects thông qua SNS topic.

Testing the SNS Notification
Bước này chúng ta sẽ test set up event notifications và verify notification có được gửi đến 2 SQS queue và Email thành công không.
- Vào S3 Console
- Click vào s3 bucket đã tạo
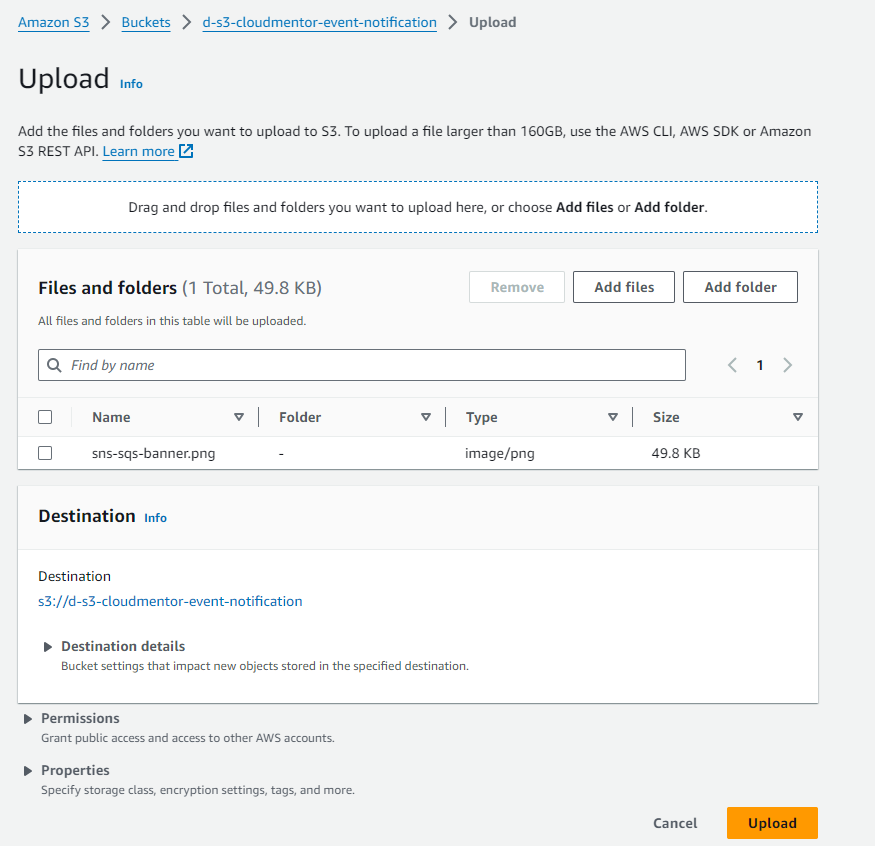
- Tại tab Object -> Click Upload
- Chọn 1 file bất kỳ và Upload
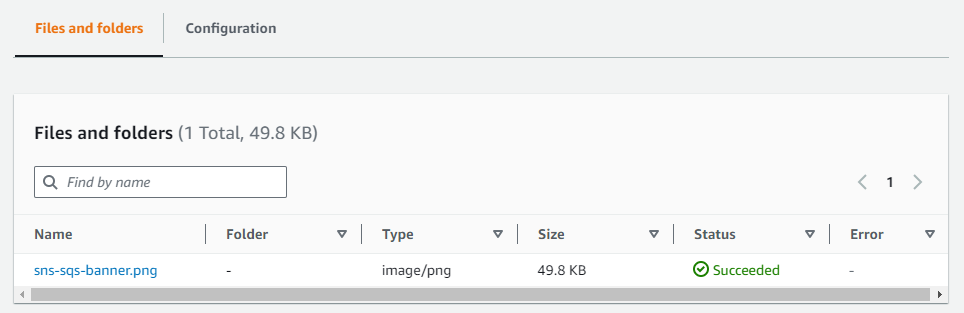
 Upload thành công
Verify email
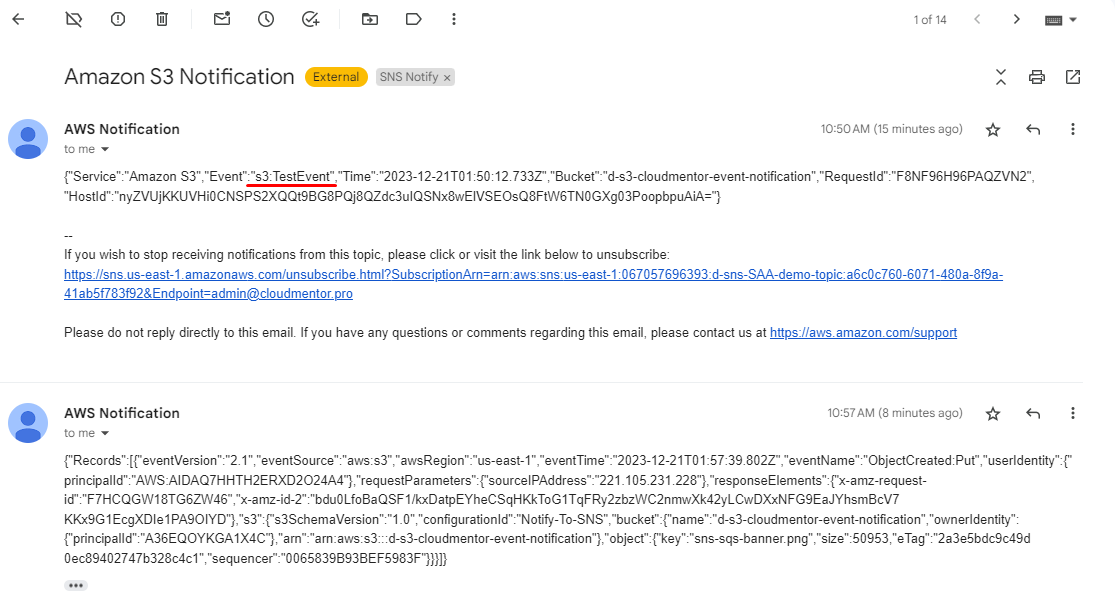
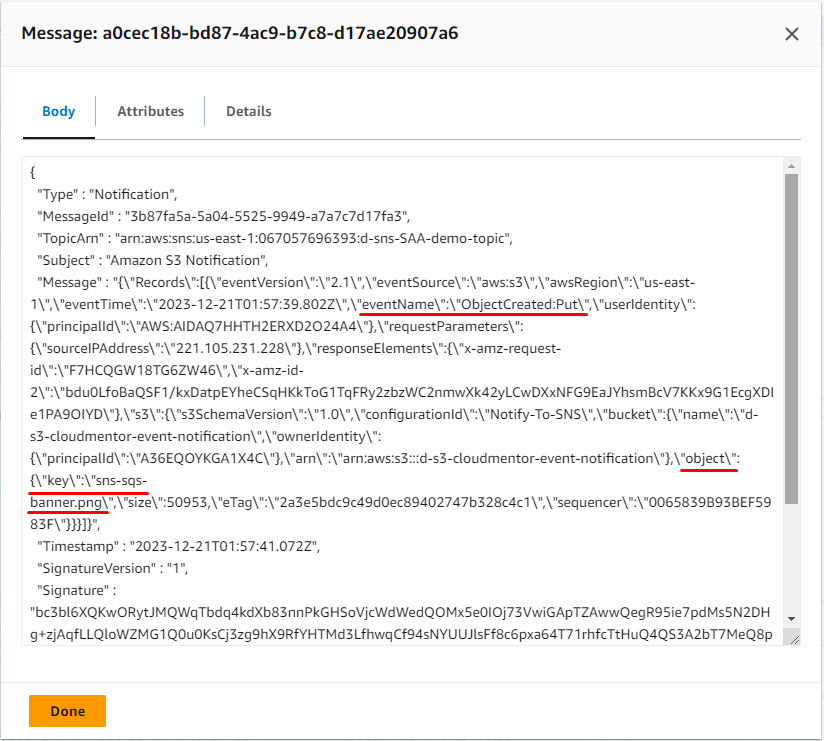
Bạn sẽ nhận 1 email từ event PUT object. Check email
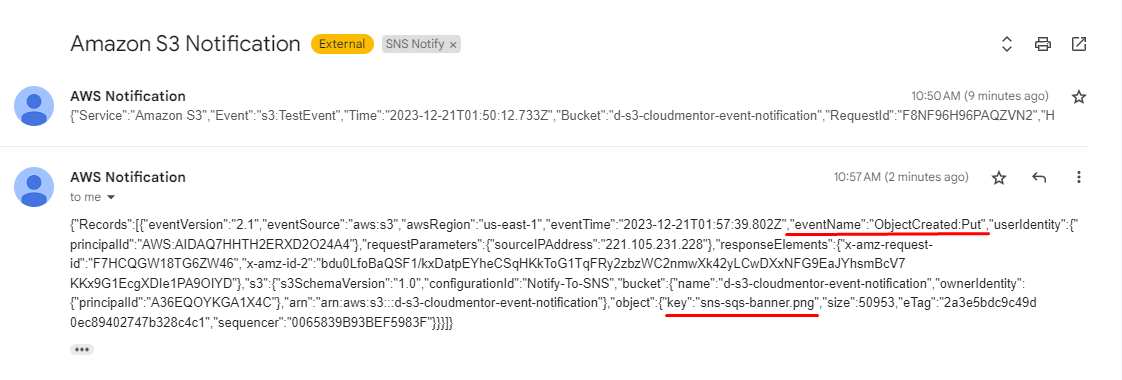
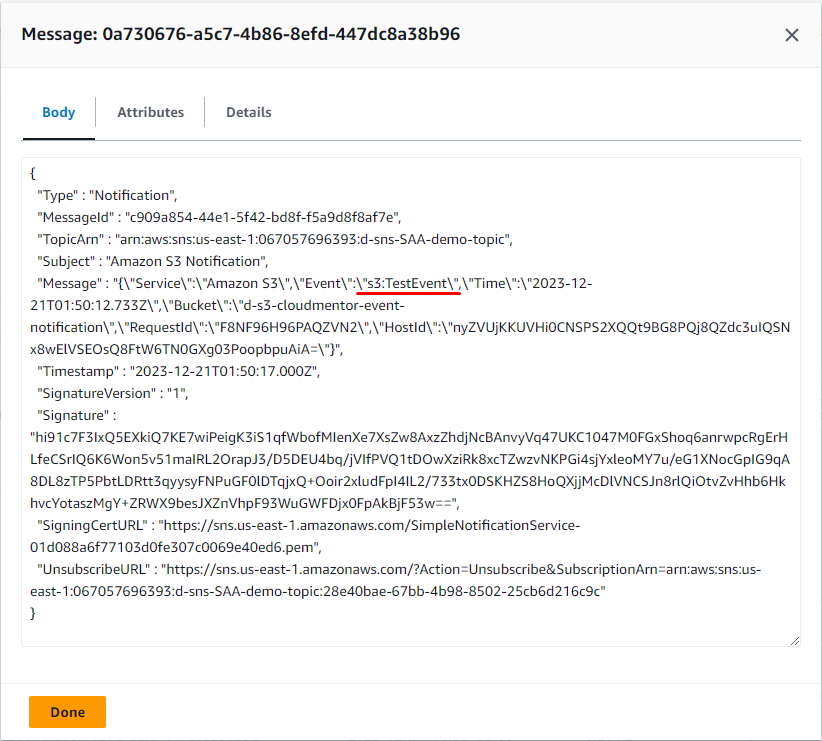
Nếu bạn để ý thì bạn cũng nhận dc 1 email trước đó, đó là email Test dc gửi từ S3 event notification lúc mới setp xong.
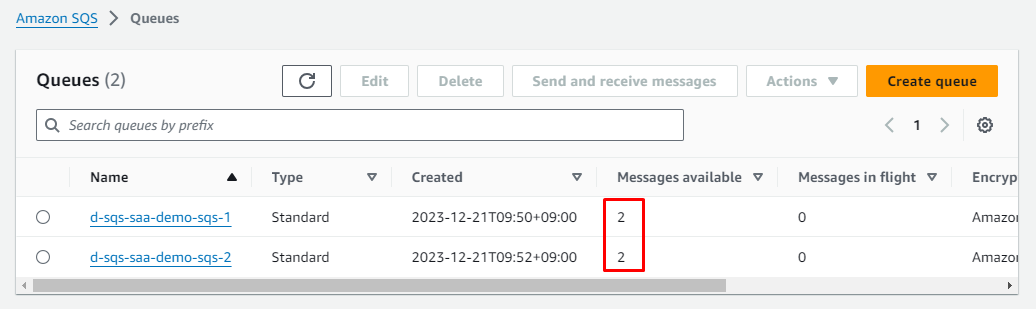
Verify SQS
Tương tự như email, thì mỗi SQS queue cũng nhận dc 2 message.
- 1 message test
- 1 message khi PUT Object
 Muốn xem nội dung message:
- Click vào
d-sqs-saa-demo-sqs-1-> ClickSend and receive message
- Click
poll for messagesẽ nhận dc 2 message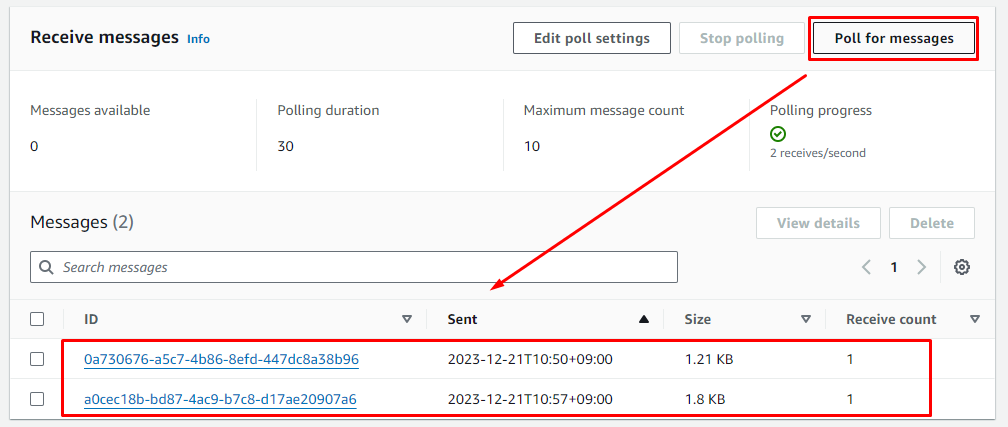
- Click vào từng message để xem nội dung
Clean up
- Delete SNS Topic:
d-sns-SAA-demo-topic - Delete 3 subscription của
d-sns-SAA-demo-topic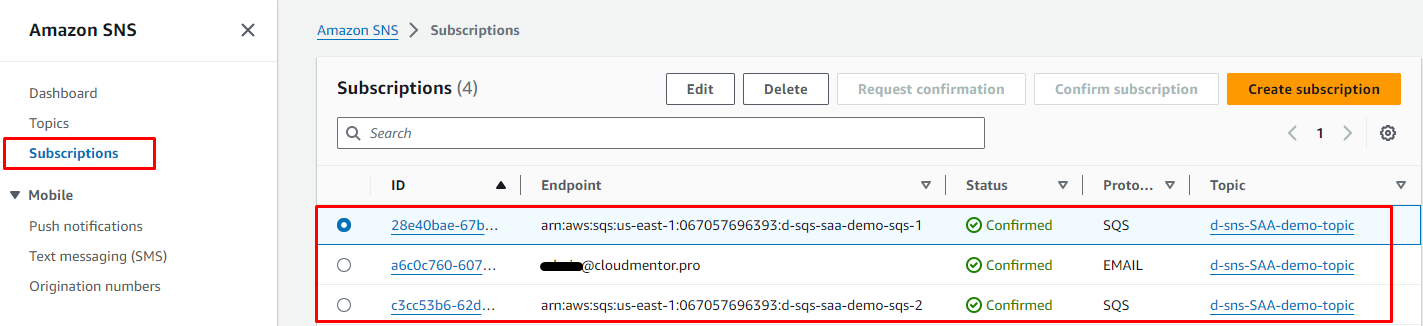
- Delete SQS queue:
d-sqs-saa-demo-sqs-1vàd-sqs-saa-demo-sqs-2 - Empty s3 bucket
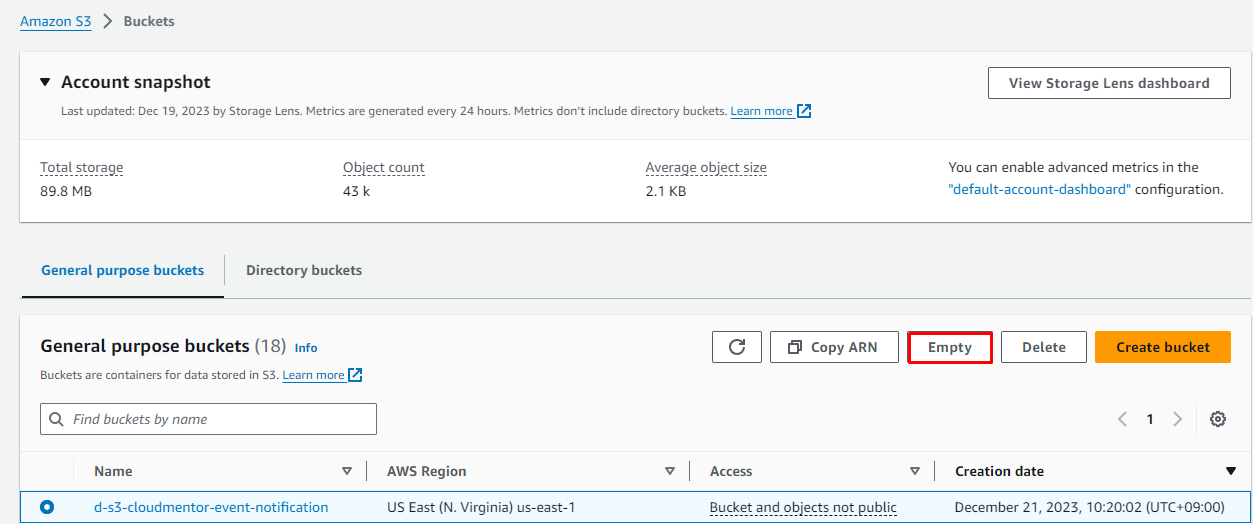
- Delete s3 bucket