How to Deploy React App with S3 and CloudFront
Lab Details
- Duration: 1 hour
- AWS Region: US East (N. Virginia) us-east-1
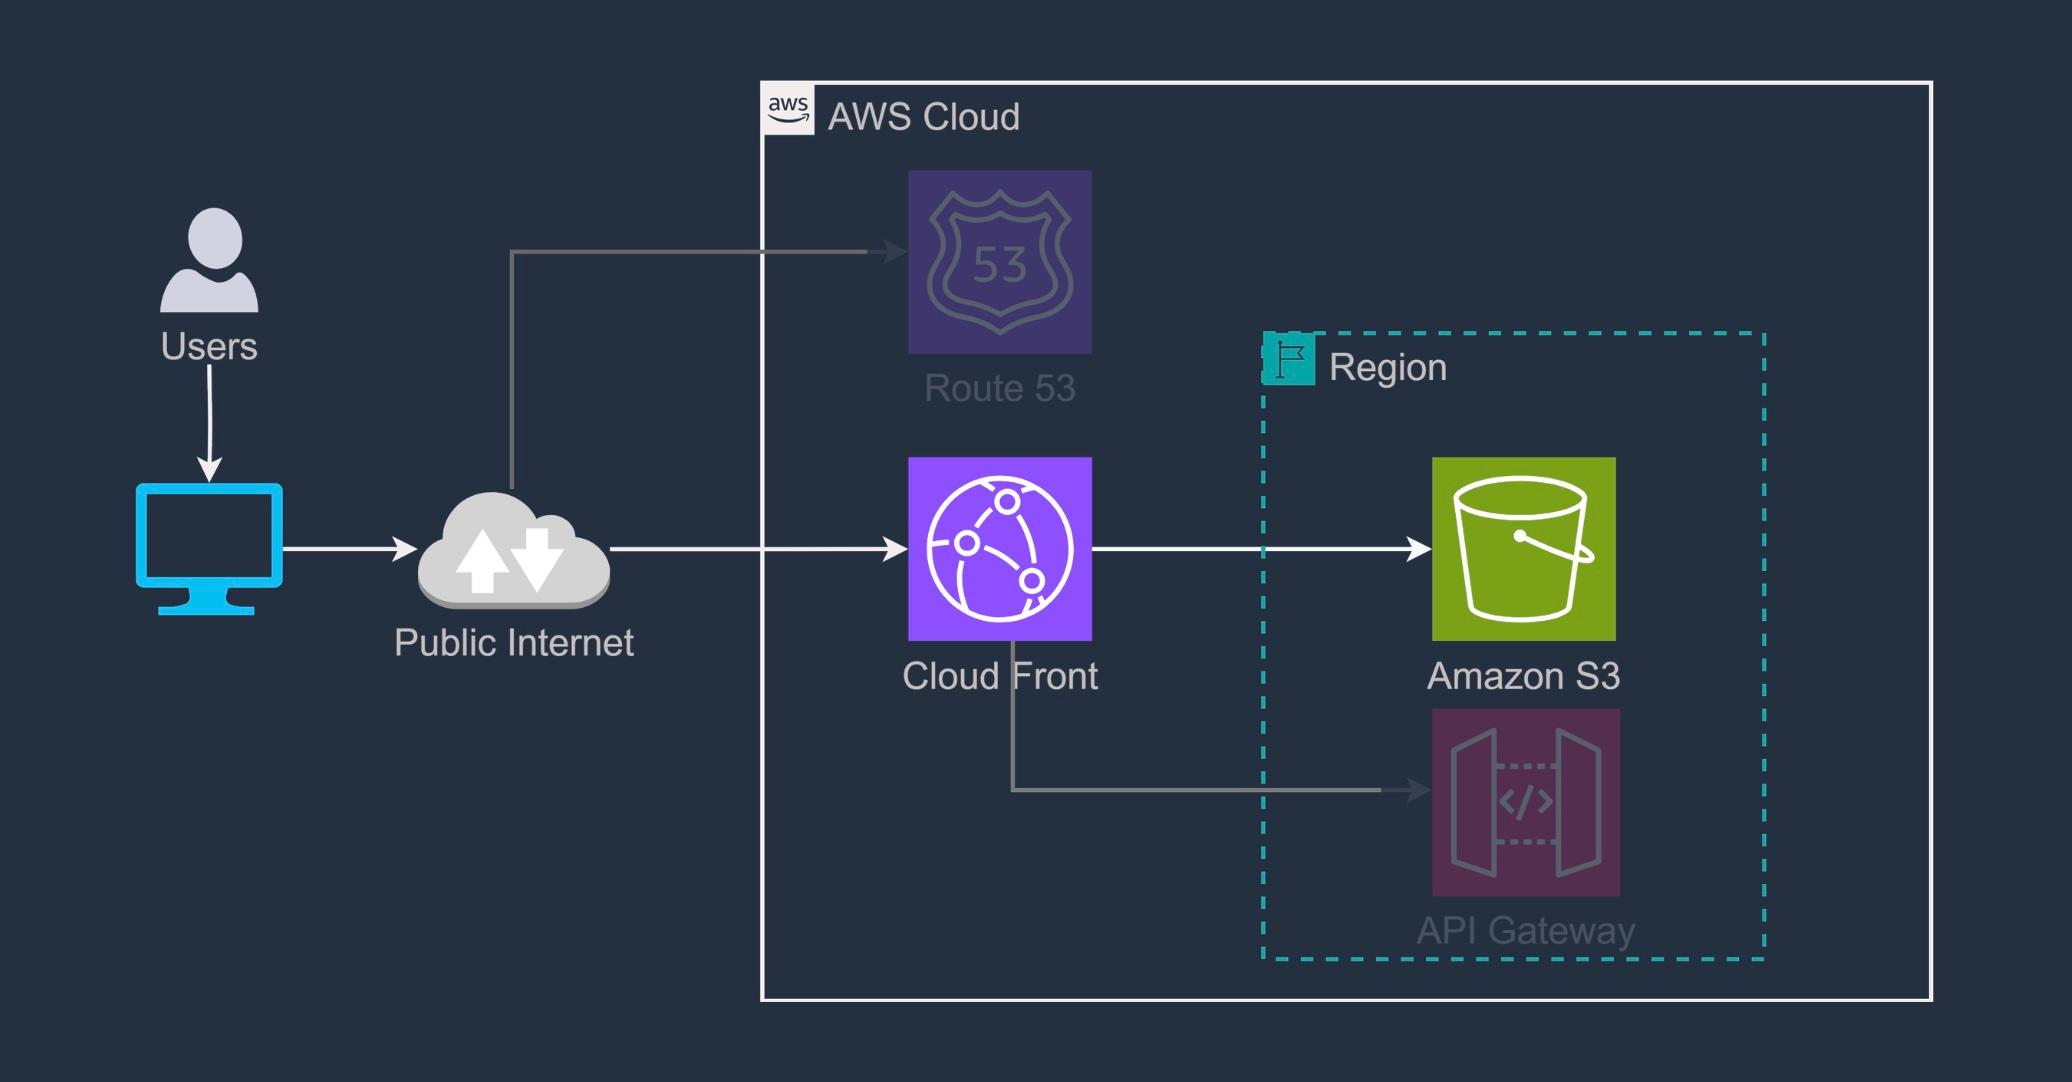
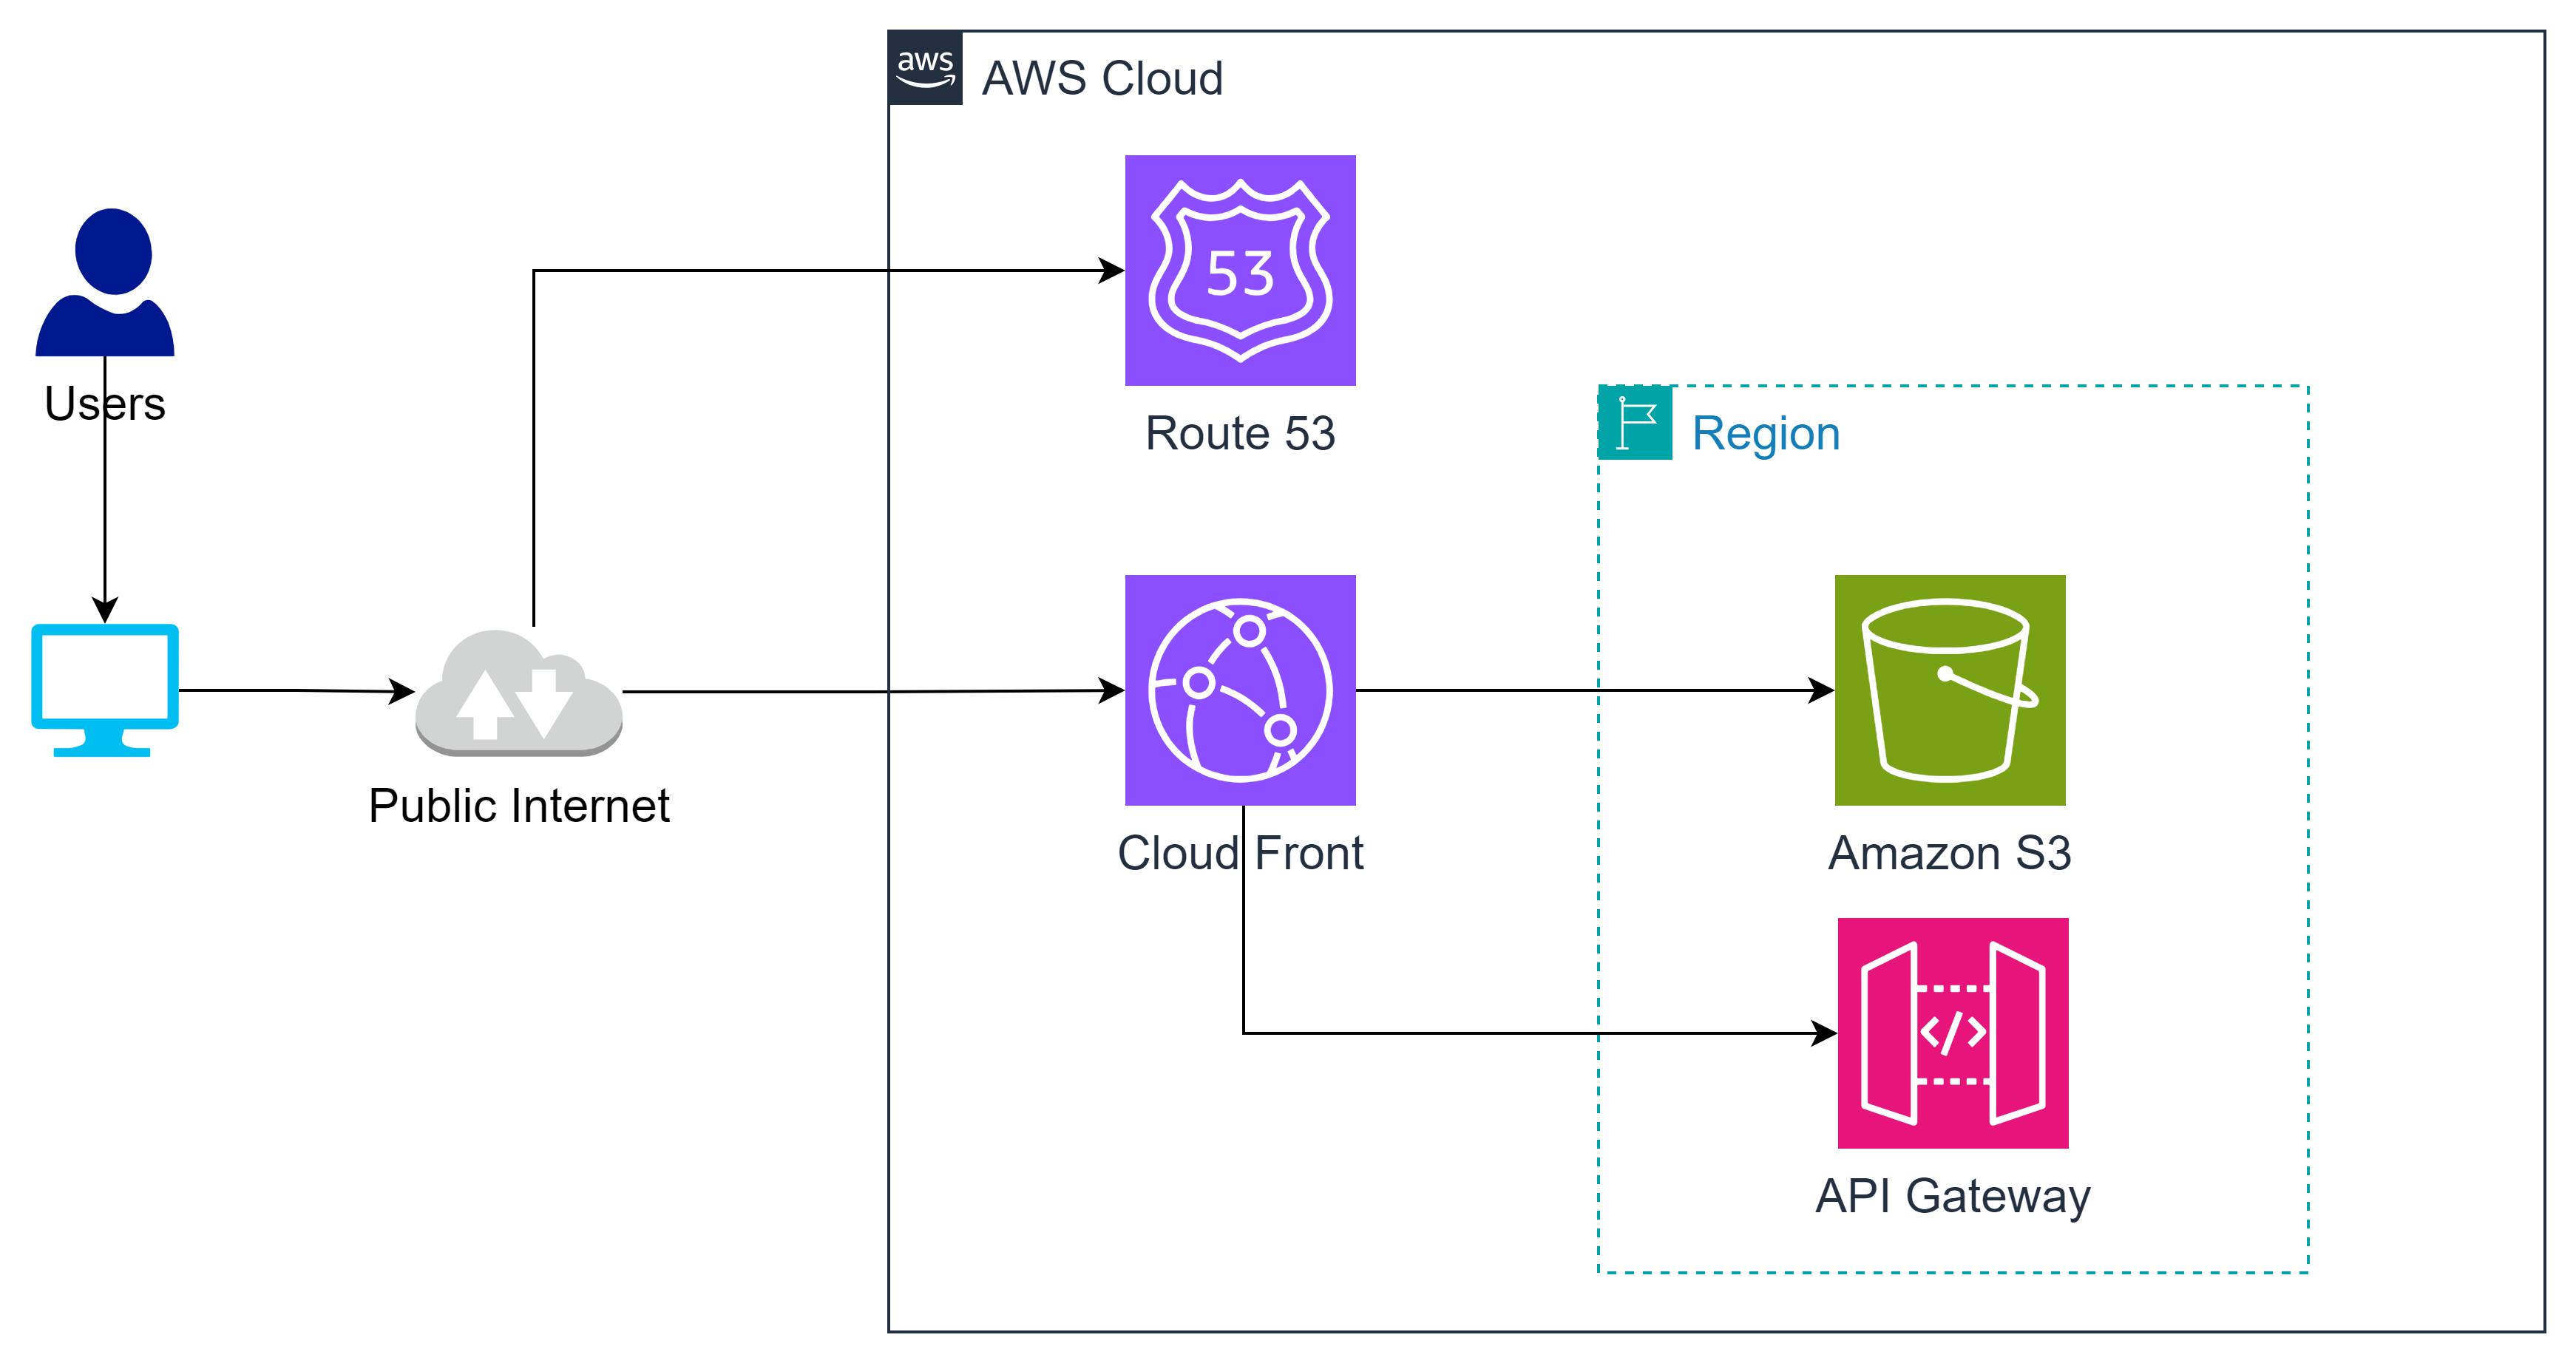
Architecture Diagram
Task Details
- Create React App
- Create an S3 Bucket
- Upload a file to the S3 bucket.
- Create a new Amazon CloudFront distribution.
- Accessing React App through Cloudfront.
- Use AWS CLI to update S3 and CloudFront
1. Create React App
Chúng ta sẽ create React App đơn giản theo GUI sau: https://create-react-app.dev/docs/getting-started
Sử dụng Code Editer như VS Code và chạy command bên dưới:
npx create-react-app my-app
cd my-app
npm start
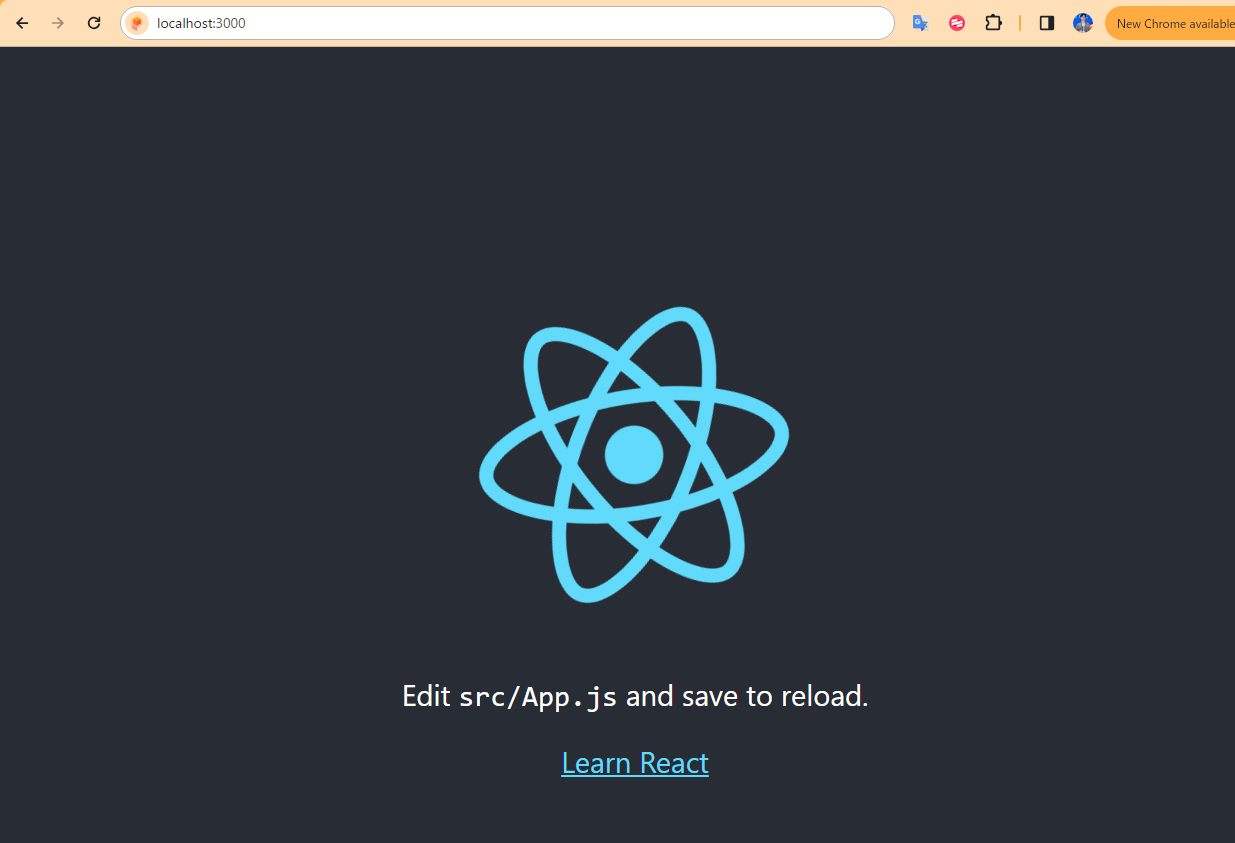
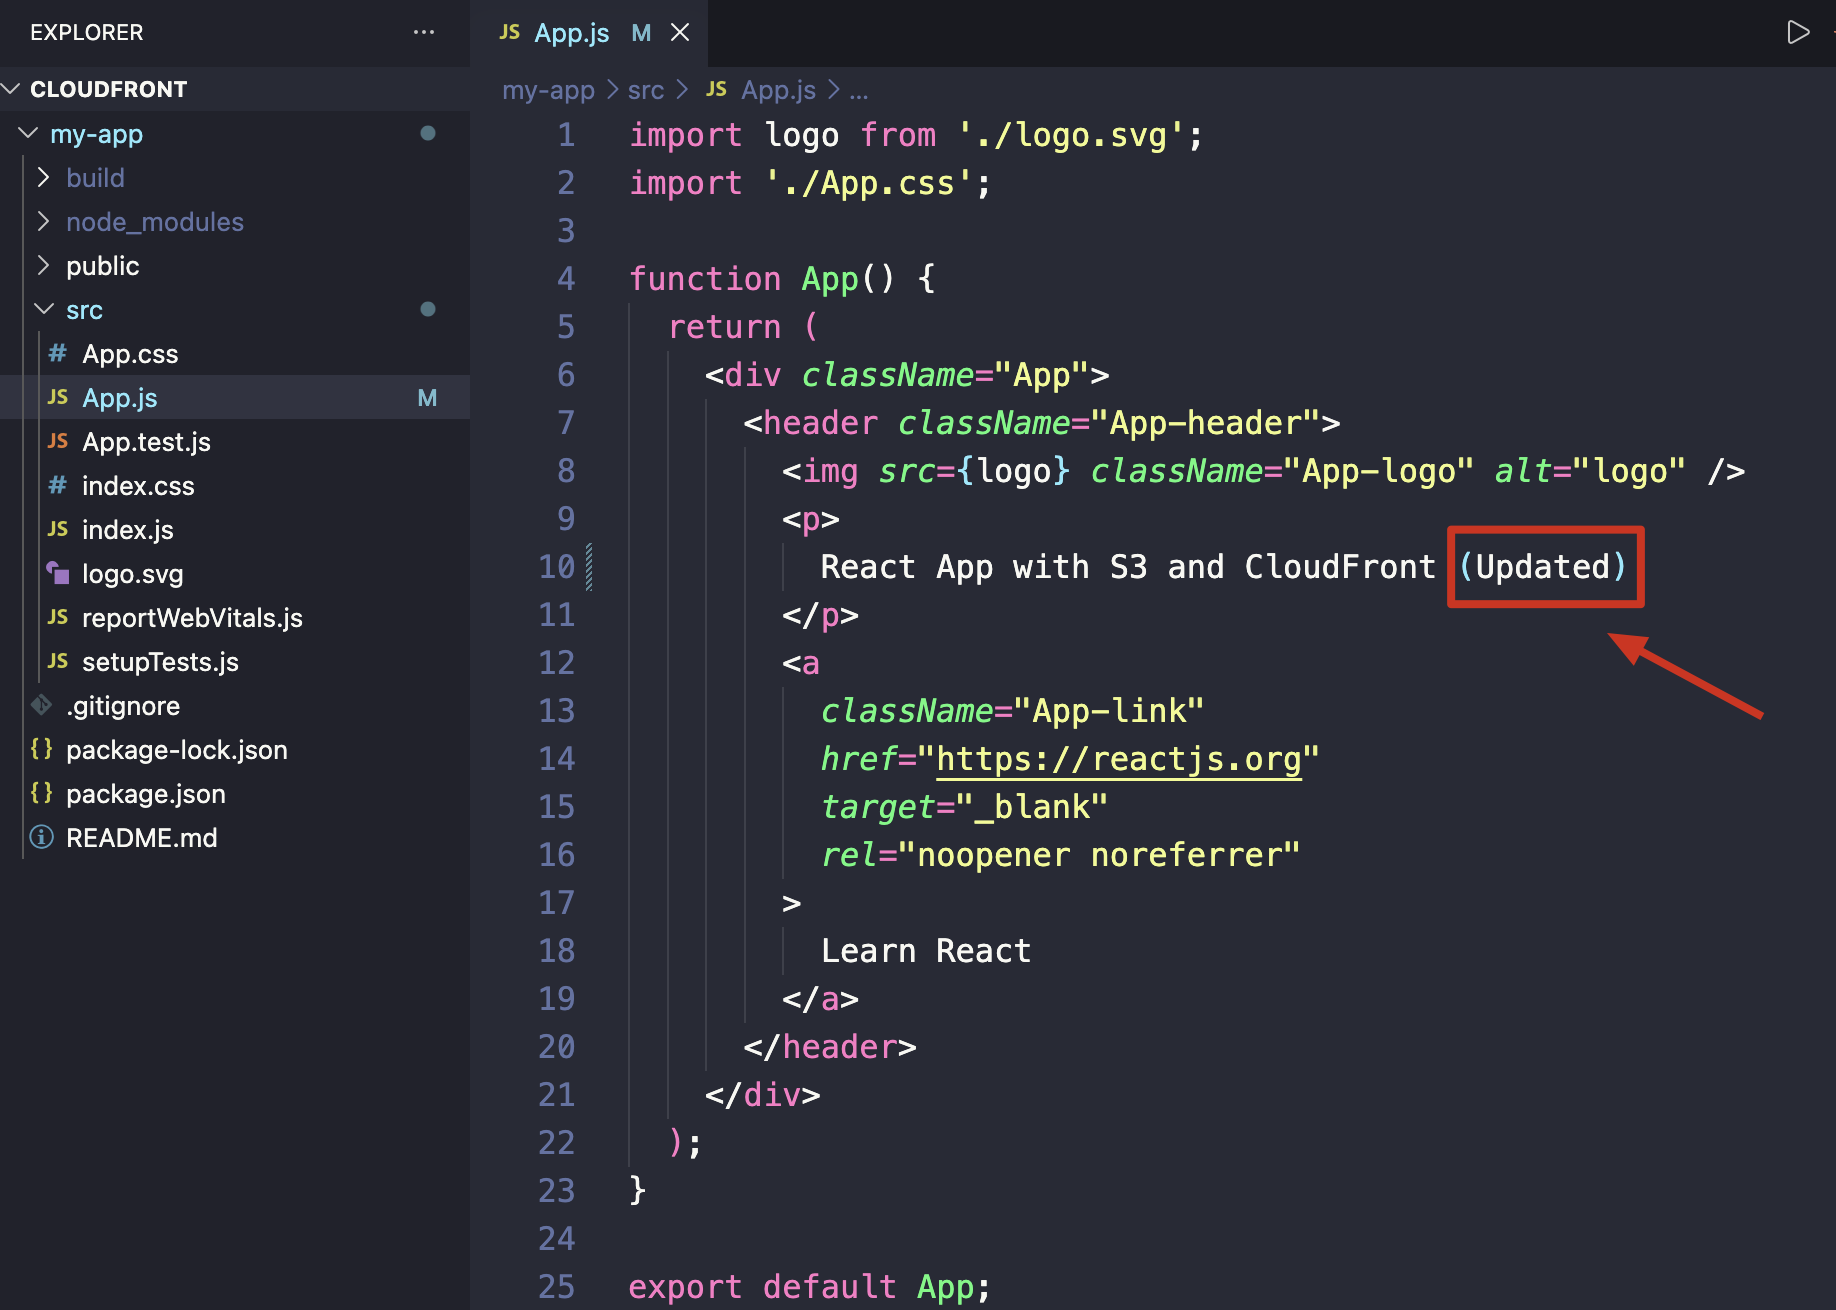
Update file src\App.js nếu bạn muốn Custom. Ví dụ như mình sẽ thay đổi dòng bên dưới
import logo from './logo.svg';
import './App.css';

function App() {
  return (
    <div className="App">
      <header className="App-header">
        <img src={logo} className="App-logo" alt="logo" />
        <p>
          React App with S3 and CloudFront
        </p>
        <a
          className="App-link"
          href="https://reactjs.org"
          target="_blank"
          rel="noopener noreferrer"
        >
          Learn React
        </a>
      </header>
    </div>
  );
}

export default App;
2. Create an S3 Bucket
Lưu ý bucket không được trùng tên trong Region, nên hãy đặt tên phù hợp.
- AWS Region:
US East (N. Virginia) us-east-1 - Bucket name:
d-s3-saa-[your-name]-react-app(Ex:d-s3-saa-cloudmentorpro-react-app)
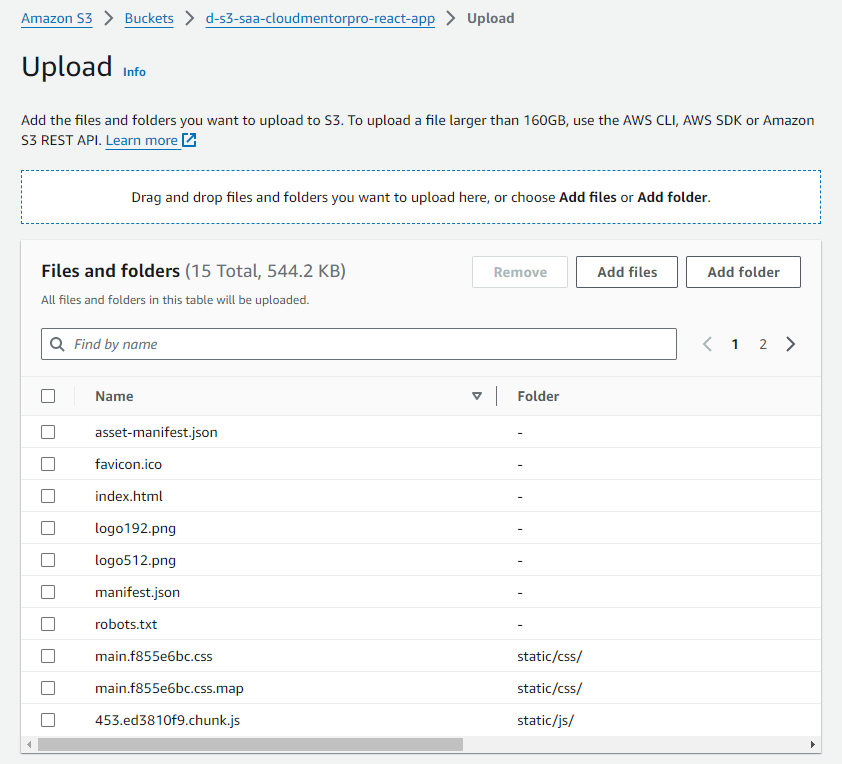
3. Upload a file to the S3 bucket.
Tại thư mục my-app, chạy lệnh sau để build React App thành content tĩnh
npm run build
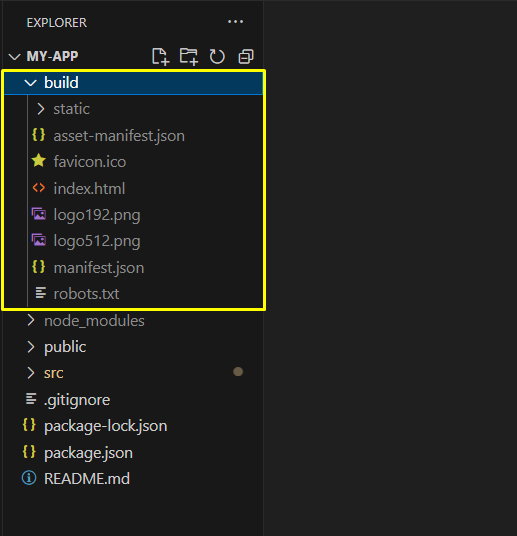
Upload toàn bộ nội dung trong thư mục build vào S3 bucket (dùng kéo thả)
4. Create a new Amazon CloudFront distribution.
Tại Console Cloudfront -> Create distribution

- Choose a plan:
Pay as you go

- Get started:
- Distribution options:
- Distribution name:
d-cf-saa-cloudmentorpro-react-app - Description - optional:
Distribution for S3 bucket (react app) - Distribution type:
Single website or app
- Distribution name:
- Domain: để default
- Distribution options:

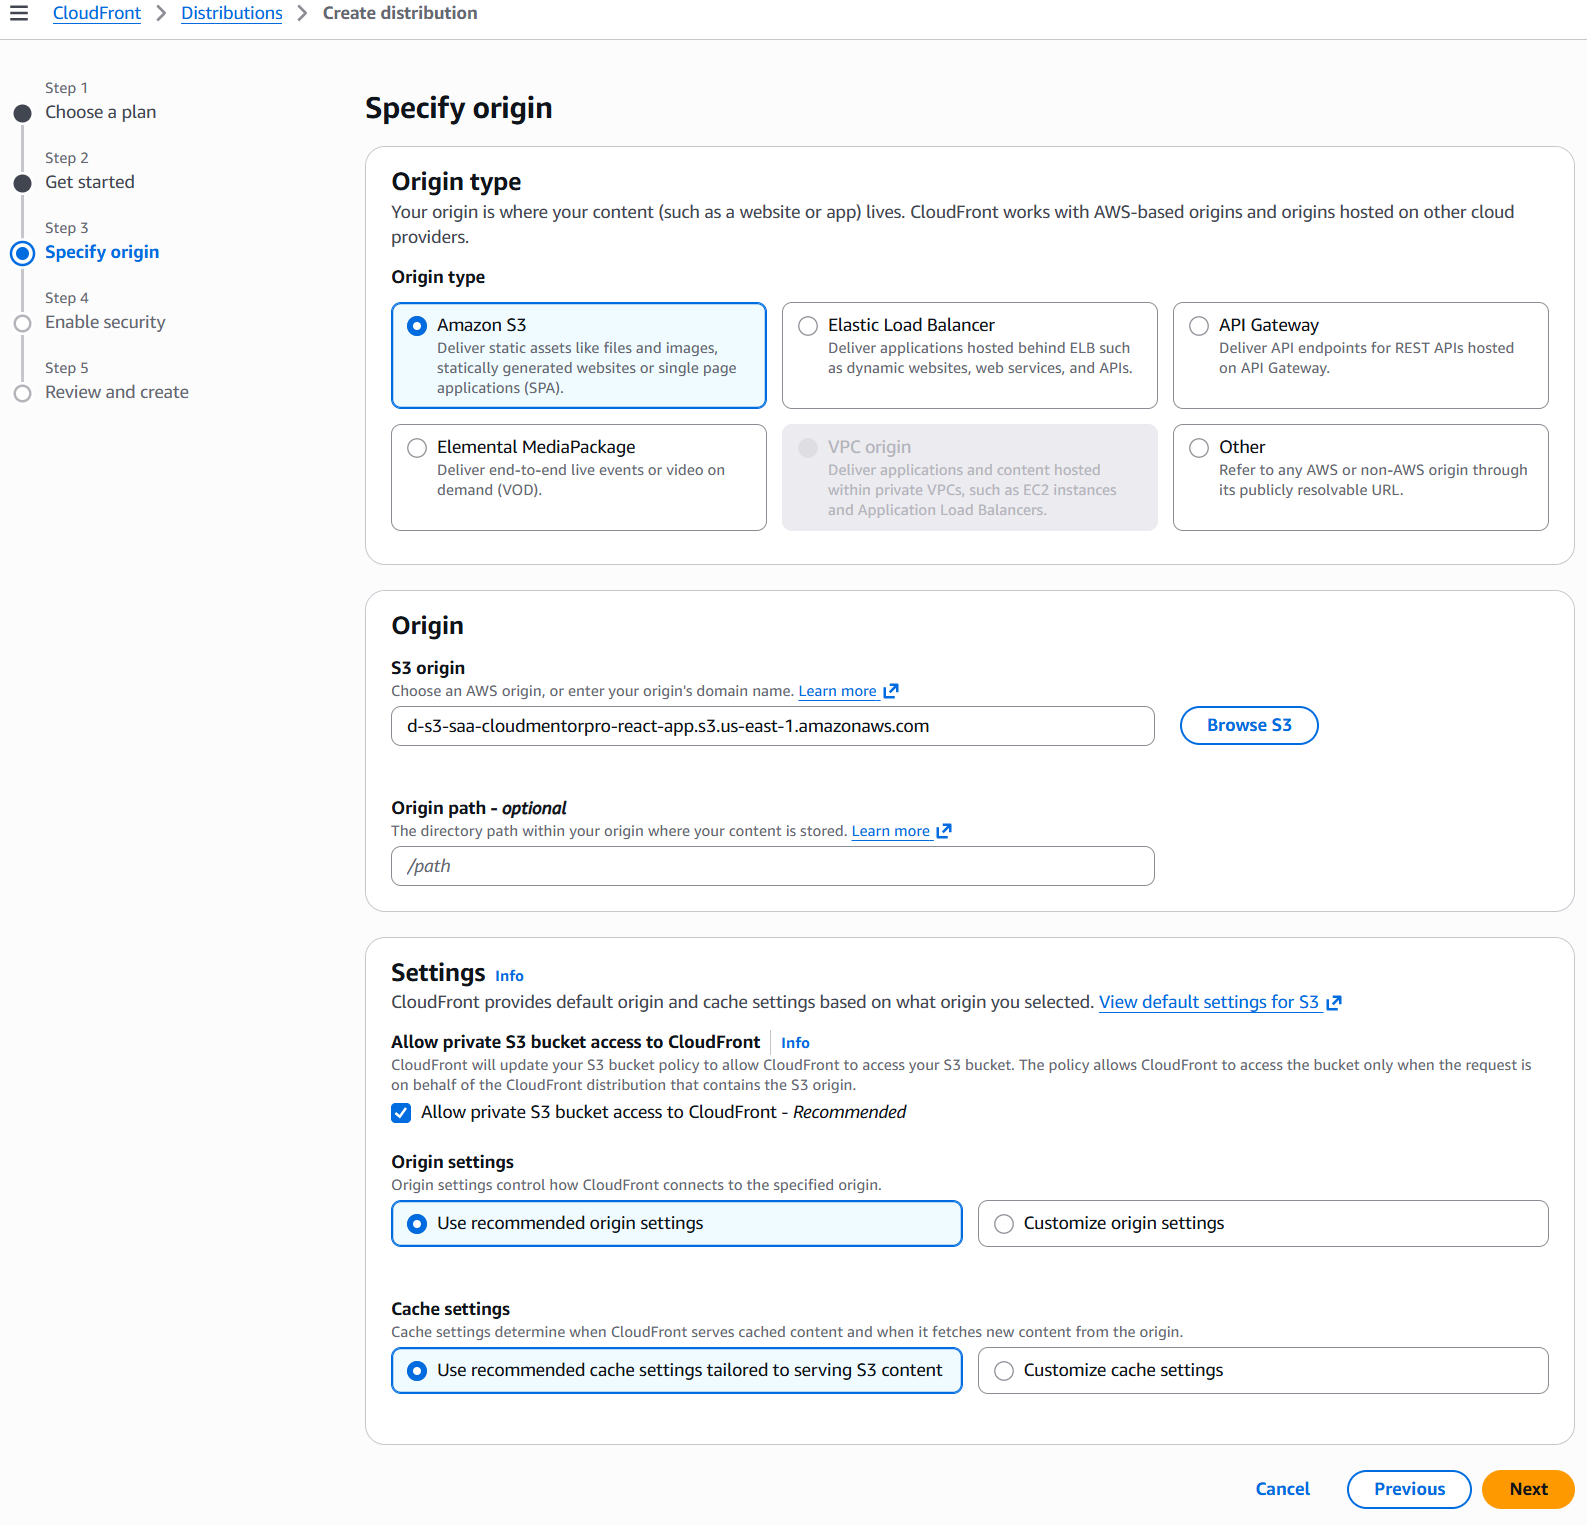
- Specify origin:
- Origin type:
Amazon S3 - S3 Origin:
Chọn S3 bucket for react app - Origin path - optional: để default
- Settings: để default ( sẽ tự tạo bucket policy chỉ cho phép access từ Cloudfront → rất security)
- Origin type:
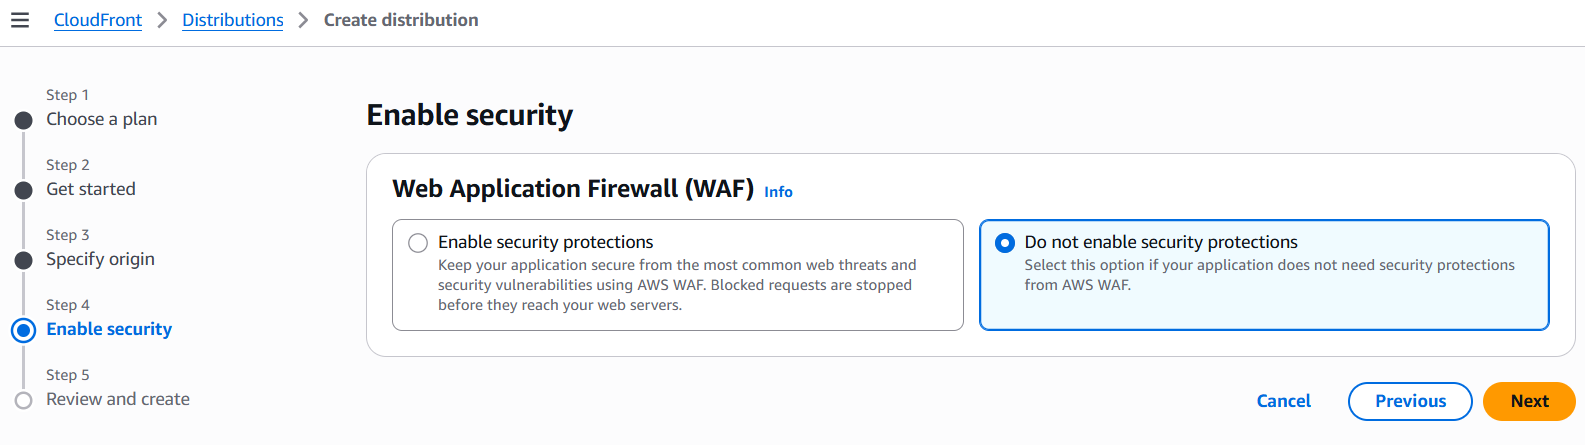
- Enable security:
- Web Application Firewall (WAF):
Do not enable security protections
- Web Application Firewall (WAF):
- Review and create:

5. Setting Default root object
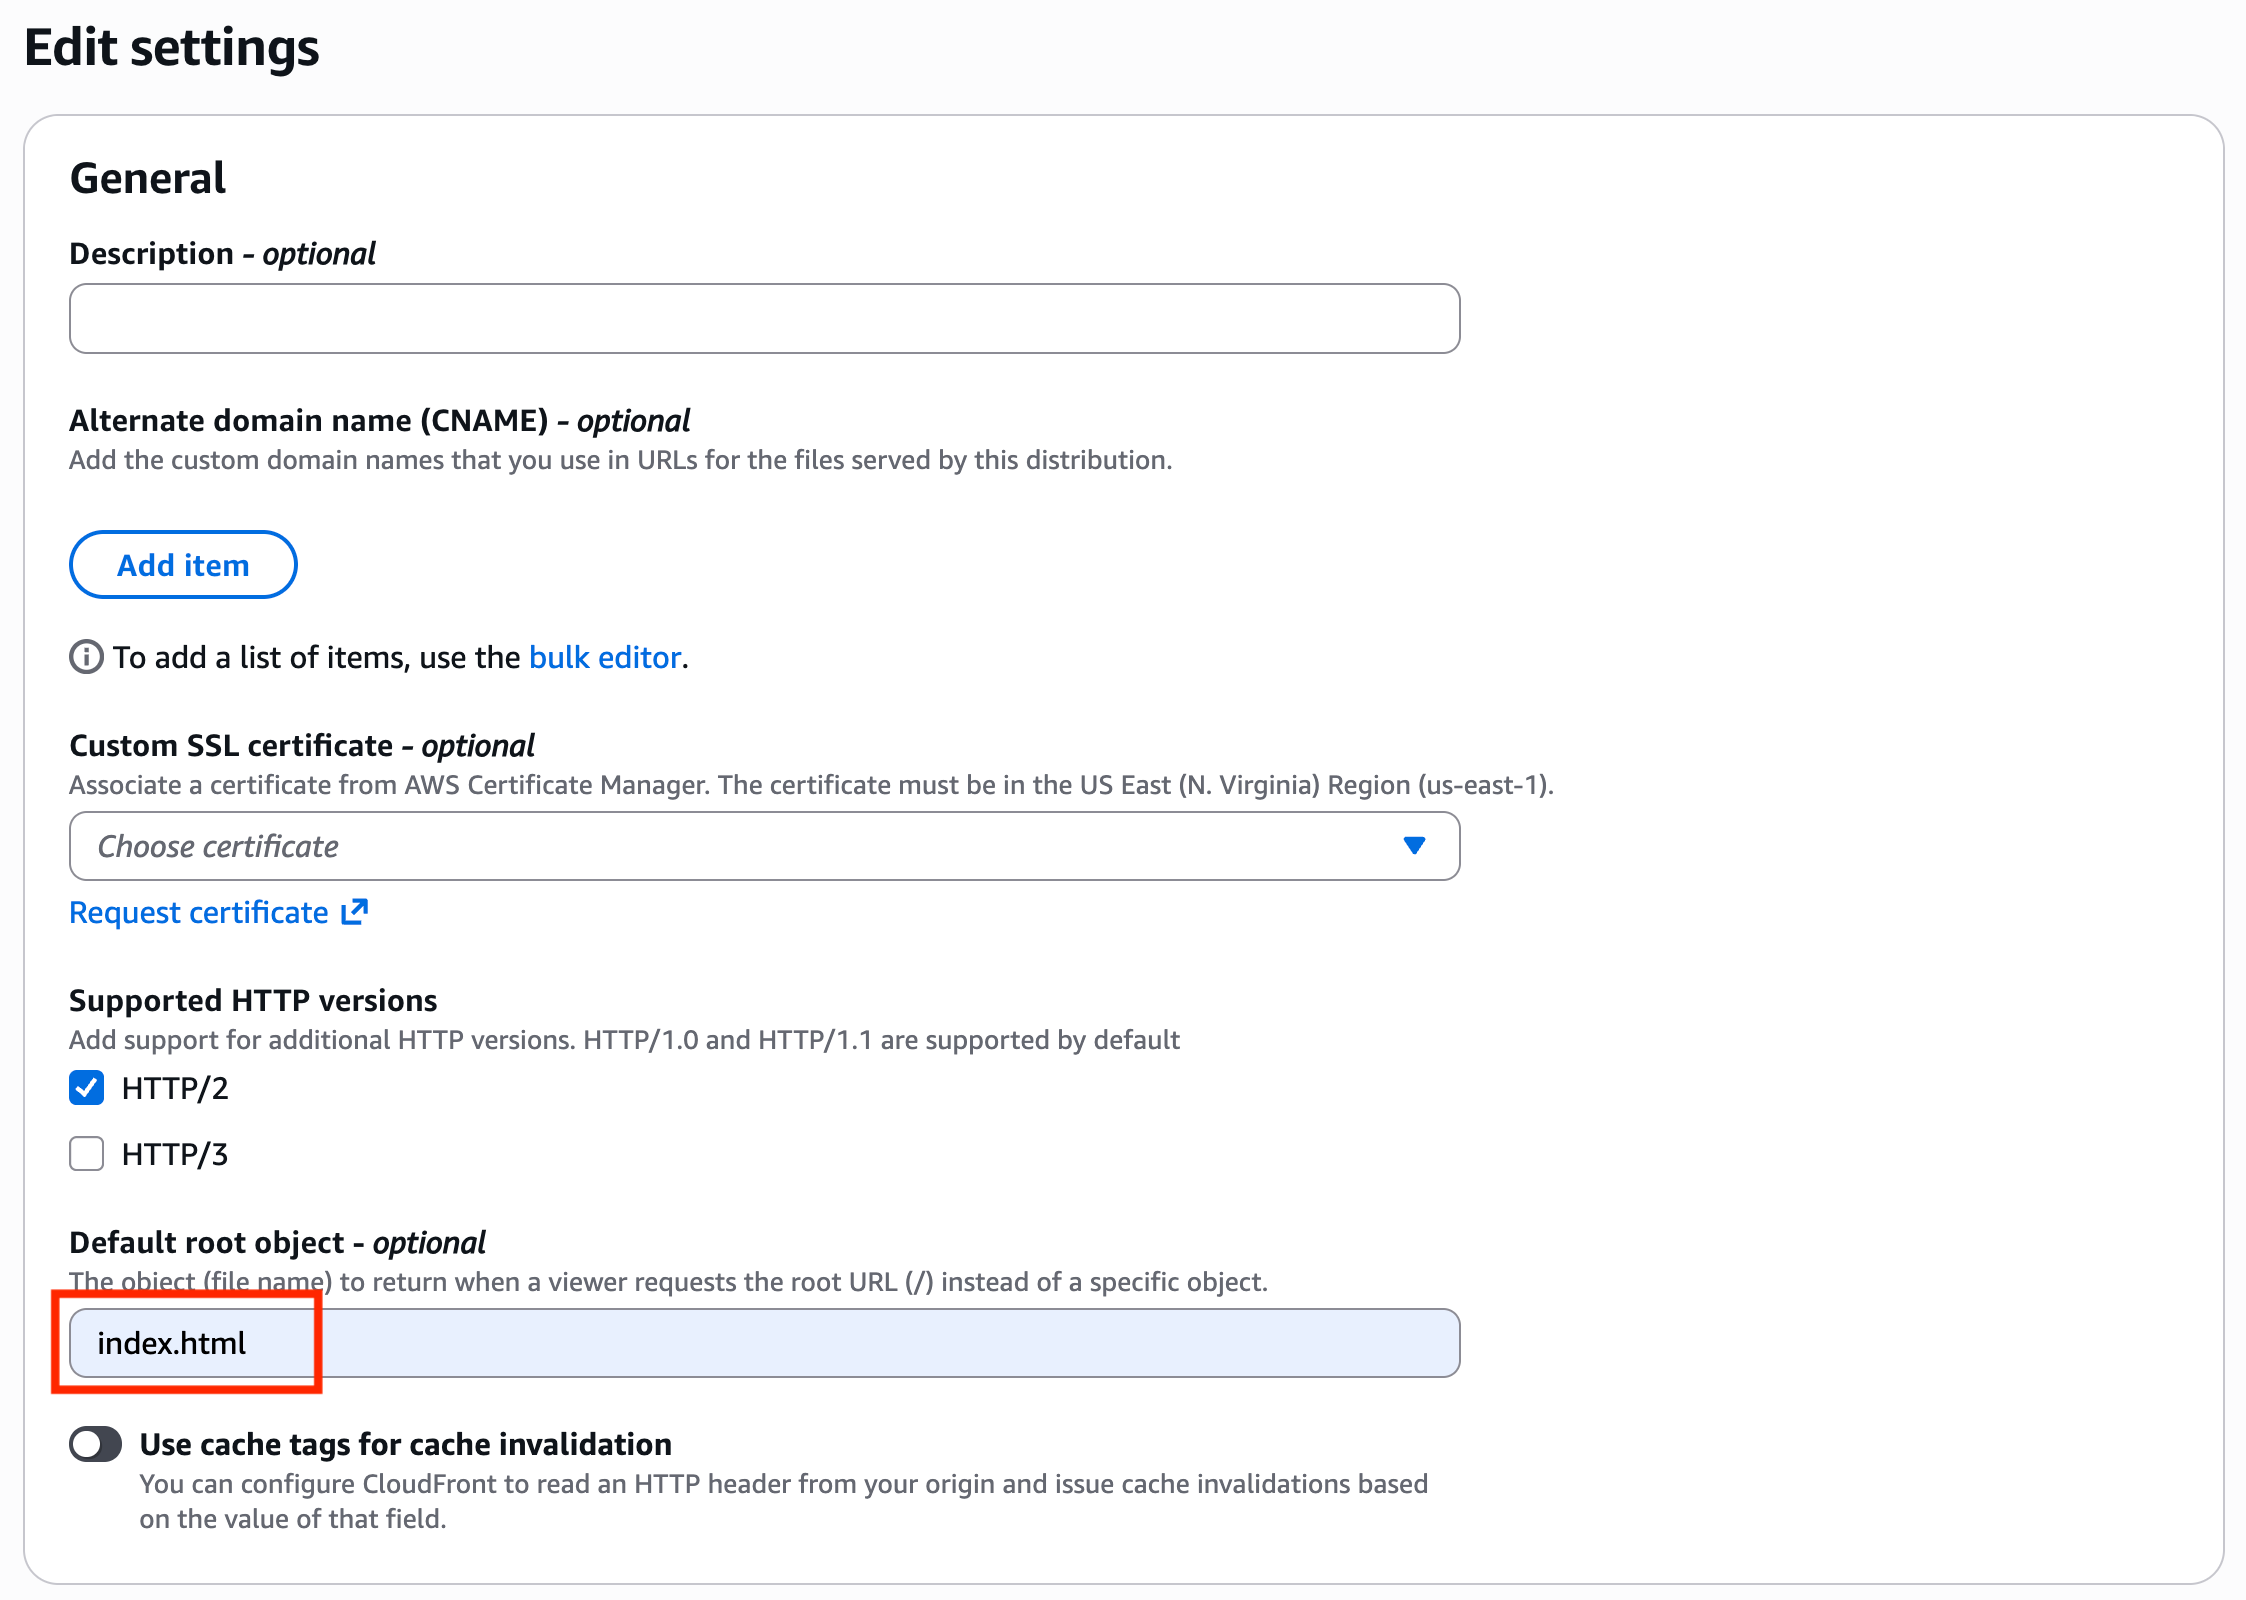
Tại Console Distribution -> Tab General -> Settings: Edit
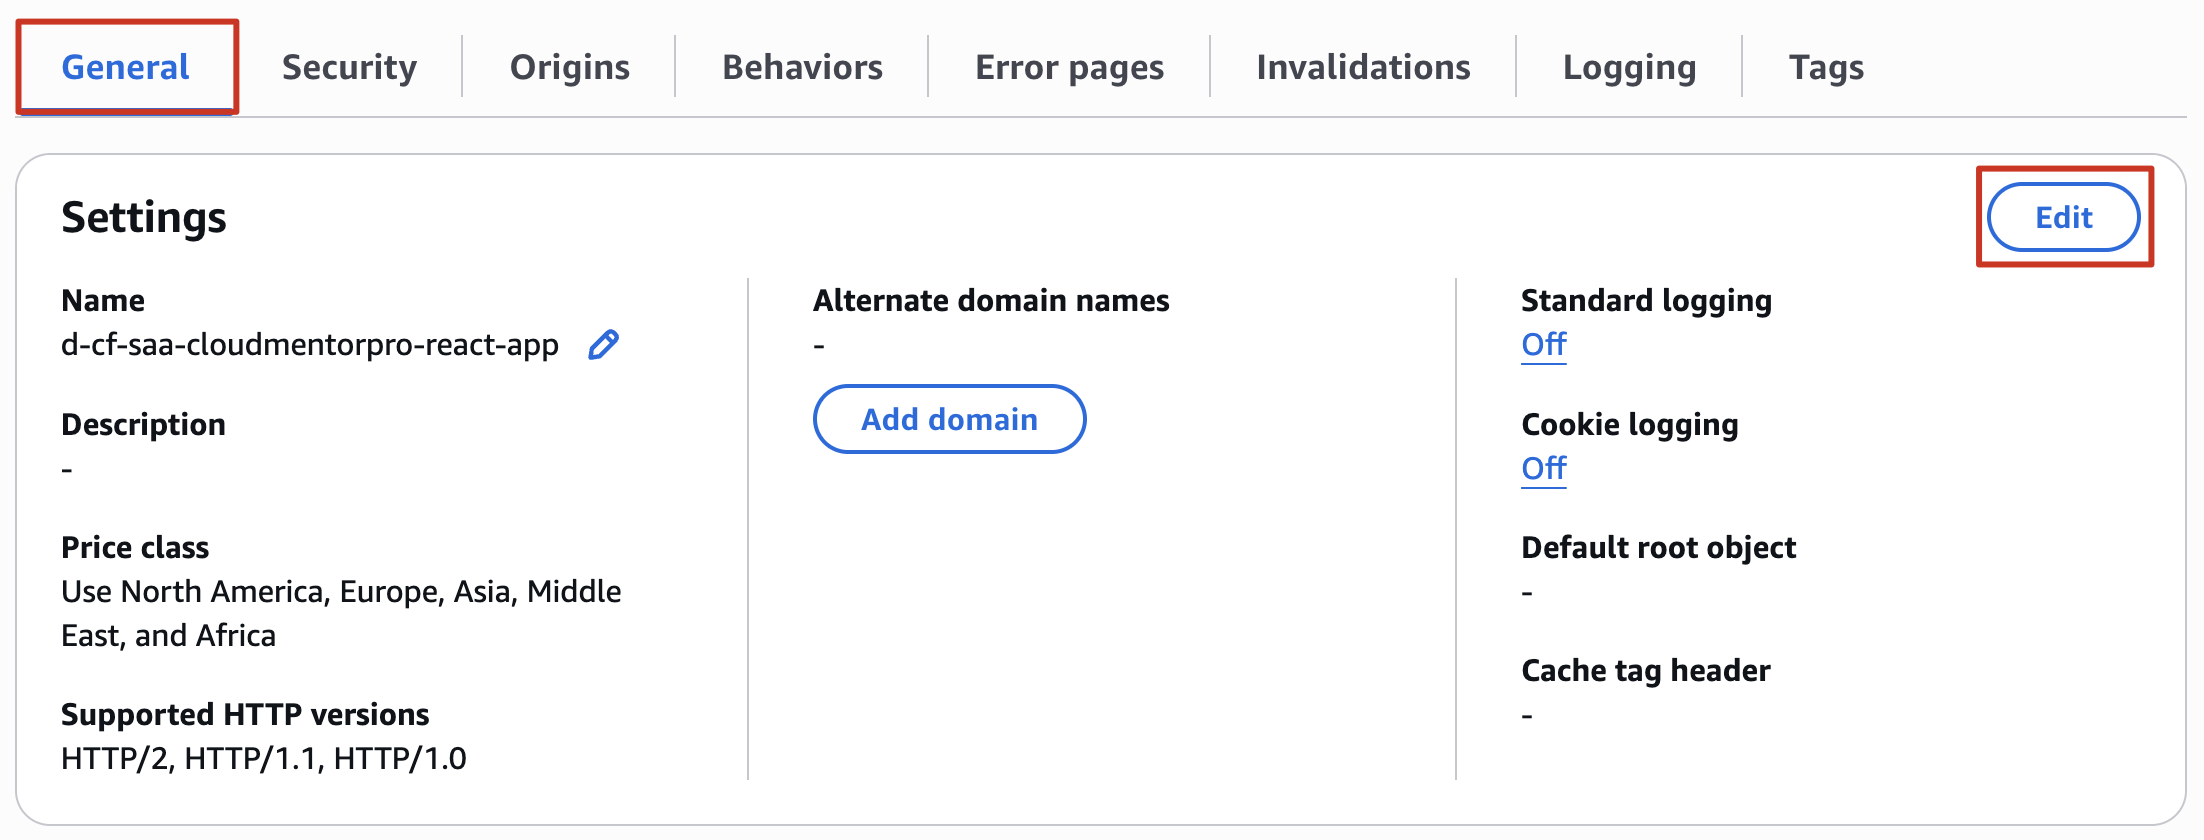
Edit settings
- Default root object - optional:
index.html - Các setting khác để default
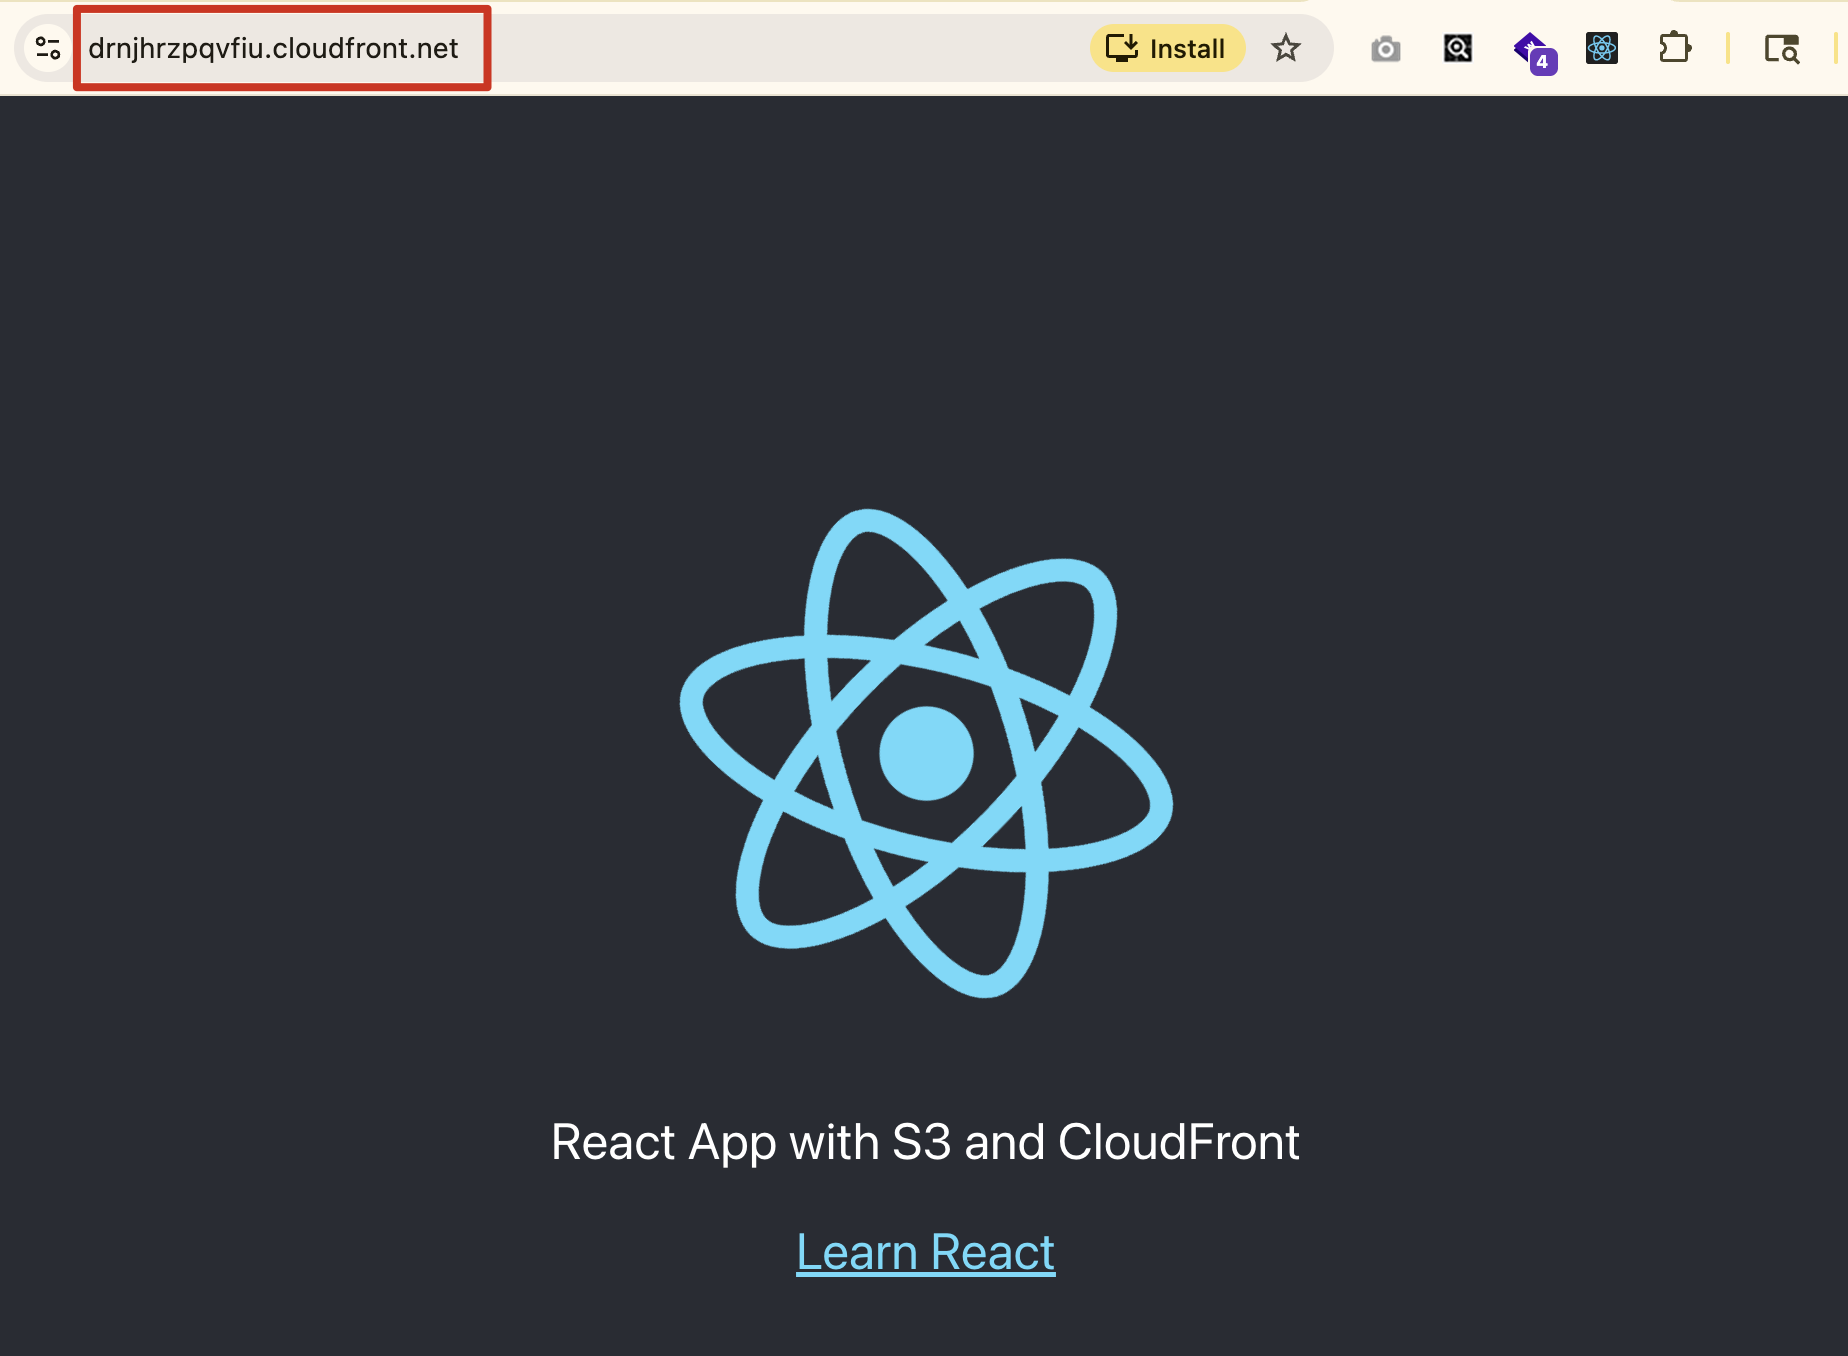
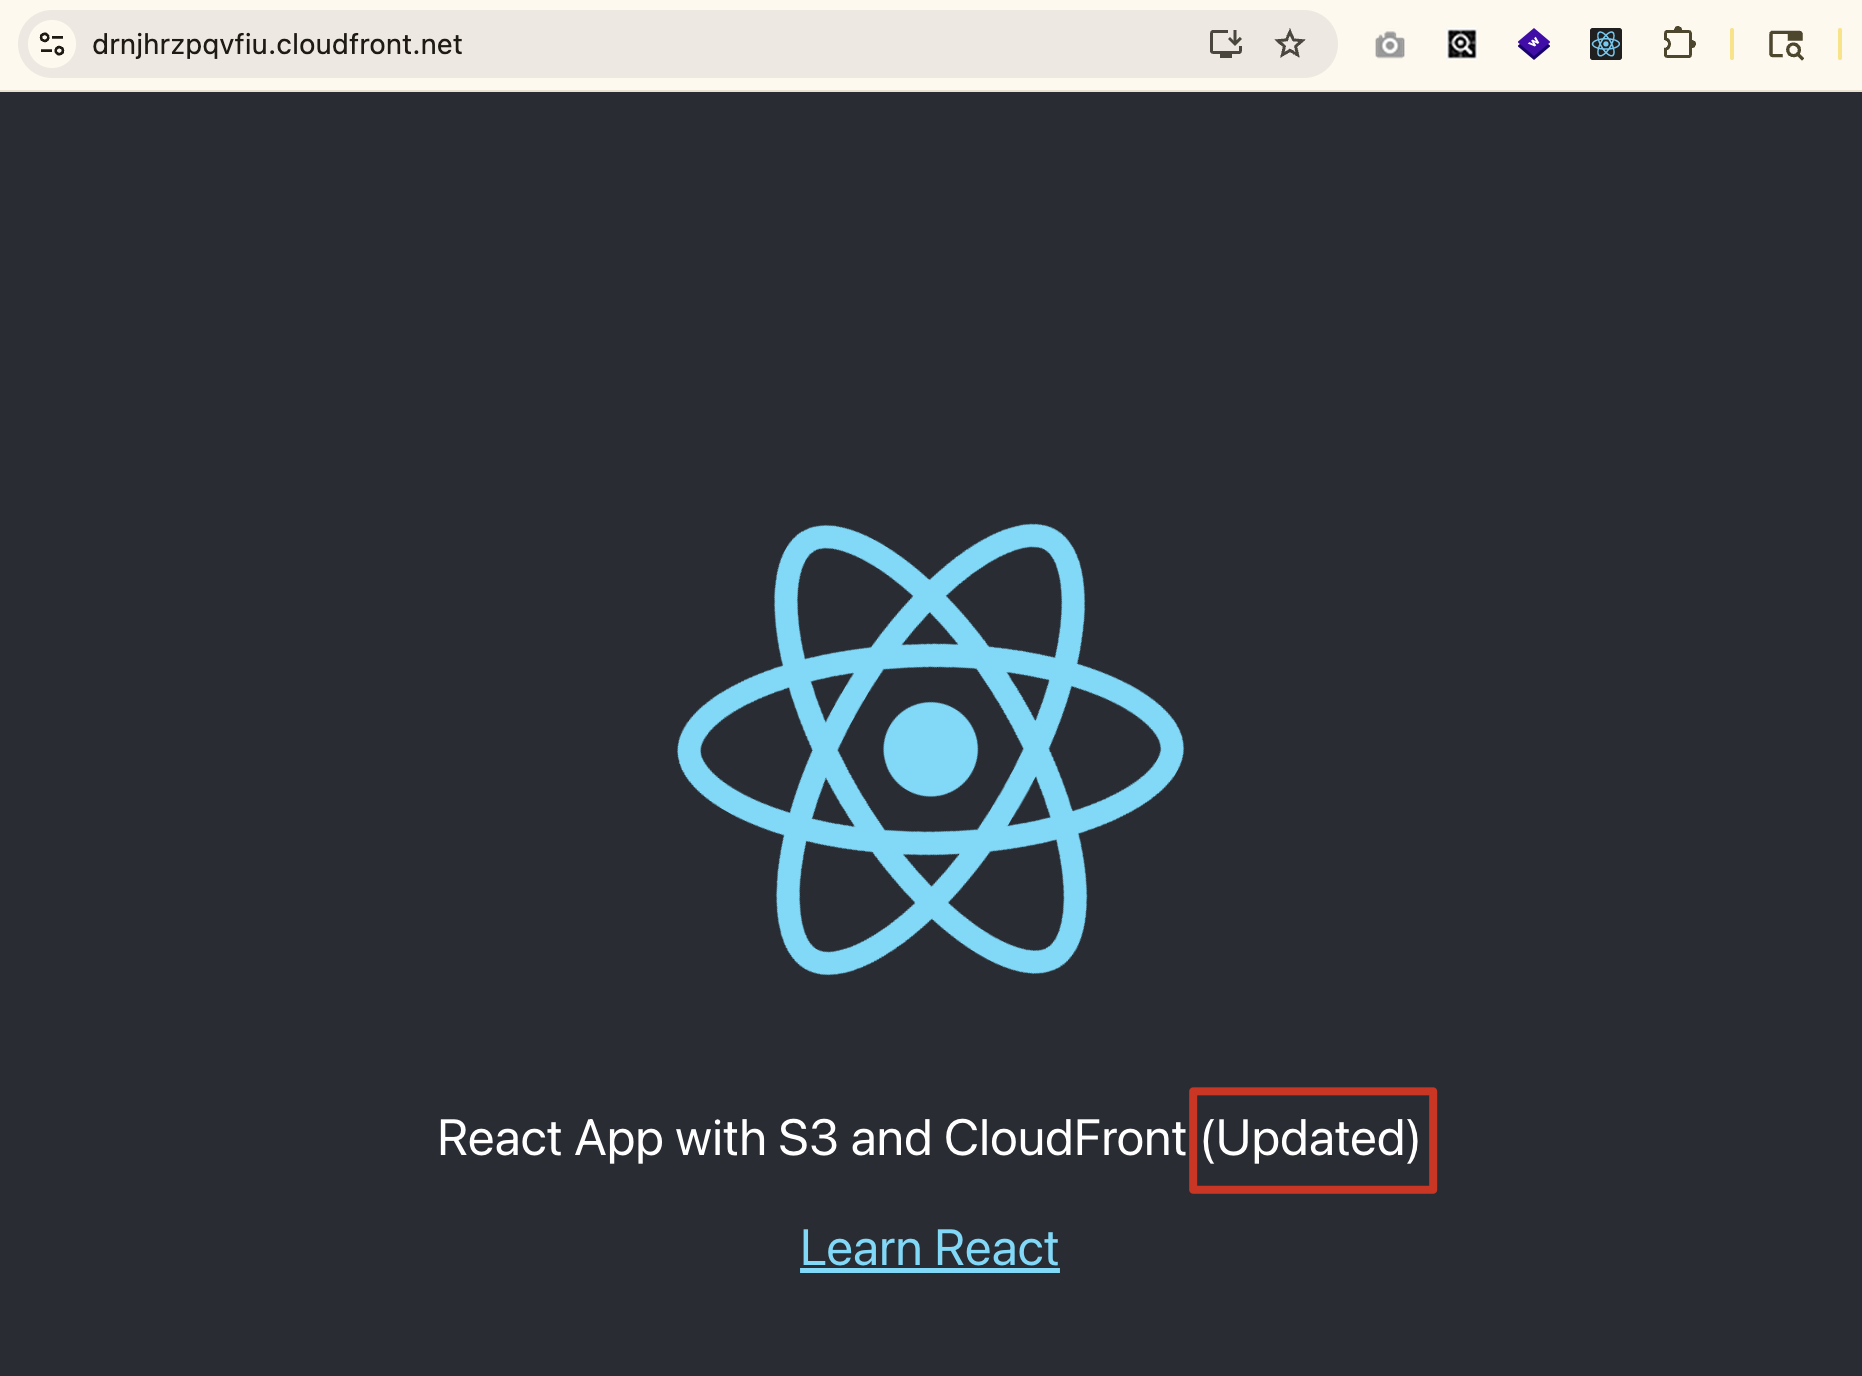
6. Accessing React App through Cloudfront.
Vào Distributions vừa tạo, copy Distribution domain name
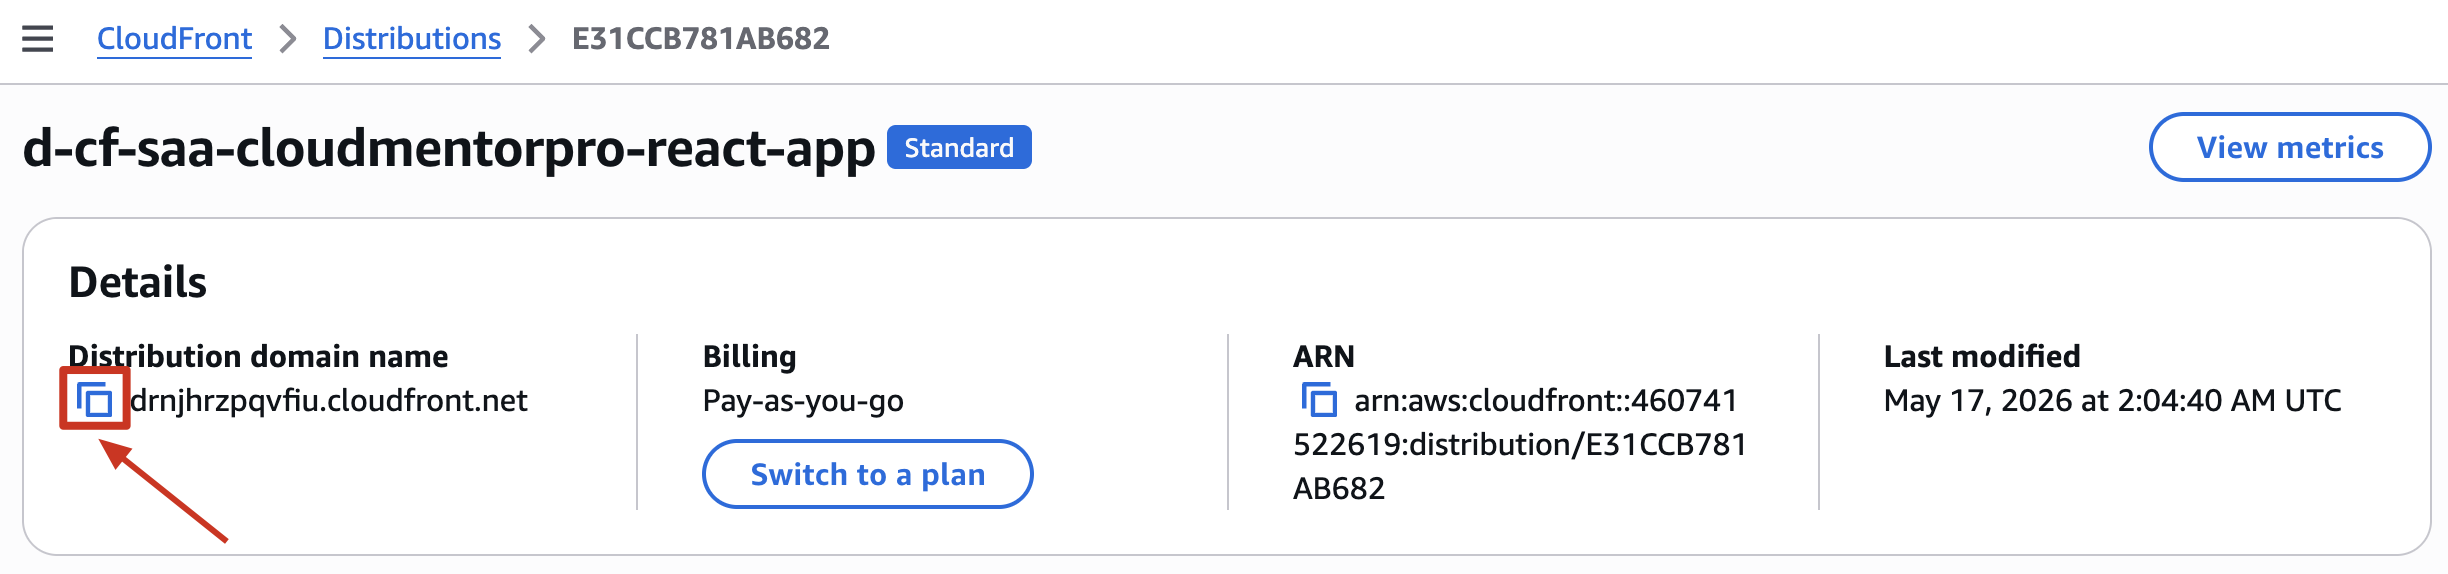
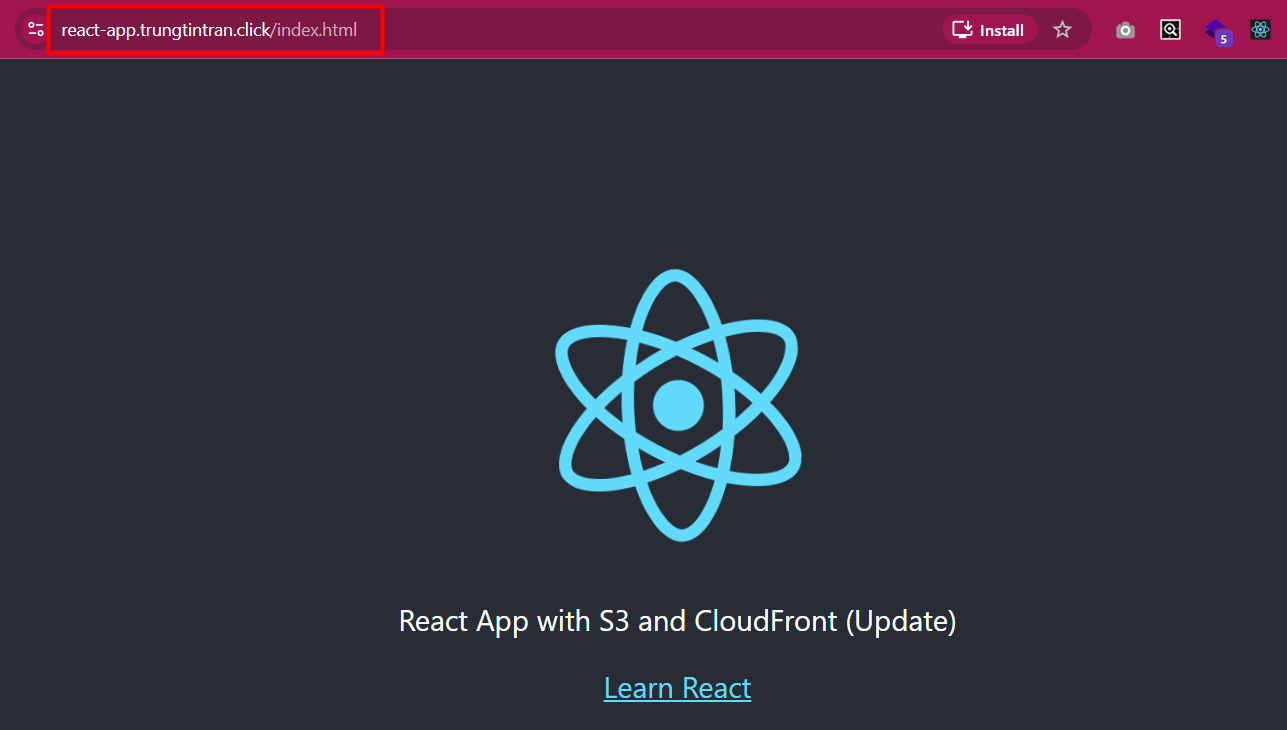
Access đến [Distribution domain name]
7. Use AWS CLI to update S3 and CloudFront
Mỗi lần chúng ta update app, chúng ta sẽ thực hiện các công việc sau để Deploy
- Build app sử dụng
npm run build - Upload nội dung thư mục build đến S3 bucket: Có thể sử dụng CLI để thực hiện việc này:
aws s3 sync build/ s3://{your-s3-bucket} - CloudFront sẽ cache nội dung của S3 bucket và nó sẽ không biết được content được update, Chúng ta sẽ cần nói cho CloudFront Distribution to invalidate the cache. Chúng ta cũng có thể làm việc này bằng CLI:
aws cloudfront create-invalidation --distribution-id YOUR_DISTRIBUTION_ID --paths '/*'
Let's Do It
- Thực hiện một chút thay đổi nhỏ ở đây
- Run command
npm run buildđể build app - Tại thư mục my-app Run command
aws s3 sync build/ s3://{your-s3-bucket}để upload file lên S3
Mặc dù S3 đã được cập nhật nhưng CloudFront domain vẫn hiển thị nội dung cũ

- Run command
aws cloudfront create-invalidation --distribution-id YOUR_DISTRIBUTION_ID --paths '/*'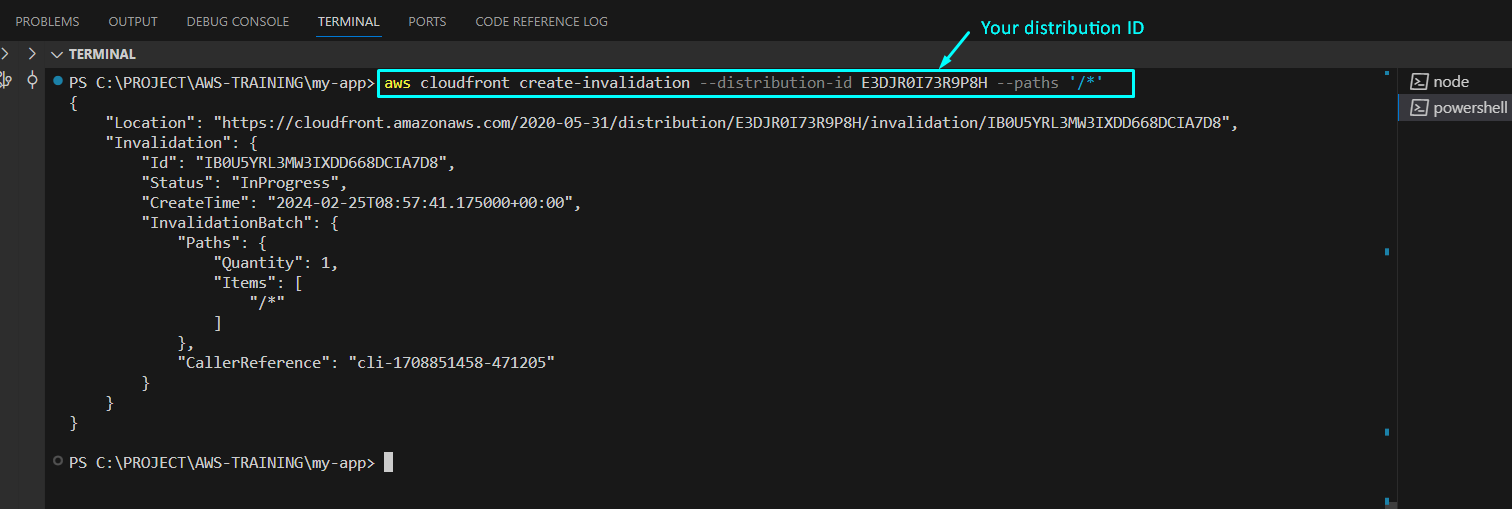
Challenge
Vì domain của CloudFront đang sử dụng là default domain, chúng ta có thể cuscom domain này. Cách làm như sau:
- 1. Mua Domain trên Route53
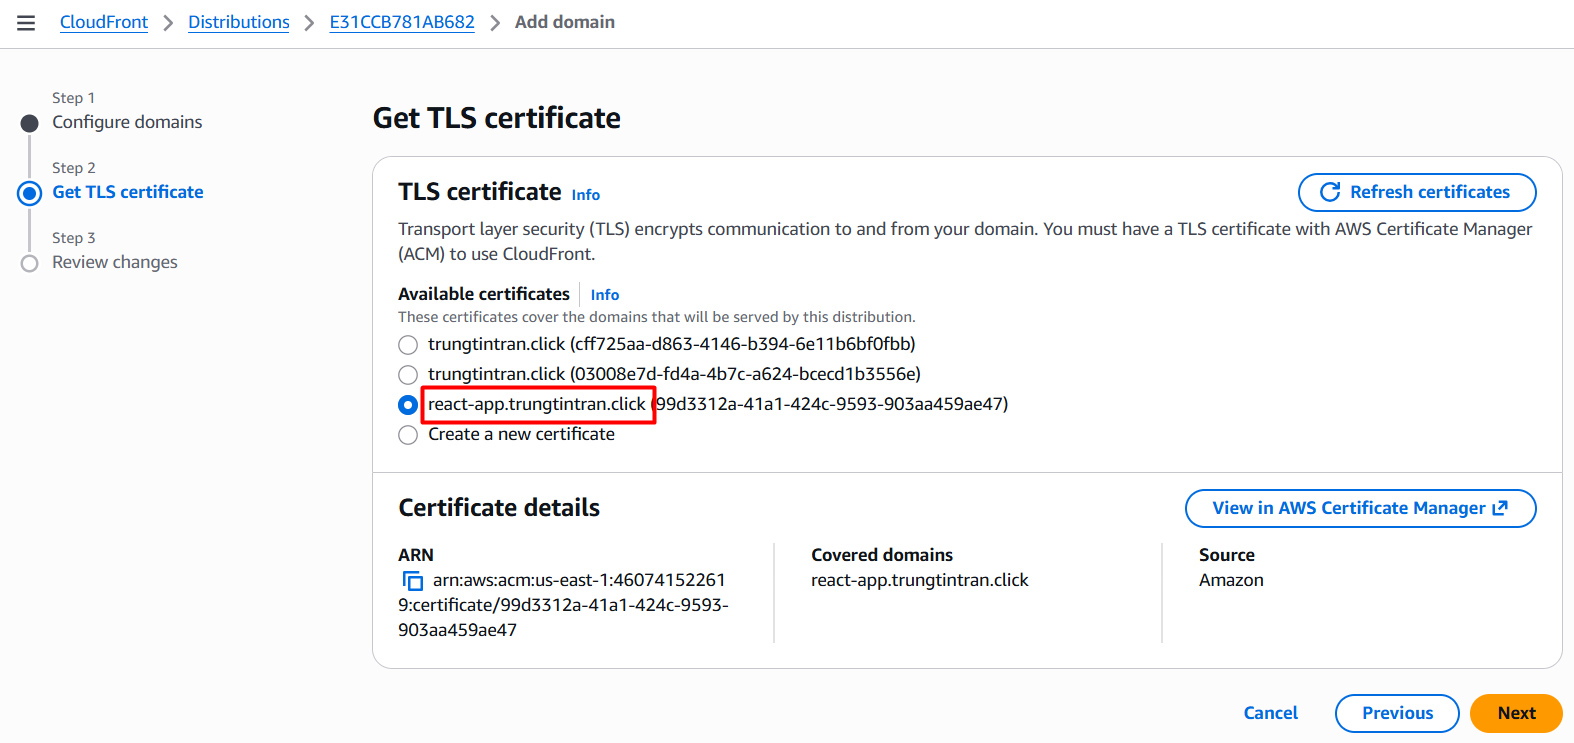
- 2. Create Certificate sử dụng ACM
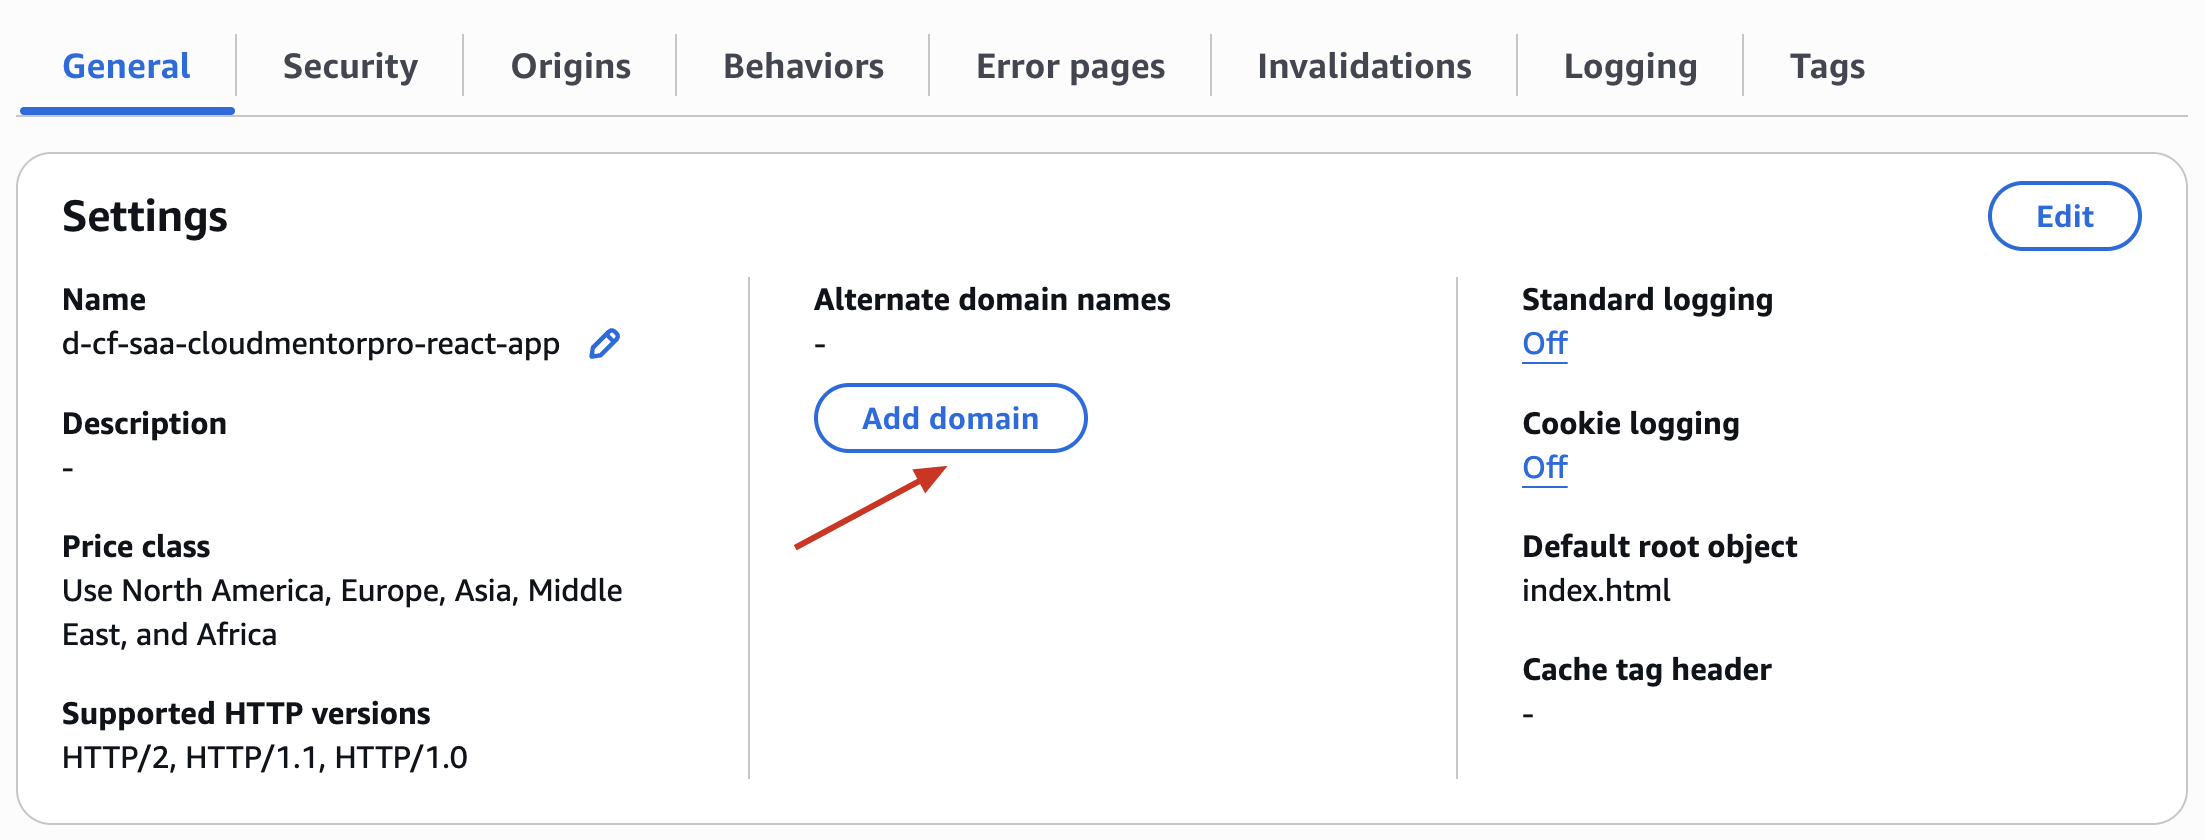
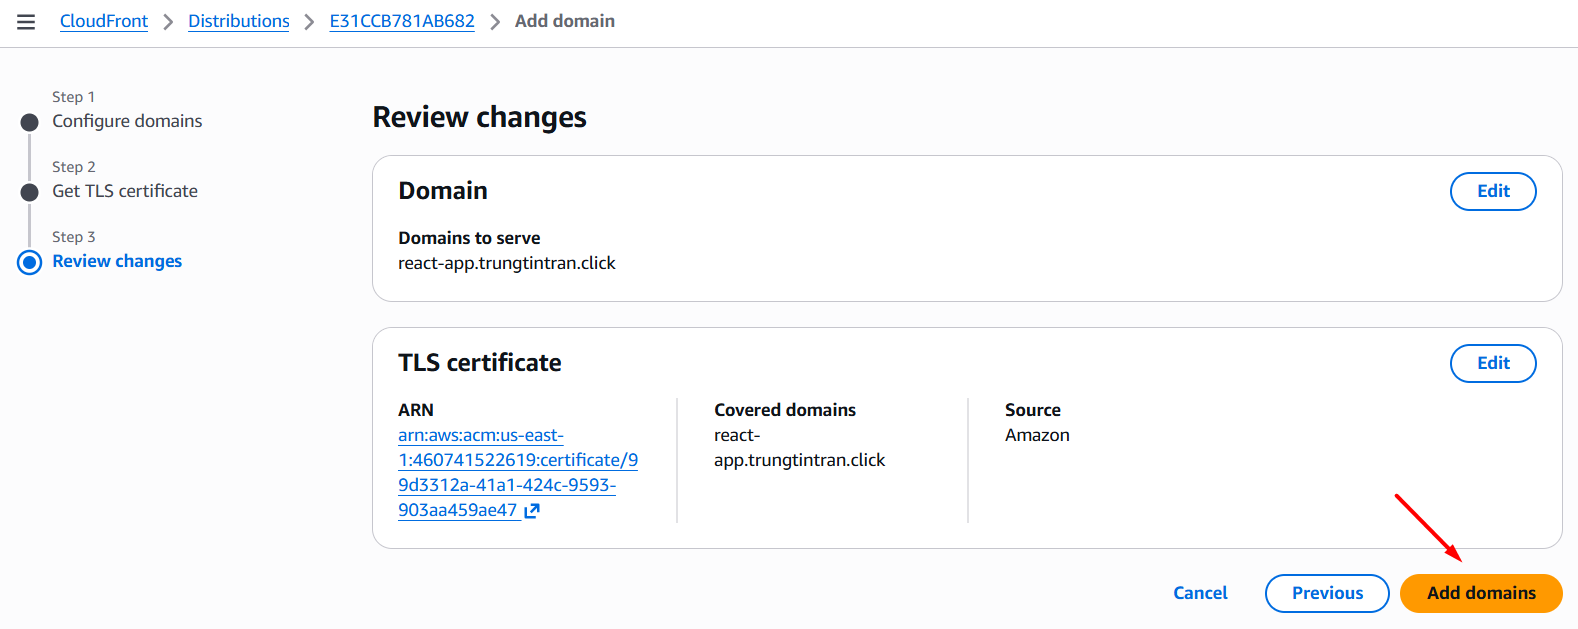
- 3. Add domain
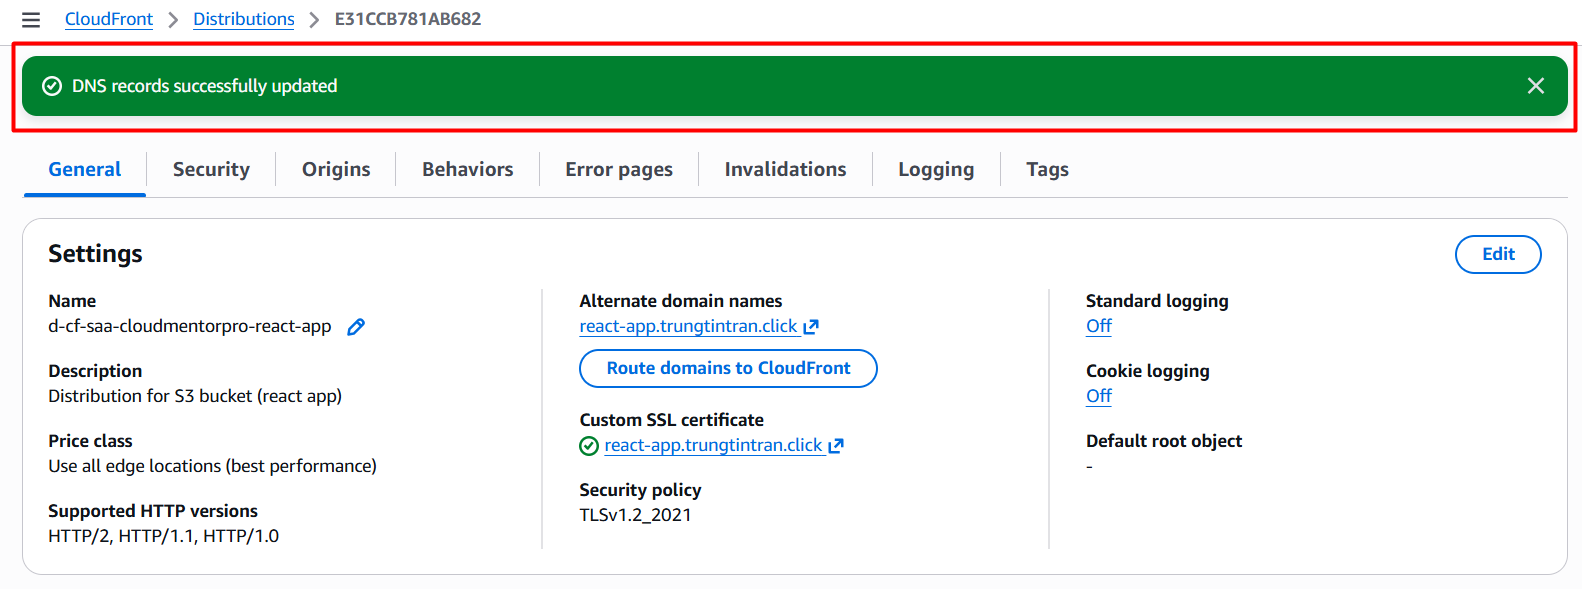
Tại Console Distribution -> Tab General -> Settings: Add domain
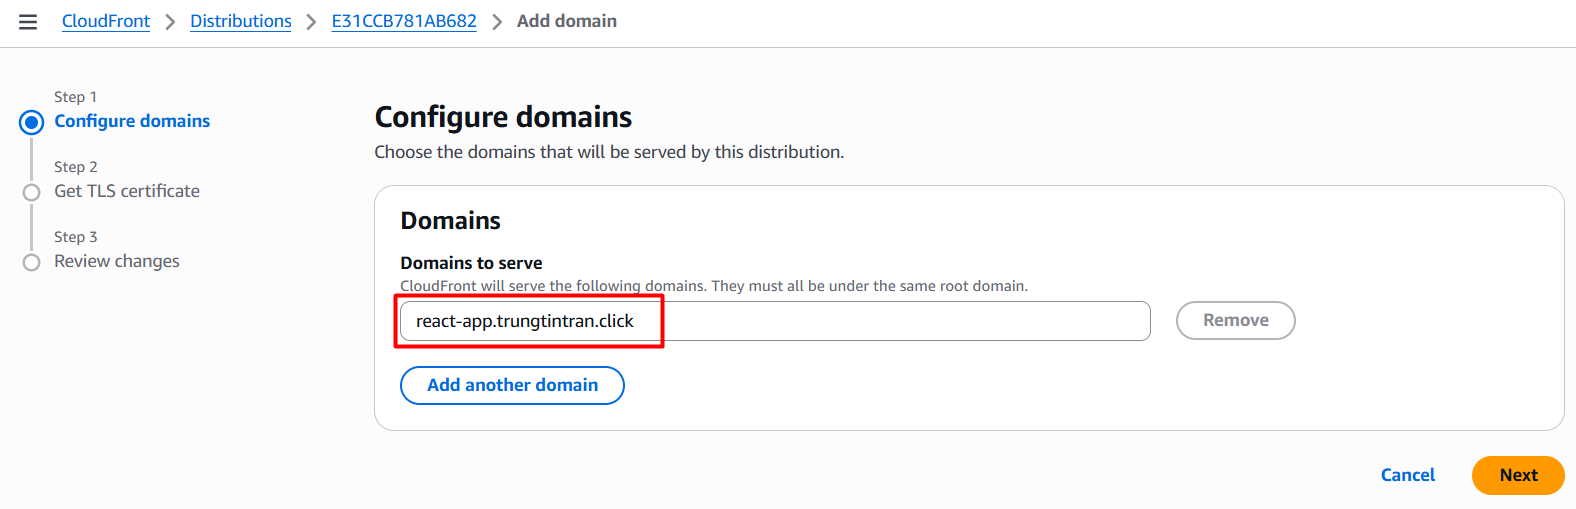
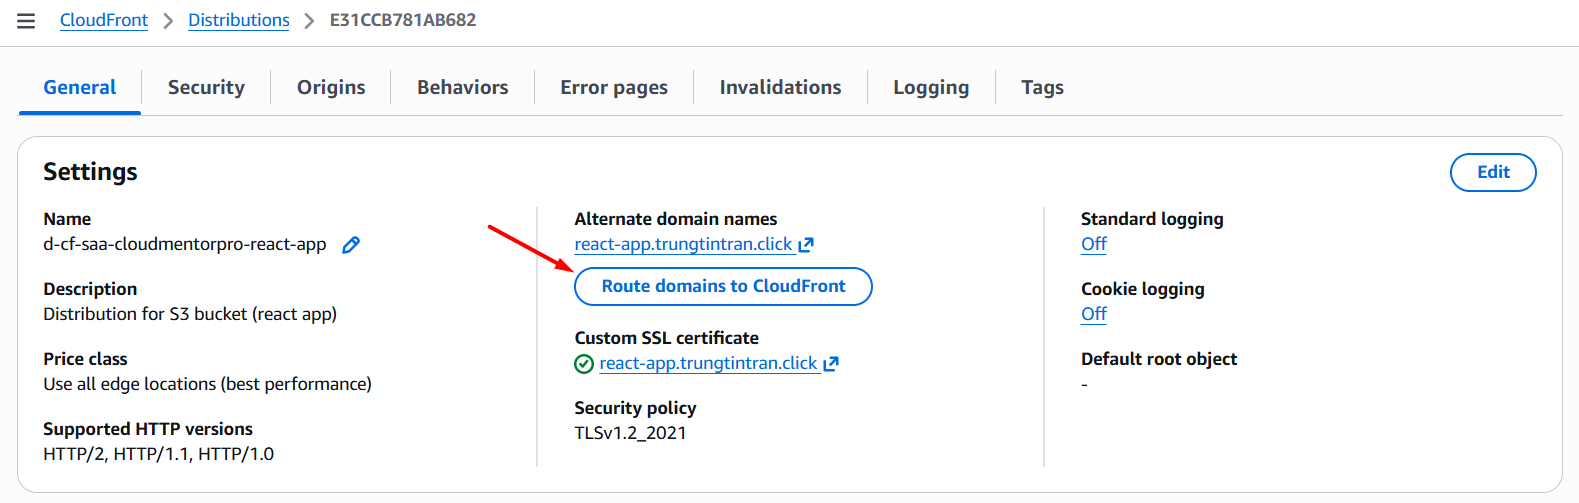
- 4. Route domains to CloudFront
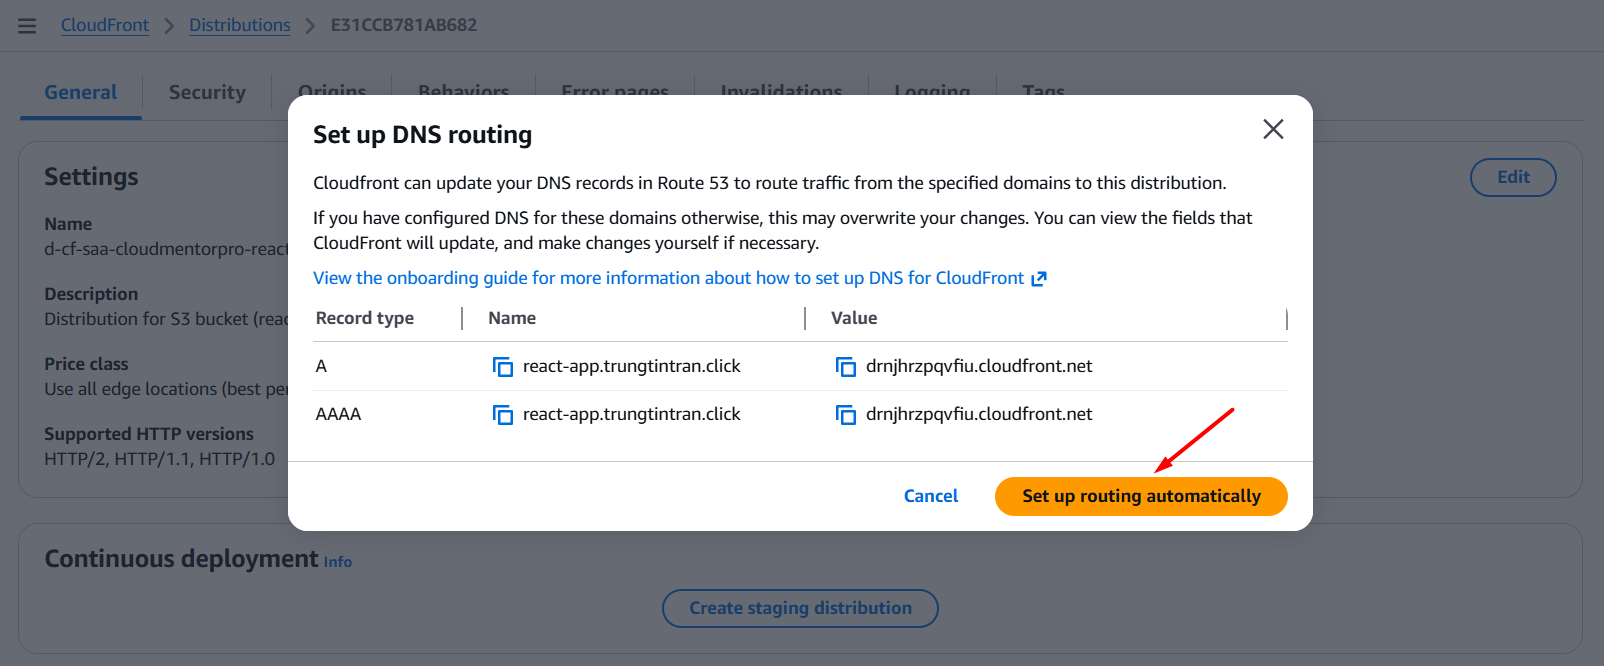
Set up DNS routing thành công!!!
Clean Up
- Empty và Delete S3 Bucket
- Disable Cloudfront Distributions
- Đợi cho Distributions Deploy hoàn thành sẽ enable nút Delete
- Delete Distributions
- Delete Certificates (Nếu thực hiện challenge)
- Delete record in Route53 (Nếu thực hiện challenge)