Create, build and Deploy a Sample Hello World App using AWS SAM
Lab Details
- Duration: 40 minutes
- AWS Region: US East (N. Virginia) us-east-1
Introduction
- AWS SAM (Serverless Application Model) là một open-source framework giúp Developer dễ dàng build và deploy serverless applications trên AWS
- Nó sử dụng AWS CloudFormation để định nghĩa infrastructure và resource cho serverless application ví dụ như Lambda Function, API Gateway, DynamoDB
- SAM hỗ trợ nhiều ngôn ngữ lập trình Node. js, Java, Python, .NET and Go
- SAM cung cấp môi trường test và debug ở local cho phép Developer có thể test code trước khi deploy lên AWS
- Nó cũng cung cấp pre-built templates cho những common serverless application architectures, giúp chúng ta dễ dầng bắt đầu build một serverless applications.
- Tích hợp với AWS CodePipeline cho CI/CD
- Cung cấp command-line interface (CLI) và AWS Toolkit for Visual Studio Code
- Đây là công cụ free
- Một số command line
sam init- cung cấp các option để khởi tạo new serverless applicationsam build- chuẩn bị serverless application cho quy trình deployment tiếp theo như local testing hoặc deploying to the AWS Cloud.sam deploy- command to deploy your serverless application to the AWS Cloud.sam delete- command cho phép xóa resource của serverless application bằng cách xóa Cloudformation stack
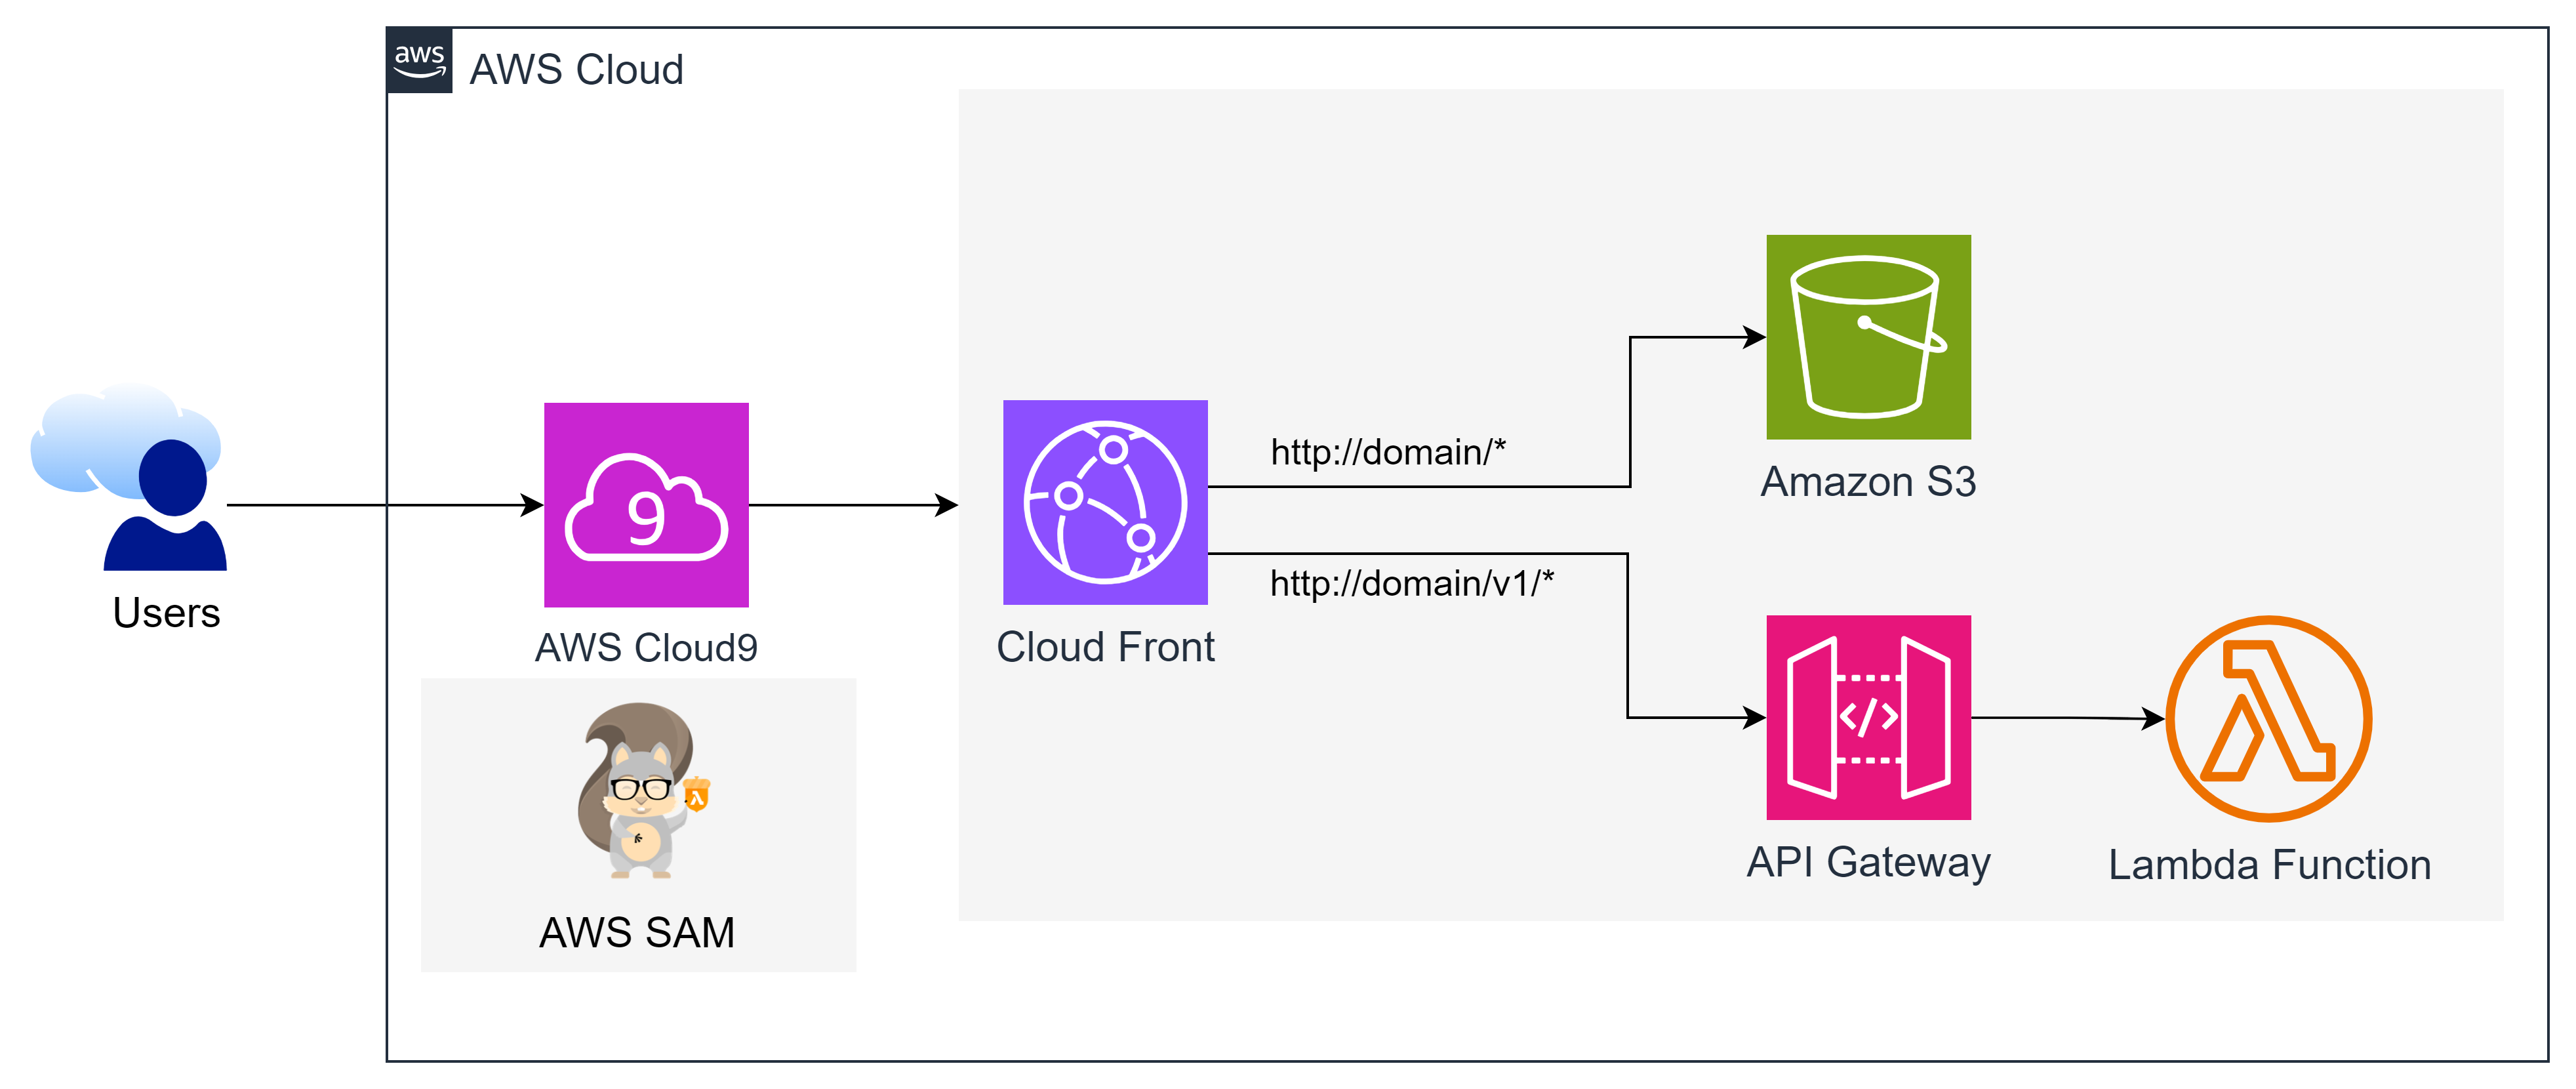
Architecture Diagram
Task Details
- Create an AWS Cloud9 development environment.
- Build app
- sam init
- AWS SAM template
- Lambda code
- Deploy
- Test hoạt động
- Upload index.html to S3 bucket
- Access trực tiếp API
- Access statis web thông qua CloudFront
- Access API Gateway thông qua CloudFront
- Clean up
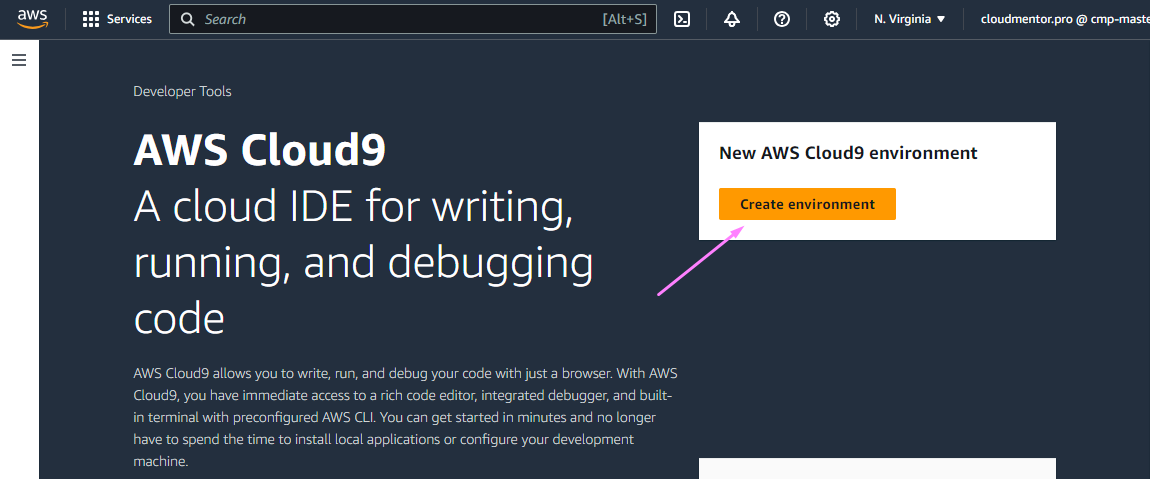
1. Create an AWS Cloud9 development environment.
Bạn có thể cài đặt cài đặt Python, aws configure, cài đặt SAM CLI ở local để thực hiện các câu lệnh build, deploy ứng dụng tại local. Tuy nhiên, tránh trường hợp môi trường không đồng nhất dẫ đến bạn không thể thực thi các command trong blog này. Mình sẽ tạo 1 Cloud9 development environment - đảm bảo môi trường các bạn dùng thống nhất với môi trường mình dùng để demo trong blog này.
Tại console -> Search Cloud9 -> Create enviroment
- Name:
d-cloud9-workstation - VPC: Default VPC
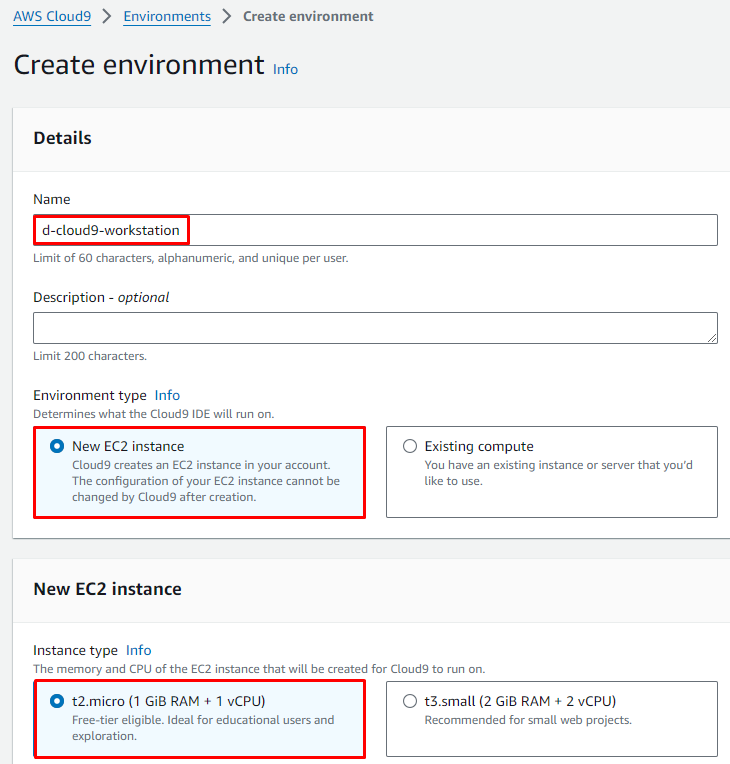
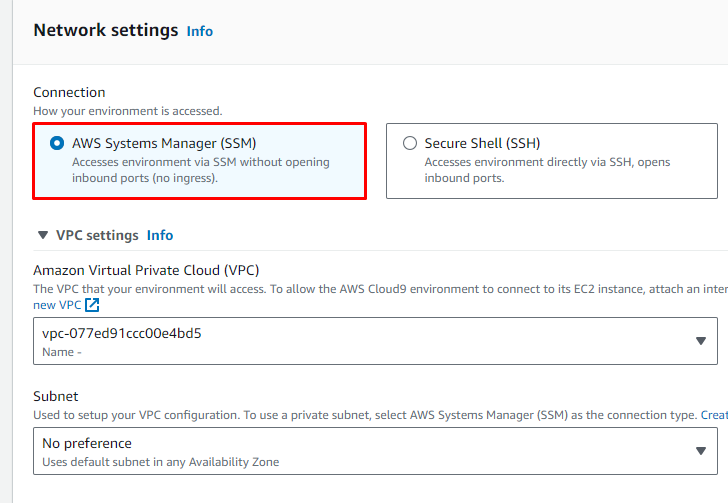
- Nhấn Create
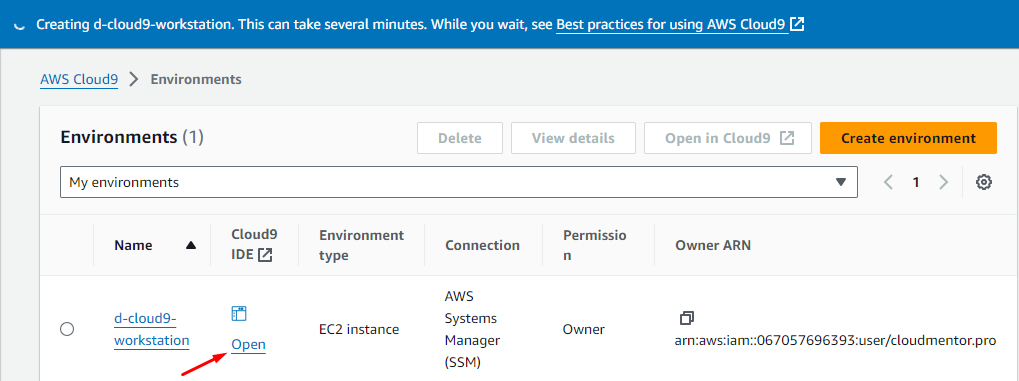
- Đợi 1-2 phút môi trường của bạn sẽ được tạo
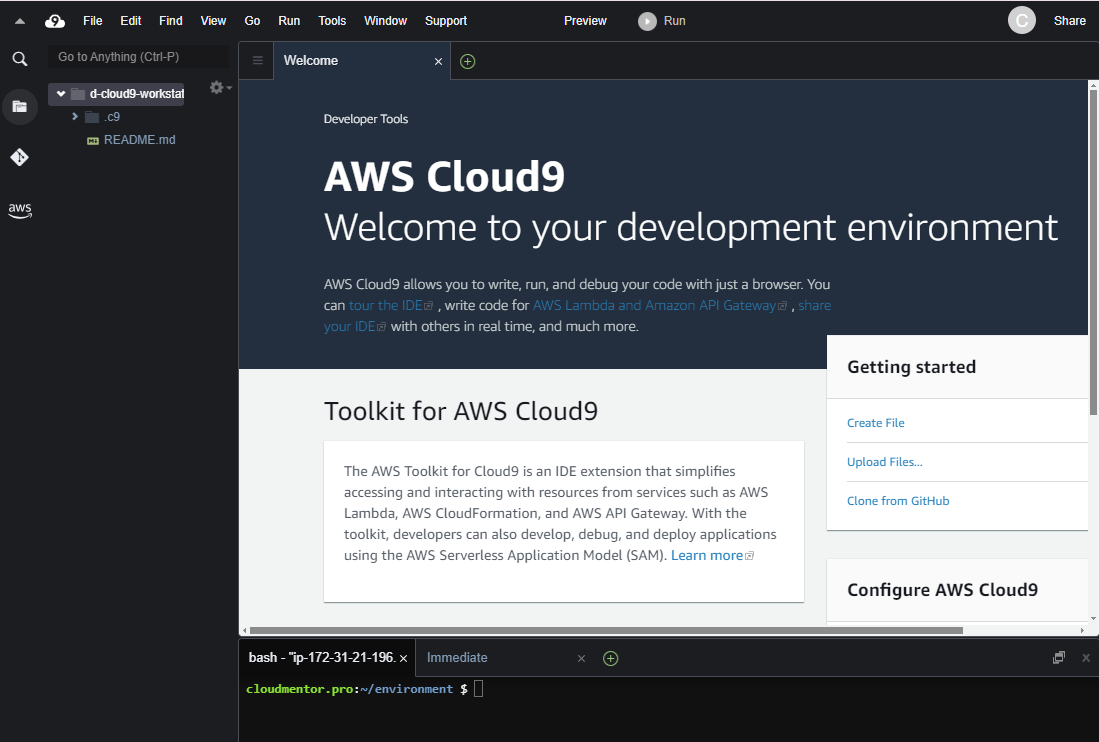
Vậy là chúng ta đã có một IDE để làm việc, viết code, sử dụng command line để tương tác với AWS rồi.
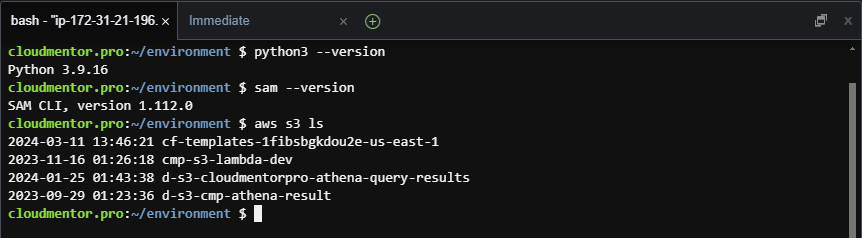
Bạn có thể kiểm tra xem python đã được cài chưa, sam cli, hay aws cli đã được cài chưa
python3 --versionsam --versionaws s3 ls
2. Build app
2.1 sam init
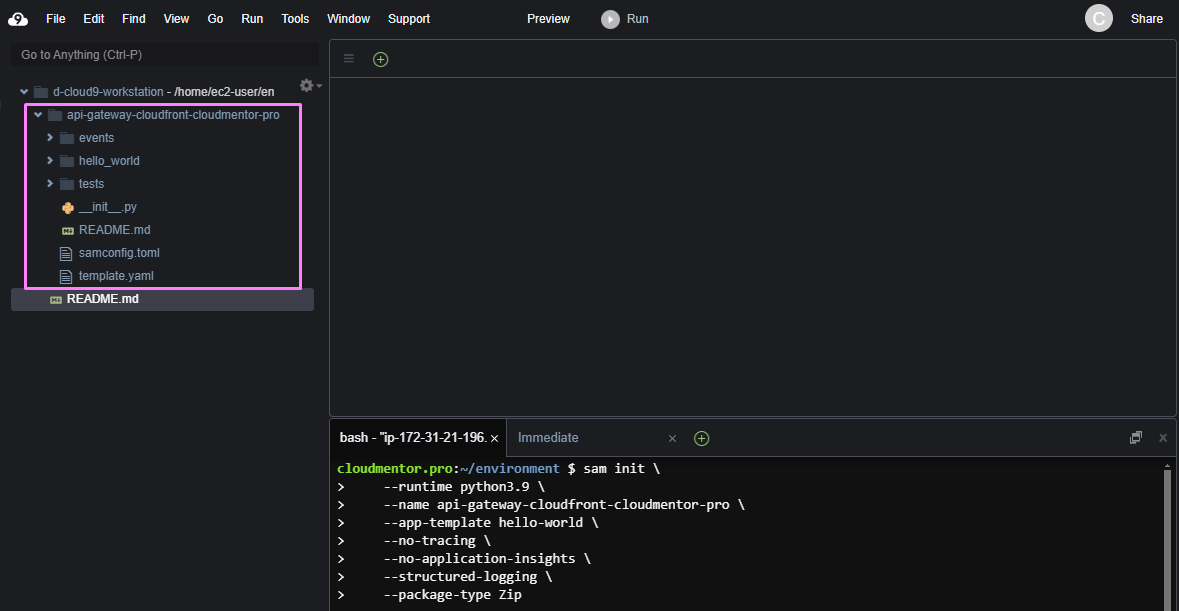
Run lệnh sau tại terminal của Cloud9
Thay {your-name} bằng tên của bạn
sam init \
    --runtime python3.9 \
    --name api-gateway-cloudfront-{your-name} \
    --app-template hello-world \
    --no-tracing \
    --no-application-insights \
    --structured-logging \
    --package-type Zip
2.2 AWS SAM template
Update file template.yaml với nội dung sau:
AWSTemplateFormatVersion: '2010-09-09'
Transform: AWS::Serverless-2016-10-31
Description: api-gateway-cloudfront-sample

Resources:
  MyApi:
    Type: AWS::Serverless::Api
    Properties:
      StageName: v1
      OpenApiVersion: 3.0.1

  HelloWorldFunction:
    Type: AWS::Serverless::Function
    Properties:
      CodeUri: hello_world/
      Handler: app.lambda_handler
      Runtime: python3.9
      Timeout: 5
      Architectures:
      - x86_64
      Events:
        HelloWorld:
          Type: Api
          Properties:
            Path: /hello
            Method: get
            RestApiId: !Ref MyApi

  HelloWorldFunctionLogGroup:
      Type: AWS::Logs::LogGroup
      Properties:
        LogGroupName: !Sub /aws/lambda/${HelloWorldFunction}

  SampleBucket:
    Type: AWS::S3::Bucket
    Properties:
      BucketName: !Sub api-gateway-sample-${AWS::AccountId}-${AWS::Region}
      PublicAccessBlockConfiguration:
        BlockPublicAcls: true
        BlockPublicPolicy: true
        IgnorePublicAcls: true
        RestrictPublicBuckets: true

  SampleBucketPolicy:
    Type: AWS::S3::BucketPolicy
    Properties:
      Bucket: !Ref SampleBucket
      PolicyDocument:
        Id: SampleBucket-BucketPolicy
        Statement:
          - Effect: Allow
            Action:
              - s3:GetObject
            Resource:
              - !Sub arn:aws:s3:::${SampleBucket}/*
            Principal:
              CanonicalUser: !GetAtt SampleBucketCloudFrontOriginAccessIdentity.S3CanonicalUserId

  SampleBucketCloudFrontOriginAccessIdentity:
    Type: AWS::CloudFront::CloudFrontOriginAccessIdentity
    Properties:
      CloudFrontOriginAccessIdentityConfig:
        Comment: !Sub Allows CloudFront to reach the ${SampleBucket}

  SampleDistribution:
    Type: AWS::CloudFront::Distribution
    Properties:
      DistributionConfig:
        Enabled: true
        DefaultRootObject: index.html
        CustomErrorResponses:
          - ErrorCachingMinTTL: 300
            ErrorCode: 403
            ResponseCode: 200
            ResponsePagePath: /index.html
          - ErrorCachingMinTTL: 300
            ErrorCode: 404
            ResponseCode: 200
            ResponsePagePath: /index.html
        Origins:
          - Id: !Sub S3-${SampleBucket}
            DomainName: !GetAtt SampleBucket.RegionalDomainName
            S3OriginConfig:
              OriginAccessIdentity: !Sub origin-access-identity/cloudfront/${SampleBucketCloudFrontOriginAccessIdentity}
          - Id: !Sub API-Gateway-${MyApi}
            DomainName: !Sub ${MyApi}.execute-api.${AWS::Region}.amazonaws.com
            CustomOriginConfig:
              OriginProtocolPolicy: https-only
        DefaultCacheBehavior:
          TargetOriginId: !Sub S3-${SampleBucket}
          AllowedMethods:
            - GET
            - HEAD
          ViewerProtocolPolicy: redirect-to-https
          # CachingDisabled
          # https://docs.aws.amazon.com/ja_jp/AmazonCloudFront/latest/DeveloperGuide/using-managed-cache-policies.html
          CachePolicyId: 4135ea2d-6df8-44a3-9df3-4b5a84be39ad
        CacheBehaviors:
          - PathPattern: 'v1/*'
            TargetOriginId: !Sub API-Gateway-${MyApi}
            AllowedMethods:
              - GET
              - HEAD
              - OPTIONS
              - PUT
              - PATCH
              - POST
              - DELETE
            CachePolicyId: 4135ea2d-6df8-44a3-9df3-4b5a84be39ad
            ViewerProtocolPolicy: redirect-to-https
        HttpVersion: http2

Outputs:
  HelloWorldApi:
    Value: !Sub "https://${MyApi}.execute-api.${AWS::Region}.amazonaws.com/v1/hello/"

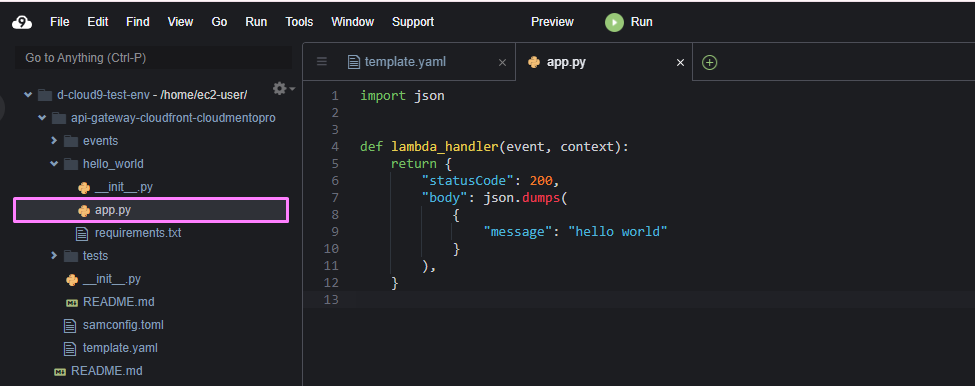
2.3 Lambda code
Update file app.py với nội dung sau:
import json

def lambda_handler(event, context):
    return {
        "statusCode": 200,
        "body": json.dumps(
            {
                "message": "hello world"
            }
        ),
    }
2.4 Deploy
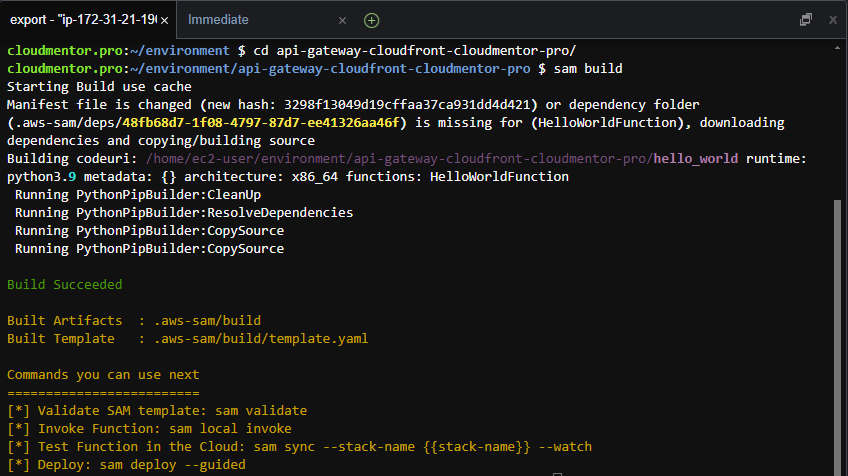
Tại bash ở Cloud9, di chuyển đến thư mục ứng dụng, chạy lệnh để build project
cd api-gateway-cloudfront-{your-name}/
sam build
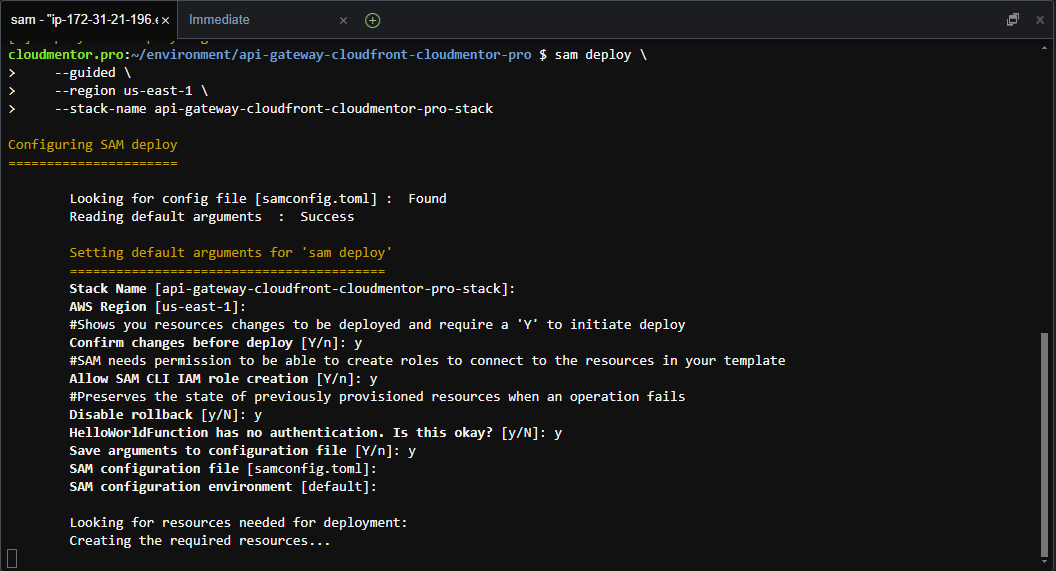
sam deploy \
    --guided \
    --region us-east-1 \
    --stack-name api-gateway-cloudfront-{your-name}-stack
Thực hiện thao tác theo hướng dẫn, chổ nào hỏi Y/N thì nhấn y và Enter. Không hỏi thì Y/N thì để các giá trị mặc định và nhấn Enter.
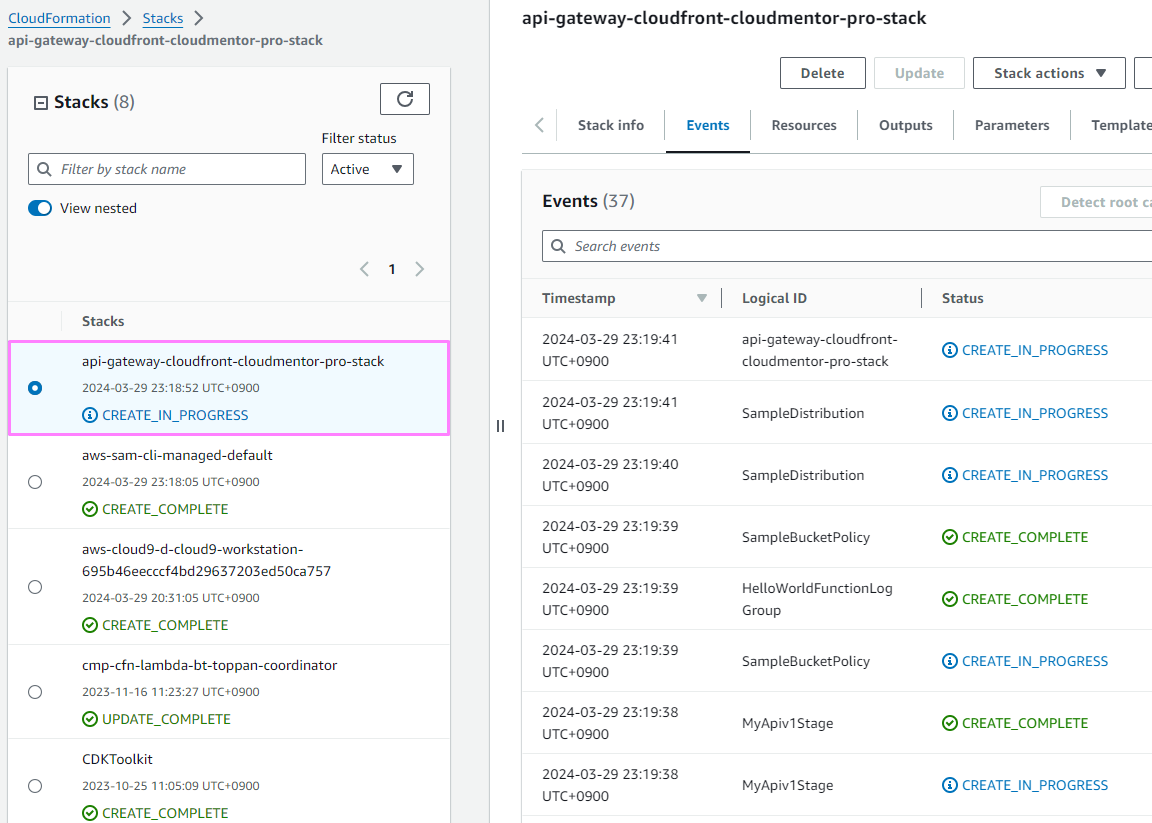
Quá trình Provisioning resource sẽ mất vài 2-3 phút.

SAM cũng dựa trên Cloudformation để tạo resource, chúng ta có thể check quá trình tạo resource ở Cloudformation
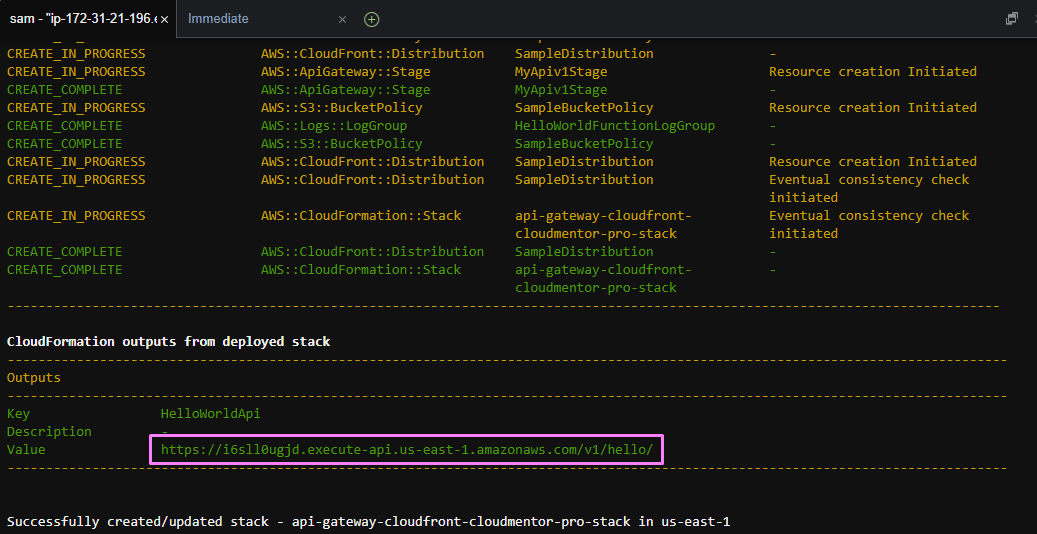
Khi quá trình hoàn tất, template sẽ output cho chúng ta API URL
3. Test hoạt động
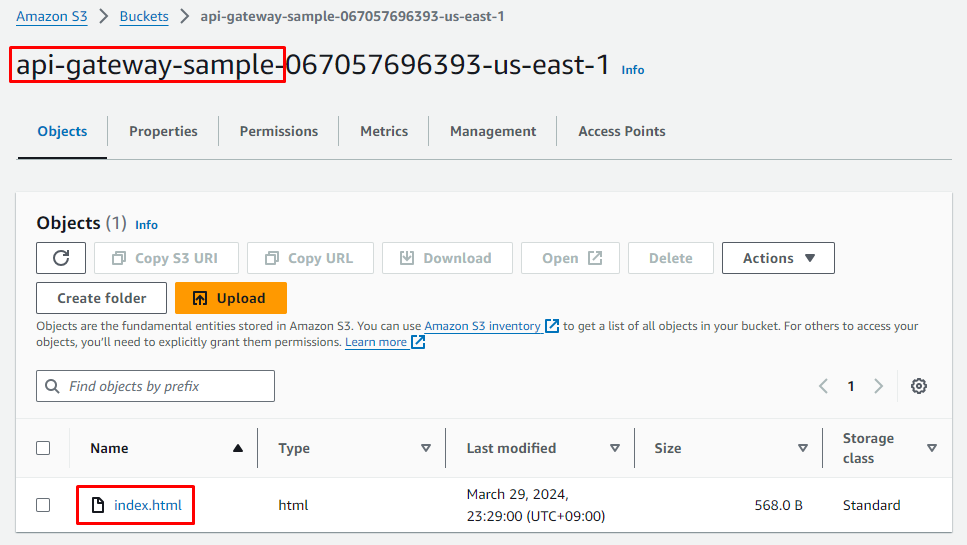
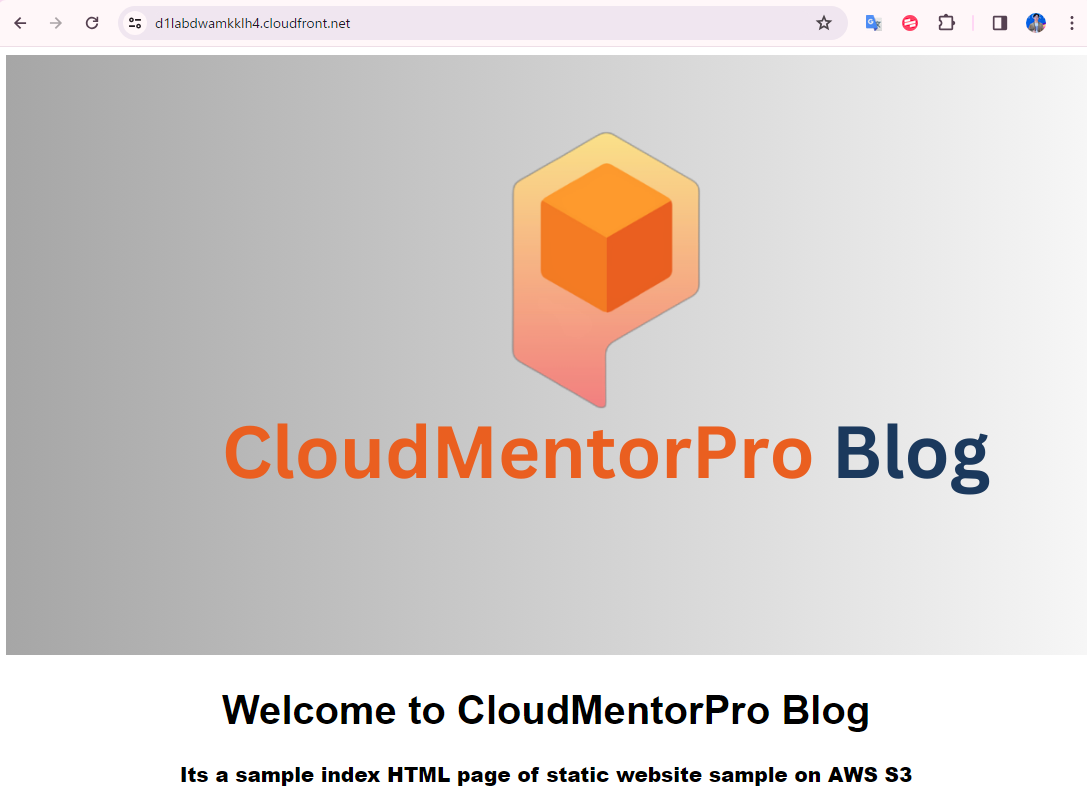
3.1 Upload index.html to S3 bucket
Tải file index.html được cung cấp tại đây và upload lên S3 bucket vừa được tạo bởi SAM
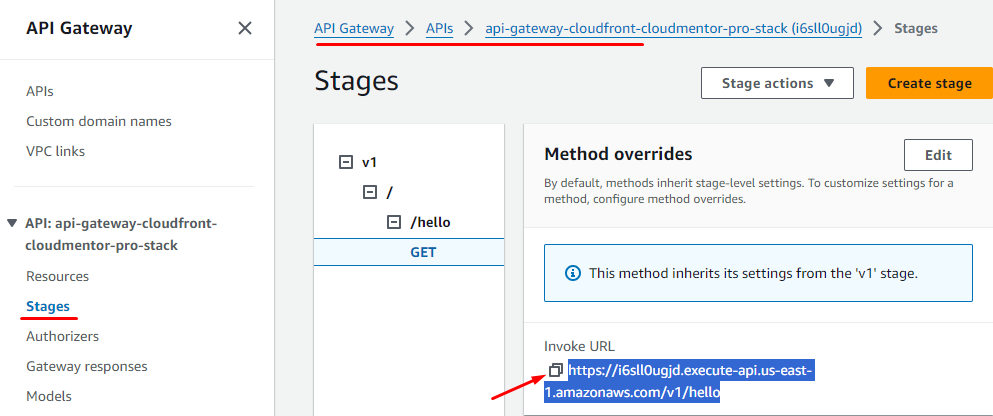
3.2 Access trực tiếp API

3.3 Access statis web thông qua CloudFront
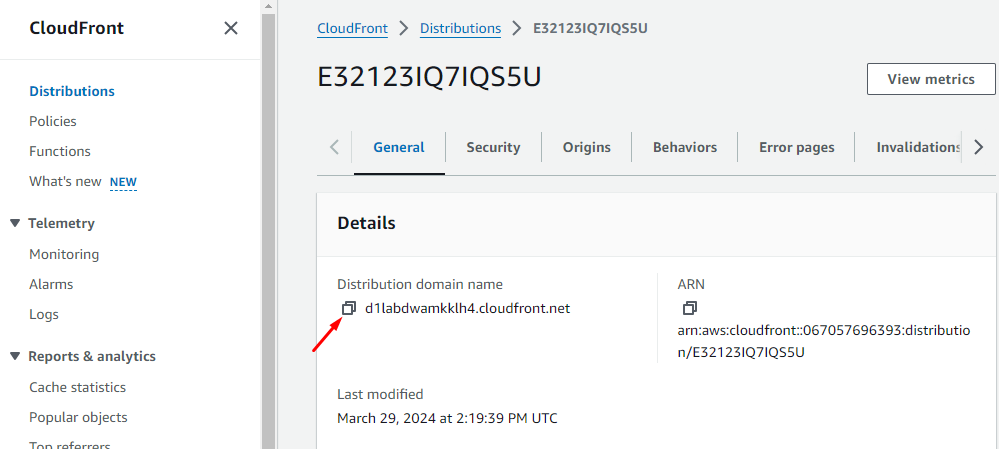
3.4 Access API Gateway thông qua CloudFront

3.5 Invoke your Lambda function in the cloud
Chúng ta có thể sử dụng AWS SAM CLI để invoke Lambda function:
- Take note of your function’s
LogicalResourceIdfrom thetemplate.yaml. It should beHelloWorldFunction. - Run command bên dưới
sam remote invoke HelloWorldFunction --stack-name api-gateway-cloudfront-{your-name}-stack
Kết quả trông như bên dưới:
sam remote invoke HelloWorldFunction --stack-name api-gateway-cloudfront-cloudmentopro-stack
Invoking Lambda Function HelloWorldFunction
START RequestId: f2a5969e-6ebb-4bac-bc55-8c93f941490d Version: $LATEST
END RequestId: f2a5969e-6ebb-4bac-bc55-8c93f941490d
REPORT RequestId: f2a5969e-6ebb-4bac-bc55-8c93f941490d  Duration: 1.09 ms       Billed Duration: 2 ms   Memory Size: 128 MB     Max Memory Used: 30 MB
{"statusCode": 200, "body": "{\"message\": \"hello world\"}"}
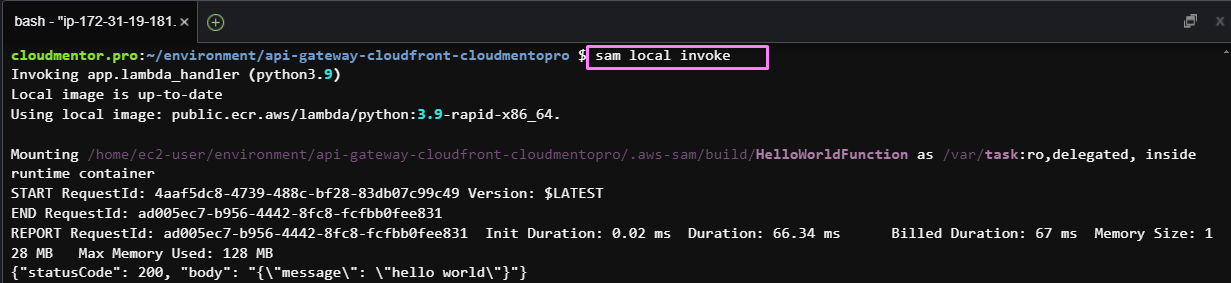
3.6 (Optional) Test your application locally
To invoke Lambda function locally
- Trong giao diện command line, tại đường dẫn project run the following:
sam local invoke
- AWS SAM CLI sẽ tạo một local Docker container và invokes function. Output trông như bên dưới
To host your API locally
- Trong giao diện command line, tại đường dẫn project run the following:
sam local start-api
- AWS SAM CLI sẽ tạo local Docker container for your Lambda function and creates a local HTTP server để mô phỏng API endpoint của bạn. Output trông như bên dưới:
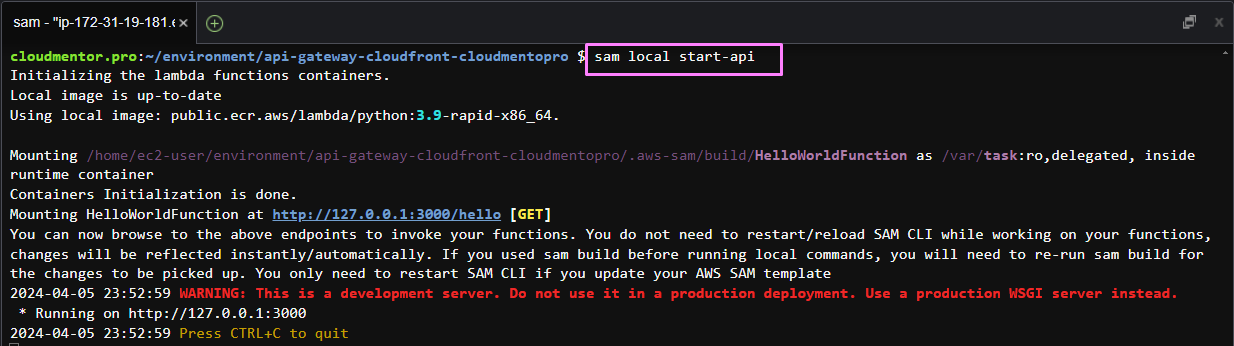
- Mở thêm 1 terminal run lệnh bên dưới, send a GET request to your local API endpoint.
curl http://127.0.0.1:3000/hello

4. Clean up
Vậy là chúng ta đã hoàn thành việc tạo serverless web sử dụng SAM một cách nhanh chóng. Các bạn có thể confirm lại các resource đã được tạo như S3, CloudFront, API Gateway, Lambda v.v. Sau đó chúng ta sẽ xóa toàn bộ resource
- Empty S3 bucket:
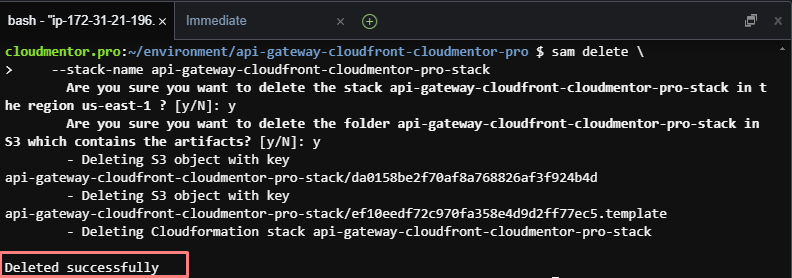
api-gateway-sample-{your-account-id}-us-east-1 - Delete SAM stack
sam delete \
    --stack-name api-gateway-cloudfront-{your-name}-stack
Đợi 2-3 phút để quá trình delete resource hoàn tất
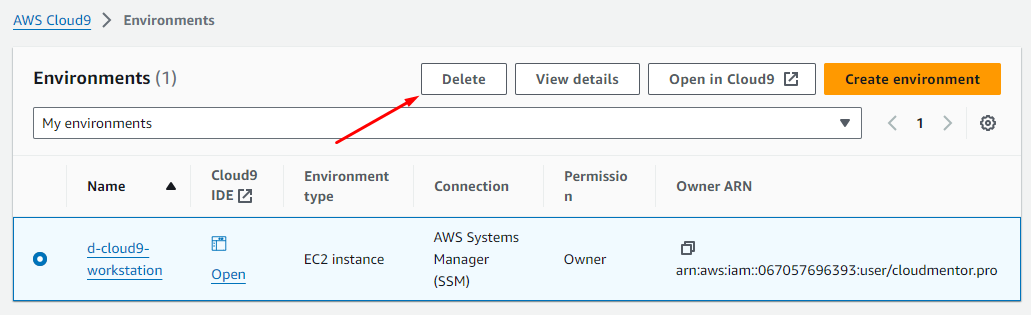
Cuối cùng xóa môi trường Cloud9
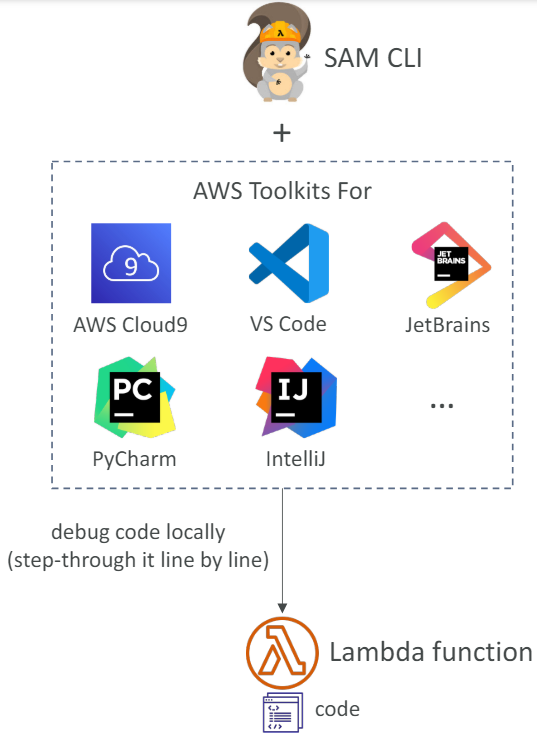
Challenges
Chắc hẳn các bạn khi làm việc với Lambda đều muốn có thể debug Lambda ở local. Không quá khó để thực hiện việc này, các công cụ cần thiết là
- VS Code / AWS Cloud9 / JetBrains v.v
- AWS Toolkit for VScode
- Docker
- SAM CLI